Video format enhancement is a multifaceted process that involves improving the quality, clarity, and overall visual appeal of video content. This enhancement can significantly impact the viewing experience and is crucial for various applications, from filmmaking to online streaming. In this comprehensive guide, we’ll delve deep into the intricacies of video format enhancement, covering everything from the fundamental principles to advanced techniques.
The Importance of Video Quality
Video quality is a paramount consideration in today’s digital age, where video content is ubiquitous across platforms and industries. Whether you’re a content creator, filmmaker, or business owner, the quality of your videos plays a pivotal role in capturing and retaining your audience’s attention.
Enhancing video formats begins with an understanding of the key factors that influence quality. This includes resolution, bit rate, frame rate, and compression techniques. Each of these elements contributes to the overall clarity and visual appeal of your videos.
Resolution: A Deep Dive
Resolution, often expressed in pixels (e.g., 1080p, 4K), is a critical aspect of video format enhancement. It determines the level of detail and sharpness in your videos. Higher resolutions offer more clarity and are especially beneficial for larger screens and cinematic experiences. However, it’s essential to strike a balance between high resolution and file size, as larger files can lead to longer loading times and may not be suitable for all viewing platforms.
Bit Rate and Compression
Bit rate and compression techniques are closely tied to video quality. Bit rate refers to the amount of data transmitted per unit of time, usually measured in megabits per second (Mbps). Higher bit rates result in less compression and better image quality but can lead to larger file sizes. Compression, on the other hand, reduces file size but may sacrifice some image detail.
Finding the right balance between bit rate and compression is a delicate art in video format enhancement. Advanced video codecs like H.265 offer improved compression efficiency, allowing for high-quality videos with reduced file sizes.
Advanced Techniques in Video Enhancement
While understanding the basics of video quality is crucial, true video format enhancement goes beyond resolution and bit rate adjustments. Advanced techniques involve post-production processes that fine-tune video elements for optimal results.
Color Grading and Correction
Color grading is a sophisticated process that involves adjusting the colors and tones in a video to achieve a specific look or mood. It can make a significant difference in the visual appeal of your content. Correcting color imbalances, enhancing contrast, and applying creative color grading techniques can elevate your videos to a professional level.
High Dynamic Range (HDR)
HDR technology enhances the contrast and brightness of videos, resulting in more vivid and lifelike images. It expands the range between the darkest and brightest parts of a video, capturing a broader spectrum of colors and details. HDR is particularly beneficial for creating stunning visuals in films and high-end productions.
Delivering Enhanced Videos to Your Audience
Enhancing video formats is not just about creating stunning visuals; it’s also about ensuring that your audience can enjoy your content seamlessly. As you optimize your video formats, consider compatibility with various devices and platforms, as well as efficient streaming solutions.
Adaptive Streaming
Adaptive streaming is a technique that adjusts video quality in real-time based on the viewer’s internet connection and device capabilities. This ensures smooth playback and a consistent viewing experience, even under varying network conditions. Implementing adaptive streaming protocols like DASH or HLS can enhance the accessibility of your content.
Choosing the Right Format
Lastly, selecting the appropriate video format for your content is essential. Different formats offer various advantages and disadvantages, so it’s crucial to align your choice with your audience’s preferences and the platforms you’ll be using for distribution.
In conclusion, video format enhancement is a multifaceted journey that encompasses resolution, bit rate, compression, color grading, HDR, and delivery methods. By mastering these elements, you can create visually stunning videos that captivate your audience and deliver an exceptional viewing experience. Whether you’re a filmmaker, content creator, or business owner, the art of enhancing video formats can set you apart in today’s digital landscape.
Future Trends in Video Format Enhancement
As technology continues to evolve, the field of video format enhancement is poised for exciting advancements. Understanding these emerging trends can help you stay ahead in the world of video production and distribution.
8K Ultra High Definition (UHD)
While 4K resolution is becoming the new standard, 8K UHD is emerging as the next frontier in video quality. With four times the pixels of 4K, 8K offers unparalleled clarity and detail. Although it’s currently in its early stages of adoption, we can expect to see more 8K content in the future, especially for high-end cinematic experiences.
Immersive Technologies: VR and AR
Virtual Reality (VR) and Augmented Reality (AR) are transforming how we consume video content. These immersive technologies require specialized formats and techniques to create truly captivating experiences. Video format enhancement in VR and AR involves considerations like spatial audio, 360-degree video, and interactive elements, opening up new creative possibilities.
The Importance of Audio Enhancement
While much attention is given to video quality, audio plays an equally crucial role in the overall viewer experience. Audio enhancement techniques, such as spatial audio, surround sound, and noise reduction, complement video format enhancement efforts. These audio enhancements immerse viewers in a more engaging auditory environment.
Spatial Audio for Immersion
Spatial audio technology simulates the three-dimensional soundscapes, creating a more immersive audio experience. Viewers can perceive sounds coming from specific directions, heightening their sense of presence within the content. Incorporating spatial audio into video format enhancement can make a significant difference, especially in VR and AR applications.
Surround Sound for Cinematic Impact
Surround sound systems are a staple in cinemas and high-end home theaters. They create a multi-dimensional audio experience by placing speakers strategically around the viewer. Enhancing video formats to support surround sound can add a cinematic touch to your content, making it more engaging and impactful.
Conclusion
In the ever-evolving landscape of video production and distribution, video format enhancement remains at the forefront. Understanding the intricacies of resolution, bit rate, compression, color grading, HDR, and audio enhancement techniques is essential for creating captivating videos that leave a lasting impression on your audience.
As technology continues to advance, embracing emerging trends like 8K UHD and immersive technologies such as VR and AR will set you apart in the competitive world of multimedia. Remember that video format enhancement is not just about achieving technical excellence; it’s about creating experiences that resonate with viewers and leave a lasting impact.
In this article, we’ve delved deep into the world of video format enhancement, exploring its core principles, advanced techniques, and future trends. Whether you’re a filmmaker, content creator, or simply someone passionate about the world of multimedia, mastering the art of video format enhancement can elevate your creations to new heights.
Standardizing video formats is a crucial step in ensuring seamless playback and compatibility across different devices and platforms. When you have a collection of video files in various formats, it can be challenging to manage and share them effectively. To address this, you can use video conversion software to convert all your video files into a single, standardized format.
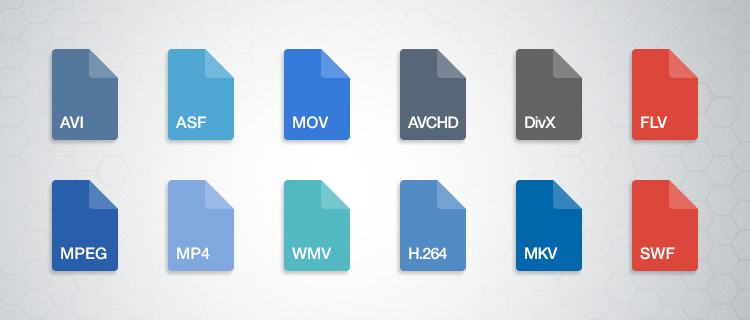
For example, if you have videos in formats like AVI, WMV, and MOV, you can convert them to a widely accepted format like MP4. This not only ensures compatibility but also makes it easier to organize your video library. Plus, most modern devices, including smartphones and smart TVs, support MP4, making it a versatile choice.
By standardizing your video formats, you can save time and avoid potential playback issues, making your video collection more accessible and user-friendly.
Video file consistency
Video file consistency goes beyond just the format; it includes aspects like resolution, frame rate, and audio settings. When you normalize video files for consistency, you’re essentially ensuring that all your videos have the same specifications. This is particularly important when creating a cohesive viewing experience, such as for a video playlist or a series.
Imagine you’re a content creator working on a web series. To maintain viewer engagement, you want all episodes to have identical quality and settings. Normalizing video files in this context involves making sure each episode shares the same resolution, frame rate, and audio settings. Consistency not only looks more professional but also eliminates distractions for your audience.
Using video editing software or dedicated normalization tools, you can easily adjust these parameters to achieve the desired consistency across your video files.
Video quality optimization
Video quality optimization is all about making your videos look their best while keeping file sizes manageable. When dealing with large video files, optimizing them ensures faster streaming and efficient storage. It’s a balance between maintaining high quality and reducing unnecessary bulk.
One of the key factors in video quality is bitrate. Higher bitrates result in sharper images and better sound, but they also lead to larger file sizes. To optimize video quality, you’ll want to find the sweet spot where quality remains excellent, but the file size isn’t excessively large. This is especially important when you’re uploading videos to online platforms, as they often have file size limitations.
Experimenting with different bitrates, resolutions, and codecs can help you strike that balance. Video editing software usually provides options for adjusting these settings, allowing you to fine-tune your videos for optimal quality.
Video compression techniques
Video compression is a fundamental aspect of normalizing video files. Compression techniques help reduce the file size of your videos without sacrificing too much quality. This is particularly useful when you need to save storage space or ensure smooth streaming over the internet.
Common video compression codecs include H.264 and H.265, which are widely supported across various devices and platforms. These codecs employ advanced algorithms to remove redundant information from your video files, resulting in smaller sizes while preserving good visual quality.
When applying video compression, it’s essential to strike a balance between compression level and quality. Higher compression can significantly reduce file size but may lead to a noticeable loss in quality, especially in highly detailed scenes. Experiment with different compression settings to find the right compromise.
Uniform video resolutions
Having uniform video resolutions is essential for a polished and professional look in your video collection. When videos have varying resolutions, it can be jarring for viewers to switch between them. Normalizing video resolutions involves adjusting all your videos to a consistent resolution.
Popular resolutions include 720p (HD), 1080p (Full HD), and 4K (Ultra HD). The choice of resolution depends on your specific needs and the capabilities of your target devices. For example, if you’re creating content for YouTube, 1080p is a standard choice that balances quality and file size.
By maintaining uniform resolutions, you ensure that your videos have a cohesive visual identity, making your content more appealing to viewers.
Consistent video bitrate
Consistency in video bitrate is another critical factor when normalizing video files. The bitrate determines the amount of data used to represent each second of video, directly impacting both quality and file size.
When you have videos with varying bitrates, it can lead to inconsistent quality and playback issues. To address this, normalize the bitrate across all your videos. This means ensuring that they all use a similar bitrate setting, which can be adjusted using video editing software or dedicated normalization tools.
Consistency in bitrate helps maintain a uniform viewing experience and prevents abrupt quality changes when switching between videos.
Video file compatibility
Ensuring video file compatibility is a fundamental step in making your videos accessible across different devices and platforms. Incompatibility issues can lead to frustrating experiences for viewers, such as playback errors or distorted visuals.
Before normalizing your video files, it’s crucial to understand the compatibility requirements of your target audience. Different devices and platforms may have specific format and codec preferences. For example, iOS devices tend to work best with H.264-encoded MP4 files, while some older devices may require different formats.
By researching and catering to the compatibility needs of your audience, you can ensure that your videos are easily accessible and enjoyable for everyone.
Normalizing multimedia files
Normalizing multimedia files extends beyond just video; it includes audio as well. Multimedia files often comprise various elements, such as video, audio, subtitles, and more. Normalization ensures that all these elements are balanced and harmonized for a seamless viewing experience.
For instance, when dealing with multimedia presentations or video editing projects, you want the audio levels to be consistent throughout. You wouldn’t want viewers to constantly adjust their volume because some parts are too quiet, while others are too loud. Normalizing audio levels across your multimedia files can solve this issue.
Additionally, subtitles and captions should be synchronized correctly with the video content, enhancing accessibility and comprehension. Multimedia normalization tools can assist in achieving these goals, providing a well-rounded viewing experience.
Video format conversion
Video format conversion is a versatile process that allows you to adapt your video files for different purposes. Whether you’re preparing videos for online streaming, archiving, or compatibility with various devices, conversion plays a significant role.
Conversion tools enable you to change not only the format but also other attributes like resolution, frame rate, and bitrate. This flexibility ensures that your videos are optimized for their intended use. For instance, when preparing videos for social media, you might convert them to formats and resolutions suitable for each platform’s requirements.
Additionally, format conversion can be handy when you want to preserve old video footage recorded in outdated formats. Converting these videos to modern formats ensures they remain accessible and of acceptable quality.
Video quality enhancement
Enhancing video quality goes beyond normalization; it involves improving the visual and auditory aspects of your videos. While normalization focuses on consistency and compatibility, quality enhancement aims to make your videos more visually appealing and engaging.
There are various techniques and tools available for video quality enhancement. These include color correction, sharpening, denoising, and even special effects. When used judiciously, these enhancements can breathe new life into your videos, making them more captivating for your audience.
For example, if you have older footage with faded colors, color correction can restore vibrancy. Similarly, adding subtle sharpening can make your videos look crisper and more professional.
Remember that quality enhancements should be applied thoughtfully, preserving the integrity of your original content while making it more visually appealing.
Final Words
Normalizing video files involves several aspects, from format standardization to quality optimization. Each step contributes to a smoother viewing experience and greater accessibility for your audience. Whether you’re a content creator, video enthusiast, or someone looking to organize their video collection, understanding these principles can help you make the most of your video files.
By ensuring video format compatibility, maintaining consistency in various attributes, and enhancing overall quality, you can present your videos in the best possible light. Remember that the specific approach may vary depending on your goals and target audience, so always tailor your normalization efforts to your unique requirements.
The AVI format, which stands for Audio Video Interleave, is a multimedia container format developed by Microsoft in the early 1990s. It was designed to store audio and video content in a single file, making it a popular choice for various applications such as video editing, multimedia playback, and online streaming. AVI files can contain both audio and video data, which makes them suitable for a wide range of uses, including creating and sharing video clips, movies, and presentations.
“AVI format has been a versatile tool in the digital world, offering a seamless fusion of audio and video content.”
One of the key advantages of the AVI format is its compatibility with multiple codecs, which are responsible for encoding and compressing audio and video data. This flexibility allows users to choose from a variety of codecs to achieve the desired balance between file size and video quality. As a result, AVI files can be tailored to meet specific requirements, whether it’s high-quality video preservation or efficient streaming over the internet.
“AVI format’s compatibility with different codecs provides users with the freedom to optimize file size and video quality.”
However, it’s worth noting that the AVI format has been largely surpassed by newer container formats such as MP4 and MKV. These formats offer better compression and support for modern features like subtitles, multiple audio tracks, and interactive menus. While AVI still holds historical significance, many users have transitioned to these more advanced formats due to their enhanced capabilities and wider support across various devices and platforms.
“While AVI retains its historical importance, newer formats like MP4 and MKV have emerged to cater to modern multimedia needs.”
How Does the AVI Format Work?
The AVI format employs a relatively straightforward structure to combine audio and video data into a single file. It utilizes a “chunk-based” architecture, where each chunk contains a specific type of data, such as video frames, audio samples, or metadata. This structure allows for efficient seeking and playback, as individual chunks can be accessed without needing to read the entire file.
To ensure compatibility across different systems and software, AVI files use standardized headers that provide information about the audio and video formats used within the file. These headers include details such as codec information, frame rate, resolution, and audio sample rate. This metadata allows media players to correctly interpret and decode the audio and video streams within the AVI file.
“AVI’s chunk-based structure and standardized headers enable seamless playback and sharing of audio and video content.”
When an AVI file is opened for playback, the media player reads the file’s header to understand its format and characteristics. Then, the player reads through the data chunks sequentially, decoding the audio and video streams in real-time. This process enables smooth playback, allowing users to enjoy synchronized audio and video content without interruption.
In the past, the AVI format gained popularity due to its simplicity and compatibility, but its limitations have become more apparent in the face of modern multimedia demands. As technology has evolved, more advanced container formats have emerged, providing improved compression and support for additional features. Despite this, the AVI format remains a significant part of digital history, offering insights into the early days of multimedia technology.
“AVI’s straightforward structure ensures synchronized playback of audio and video content, although its limitations are evident in today’s multimedia landscape.”
Is the AVI Format Still Relevant Today?
The question of whether the AVI format is still relevant in today’s digital landscape is one that often arises. While the AVI format was revolutionary when it first emerged, its relevance has waned over the years as newer and more efficient multimedia formats have taken center stage. Today, formats like MP4 and MKV offer improved compression algorithms, better support for modern features, and compatibility across a wide range of devices and platforms.
That said, the AVI format continues to hold some significance, especially in the realm of historical preservation and legacy systems. Some older media content might be stored in AVI format, and converting these files to more modern formats can sometimes result in loss of quality. Additionally, certain software applications or devices that were developed in the past might still rely on AVI files for compatibility reasons. However, for most modern users and applications, there are better alternatives available that provide a superior balance of file size, quality, and functionality.
“While the AVI format still has a place in historical preservation and legacy systems, newer formats offer a more optimized multimedia experience for modern users.”
Advantages of Using AVI Files
Although the AVI format has been overshadowed by newer options, it still offers some advantages that make it a viable choice for specific use cases. One of the notable advantages is its simplicity. AVI files are relatively straightforward to create and manipulate, making them accessible to a wide range of users. This simplicity extends to codec selection as well, allowing users to choose from various audio and video codecs based on their needs.
Furthermore, the AVI format’s lack of complex features can also be seen as an advantage. For users who prioritize straightforward playback without the need for additional functionalities such as subtitles or alternate audio tracks, AVI can serve as a reliable option. Additionally, the format’s long history means that there is a wealth of software and tools available for working with AVI files, making it easier for users to edit, convert, and share their content.
“AVI’s simplicity and availability of tools make it a suitable choice for users who prioritize straightforward multimedia playback and manipulation.”
However, it’s important to acknowledge the downsides of the AVI format. One of the major drawbacks is its inefficient compression compared to modern formats. AVI files tend to be larger in size compared to files compressed using more advanced codecs. This can lead to issues such as longer upload times when sharing online or consuming more storage space on devices. Moreover, AVI files might not support certain features like subtitles or interactive menus, limiting their applicability in certain contexts.
“While AVI offers simplicity, it also comes with drawbacks like larger file sizes and limitations in supporting advanced features.”
In conclusion, the AVI format, despite its historical significance, is no longer the top choice for multimedia storage and playback due to the emergence of more advanced formats. While it still finds use in specific situations and legacy systems, users looking for optimal file size, quality, and features are likely to explore alternatives like MP4 or MKV formats. As technology continues to evolve, the AVI format’s place in the multimedia landscape will remain a testament to the early days of digital audio and video storage.
“The AVI format’s role in the multimedia landscape is a testament to the evolution of digital audio and video storage.”
Can AVI Files Contain High-Definition Video?
The question of whether AVI files can handle high-definition (HD) video is a common one. The answer, however, is a bit nuanced. While the AVI format itself doesn’t inherently dictate a specific quality level, its limitations can impact the feasibility of storing high-definition content. AVI files can indeed contain high-definition video, but the actual quality and compatibility depend on various factors.
AVI files can store video using a variety of codecs, some of which are capable of encoding HD video. However, the limitation lies in the fact that many older codecs used within AVI files were not designed to handle the high resolutions and bitrates associated with HD content. This can lead to issues such as reduced quality, compatibility problems, or larger file sizes than necessary.
“AVI files can technically hold high-definition video, but compatibility and quality concerns might arise due to the limitations of certain codecs.”
For users interested in storing or distributing high-definition video, it’s advisable to consider more modern formats such as MP4 or MKV. These formats have better support for advanced video codecs like H.264 or H.265, which are optimized for HD and even 4K content. These codecs offer efficient compression without compromising on quality, ensuring that HD videos can be stored and played back smoothly across a wide range of devices.
“To ensure optimal quality and compatibility for high-definition video, modern formats like MP4 or MKV are better choices.”
Are There Any Limitations to the AVI Format?
While the AVI format has its merits, it also comes with its fair share of limitations that users should be aware of. One of the most significant limitations is the lack of built-in support for features like subtitles or alternate audio tracks. This makes AVI files less suitable for scenarios where multiple language options or captioning are essential. Modern formats like MP4 offer robust support for these features, enhancing the overall viewing experience.
Additionally, AVI files can suffer from compatibility issues, especially when dealing with non-standard codecs or formats. Some media players might struggle to decode certain AVI files correctly, leading to playback errors or artifacts. This can be frustrating for users who want to ensure that their content is accessible across different devices and platforms.
“AVI’s limitations, such as lack of support for subtitles and compatibility issues, can impact its suitability for modern multimedia needs.”
Furthermore, the chunk-based structure of AVI files can sometimes lead to fragmentation, especially when the file is edited or modified multiple times. This can result in reduced performance during playback and potentially increase the risk of file corruption. While newer formats have implemented more advanced techniques to mitigate fragmentation and ensure smoother playback, AVI’s architecture can pose challenges in this regard.
“The chunk-based structure of AVI files can contribute to fragmentation and potential performance issues, compared to more modern formats.”
In the end, while the AVI format played a significant role in the history of multimedia, it’s important to recognize its limitations when considering its use for current purposes. Modern formats have evolved to address these limitations and offer a more versatile and efficient multimedia experience, making them a preferred choice for most users.
“Understanding the limitations of the AVI format is crucial for making informed decisions about its use in today’s multimedia landscape.”
Which Media Players Support AVI Playback?
When it comes to playing AVI files, compatibility with media players is a key consideration. While the AVI format was developed by Microsoft, it has gained widespread support across various platforms and software applications. Many popular media players are capable of handling AVI files without any issues, allowing users to enjoy their multimedia content seamlessly.
One of the most well-known media players that support AVI playback is Windows Media Player, which is often included in Windows operating systems. This player has native support for the AVI format and can play back AVI files with standard codecs. Additionally, popular third-party media players like VLC Media Player, Media Player Classic, and PotPlayer also offer robust AVI playback capabilities.
“Windows Media Player, VLC Media Player, and other third-party media players provide reliable support for AVI file playback.”
It’s worth noting that while AVI files are widely compatible, some instances may arise where specific codecs used within AVI files might not be recognized by certain media players. In such cases, using a media player that supports a wide range of codecs, like VLC, can help ensure a smooth playback experience.
“Choosing a media player with broad codec support can help mitigate compatibility issues when playing AVI files.”
How Do I Convert AVI Files to Other Formats?
Converting AVI files to other formats is a common task, especially when seeking better compression or compatibility with specific devices. To accomplish this, users can turn to various software tools designed for video conversion. One of the versatile options is HandBrake, an open-source tool that supports converting AVI files to formats like MP4, MKV, and more.
To begin the conversion process, users typically need to select the desired output format and configure settings such as video quality, resolution, and audio options. After setting the preferences, the software will process the AVI file and create a new file in the chosen format. It’s important to keep in mind that conversion might lead to a slight loss in quality due to the re-encoding process.
“Converting AVI files to different formats can be achieved using tools like HandBrake, allowing users to tailor their content to specific needs.”
Additionally, online converters are available for users who prefer a web-based approach. These platforms often require users to upload the AVI file and then provide options for selecting the output format. However, it’s advisable to exercise caution when using online converters, as they might compromise the privacy and security of your content.
“Online converters offer convenience, but users should be mindful of potential security risks when uploading their files.”
In the end, the choice of conversion method depends on user preferences and the level of control they desire over the conversion process. Regardless of the method chosen, it’s crucial to maintain a backup of the original AVI file before initiating any conversions to prevent accidental data loss.
“Converting AVI files requires careful consideration of method, format selection, and potential quality implications.”
Are AVI Files Compatible with Mac Computers?
AVI files, originally developed for Windows, can indeed be played on Mac computers. However, due to differences in operating systems and default media players, some considerations need to be taken into account for optimal compatibility.
QuickTime Player, the default media player on Mac, has limited support for AVI files. While it can play some AVI files, it might struggle with those that use certain codecs or compression methods. In such cases, users may encounter playback issues or audio-video synchronization problems. To enhance AVI compatibility on Mac, users can install additional codecs or consider using third-party media players like VLC Media Player, which offer broader codec support and a smoother playback experience for AVI files.
“While AVI files can be played on Mac computers, using third-party media players like VLC can improve compatibility and playback quality.”
What’s the History of the AVI Format’s Development?
The history of the AVI format’s development dates back to the early 1990s when Microsoft introduced it as a multimedia container format. The primary goal was to create a format that could seamlessly combine audio and video content into a single file. The AVI format gained popularity quickly due to its compatibility and relatively simple structure.
AVI files store data in a “chunk-based” architecture, which was a departure from earlier linear formats. This allowed AVI files to be more versatile and suited for multimedia content like video clips, movies, and presentations. Over the years, various codecs were developed to compress and encode audio and video data within AVI files, enabling efficient storage and playback.
“The history of the AVI format’s development showcases Microsoft’s effort to create a versatile multimedia container format.”
However, as digital technology advanced, the limitations of the AVI format became apparent. Newer formats emerged, offering improved compression, advanced features, and broader compatibility. Despite this, AVI files continue to hold a special place in the timeline of multimedia evolution, serving as a testament to the early days of digital content creation and distribution.
“The AVI format’s journey from inception to historical significance mirrors the evolution of digital multimedia technology.”
Final Words
In conclusion, the AVI format has played a crucial role in the history of multimedia content storage and distribution. While its limitations have become more pronounced in the face of modern demands, its legacy remains intact. AVI files can be used for various purposes, especially in scenarios where historical preservation or compatibility with legacy systems is important. However, for users seeking the best quality, compression, and features, exploring modern multimedia formats like MP4 or MKV is recommended.
“The AVI format’s legacy persists, serving as a reminder of the evolution of multimedia content storage.”
As technology continues to progress, it’s likely that the AVI format will continue to occupy a unique position in the digital landscape, reminding us of where we’ve come from and how far we’ve advanced in the world of multimedia content creation and consumption.
“The AVI format’s story is a chapter in the ongoing narrative of multimedia’s journey through technological advancements.”
What is the maximum video bit depth supported by MP4?
Mp4 video bit depthMp4 video bit depth
Understanding the MP4 Video File Format
As video technology has advanced, so too has the number of video file formats available. One of the most popular video file formats today is the MP4 format. The MP4 format is known for its versatility and compatibility with a wide range of devices and platforms.
One of the key features of the MP4 file format is its ability to compress video data without sacrificing quality. This is achieved through the use of video compression algorithms, which reduce the amount of data required to store video content while maintaining its visual fidelity.
Maximizing Video Quality in MP4
To ensure that your MP4 videos look their best, it’s important to understand the maximum video bit depth supported by the format. Bit depth refers to the number of bits used to represent each color in a video image. The higher the bit depth, the more colors that can be represented, resulting in smoother gradients and more accurate color reproduction.
The maximum video bit depth supported by MP4 is 10 bits per channel, which allows for a total of 1.07 billion possible colors. This is a significant improvement over the 8-bit color depth supported by many other video file formats, which only allows for 16.7 million colors.
To take advantage of the higher bit depth supported by MP4, it’s important to use a video encoder that supports 10-bit color depth. This will ensure that your videos have the maximum possible color accuracy and quality.
Ensuring Compatibility and Playback
While MP4 is a widely supported video file format, it’s important to ensure that your videos are compatible with the devices and platforms you intend to use them on. This includes checking the video codec used in your MP4 files, as well as the audio codec and other technical specifications.
In addition, it’s important to consider the playback software or hardware that will be used to view your MP4 videos. Not all devices and software support the maximum video bit depth of 10 bits per channel, so it’s important to test your videos on a range of devices to ensure they will play back correctly.
Final Words
In conclusion, understanding the maximum video bit depth supported by MP4 is important for ensuring the best possible video quality. By using a video encoder that supports 10-bit color depth and testing your videos on a range of devices, you can ensure that your MP4 videos look their best and are compatible with a wide range of platforms.
The Importance of Color Grading in Video Production
Why color grading matters in videoWhy color grading matters in video
Why color grading matters in video
Color grading is an essential part of video production that often goes overlooked. It involves adjusting the colors, contrast, and brightness of a video to create a specific look and feel. Without color grading, a video may look flat, dull, or inconsistent. As a video producer, I’ve experienced firsthand the impact of color grading on the final product. In fact, color grading is often the final step in the video production process, and it can make all the difference in the world.
According to Patrick Inhofer, author of “Color Correction Handbook: Professional Techniques for Video and Cinema,” “Color grading allows us to manipulate the visual mood and tone of a video, communicate subtext, and enhance the story’s emotional impact.” It’s not just about making a video look pretty; it’s about using color to tell a story and evoke emotion. By adjusting the colors and tones, a video can be transformed from a simple recording to a cinematic masterpiece.
The benefits of color grading in video production
Color grading is not just about aesthetics; it also has practical benefits. For example, color grading can help ensure consistency between shots, even if they were filmed at different times or locations. It can also help create a cohesive look and feel for a video, which is especially important for branding and marketing purposes.
In my experience, color grading can also help hide flaws or mistakes in a video. For example, if a shot is overexposed or underexposed, color grading can help balance out the colors and create a more natural-looking image. It can also help correct color temperature issues or fix skin tones.
The impact of color grading in filmmaking
Color grading is an integral part of filmmaking, and it has a significant impact on the final product. In fact, some filmmakers use color grading as a storytelling device, using color to convey emotion, mood, and meaning.
As David Fincher, director of “Fight Club” and “Gone Girl,” said, “Color is a powerful tool that can evoke emotion and enhance storytelling. It’s not just about making something look pretty; it’s about using color to create meaning and subtext.” In “Fight Club,” for example, Fincher used color grading to create a desaturated, gritty look that reflects the film’s themes of disillusionment and anarchy.
In conclusion, color grading is an essential part of video production and filmmaking. It can transform a simple recording into a cinematic masterpiece, create a cohesive look and feel for a video, and even serve as a storytelling device. As a video producer, I know firsthand the impact that color grading can have on the final product, and I encourage anyone involved in video production to take color grading seriously.
As the world becomes increasingly digitized, the importance of video codecs in our lives cannot be overstated. Video codecs are essential in video compression, encoding, streaming, and playback. Choosing the right codec can make the difference between smooth playback and frustrating buffering, between crisp and clear images and pixelated messes. In this article, we will explore the differences between three of the most popular video codecs in use today: H.264, H.265, and VP9.
H.264 vs H.265: What’s the Difference?
H.264, also known as AVC (Advanced Video Coding), has been the dominant codec in use for the past decade. It is widely supported by devices and software and offers good compression while maintaining high video quality. However, H.265 (HEVC) is slowly taking over. It is a newer and more advanced codec that offers better compression ratios, which means smaller file sizes with the same quality as H.264. H.265 is also better at handling high-resolution videos, making it a good choice for 4K and 8K videos. However, it requires more processing power to decode, which may be an issue on older devices.
Personally, I have found that H.265 delivers noticeably better quality than H.264 for the same file size. It is especially noticeable in high-motion scenes like action movies or sports. However, it does require more processing power, so make sure your device can handle it before choosing it as your preferred codec.
VP9: The New Kid on the Block
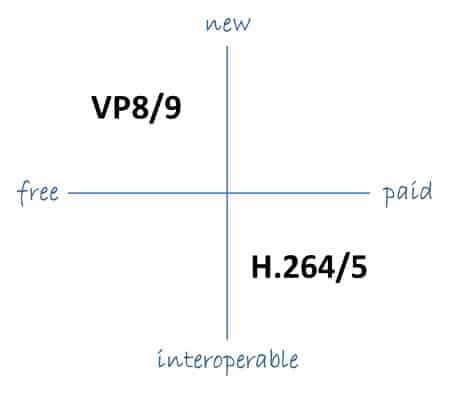
VP9 is a newer codec developed by Google and is designed to be a royalty-free alternative to H.265. It offers better compression than H.264 while maintaining the same video quality. It is also highly efficient at handling high-resolution videos, making it a good choice for 4K and 8K videos. However, its adoption has been slow due to its lack of support in many devices and software. It also requires more processing power to decode than H.264.
One of my personal experiences with VP9 was when I was trying to stream a 4K video on my laptop. I noticed that the video was buffering a lot and the quality was not as good as I expected. After some research, I found out that the video was encoded with VP9, which my laptop did not support. I had to switch to H.264 to get smooth playback.
Conclusion: Choosing the Right Video Codec
Choosing the right video codec is crucial for ensuring smooth video playback and high video quality. H.264 is still a solid choice for most situations, but H.265 and VP9 offer better compression and handling of high-resolution videos. However, they require more processing power and may not be supported by all devices and software. Make sure to choose the codec that best suits your needs and device capabilities.
In conclusion, video codecs are an essential part of our digital lives, and choosing the right one can make all the difference in our video-watching experience. Always keep in mind the pros and cons of each codec and make an informed decision based on your needs.
What is the difference between bit depth and bitrate?
Bit DepthBit Depth
Understanding Bit Depth and Bitrate
When it comes to audio and video files, there are two terms that are often used interchangeably: bit depth and bitrate. However, they are not the same thing. Bit depth refers to the number of bits used to represent each sample in an audio or video file, while bitrate refers to the amount of data transmitted per second.
Bit depth determines the number of possible values for each sample in a digital audio or video file. For example, an 8-bit audio file can have 256 possible values per sample, while a 16-bit file can have 65,536. The higher the bit depth, the more accurate the representation of the original sound or image.
On the other hand, bitrate refers to the amount of data transmitted per second in a digital file. In other words, it’s the rate at which data is encoded in a file. Higher bitrates typically mean higher quality files with more information, but also larger file sizes.
Audio Bit Depth vs Bitrate
When it comes to audio files, the bit depth and bitrate are both important factors in determining the quality of the sound. A higher bit depth means a more accurate representation of the original sound, while a higher bitrate means more data is transmitted per second, resulting in a higher quality sound.
However, it’s important to note that a higher bitrate does not necessarily mean a higher quality sound. If the original recording is of poor quality, increasing the bitrate will not improve the sound. In fact, it can actually result in larger file sizes with no improvement in sound quality.
Video Bit Depth vs Bitrate
Video files also have bit depth and bitrate, but they work slightly differently than in audio files. Bit depth determines the number of colors that can be represented in a video file, while bitrate determines the amount of data transmitted per second.
A higher bit depth means a wider range of colors can be represented in the video, resulting in a more accurate and vibrant image. However, a higher bitrate is also important for video files, as it determines the amount of detail that can be captured in each frame.
It’s important to find the right balance between bit depth and bitrate for video files, as increasing one can have a negative impact on the other. For example, a high bit depth with a low bitrate can result in a choppy or pixelated image, while a low bit depth with a high bitrate can result in a washed-out or blurry image.
Final Words
In conclusion, bit depth and bitrate are both important factors to consider when working with audio and video files. While they may seem similar, they serve different purposes and have different effects on the quality of the final product. It’s important to find the right balance between the two to ensure the best possible sound or image quality.
Keywords: audio bit depth, video bit depth, bit depth vs bitrate, bitrate definition, bitrate vs quality, audio quality, video quality, digital audio, digital video, file size, data transmission, accuracy, color representation, image quality, sound quality, audio recording, video recording, data encoding, pixelation, file format, media production, sound engineering, video editing, multimedia, digital media, technology, mp4gain, audio normalization, audio conversion, equalizer, windows, digital signal processing, dynamic
Digital audio and video are types of data that we can store on a computer or other electronic device. They are made up of a series of numbers that represent the sound or image we want to save. This means that instead of using physical materials like film or tape to record sound or video, we can use a computer to store and manipulate digital versions of that data.
Digital Audio and Video
How is sound digitized?
Sound is a type of wave that travels through the air. When we want to digitize sound, we need to find a way to measure that wave and turn it into a series of numbers. We do this by using a device called a microphone, which converts sound waves into electrical signals that can be processed by a computer.
Here’s an example: imagine you’re at a concert and you want to record a song using your phone. You turn on the voice memo app and hold your phone up to the speakers. The microphone in your phone converts the sound waves from the speakers into electrical signals that are then turned into a digital audio file that you can listen to later.
How are multiple sounds combined into a single file?
When we record sound using a microphone, we’re not just capturing one sound at a time. We’re also picking up any other sounds that might be happening in the background, like people talking or the sound of a car driving by. So how do we store all of these different sounds in a single file?
The answer is that each sound is given its own “channel” in the digital audio file. Imagine that you have a stereo system with two speakers – one on the left and one on the right. When you record a song using your phone, the sound that’s coming out of the left speaker is saved in one channel of the audio file, while the sound that’s coming out of the right speaker is saved in another channel.
How are different instruments and voices saved in a single channel?
So now we know how to store multiple sounds in a digital audio file using different channels. But what if we want to save a song that has lots of different instruments and voices playing at the same time? How can we separate out all of those different sounds and make sure they’re saved correctly in the file?
The answer is that each sound is given its own “frequency” in the digital audio file. Think of it like a rainbow: just like how a rainbow has lots of different colors, sound has lots of different frequencies. When we record a song, we’re capturing all of those different frequencies at the same time.
So let’s say we’re recording a song that has a guitar, a bass, a drum set, and a singer. Each of those instruments and the singer’s voice has a different set of frequencies that make up its sound. The guitar might have a lot of high frequencies, while the bass might have a lot of low frequencies. When we record the song, we capture all of those frequencies at the same time and save them in the digital audio file.
How are timbres saved in a digital audio file?
The “timbre” of a sound refers to its unique quality or tone. For example, if you hear a trumpet and a violin playing the same note, you can still tell the difference between the two because they have different timbres. So how do we save the timbre of each instrument or voice in a digital audio file?
To save the timbre of each sound, we use a process called “sampling”. Sampling involves taking tiny snapshots of the sound wave at regular intervals and saving those snapshots as numbers in the digital audio file. The more snapshots we take, the more accurately we can capture the unique timbre of each sound.
Here’s an example: let’s say we’re recording a piano playing a single note. We take 44,100 snapshots of the sound wave per second and save each snapshot as a number in the digital audio file. When we play back the file, the computer reads those numbers and uses them to recreate the sound of the piano note. Because we took so many snapshots per second, we’re able to capture all of the nuances of the piano’s timbre and make it sound like a real piano.
How are noises and other sounds saved in a digital audio file?
When we record sound using a microphone, we’re not just capturing the sounds we want to hear – we’re also capturing any background noise that might be happening. This can include things like people talking, cars driving by, or birds chirping. So how do we deal with all of that extra noise when we save the sound as a digital file?
One way to deal with background noise is to use a process called “noise reduction”. This involves analyzing the digital audio file and looking for parts of the sound that are consistent over time – like the sound of a fan running or the hum of a fluorescent light. The computer can then remove those consistent sounds from the file, leaving behind just the sounds we want to hear.
Another way to deal with background noise is to use a process called “EQ” (short for “equalization”). EQ allows us to boost or cut certain frequencies in the sound to make it sound better. For example, if there’s a lot of low-frequency rumble in a recording, we can use EQ to cut out some of those frequencies and make the sound clearer.
What is digital video?
Digital video is similar to digital audio, but instead of capturing sound waves, we’re capturing images. When we record a video, we’re capturing a series of still images (or frames) at regular intervals and saving them as a digital file.
How are videos saved in digital format?
To save a video in digital format, we need to capture a series of still images (or frames) and save them as a digital file. We do this using a device called a camera, which captures light from the scene we’re filming and turns it into an electrical signal that can be processed by a computer.
Here’s an example: imagine you’re filming a video of your dog playing in the park. You hold up your phone and hit the record button. The camera in your phone captures a series of still images (or frames) of your dog playing and saves them as a digital video file that you can watch later.
How are multiple images combined into a single video file?
When we capture a video, we’re capturing a series of still images (or frames) at regular intervals. To create a smooth video, we need to combine all of those frames into a single file. This is done using a process called “video compression”.
Video compression works by looking for parts of the image that are similar from frame to frame and only saving the parts that are different. For example, if you’re filming a video of a person sitting in a chair, the background behind them might not change much from frame to frame, so the computer can save that part of the image just once and only save the parts that are changing (like the person’s movements).
By only saving the parts of the image that are changing, we’re able to save space and create smaller video files that are easier to store and share. However, too much compression can make the video look blurry or pixelated. So, it’s important to find a balance between file size and video quality when compressing videos.
How do we add sound to a digital video file?
To add sound to a digital video file, we use a process called “audio syncing”. Audio syncing involves combining the digital audio file (which we learned about earlier) with the digital video file so that the sound matches up with the images.
Here’s an example: let’s say you’re filming a concert and you want to create a video of one of the songs. You record the video using your camera and the audio using a separate recording device. When you go to edit the video, you import both the digital audio file and the digital video file into your editing software. Then, you use audio syncing to line up the audio with the video so that the sound matches up with the images.
Conclusion
In conclusion, digital audio and video are complex subjects, but they can be explained in a way that a 6-year-old can understand. Digital audio involves converting sound waves into numbers that can be saved in a digital file. We use sampling to capture the unique timbre of each sound, and we use noise reduction and EQ to deal with background noise. Digital video involves capturing a series of still images (or frames) and saving them as a digital file. We use video compression to combine those frames into a single file and audio syncing to add sound to the video. By understanding these concepts, we can appreciate the technology behind the digital media that we enjoy every day.