As an audio specialist with years of experience, I understand the importance of choosing the right audio format. Whether you’re a music enthusiast, a sound engineer, or a content creator, the choice between MP3 and AIFF can significantly impact the quality and usability of your audio files. Let’s delve into the differences between these two popular formats and explore their respective strengths and weaknesses.
Understanding Audio Formats
MP3 (MPEG Audio Layer III)
MP3 is a widely used audio compression format that reduces the file size of audio recordings without significantly compromising sound quality. It achieves this by discarding frequencies that are less perceptible to the human ear, resulting in smaller file sizes ideal for online streaming and portable devices.
Lossy Compression
Wide Compatibility
Small File Sizes
AIFF (Audio Interchange File Format)
AIFF, developed by Apple, is an uncompressed audio format known for its high fidelity and lossless quality. Unlike MP3, AIFF files retain all original audio data, making them ideal for professional audio production, mastering, and archival purposes.
Uncompressed Audio
High Fidelity
Large File Sizes
Comparing Performance and Usability
Performance
In terms of performance, MP3 files are lightweight and easy to stream or download, making them perfect for online distribution and playback on portable devices with limited storage capacity. However, the compression process removes some audio data, resulting in a slight loss of quality compared to AIFF.
Usability
For everyday listening and casual use, MP3 is the go-to choice due to its small file sizes and wide compatibility with various devices and platforms. On the other hand, AIFF is preferred in professional audio production environments where preserving the highest possible audio quality is paramount, even at the expense of larger file sizes.
Latest words on MP3 vs AIFF
In conclusion, the choice between MP3 and AIFF depends on your specific needs and priorities. If you prioritize convenience and compatibility, MP3 is the practical option for everyday listening and online distribution. However, if you’re a professional musician, sound engineer, or audiophile seeking the best possible audio quality, AIFF offers unparalleled fidelity and accuracy for your recordings and projects.
Comments:
Wow, I never realized there were so many factors to consider when choosing an audio format. This article really helped me understand the differences between MP3 and AIFF!
As a musician, I’ve always struggled with balancing file size and audio quality. This article provided some great insights into the pros and cons of MP3 and AIFF. Thanks!
This was a fascinating read! I’ve been using MP3 for years without realizing I might be sacrificing audio quality. I’ll definitely consider switching to AIFF for my next project.
Great article! I’ve always been curious about the differences between MP3 and AIFF, and this article explained everything in a clear and concise manner. Well done!
I appreciate how this article broke down the technical aspects of audio formats into easy-to-understand concepts. Now I feel more confident in choosing the right format for my audio projects.
As a podcaster, audio quality is crucial for my content. This article helped me understand why AIFF might be a better choice for recording and editing my episodes. Thanks for the valuable information!
Interesting article! I never knew the difference between MP3 and AIFF until now. It’s amazing how much impact the choice of audio format can have on the overall listening experience.
signal-to-noise ratio audiosignal-to-noise ratio audio
Understanding the Basics of Audio Quality
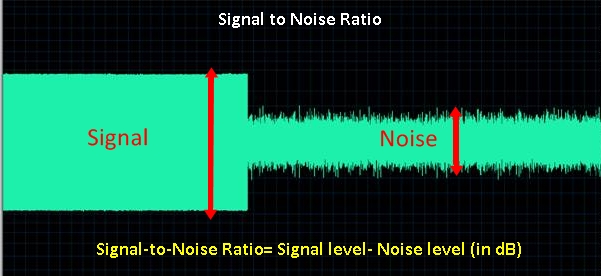
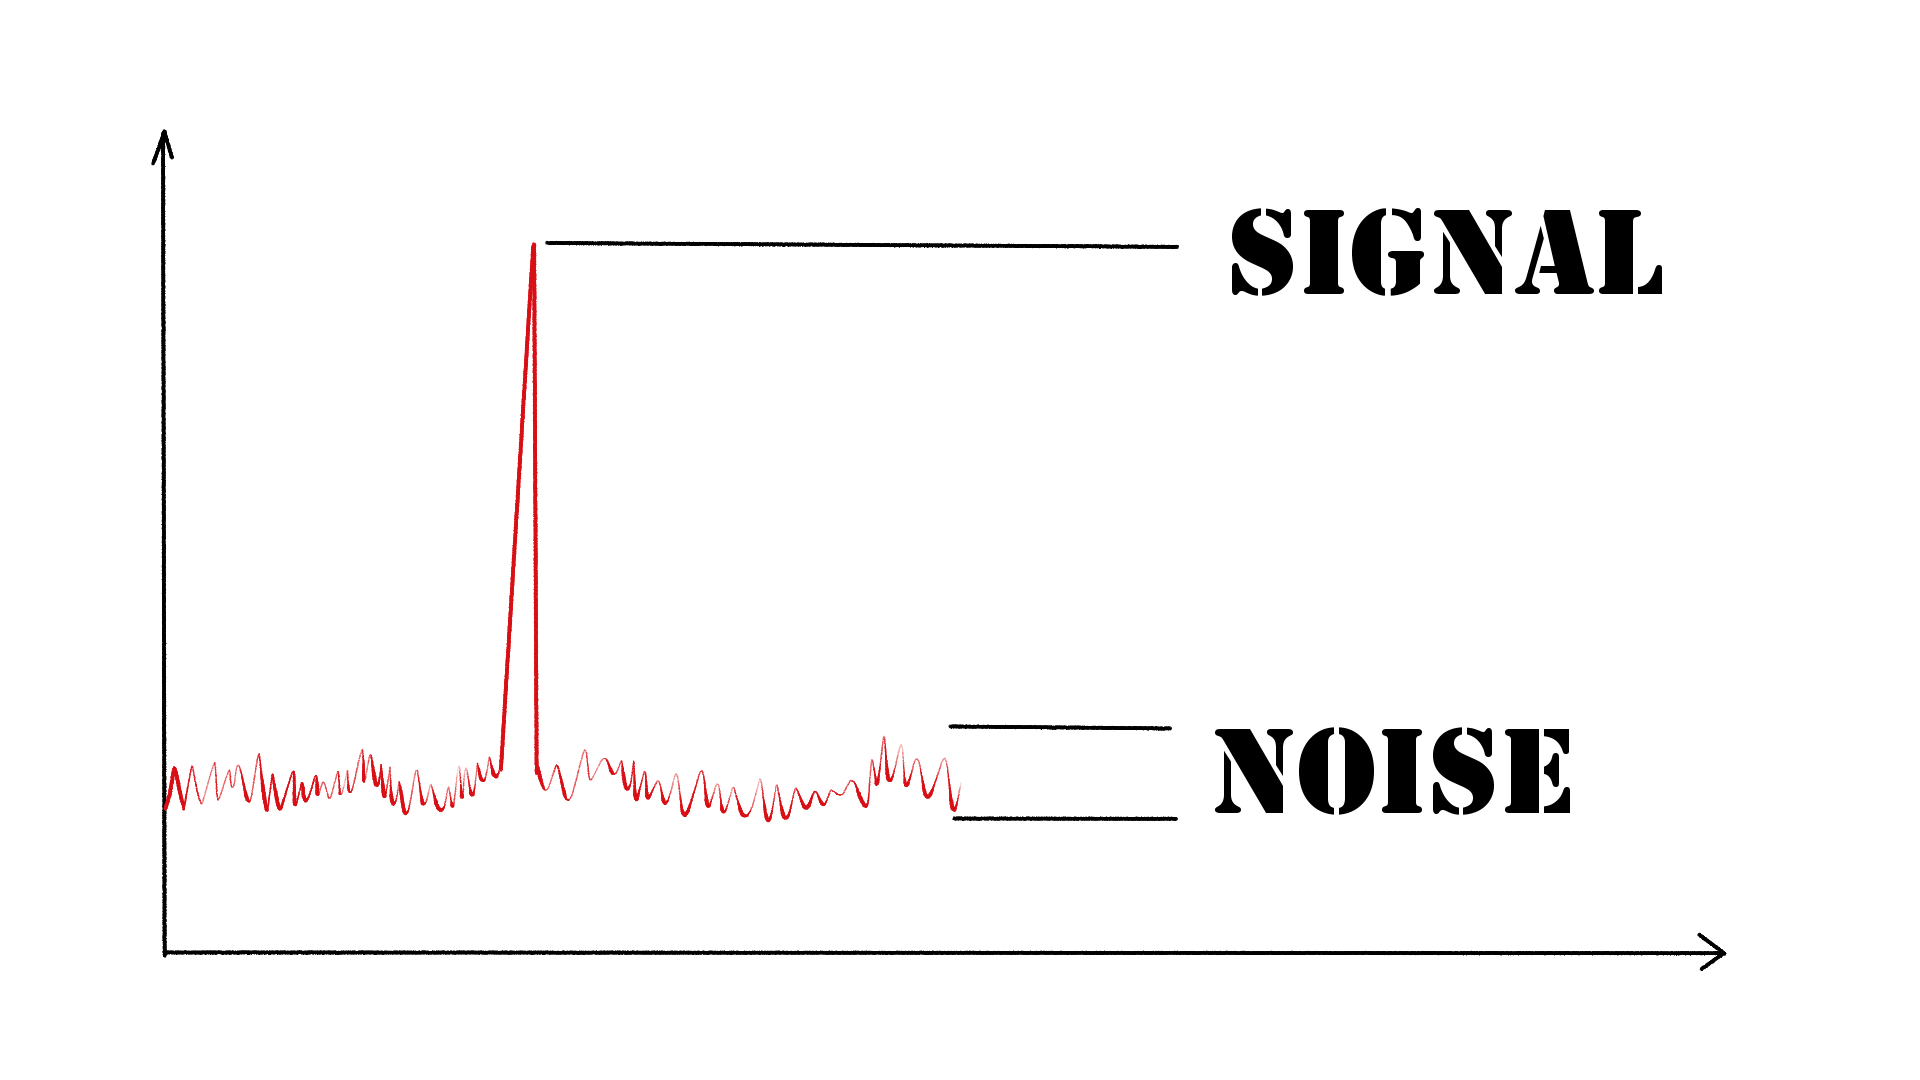
As an audio engineer, I have come across many questions about audio quality, and one of the most common ones is “What is a signal-to-noise ratio in audio?” In simple terms, the signal-to-noise ratio (SNR) is the difference between the desired audio signal and the background noise. A high SNR means that the desired signal is much stronger than the noise, resulting in better audio quality.
When it comes to audio quality, there are many factors to consider, such as audio processing, normalization, compression, dynamics, and distortion. Each of these factors can affect the SNR and, therefore, the overall audio quality. For example, audio normalization can help to increase the SNR by adjusting the volume levels of the audio signal, while audio compression can reduce the dynamic range of the audio signal, resulting in a more consistent SNR.
The Importance of Audio Normalization
As someone who has worked with audio for many years, I can attest to the importance of audio normalization. Normalization is the process of adjusting the volume levels of an audio signal to a standard level, which can help to improve the SNR and overall audio quality.
One of the benefits of audio normalization is that it can help to prevent distortion in the audio signal. When an audio signal is too loud, it can cause distortion, which can be heard as a buzzing or crackling sound. By normalizing the audio signal, you can ensure that it is at a safe and consistent volume level, which can help to prevent distortion and improve the overall audio quality.
The Role of Audio Compression in Audio Quality
Audio compression is another important factor to consider when it comes to audio quality. Compression is the process of reducing the dynamic range of an audio signal, which can help to make it sound more consistent and balanced.
One of the benefits of audio compression is that it can help to improve the SNR by reducing the background noise in the audio signal. However, it is important to use compression carefully, as too much compression can result in a loss of detail and dynamics in the audio signal. As with all aspects of audio engineering, finding the right balance is key to achieving the best possible audio quality.
Final Words:
In conclusion, understanding the basics of audio quality is essential for anyone working with audio. Whether you are an audio engineer, musician, or just someone who enjoys listening to music, knowing about factors such as SNR, normalization, compression, dynamics, and distortion can help you to achieve the best possible audio quality. And if you are looking for a solution to improve your audio quality, consider using mp4gain, a powerful and easy-to-use audio normalizer and converter that can help you to achieve consistent and high-quality audio.
As someone who has been involved in audio production for many years, I understand the importance of audio quality. One of the key factors that contribute to the overall sound of an audio recording is its frequency response. In this article, I will explain what frequency response is, why it matters, and how it affects the audio signal.
What is Audio Frequency Response?
Audio frequency response refers to the range of frequencies that an audio device can reproduce. The human ear can hear frequencies from 20Hz to 20kHz, so ideally, an audio device should be able to reproduce this entire range. However, different audio devices have different frequency responses. Some may have a wider range, while others may have a narrower range.
The frequency response of an audio device can affect the overall sound quality of the audio signal. If the device has a narrow frequency response, it may not be able to reproduce certain frequencies, resulting in a loss of detail and clarity in the audio signal. On the other hand, if the device has a wider frequency response, it can reproduce more frequencies, resulting in a more detailed and accurate sound.
Why Does Audio Frequency Response Matter?
Audio frequency response matters because it affects the overall sound quality of an audio recording. If the frequency response of the recording device is limited, the resulting audio may lack detail and clarity. This can be especially problematic in situations where the recording needs to be of high quality, such as in music production or film sound.
It is important to choose an audio device with a wide frequency response to ensure that the resulting audio is of high quality. Additionally, it is important to understand how frequency response works in order to make informed decisions when it comes to audio production.
Understanding Audio Frequency Response
To understand audio frequency response, it is important to understand how sound waves work. Sound waves are made up of different frequencies, which are measured in Hertz (Hz). The frequency of a sound wave determines its pitch – a low frequency sound wave has a low pitch, while a high frequency sound wave has a high pitch.
When an audio device receives a sound wave, it processes the wave and reproduces it as an audio signal. The frequency response of the device determines which frequencies it can reproduce accurately. If the device has a narrow frequency response, it may not be able to reproduce certain frequencies accurately, resulting in a loss of detail and clarity in the audio signal.
Final Words
In conclusion, understanding audio frequency response is essential for anyone involved in audio production. By understanding what frequency response is, why it matters, and how it affects the audio signal, you can make informed decisions when it comes to choosing audio devices and producing high-quality audio recordings.
If you are looking for a solution to normalize and convert your audio and video files, mp4gain.com can help. Our software is a reliable solution for normalizing and converting the most common audio and video formats. Try it out and see the difference in audio quality for yourself.
Digital audio and video are types of data that we can store on a computer or other electronic device. They are made up of a series of numbers that represent the sound or image we want to save. This means that instead of using physical materials like film or tape to record sound or video, we can use a computer to store and manipulate digital versions of that data.
Digital Audio and Video
How is sound digitized?
Sound is a type of wave that travels through the air. When we want to digitize sound, we need to find a way to measure that wave and turn it into a series of numbers. We do this by using a device called a microphone, which converts sound waves into electrical signals that can be processed by a computer.
Here’s an example: imagine you’re at a concert and you want to record a song using your phone. You turn on the voice memo app and hold your phone up to the speakers. The microphone in your phone converts the sound waves from the speakers into electrical signals that are then turned into a digital audio file that you can listen to later.
How are multiple sounds combined into a single file?
When we record sound using a microphone, we’re not just capturing one sound at a time. We’re also picking up any other sounds that might be happening in the background, like people talking or the sound of a car driving by. So how do we store all of these different sounds in a single file?
The answer is that each sound is given its own “channel” in the digital audio file. Imagine that you have a stereo system with two speakers – one on the left and one on the right. When you record a song using your phone, the sound that’s coming out of the left speaker is saved in one channel of the audio file, while the sound that’s coming out of the right speaker is saved in another channel.
How are different instruments and voices saved in a single channel?
So now we know how to store multiple sounds in a digital audio file using different channels. But what if we want to save a song that has lots of different instruments and voices playing at the same time? How can we separate out all of those different sounds and make sure they’re saved correctly in the file?
The answer is that each sound is given its own “frequency” in the digital audio file. Think of it like a rainbow: just like how a rainbow has lots of different colors, sound has lots of different frequencies. When we record a song, we’re capturing all of those different frequencies at the same time.
So let’s say we’re recording a song that has a guitar, a bass, a drum set, and a singer. Each of those instruments and the singer’s voice has a different set of frequencies that make up its sound. The guitar might have a lot of high frequencies, while the bass might have a lot of low frequencies. When we record the song, we capture all of those frequencies at the same time and save them in the digital audio file.
How are timbres saved in a digital audio file?
The “timbre” of a sound refers to its unique quality or tone. For example, if you hear a trumpet and a violin playing the same note, you can still tell the difference between the two because they have different timbres. So how do we save the timbre of each instrument or voice in a digital audio file?
To save the timbre of each sound, we use a process called “sampling”. Sampling involves taking tiny snapshots of the sound wave at regular intervals and saving those snapshots as numbers in the digital audio file. The more snapshots we take, the more accurately we can capture the unique timbre of each sound.
Here’s an example: let’s say we’re recording a piano playing a single note. We take 44,100 snapshots of the sound wave per second and save each snapshot as a number in the digital audio file. When we play back the file, the computer reads those numbers and uses them to recreate the sound of the piano note. Because we took so many snapshots per second, we’re able to capture all of the nuances of the piano’s timbre and make it sound like a real piano.
How are noises and other sounds saved in a digital audio file?
When we record sound using a microphone, we’re not just capturing the sounds we want to hear – we’re also capturing any background noise that might be happening. This can include things like people talking, cars driving by, or birds chirping. So how do we deal with all of that extra noise when we save the sound as a digital file?
One way to deal with background noise is to use a process called “noise reduction”. This involves analyzing the digital audio file and looking for parts of the sound that are consistent over time – like the sound of a fan running or the hum of a fluorescent light. The computer can then remove those consistent sounds from the file, leaving behind just the sounds we want to hear.
Another way to deal with background noise is to use a process called “EQ” (short for “equalization”). EQ allows us to boost or cut certain frequencies in the sound to make it sound better. For example, if there’s a lot of low-frequency rumble in a recording, we can use EQ to cut out some of those frequencies and make the sound clearer.
What is digital video?
Digital video is similar to digital audio, but instead of capturing sound waves, we’re capturing images. When we record a video, we’re capturing a series of still images (or frames) at regular intervals and saving them as a digital file.
How are videos saved in digital format?
To save a video in digital format, we need to capture a series of still images (or frames) and save them as a digital file. We do this using a device called a camera, which captures light from the scene we’re filming and turns it into an electrical signal that can be processed by a computer.
Here’s an example: imagine you’re filming a video of your dog playing in the park. You hold up your phone and hit the record button. The camera in your phone captures a series of still images (or frames) of your dog playing and saves them as a digital video file that you can watch later.
How are multiple images combined into a single video file?
When we capture a video, we’re capturing a series of still images (or frames) at regular intervals. To create a smooth video, we need to combine all of those frames into a single file. This is done using a process called “video compression”.
Video compression works by looking for parts of the image that are similar from frame to frame and only saving the parts that are different. For example, if you’re filming a video of a person sitting in a chair, the background behind them might not change much from frame to frame, so the computer can save that part of the image just once and only save the parts that are changing (like the person’s movements).
By only saving the parts of the image that are changing, we’re able to save space and create smaller video files that are easier to store and share. However, too much compression can make the video look blurry or pixelated. So, it’s important to find a balance between file size and video quality when compressing videos.
How do we add sound to a digital video file?
To add sound to a digital video file, we use a process called “audio syncing”. Audio syncing involves combining the digital audio file (which we learned about earlier) with the digital video file so that the sound matches up with the images.
Here’s an example: let’s say you’re filming a concert and you want to create a video of one of the songs. You record the video using your camera and the audio using a separate recording device. When you go to edit the video, you import both the digital audio file and the digital video file into your editing software. Then, you use audio syncing to line up the audio with the video so that the sound matches up with the images.
Conclusion
In conclusion, digital audio and video are complex subjects, but they can be explained in a way that a 6-year-old can understand. Digital audio involves converting sound waves into numbers that can be saved in a digital file. We use sampling to capture the unique timbre of each sound, and we use noise reduction and EQ to deal with background noise. Digital video involves capturing a series of still images (or frames) and saving them as a digital file. We use video compression to combine those frames into a single file and audio syncing to add sound to the video. By understanding these concepts, we can appreciate the technology behind the digital media that we enjoy every day.


Comments:
Wow, I never realized there were so many factors to consider when choosing an audio format. This article really helped me understand the differences between MP3 and AIFF!
As a musician, I’ve always struggled with balancing file size and audio quality. This article provided some great insights into the pros and cons of MP3 and AIFF. Thanks!
This was a fascinating read! I’ve been using MP3 for years without realizing I might be sacrificing audio quality. I’ll definitely consider switching to AIFF for my next project.
Great article! I’ve always been curious about the differences between MP3 and AIFF, and this article explained everything in a clear and concise manner. Well done!
I appreciate how this article broke down the technical aspects of audio formats into easy-to-understand concepts. Now I feel more confident in choosing the right format for my audio projects.
As a podcaster, audio quality is crucial for my content. This article helped me understand why AIFF might be a better choice for recording and editing my episodes. Thanks for the valuable information!
Interesting article! I never knew the difference between MP3 and AIFF until now. It’s amazing how much impact the choice of audio format can have on the overall listening experience.