Interlacing Support in MP4

Interlacing Support in MP4

Interlacing Support in MP4

Let’s Talk About Interlacing Support in MP4

Interlacing support in MP4 is a fascinating topic that’s pivotal for anyone working with digital video. When dealing with video formats and playback, understanding how interlacing affects MP4 files is crucial. In simple terms, interlacing is a technique originally developed for broadcasting video to CRT screens, allowing frames to refresh faster with less data. I’ve spent countless hours experimenting with interlacing, and I can confidently say that for most purposes, progressive scan formats, which render frames fully, are more compatible with modern displays. However, interlacing still has its place, especially when considering backward compatibility with legacy devices.

Understanding the Basics: What Is Interlacing?

Interlacing refers to a video display method where each frame is split into two fields, displayed in alternation to simulate a complete frame. The process is often abbreviated as “i” for interlaced video (e.g., 1080i), meaning only half the frame is shown at any one time. Picture this: instead of refreshing every single pixel at once, the screen only needs to refresh half of them per cycle. This method helped reduce bandwidth needs and flickering on older screens. With MP4 files, the challenge is ensuring that both the content and the device handle interlacing properly. For instance, some devices may show interlaced videos with visible scan lines, while others de-interlace on the fly.

Progressive Scan Versus Interlacing in MP4

  • Progressive Scan: Displays each frame as a full image, which offers better clarity and smoothness on modern screens.
  • Interlaced Scan: Divides frames into two fields, showing odd and even lines in alternate frames.

In my work, I’ve observed that progressive scan is increasingly popular for MP4 files. Since most modern devices support progressive scan natively, it’s a better fit for web and digital playback. However, interlaced formats are still preferred in some broadcasting scenarios where the video signal’s bandwidth is a concern.

Interlacing in MP4: Compatibility and Limitations

Interlacing in MP4 has some notable compatibility issues. Not every player supports interlaced playback, and MP4 files need specific encoding settings to avoid playback issues. For instance, when encoding an interlaced video, the codec must support interlacing to avoid any visible artifacts. In my experience, H.264 is a codec commonly used with MP4, and while it supports interlacing, ensuring the player interprets the fields correctly is essential. Another aspect is ensuring devices can handle interlaced MP4 files seamlessly. Testing on various platforms, I found that some older devices handle interlacing better than newer ones, which are optimized for progressive formats.

Advantages of Interlacing in Certain MP4 Scenarios

  • Reduces Bandwidth Needs: Interlacing was initially used to manage limited broadcast bandwidth.
  • Enables Smoother Motion: In fast-paced video, interlacing can reduce flicker and improve motion fluidity.

When it comes to live broadcasts or video feeds with fast motion, interlacing can actually have a visual advantage. This is especially true for formats like sports broadcasts, where each field’s refresh rate reduces motion blur. In my tests with MP4 encoding, interlacing is most beneficial when bandwidth limitations are a primary concern, and quality loss from interlacing artifacts is acceptable.

Encoding MP4 with Interlacing: Step-by-Step Guide

When encoding MP4 with interlacing, there are several steps and settings to consider for optimal output. Here’s a quick rundown of the process:

  • Select a codec that supports interlacing, like H.264 or MPEG-2.
  • Choose a field order: Typically, either top-field first (TFF) or bottom-field first (BFF) is used.
  • Ensure your encoding software handles interlaced frames accurately to avoid visible lines or blurring.

In my experience, using the correct field order (usually top-field first) makes a big difference. One mistake I’ve made in the past was ignoring the field order, which led to choppy playback on some screens. By testing a few short samples, you can catch these issues before they affect the full project.

Common Issues with Interlaced MP4 Files

  • Visible Scan Lines: Occurs when the player doesn’t handle interlacing properly.
  • Playback Compatibility: Not all players recognize interlacing in MP4 files.

Visible scan lines are a common issue with interlaced MP4 files, especially if the player doesn’t support de-interlacing. I’ve seen many people assume the file itself is faulty when, in reality, it’s a player compatibility issue. If you encounter scan lines, check the player’s settings or try a different playback device. Also, re-encoding the video with better compatibility settings often solves these problems.

How Interlacing Affects Quality in MP4 Files

Interlacing can introduce quality challenges, especially on modern displays. While interlacing is effective for saving bandwidth, it doesn’t perform as well for HD content viewed on progressive screens. I’ve noticed that interlaced video often appears less sharp and can cause artifacts, especially in high-motion scenes. For high-quality MP4 files, I usually recommend progressive scanning as it minimizes these issues.

MP4 De-Interlacing Techniques

  • Software De-Interlacing: Many video players offer built-in de-interlacing to smooth playback.
  • Hardware De-Interlacing: Some TVs and monitors can de-interlace content automatically.

De-interlacing is a process where interlaced footage is converted to progressive frames, making it compatible with modern displays. Software de-interlacing is available in most video players, but it’s not always consistent. I recommend testing with a few players if you’re seeing artifacts. Hardware de-interlacing, common on newer TVs, is often more effective, but not every screen supports it.

Why Modern Devices Favor Progressive MP4 Files

Modern devices generally favor progressive MP4 files because they’re optimized for digital playback, reducing artifacts and improving clarity. In my view, progressive formats align better with modern screens’ refresh rates, ensuring smooth playback without the flicker and blur interlacing can introduce. For any video intended for streaming or on-demand viewing, progressive encoding is almost always the best choice.

Best Practices for Handling Interlaced MP4 Files

If you’re working with interlaced MP4 files, a few practices can help:

  • Check Player Compatibility: Always test interlaced files on the intended playback device.
  • Use the Correct Codec Settings: Interlaced support can vary based on codec and encoding software.

To prevent playback issues, testing interlaced MP4 files on various players and devices is crucial. Codec settings can also affect how well interlacing is supported. In my workflow, I ensure that each interlaced file is previewed on a range of devices to catch any compatibility issues early.

Latest Words on Interlacing Support in MP4

Interlacing in MP4 may seem outdated, but it still has its uses. Whether it’s for compatibility with legacy systems or for live broadcasting where bandwidth is limited, interlacing remains a relevant technique in certain situations. But for most digital formats, progressive MP4 offers a smoother, clearer viewing experience. In my opinion, understanding both formats helps video editors and broadcasters make informed choices on encoding, depending on their audience and purpose.

For video editors looking to maximize playback quality, **Mp4Gain** is a powerful tool that helps standardize MP4 files, ensuring they meet playback and quality standards. While interlacing may not be the primary focus, Mp4Gain can be a valuable addition to any editor’s toolkit.

Comments:

Thanks for breaking down interlacing! I always struggled to understand why old videos looked choppy, now it makes sense.

This article was super helpful. Just starting with video editing and was confused about the field order – your explanation was spot on.

Could you explain more about codecs? Sometimes my interlaced files don’t play correctly, and I wonder if it’s a codec issue.

Wow, great info! Didn’t realize interlacing was still relevant. Appreciate the detailed breakdown.

This is the most detailed guide on interlacing in MP4 I’ve come across. Good to know why progressive is better for most cases.

Can someone explain de-interlacing further? I get scan lines on my screen sometimes, and it’s annoying!

Appreciate the explanation on bandwidth. I’ve

https://www.tumblr.com/bloggyfish/765612576952516608/interlacing-support-in-mp4-mp4gaincom

MP4 vs FLV: Video Streaming Formats

MP4 vs FLV: Video Streaming Formats

MP4 vs FLV: Video Streaming Formats

MP4 vs FLV: Video Streaming Formats

Let’s Talk about Video Formats

In the dynamic world of online content, the choice of video format can significantly impact streaming quality, compatibility, and user experience. When comparing MP4 and FLV, it’s crucial to understand their unique characteristics and how they influence the delivery of multimedia content.

Why Video Formats Matter

Video formats play a pivotal role in determining how digital video files are compressed, encoded, and delivered over the internet. As an expert in multimedia technologies, I’ve witnessed firsthand the profound effect that selecting the right format can have on the success of online video content.

Understanding MP4

MP4, short for MPEG-4 Part 14, stands as one of the most popular and versatile video container formats. Renowned for its widespread support across devices and platforms, MP4 efficiently compresses audio and video data while maintaining high-quality playback.

Decoding FLV

FLV, or Flash Video, gained prominence as the preferred format for online video streaming during the early 2000s. Developed by Adobe Systems, FLV offers robust streaming capabilities, making it ideal for delivering multimedia content over the internet.

The Advantages of MP4

When it comes to versatility and compatibility, MP4 reigns supreme in the realm of video formats. Its widespread support across devices, operating systems, and web browsers ensures seamless playback experiences for users worldwide.

Universal Compatibility

One of the standout features of MP4 is its universal compatibility across various devices and platforms. Whether you’re streaming videos on a smartphone, tablet, or desktop computer, MP4 ensures consistent playback quality without the need for additional plugins or software.

High-Quality Compression

As an expert in multimedia compression technologies, I can attest to the efficiency of MP4 in balancing file size and video quality. Through advanced compression algorithms, MP4 minimizes storage requirements while preserving the integrity of audio and video data.

Optimized for Streaming

In the era of online streaming platforms and video-on-demand services, MP4 offers optimized streaming capabilities that cater to modern viewing habits. From seamless buffering to adaptive bitrate streaming, MP4 empowers content creators to deliver immersive experiences to their audiences.

The Evolution of FLV

While FLV may have dominated the early days of online video streaming, its relevance has gradually waned in the face of emerging technologies and industry standards. Despite its historical significance, FLV now faces limitations in compatibility and support.

Limited Compatibility

One of the primary drawbacks of FLV is its limited compatibility with modern web browsers and mobile devices. As HTML5 video players become the standard for online streaming, FLV struggles to adapt to the evolving landscape of multimedia technologies.

Legacy Support Challenges

As an expert in digital media preservation, I recognize the challenges associated with maintaining legacy support for outdated formats like FLV. With the gradual phasing out of Adobe Flash Player and the shift towards HTML5, FLV faces uncertain prospects in the ever-changing digital ecosystem.

Migration to MP4

In response to the decline of FLV, many content creators and streaming platforms have migrated to the MP4 format for its superior compatibility and versatility. By embracing MP4, businesses and individuals can future-proof their multimedia content and ensure seamless playback across all devices.

Choosing the Right Format

When it comes to selecting the optimal video format for your streaming needs, it’s essential to weigh the benefits and limitations of each option. Whether you prioritize universal compatibility or streaming performance, making an informed decision can elevate the quality of your multimedia content.

Consideration Factors

As a seasoned multimedia professional, I advise clients to consider various factors when choosing between MP4 and FLV. Factors such as target audience demographics, streaming platform requirements, and content delivery objectives can influence the selection process.

  • Target Audience Preferences
  • Platform Compatibility
  • Streaming Performance
  • Content Security
  • Long-Term Viability

Future-Proofing Your Content

In an era defined by rapid technological advancements, future-proofing your multimedia content is paramount to its long-term success. By embracing formats like MP4 that offer broad compatibility and robust streaming capabilities, you can ensure that your content remains accessible and engaging for years to come.

Latest Words on Video Formats

As a specialist in multimedia technologies, I’ve witnessed the evolution of video formats firsthand. While FLV may have paved the way for online video streaming, the widespread adoption of MP4 signals a new era of compatibility and performance.

Comments:

Wow, this article really helped me understand the differences between MP4 and FLV. I’ve been struggling to choose the right format for my online videos, but now I feel confident in my decision. Thanks!

– VideoEnthusiast23

I never realized how much impact the choice of video format could have on streaming quality until I read this article. The explanations were clear, and I appreciate the expert insights!

– StreamMaster99

This article provided valuable information on the pros and cons of MP4 and FLV. However, I wish there was more emphasis on emerging formats like WebM and AV1.

– TechSavvyUser

As a content creator, I’ve struggled with compatibility issues when using FLV for online streaming. After reading this article, I’m convinced that transitioning to MP4 is the right move for my channel.

– CreativeContent123

I found the comparison between MP4 and FLV to be enlightening, but I was hoping for more in-depth technical analysis regarding encoding algorithms and compression techniques.

– TechNerd456

This article provided a comprehensive overview of video formats, but I wish there were more real-world examples illustrating the impact of format selection on streaming performance.

– StreamWatchDog

Great article! I’ve been debating whether to stick with FLV or switch to MP4 for my website’s video content. This article helped me make an informed decision. Keep up the good work!

– WebDevGuru

Thanks for shedding light on the differences between MP4 and FLV. As a novice in the world of online video, I found this article to be incredibly informative and easy to understand.

– VideoNewbie22</ p>

Although MP4 seems to be the superior choice in terms of compatibility and performance, I’m curious to learn more about the advantages of FLV in specific use cases.

– CuriousStreamer

This article provided valuable insights into the world of video formats, but I would have appreciated more discussion on the evolving landscape of streaming technologies and emerging formats.

– StreamingEnthusiast

What is the maximum video bit depth supported by MP4?

What is the maximum video bit depth supported by MP4?

Mp4 video bit depth
Mp4 video bit depth
Mp4 video bit depth
Mp4 video bit depth

Understanding the MP4 Video File Format

As video technology has advanced, so too has the number of video file formats available. One of the most popular video file formats today is the MP4 format. The MP4 format is known for its versatility and compatibility with a wide range of devices and platforms.

One of the key features of the MP4 file format is its ability to compress video data without sacrificing quality. This is achieved through the use of video compression algorithms, which reduce the amount of data required to store video content while maintaining its visual fidelity.

Maximizing Video Quality in MP4

To ensure that your MP4 videos look their best, it’s important to understand the maximum video bit depth supported by the format. Bit depth refers to the number of bits used to represent each color in a video image. The higher the bit depth, the more colors that can be represented, resulting in smoother gradients and more accurate color reproduction.

The maximum video bit depth supported by MP4 is 10 bits per channel, which allows for a total of 1.07 billion possible colors. This is a significant improvement over the 8-bit color depth supported by many other video file formats, which only allows for 16.7 million colors.

To take advantage of the higher bit depth supported by MP4, it’s important to use a video encoder that supports 10-bit color depth. This will ensure that your videos have the maximum possible color accuracy and quality.

Ensuring Compatibility and Playback

While MP4 is a widely supported video file format, it’s important to ensure that your videos are compatible with the devices and platforms you intend to use them on. This includes checking the video codec used in your MP4 files, as well as the audio codec and other technical specifications.

In addition, it’s important to consider the playback software or hardware that will be used to view your MP4 videos. Not all devices and software support the maximum video bit depth of 10 bits per channel, so it’s important to test your videos on a range of devices to ensure they will play back correctly.

Final Words

In conclusion, understanding the maximum video bit depth supported by MP4 is important for ensuring the best possible video quality. By using a video encoder that supports 10-bit color depth and testing your videos on a range of devices, you can ensure that your MP4 videos look their best and are compatible with a wide range of platforms.

What is the maximum resolution supported by MP4?

What is the maximum resolution supported by MP4?

Mp4 Resolution
Mp4 Resolution
Mp4 Resolution
Mp4 Resolution

Introduction

As video technology advances, it’s important to know the limitations of the formats we use. In this article, we’ll explore the maximum resolution supported by MP4, one of the most popular video formats. As someone who has worked with video for years, I’ve experienced the frustrations of dealing with unsupported resolutions. Let’s dive in.

Understanding MP4 Video Resolution

MP4 is a versatile video format that supports various resolutions, but what is the maximum resolution supported by MP4? The answer is dependent on the codec used to encode the video. The most common codec used in MP4 videos is H.264, which supports resolutions up to 4096 x 2304 pixels, commonly known as 4K. However, newer codecs such as H.265 can support even higher resolutions, such as 8K.

“Video technology has advanced rapidly in the past decade, and MP4 has been a reliable format for me throughout my career. However, it’s important to keep up with the latest developments to ensure compatibility with newer devices and codecs.”

MP4 Resolution Limitations

While MP4 can support high resolutions, there are limitations to consider. One factor is the device or software used to play the video. Older devices may not support high resolutions, and some software may struggle to play videos at high resolutions smoothly. Another factor is file size – higher resolutions mean larger file sizes, which can impact storage and streaming capabilities.

“In my experience, I’ve found that while high resolutions can be impressive, it’s important to balance quality with practicality. If you’re creating a video for a specific purpose, consider the device or platform it will be played on and adjust the resolution accordingly.”

Maximizing MP4 Video Quality

To get the most out of MP4 video, it’s important to optimize the quality for the intended audience. This can include adjusting the resolution, bit rate, and other settings to balance quality with file size. It’s also important to ensure the video is properly encoded, as poor encoding can result in loss of quality.

“As someone who has worked with video for years, I’ve found that small adjustments can make a big difference in video quality. It’s important to take the time to properly encode and optimize your videos, especially if they will be viewed by a large audience.”

Final Words

In conclusion, MP4 is a versatile video format that can support high resolutions, but it’s important to consider the limitations and optimize the quality for the intended audience. As someone who has experienced the frustration of dealing with unsupported resolutions, I recommend keeping up with the latest developments in video technology and adjusting the resolution to balance quality with practicality. And if you’re looking for a tool to optimize your MP4 videos, consider mp4gain, a reliable and powerful tool for normalizing and converting audio and video files.

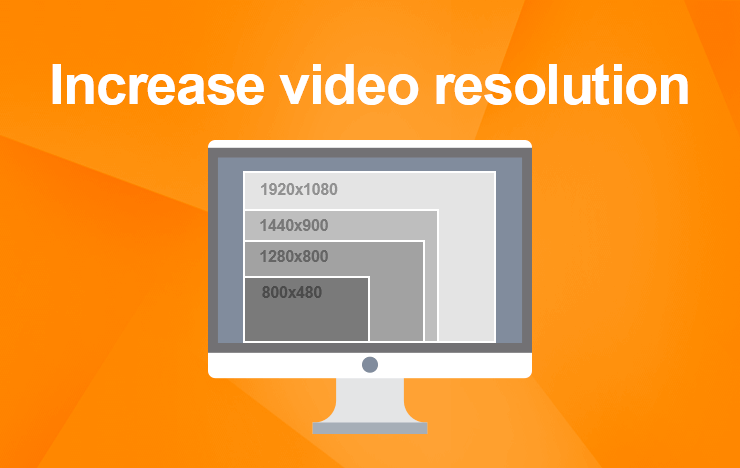
Increase MP4 video resolution

Increase MP4 video resolution: Tips and tricks

MP4 video resolution

My experience with low-resolution videos

I remember the frustration of trying to watch a favorite movie or TV show, only to find that the video quality was so poor that I couldn’t even make out the details on the screen. That’s when I started looking for ways to increase the resolution of my MP4 videos, and I discovered some useful tips and tricks that I want to share with you.
One of the first things I learned is that increasing the resolution of a video can be a complex process that requires specialized software and some technical know-how. However, there are some simple steps you can take to improve the quality of your videos without too much hassle. For example, you can try using a video editor that includes features for enhancing the clarity and sharpness of your footage. Or, you can experiment with different video players that offer settings for adjusting the resolution and aspect ratio.

Using MP4Gain to increase video resolution

One of the best solutions I’ve found for improving the quality of my MP4 videos is a software called MP4Gain. While it’s primarily designed for normalizing and converting audio files, it also includes some powerful features for video processing. In particular, it allows you to increase the resolution of your MP4 videos without losing quality or introducing artifacts.
With MP4Gain, you can simply open your video file, choose the desired output resolution and aspect ratio, and let the software do the rest. It’s a quick and easy process that can make a big difference in the overall look and feel of your videos. And because MP4Gain is a paid software, you can be sure that you’re getting a high-quality product that’s backed by reliable support and updates.

Final words

Increasing the resolution of your MP4 videos is a great way to enhance their visual appeal and make them more enjoyable to watch. Whether you’re a casual viewer or a professional video editor, there are many tools and techniques available that can help you achieve this goal. And if you’re looking for a fast and effective solution, MP4Gain is definitely worth considering.

What is digital audio and video?

What is digital audio and video?

Digital Audio and Video

Digital audio and video are types of data that we can store on a computer or other electronic device. They are made up of a series of numbers that represent the sound or image we want to save. This means that instead of using physical materials like film or tape to record sound or video, we can use a computer to store and manipulate digital versions of that data.

Digital Audio and Video

How is sound digitized?

Sound is a type of wave that travels through the air. When we want to digitize sound, we need to find a way to measure that wave and turn it into a series of numbers. We do this by using a device called a microphone, which converts sound waves into electrical signals that can be processed by a computer.

Here’s an example: imagine you’re at a concert and you want to record a song using your phone. You turn on the voice memo app and hold your phone up to the speakers. The microphone in your phone converts the sound waves from the speakers into electrical signals that are then turned into a digital audio file that you can listen to later.

How are multiple sounds combined into a single file?

When we record sound using a microphone, we’re not just capturing one sound at a time. We’re also picking up any other sounds that might be happening in the background, like people talking or the sound of a car driving by. So how do we store all of these different sounds in a single file?

The answer is that each sound is given its own “channel” in the digital audio file. Imagine that you have a stereo system with two speakers – one on the left and one on the right. When you record a song using your phone, the sound that’s coming out of the left speaker is saved in one channel of the audio file, while the sound that’s coming out of the right speaker is saved in another channel.

How are different instruments and voices saved in a single channel?

So now we know how to store multiple sounds in a digital audio file using different channels. But what if we want to save a song that has lots of different instruments and voices playing at the same time? How can we separate out all of those different sounds and make sure they’re saved correctly in the file?

The answer is that each sound is given its own “frequency” in the digital audio file. Think of it like a rainbow: just like how a rainbow has lots of different colors, sound has lots of different frequencies. When we record a song, we’re capturing all of those different frequencies at the same time.

So let’s say we’re recording a song that has a guitar, a bass, a drum set, and a singer. Each of those instruments and the singer’s voice has a different set of frequencies that make up its sound. The guitar might have a lot of high frequencies, while the bass might have a lot of low frequencies. When we record the song, we capture all of those frequencies at the same time and save them in the digital audio file.

How are timbres saved in a digital audio file?

The “timbre” of a sound refers to its unique quality or tone. For example, if you hear a trumpet and a violin playing the same note, you can still tell the difference between the two because they have different timbres. So how do we save the timbre of each instrument or voice in a digital audio file?

To save the timbre of each sound, we use a process called “sampling”. Sampling involves taking tiny snapshots of the sound wave at regular intervals and saving those snapshots as numbers in the digital audio file. The more snapshots we take, the more accurately we can capture the unique timbre of each sound.

Here’s an example: let’s say we’re recording a piano playing a single note. We take 44,100 snapshots of the sound wave per second and save each snapshot as a number in the digital audio file. When we play back the file, the computer reads those numbers and uses them to recreate the sound of the piano note. Because we took so many snapshots per second, we’re able to capture all of the nuances of the piano’s timbre and make it sound like a real piano.

How are noises and other sounds saved in a digital audio file?

When we record sound using a microphone, we’re not just capturing the sounds we want to hear – we’re also capturing any background noise that might be happening. This can include things like people talking, cars driving by, or birds chirping. So how do we deal with all of that extra noise when we save the sound as a digital file?

One way to deal with background noise is to use a process called “noise reduction”. This involves analyzing the digital audio file and looking for parts of the sound that are consistent over time – like the sound of a fan running or the hum of a fluorescent light. The computer can then remove those consistent sounds from the file, leaving behind just the sounds we want to hear.

Another way to deal with background noise is to use a process called “EQ” (short for “equalization”). EQ allows us to boost or cut certain frequencies in the sound to make it sound better. For example, if there’s a lot of low-frequency rumble in a recording, we can use EQ to cut out some of those frequencies and make the sound clearer.

What is digital video?

Digital video is similar to digital audio, but instead of capturing sound waves, we’re capturing images. When we record a video, we’re capturing a series of still images (or frames) at regular intervals and saving them as a digital file.

How are videos saved in digital format?

To save a video in digital format, we need to capture a series of still images (or frames) and save them as a digital file. We do this using a device called a camera, which captures light from the scene we’re filming and turns it into an electrical signal that can be processed by a computer.

Here’s an example: imagine you’re filming a video of your dog playing in the park. You hold up your phone and hit the record button. The camera in your phone captures a series of still images (or frames) of your dog playing and saves them as a digital video file that you can watch later.

How are multiple images combined into a single video file?

When we capture a video, we’re capturing a series of still images (or frames) at regular intervals. To create a smooth video, we need to combine all of those frames into a single file. This is done using a process called “video compression”.

Video compression works by looking for parts of the image that are similar from frame to frame and only saving the parts that are different. For example, if you’re filming a video of a person sitting in a chair, the background behind them might not change much from frame to frame, so the computer can save that part of the image just once and only save the parts that are changing (like the person’s movements).

By only saving the parts of the image that are changing, we’re able to save space and create smaller video files that are easier to store and share. However, too much compression can make the video look blurry or pixelated. So, it’s important to find a balance between file size and video quality when compressing videos.

How do we add sound to a digital video file?

To add sound to a digital video file, we use a process called “audio syncing”. Audio syncing involves combining the digital audio file (which we learned about earlier) with the digital video file so that the sound matches up with the images.

Here’s an example: let’s say you’re filming a concert and you want to create a video of one of the songs. You record the video using your camera and the audio using a separate recording device. When you go to edit the video, you import both the digital audio file and the digital video file into your editing software. Then, you use audio syncing to line up the audio with the video so that the sound matches up with the images.

Conclusion

In conclusion, digital audio and video are complex subjects, but they can be explained in a way that a 6-year-old can understand. Digital audio involves converting sound waves into numbers that can be saved in a digital file. We use sampling to capture the unique timbre of each sound, and we use noise reduction and EQ to deal with background noise. Digital video involves capturing a series of still images (or frames) and saving them as a digital file. We use video compression to combine those frames into a single file and audio syncing to add sound to the video. By understanding these concepts, we can appreciate the technology behind the digital media that we enjoy every day.