
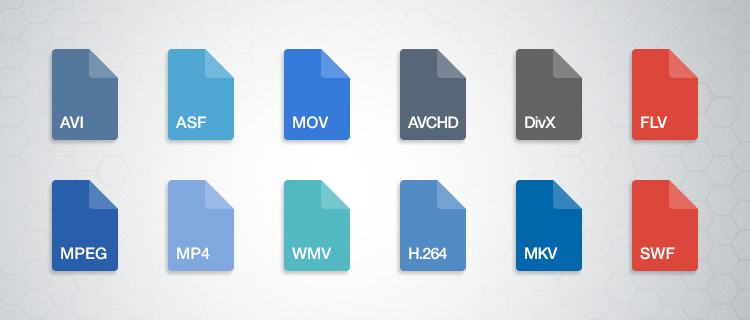
Progressive vs Interlaced Encoding in MPEG and AVI
Let’s talk about Progressive vs Interlaced Encoding in MPEG and AVI
When comparing progressive and interlaced encoding in video formats like MPEG and AVI, it’s essential to understand their impact on video quality, playback, and compatibility. Progressive encoding stores video data sequentially, frame by frame, making it ideal for modern screens. Interlaced encoding, on the other hand, divides each frame into alternating lines, making it compatible with older CRT displays. I’ve spent years examining how these encoding methods perform in various scenarios, and today, I’ll guide you through their unique features and challenges.
What is Progressive Encoding?
Progressive encoding captures and stores each frame as a complete image, which improves video clarity and consistency during playback. This method aligns perfectly with modern display technologies like LCD, LED, and OLED screens. When I think of progressive encoding, I compare it to reading a book page by page—every piece of information is complete and clear. This ensures a smooth viewing experience, especially for fast-moving or high-resolution content.
What is Interlaced Encoding?
Interlaced encoding splits each video frame into two fields—one with the odd lines and the other with the even lines. This was a clever solution for older TVs to reduce bandwidth while maintaining apparent resolution. It’s like watching a video through a picket fence, where your brain fills in the gaps to create the full picture. While it worked well for its time, interlaced encoding struggles with artifacts like combing effects on modern screens.
Key Differences Between Progressive and Interlaced Encoding
- Progressive encoding provides better quality for fast-moving scenes, as each frame is a complete image.
- Interlaced encoding is more bandwidth-efficient but prone to visual artifacts on modern displays.
- Progressive videos are more compatible with current devices and streaming platforms.
- Interlaced encoding often requires deinterlacing for optimal playback on digital screens.
How Does MPEG Handle Progressive and Interlaced Encoding?
MPEG formats support both progressive and interlaced encoding, making them versatile for various applications. MPEG-2, for example, was widely used in DVDs and broadcast TV, favoring interlaced encoding for compatibility with older TVs. However, MPEG-4 shifted the focus towards progressive encoding, recognizing the growing need for high-quality digital video. I’ve found that MPEG’s flexibility allows it to adapt to evolving viewing habits and technologies.
Why Interlaced Encoding Persisted in Older AVI Files
AVI files, a staple in the early days of digital video, often used interlaced encoding due to hardware limitations and broadcast standards. Back then, storage and bandwidth were precious commodities. Interlaced encoding provided a practical compromise, allowing higher resolutions without overwhelming system resources. However, this choice introduced challenges when those same AVI files were viewed on modern screens, where deinterlacing is often required.
Advantages of Progressive Encoding
Progressive encoding shines in delivering superior image quality and playback consistency. Here’s why I recommend it for most modern applications:
- Eliminates visual artifacts like combing and flickering.
- Provides better compatibility with streaming platforms and modern displays.
- Enhances the viewing experience for high-motion content, such as sports or action movies.
I always advocate for progressive encoding when working with high-definition content or preparing videos for online platforms. It ensures that your videos look sharp and professional.
Challenges with Interlaced Encoding in Modern Video
Interlaced encoding, while innovative for its time, presents significant challenges today. The most noticeable issue is the combing effect, where horizontal lines appear during motion. This happens because modern screens display both fields simultaneously, revealing the incomplete frames. I’ve often had to deal with these artifacts when converting older video libraries, requiring deinterlacing techniques to fix the issues.
Why Deinterlacing Matters
Deinterlacing is crucial for converting interlaced videos into a format compatible with modern displays. Without it, interlaced videos look jittery or blurred. I compare deinterlacing to untangling a knot—it requires precision and the right tools to maintain video quality. Advanced algorithms now make this process more efficient, but it’s not without its challenges, especially for high-resolution or fast-motion content.
Real-Life Applications of Progressive and Interlaced Encoding
Understanding the practical uses of these encoding methods helps in selecting the right one for your needs. For example:
- Broadcast TV: Interlaced encoding was the standard for decades due to its bandwidth efficiency.
- Online Streaming: Progressive encoding dominates, ensuring high-quality playback across devices.
- Film Production: Progressive encoding is preferred for its superior visual fidelity.
In my experience, progressive encoding is almost always the better choice for contemporary applications, while interlaced encoding remains relevant in niche legacy systems.
Future Trends in Video Encoding
The shift towards progressive encoding reflects broader trends in video technology. As displays become more advanced and resolutions increase, the need for precise, artifact-free video grows. I’ve noticed that codecs like H.264 and HEVC prioritize progressive encoding, further cementing its place as the standard for high-quality video. Meanwhile, interlaced encoding continues to fade, primarily surviving in archival content and legacy broadcasts.
Latest words on Progressive vs Interlaced Encoding in MPEG and AVI
Progressive and interlaced encoding serve different purposes and audiences, but progressive encoding is undoubtedly the future. It provides the clarity and compatibility that modern viewers expect, while interlaced encoding struggles to keep up. If you’re working with video content, understanding these differences ensures you choose the best format for your needs. And for those looking to optimize or convert their videos, Mp4Gain is an excellent solution to make the process seamless and effective.
FAQ: Progressive vs Interlaced Encoding in MPEG and AVI
What is progressive encoding?
Progressive encoding stores video data frame by frame, capturing each image as a complete sequence. This method ensures smooth playback on modern screens like LCDs and OLEDs, making it ideal for high-quality video and streaming platforms.
What is interlaced encoding?
Interlaced encoding divides each video frame into two fields—one with odd lines and another with even lines. It was designed for older CRT displays to reduce bandwidth requirements while maintaining visual resolution, but it often creates artifacts on modern screens.
Which is better: progressive or interlaced encoding?
Progressive encoding is generally better for modern devices and digital platforms due to its superior video quality and compatibility. Interlaced encoding may still be useful in legacy systems but often requires deinterlacing for proper playback on newer screens.
Why does interlaced video look bad on modern TVs?
Modern TVs display all video lines simultaneously, revealing the incomplete frames in interlaced video. This creates artifacts like combing effects, which are not present in progressive video.
Can interlaced videos be converted to progressive?
Yes, interlaced videos can be converted to progressive using a process called deinterlacing. Deinterlacing uses algorithms to combine or interpolate the two fields into complete frames, improving compatibility and visual quality.
Why was interlaced encoding used in older AVI files?
Interlaced encoding was used in older AVI files because it reduced bandwidth and storage requirements, making it suitable for early digital video technologies and CRT displays.
Is progressive encoding compatible with streaming platforms?
Yes, progressive encoding is the preferred format for streaming platforms due to its superior video quality and ease of playback on modern devices, including smartphones and smart TVs.
What challenges does interlaced encoding present?
Interlaced encoding can cause visual artifacts like combing effects and flickering when viewed on digital screens. These issues often require additional processing, like deinterlacing, to ensure smooth playback.
How do progressive and interlaced encoding affect file size?
Interlaced encoding can save bandwidth and reduce file size compared to progressive encoding. However, the visual quality trade-offs often make progressive encoding the better choice for high-resolution or modern applications.
What is deinterlacing, and why is it important?
Deinterlacing is the process of converting interlaced video into progressive video. It’s crucial for ensuring smooth playback and eliminating artifacts when interlaced videos are viewed on modern digital screens.


Comments:
Wow, this article was super helpful! I never really understood why old TV shows look so weird on my new TV, but now I get it. Thanks for breaking it down so clearly!
Good info here, but I wish you went more into the specifics of deinterlacing. What’s the best way to do it without losing quality? Anyone else here have tips?
I’ve been converting some old family videos from AVI files, and this article explains a lot of the challenges I’ve faced. Progressive encoding is definitely the way to go.
This is one of the most detailed articles I’ve read on the topic. Learned so much about progressive and interlaced encoding. Keep up the great work!
Interlaced encoding always confuses me, but you made it sound so simple. Appreciate the real-life examples—really helps someone like me understand better!
Progressive encoding sounds like the future. I’ve been researching this for a while, and this article is by far the most comprehensive one. Thanks for sharing!
Not sure I agree with the idea that interlaced encoding is outdated. It still has its place in certain areas, don’t you think?
I’ve always been curious about the difference between these two methods. This really cleared things up for me. Thank you!
I recently digitized some old VHS tapes, and they looked terrible on my HDTV. Now I understand why. This info is invaluable.
The part about deinterlacing was super useful. I’m going to try applying this to my video library and see if it improves playback quality.
I’m new to video editing, and this was so insightful. You’ve saved me a lot of time by explaining these concepts so clearly. Thanks a ton!
This is the type of in-depth explanation I’ve been searching for. It’s hard to find articles that go beyond the basics. Well done!
Could you add more technical details on how progressive encoding works? I’m looking for something more in-depth for my research project.
This was a fantastic read! The comparison between progressive and interlaced was spot on. I learned a lot.