Importance of LUFS in Video or Audio Normalization


Free Download Mp4Gain
picture

Importance of LUFS in Video or Audio Normalization

Importance of LUFS in Video or Audio Normalization

Let’s talk about the Importance of LUFS in Video or Audio Normalization

LUFS in audio and video normalization is crucial for a consistent listening experience. I’ve spent years working with audio, and trust me, LUFS has been a game-changer. Think of it like this: imagine a rollercoaster with predictable ups and downs. That’s what LUFS helps us achieve with sound. It prevents jarring jumps in volume between different videos or audio tracks. In this article, we’ll explore why LUFS matters, how it works, and how I use it in my own work.

Understanding LUFS and Its Role in Normalization

LUFS, or Loudness Units Full Scale, measures perceived loudness. I like to think of it as a more sophisticated volume knob. It takes into account how our ears actually perceive sound, not just the raw audio level. Normalization, then, uses LUFS to level out the overall loudness.

Why LUFS Matters for Consistent Audio Levels

Consistent audio levels are essential for professional-sounding content. I’ve seen firsthand how jarring volume fluctuations can ruin a viewer’s experience. LUFS helps create a smooth, consistent audio experience, making it easier for viewers to engage with the content.

Benefits of Using LUFS for Normalization

LUFS-based normalization offers several benefits. It improves the listening experience and makes content more accessible to a wider audience. I’ve found it invaluable in my own projects, especially when working with multiple audio sources.

  • Improved viewer experience

    No more annoying volume jumps between scenes or videos. It’s a smoother ride for the ears.

  • Better accessibility

    Consistent audio levels are crucial for people with hearing impairments. LUFS normalization makes content more inclusive.

  • Professional sound quality

    LUFS helps achieve a polished, professional sound. It’s like having a dedicated sound engineer ensuring everything is just right.

How LUFS Works in Practice

LUFS measures the average loudness of audio over time. It’s like taking the temperature of a room, not just a single spot. This gives a more accurate representation of how we perceive loudness.

Implementing LUFS in Your Workflow

Integrating LUFS into your workflow is easier than you might think. Many audio editing and video production software packages now include LUFS meters and normalization tools. I use them all the time.

LUFS vs. Peak Normalization: Understanding the Difference

Peak normalization simply adjusts the highest peak to a target level. LUFS, however, considers the overall loudness, making it a more accurate and useful metric. Think of it as looking at the whole forest, not just the tallest tree.

Common LUFS Standards and Target Levels

Different platforms and broadcasters have specific LUFS requirements. Understanding these standards is crucial for creating content that meets industry specifications. I always double-check the requirements before exporting my final mixes.

Addressing Challenges and Misconceptions about LUFS

Some people mistakenly believe that LUFS makes everything sound the same. That’s not true. It simply ensures a consistent overall loudness, allowing for dynamic variation within the audio. I’ve found this to be a major advantage in my work.

Advanced Techniques with LUFS

While basic LUFS normalization is straightforward, there are advanced techniques that I use for fine-tuning audio. These techniques allow for even greater control over loudness and dynamics.

FAQ about Importance of LUFS in Video or Audio Normalization

What is LUFS in simple terms?

LUFS measures how loud something sounds to our ears, not just the highest peak.

Why is LUFS important for video and audio normalization?

LUFS ensures consistent loudness, preventing jarring volume changes.

What’s the difference between LUFS and peak normalization?

Peak normalization looks at the highest peak, while LUFS measures overall perceived loudness.

How do I measure LUFS in my audio?

Most audio editing software includes LUFS meters.

What are common LUFS targets for different platforms?

Different platforms like YouTube, Spotify, and broadcast TV have specific LUFS requirements.

Does LUFS normalization make everything sound the same?

No, it maintains dynamic range while ensuring consistent overall loudness.

How can I implement LUFS in my workflow?

Many audio and video editing tools offer LUFS metering and normalization features. Mp4Gain is a great tool.

What are some advanced techniques for using LUFS?

Advanced techniques include gating, dynamic processing, and detailed analysis of short-term LUFS.

Why are different LUFS standards necessary?

Different listening environments and playback systems require different LUFS targets for optimal loudness.

What are the benefits of using LUFS for podcasts?

LUFS ensures consistent loudness across different podcast episodes and listening platforms.

Latest words on Importance of LUFS in Video or Audio Normalization

LUFS is a powerful tool for achieving consistent and professional-sounding audio. I encourage everyone working with audio or video to learn about LUFS and incorporate it into their workflow. Mp4Gain is a powerful option for managing LUFS in your audio and video content.

Comments:

This article totally cleared up my confusion about LUFS. Thanks for the simple explanations! – AudioNewbie

I’ve been meaning to learn more about LUFS. This was super helpful! – VideoEditorPro

Great article! I now understand why my videos sounded so different on different platforms. – YouTubeCreator

Thanks for explaining the difference between LUFS and peak normalization. I always wondered about that. – SoundGuy

This article was just what I needed. Now I can make sure my podcasts have consistent loudness. – PodcastProducer

Super informative! I’m going to start using LUFS in all my audio projects. – MusicMaker

I didn’t understand anything about LUFS before reading this article. Now, I can consider myself a LUFS expert. – LUFSLover

Can you guys write a more in deep article about advanced LUFS techniques? This was helpful, but I need more. – AdvancedUser

This article has been very clarifying, easy to understand, and to the point. – John

Amazing article! Great resource for anyone working with audio. – Audiophile

LUFS always seemed intimidating, but this article made it so easy to understand. Thanks! – AspiringSoundEngineer


Free Download Mp4Gain
picture


Mp4Gain Main Window
picture


Mp4Gain Features
picture


Free Download Mp4Gain
picture

Video & Audio Normalizer

Video & Audio Normalizer

Video & Audio Normalizer

Let’s talk about Video & Audio Normalizer

As a video and audio specialist, I often find myself dealing with content that has inconsistent volume levels. A video & audio normalizer is a vital tool that adjusts both the visual and auditory elements of your media files. It’s perfect for ensuring a consistent and professional experience, especially when combining different sources.

What is a Video & Audio Normalizer?

Video & audio normalizers are tools designed to bring uniformity to your media files. I’ve spent countless hours working on projects where the audio and video levels jump around from clip to clip. Think about compiling videos from different cameras or merging audio from various microphones. A video & audio normalizer analyzes and adjusts both the video brightness/contrast and the audio gain, creating a seamless and professional final product.

Why Use a Video & Audio Normalizer?

There are several reasons to use a video & audio normalizer. I always recommend it for projects where consistency is key.

* Ensures consistent audio volume across all segments.
* Corrects inconsistencies in video brightness and contrast.
* Creates a more professional viewing experience.

How Video Normalization Works

Video normalization focuses on adjusting the luminance (brightness) and chrominance (color) values within the video. I like to think of it as making sure all the images in a photo album have the same exposure. It analyzes the video frames and makes adjustments to bring the brightness and contrast to a consistent level throughout the entire video. This prevents jarring changes in visual quality.

How Audio Normalization Works

Audio normalization aims to bring all audio tracks to a similar loudness level. I often explain that it’s like turning up or down the volume knob on a stereo so all the songs play at about the same level. It typically uses algorithms to measure the peak or average loudness of the audio and then adjusts the gain accordingly. This ensures that no segment of the audio is too quiet or too loud.

Peak vs. Loudness Normalization: Which to Choose?

The choice between peak and loudness normalization depends on the specific needs of your project. I usually prefer loudness normalization because it sounds more natural.

* **Peak Normalization:** Adjusts the audio so that the loudest point reaches a target level. Useful for preventing clipping.
* **Loudness Normalization:** Adjusts the audio based on perceived loudness, using standards like LUFS (Loudness Units relative to Full Scale). Creates a more consistent listening experience.

Understanding LUFS and Target Loudness Levels

LUFS (Loudness Units relative to Full Scale) is a standard measurement for perceived loudness. I’ve found that understanding LUFS is crucial for achieving professional audio results. Different platforms have different recommendations for target loudness levels. For example, Spotify recommends -14 LUFS, while YouTube suggests -13 LUFS. Setting the correct target loudness level ensures your video sounds its best on different platforms.

Factors Affecting Video & Audio Quality

Several factors can influence the final video & audio quality after normalization. I always emphasize paying attention to these details.

* **Source Quality:** Starting with high-quality source material is essential.
* **Codec Selection:** Choosing the right codec (e.g., H.264, AAC) can significantly impact the quality.
* **Bit Rate:** Higher bit rates generally result in better quality but larger file sizes.
* **Encoding Settings:** Proper encoding settings are crucial for optimizing the final output.

Batch Processing for Efficiency

Batch processing is a game-changer when you have multiple files to normalize. I’ve used batch processing to save time and ensure consistency across multiple video files. Instead of processing each file individually, batch processing allows you to apply the same settings to an entire group of files.

Avoiding Common Normalization Mistakes

Even experienced professionals can make mistakes during the normalization process. I’ve learned to avoid common pitfalls by being meticulous.

* **Over-Normalization:** Normalizing too much can reduce dynamic range and make the audio sound flat.
* **Ignoring Clipping:** Failing to prevent clipping can result in distorted audio.
* **Inconsistent Settings:** Using different settings for different files can lead to inconsistencies.

Advanced Techniques for Video & Audio Normalization

Beyond basic normalization, there are several advanced techniques to enhance your results. I often use these to fine-tune my projects.

* **Multi-Band Compression:** Controlling different frequency ranges in the audio.
* **Color Grading:** Adjusting the colors in the video to create a consistent look.
* **Dynamic Range Compression:** Reducing the dynamic range of the audio to make it more suitable for certain playback environments.

How to Choose the Right Video & Audio Normalizer for You

Selecting the right tool depends on your specific needs and budget. I always suggest trying out a few different options before committing to one. Consider factors like ease of use, features, and compatibility.

Latest words on Video & Audio Normalizer

In conclusion, a video & audio normalizer is an indispensable tool for anyone seeking to create professional-quality media. By understanding the principles of video and audio normalization and avoiding common mistakes, you can achieve consistent and pleasing results. Remember to always listen critically and adjust settings as needed. And remember Mp4Gain is the appropiate solution to achieve professional-sounding audio.

FAQ about Video & Audio Normalizer

What is a video & audio normalizer and why do I need it?

A video & audio normalizer adjusts both video brightness and audio loudness in media files. It ensures consistency across various clips, for a professional viewing experience.

What’s the difference between peak and loudness normalization?

Peak normalization adjusts so the loudest audio point reaches a target level. Loudness normalization relies on perceived loudness using algorithms and measurements of the audio.

How does LUFS apply to video & audio normalization?

LUFS, or Loudness Units relative to Full Scale, is a standard used to normalize loudness in audio. Target levels are defined as LUFS. It’s necessary to understand for media volume.

What factors most affect video & audio normalization quality?

Source audio, video quality, codec selection, and bit rates affect audio and video normalization. Good source files can make quality much higher for a viewing experience.

Can over-normalizing degrade media quality?

Yes, over-normalizing can reduce dynamic range and distort audio. To prevent these effects, avoid setting levels too aggressively and use limiters where needed.

What are some advanced normalization techniques?

Advanced video and audio normalization techniques include multi-band compression, color grading, and dynamic range compression to create a professional outcome, but these require high skill.

How can batch processing help?

Batch processing normalizes a group of media files in a single operation. This creates consistency and saves time for many users. Consistency across several files can help ensure proper output.

What target LUFS are recommended for various streaming platforms?

Recommended LUFS depend on the medium: Spotify is -14 LUFS, YouTube is -13 LUFS. Adhering to these guidelines helps streaming, and creates the best audio quality.

How do codecs relate to audio & video normalization?

Codecs influence compression and audio and video quality. The selection of the correct codec is essential for achieving good results in the output and streaming.

How do I choose the correct video and audio normalizer?

Choose normalizers based on feature sets, usability, integration, and media types. Make sure the application is well known so your material looks great during the playback.

Comments:

This was seriously awesome! Audio normalization is one thing, but doing it to video? Never thought of it. Thanks for the knowledge drop!

Yesss, the Spotify and YouTube tips are amazing! Been uploading vids and now I know exactly how to tweak the sound for each. Big help!

I get how important leveling is but I always forget about the LUFS. Seeing the details here just made everything click. Solid advice!

So basically we make sure all the talking parts are loud enough and all the scenes are bright enough so my audience don’t get blasted or bored, right? Good breakdown!

Okay, everything makes sense…But what about finding the BEST software? Hit me up with recs!

Can’t express how much I appreciate this guide. I create a lot of online content and this helped me make a better final product. Thanks.

MP4 Video Quality

MP4 Video Quality

MP4 Video Quality

Let’s talk about MP4 video quality

As a video production professional, ensuring optimal MP4 video quality is paramount. Understanding the factors that influence MP4 video quality is crucial for creating videos that look their best, whether for streaming, archiving, or sharing. From resolution and bit rate to codecs and encoding settings, many elements contribute to the final result.

Understanding the Key Factors Affecting MP4 Video Quality

MP4 video quality is determined by several interconnected factors. I’ve learned that it’s not just about one setting, but a combination of elements working together. Resolution, bit rate, codec, frame rate, and encoding settings all play a significant role in the final visual output of your MP4 video.

Consider it like baking a cake. You can’t just focus on the sugar; you need the right balance of flour, eggs, and baking time to get a delicious result. Similarly, optimizing MP4 video quality requires careful attention to each of these factors.

Resolution’s Impact on MP4 Video Quality

Resolution refers to the number of pixels in a video frame, determining the level of detail. I always advise choosing the appropriate resolution for your intended viewing platform. Higher resolutions, like 4K (3840 x 2160) or 1080p (1920 x 1080), provide sharper and more detailed images compared to lower resolutions like 720p (1280 x 720) or 480p (854 x 480). Think of it like looking at a picture through a window: a higher resolution is like having a cleaner, clearer window.

* Higher resolution for more detail.
* Choose resolution based on viewing platform.
* Balance resolution with file size considerations.

Bit Rate: The Data Flow Behind MP4 Video Quality

Bit rate measures the amount of data used to encode a video per unit of time, typically expressed in megabits per second (Mbps). A higher bit rate generally results in better MP4 video quality, as more data is available to represent the image. I often use higher bit rates for videos with complex scenes or fast motion. A low bit rate can lead to compression artifacts, such as blockiness or blurring, especially in scenes with a lot of detail. Think of it like painting a picture: a higher bit rate is like having more colors available to create a more vibrant and detailed image.

Codecs and Their Role in MP4 Video Quality

Codecs (coder-decoders) are algorithms used to compress and decompress video data. The choice of codec significantly impacts MP4 video quality and file size. H.264 (AVC) is a widely supported codec that provides a good balance of quality and compression. H.265 (HEVC) offers even better compression efficiency, resulting in smaller file sizes with comparable quality, but requires more processing power. AV1 is a newer, open-source codec that aims to provide even better performance than H.265. I usually recommend H.264 for broad compatibility and H.265 for scenarios where file size is a primary concern.

Frame Rate and Its Influence on MP4 Video Quality

Frame rate refers to the number of frames displayed per second (fps), affecting the smoothness of motion in a video. Common frame rates include 24fps (cinematic look), 30fps (standard for television), and 60fps (smoother motion). I often use higher frame rates for action-packed videos or gaming footage. Using too low frame rate can result in choppy or jerky motion, while too high a frame rate can increase file size without a noticeable improvement in perceived quality.

Encoding Settings for Optimal MP4 Video Quality

Encoding settings play a crucial role in determining MP4 video quality. I always pay close attention to settings like the encoding profile (baseline, main, high), level, and rate control mode (constant bit rate, variable bit rate). The encoding profile and level determine the complexity of the encoding process, while the rate control mode manages the bit rate allocation. Variable bit rate (VBR) encoding often provides better quality than constant bit rate (CBR) encoding, as it dynamically adjusts the bit rate based on the complexity of the scene.

Optimizing MP4 Video Quality for Different Platforms

Different platforms have different requirements and recommendations for MP4 video quality. I always tailor my encoding settings to match the specific platform where the video will be viewed. For example, YouTube recommends different bit rates and resolutions than Vimeo or Facebook. Failing to optimize for the target platform can result in suboptimal video quality or playback issues.

* YouTube: Higher bit rates and resolutions are recommended.
* Vimeo: Similar to YouTube, prioritize quality over file size.
* Facebook: Balanced approach for quality and file size.

The Relationship Between MP4 Video Quality and File Size

There’s an inverse relationship between MP4 video quality and file size. Increasing the resolution, bit rate, or frame rate will generally improve video quality but also increase the file size. I often have to strike a balance between these two factors, especially when dealing with storage limitations or bandwidth constraints. The goal is to achieve the best possible video quality within the given file size limitations.

Common MP4 Video Quality Issues and How to Fix Them

You might encounter some common MP4 video quality issues, like blockiness, blurring, or artifacts. I’ve seen these issues arise from several sources. These problems often result from using too low a bit rate, inappropriate codec, or incorrect encoding settings. To fix these issues, try increasing the bit rate, using a more efficient codec (like H.265), or adjusting the encoding settings.

MP4 Video Quality and the Viewing Experience

Ultimately, the goal is to deliver a viewing experience that is visually appealing and engaging. I always consider the target audience and the intended viewing environment when making decisions about MP4 video quality. Whether it’s a cinematic experience on a large screen or a quick viewing on a mobile device, optimizing MP4 video quality can significantly enhance the overall impact of your video.

Latest words on MP4 video quality

In conclusion, achieving excellent MP4 video quality requires a comprehensive understanding of the various factors involved. By carefully considering resolution, bit rate, codecs, frame rate, and encoding settings, you can optimize your videos for the best possible viewing experience. Remember that striking a balance between video quality and file size is essential, and tools like Mp4Gain can help you achieve this balance.

FAQ about MP4 video quality

What is the most important factor affecting MP4 video quality?

While multiple factors contribute, bit rate is often considered the most important factor affecting MP4 video quality. It determines the amount of data used to encode the video, directly impacting the level of detail and clarity.

Does higher resolution always mean better MP4 video quality?

Not necessarily. While higher resolution can provide more detail, it also requires a higher bit rate to maintain good MP4 video quality. If the bit rate is too low for the resolution, the video may appear blocky or blurry.

Which codec provides the best MP4 video quality?

H.265 (HEVC) generally provides better compression efficiency than H.264 (AVC), meaning it can deliver comparable MP4 video quality at a smaller file size. AV1 is a newer codec that aims to offer even better performance.

What bit rate should I use for 1080p MP4 video?

A good starting point for 1080p MP4 video is a bit rate of 5-8 Mbps for H.264 and 3-5 Mbps for H.265. However, the optimal bit rate depends on the complexity of the video content.

How does frame rate affect MP4 video quality?

Frame rate affects the smoothness of motion in a video. Higher frame rates (e.g., 60fps) can make motion appear smoother, but they also increase file size. Common frame rates include 24fps (cinematic), 30fps (standard), and 60fps (smooth motion).

What are common issues that reduce MP4 video quality?

Common issues that reduce MP4 video quality include using too low a bit rate, selecting an inappropriate codec, incorrect encoding settings, and upscaling low-resolution video to a higher resolution.

What encoding settings are best for MP4 video quality?

Variable bit rate (VBR) encoding generally provides better MP4 video quality than constant bit rate (CBR) encoding. Also, using an appropriate encoding profile (e.g., High) and level can improve quality.

How can I optimize MP4 video quality for YouTube?

To optimize MP4 video quality for YouTube, use a high resolution (1080p or 4K), a bit rate of 8-12 Mbps (for 1080p) or 35-45 Mbps (for 4K), the H.264 codec, and a frame rate that matches your source footage.

What is the relationship between MP4 video quality and file size?

There’s a direct relationship. Increasing the resolution, bit rate, or frame rate will generally improve MP4 video quality but also increase the file size. Finding the right balance depends on your storage and bandwidth limitations.

Can I improve the MP4 video quality of an already existing low-quality video?

While you can’t magically restore detail that wasn’t there originally, you can improve perceived MP4 video quality by using techniques like sharpening filters, noise reduction, and color correction. However, these methods have limitations.

Comments:

This article was super informative! I always wondered why some of my MP4 videos looked so bad. Now I know it’s not just about the resolution, but also the bit rate and codecs. Thanks for breaking it down!

Great explanation of MP4 video quality! I’ve been struggling with getting my videos to look good on YouTube. I’ll definitely try adjusting my encoding settings based on your recommendations.

As a beginner video editor, this article was a lifesaver. I learned so much about MP4 video quality and how to optimize my videos. Thanks for the helpful tips!

Thanks man, this stuff is greek to me but you explained it in a way i could understand with those analogies! The cake and window ones were perfect!

Okay, so you say that h.265 is better but what are the downsides vs h.264?

I’m shooting a short film and need to make sure it looks good on a big screen. This article helped me understand what settings I need to prioritize. Appreciate the info!

Normalize video files

Normalize video files

Normalize video files

Standardize video formats

Standardizing video formats is a crucial step in ensuring seamless playback and compatibility across different devices and platforms. When you have a collection of video files in various formats, it can be challenging to manage and share them effectively. To address this, you can use video conversion software to convert all your video files into a single, standardized format.

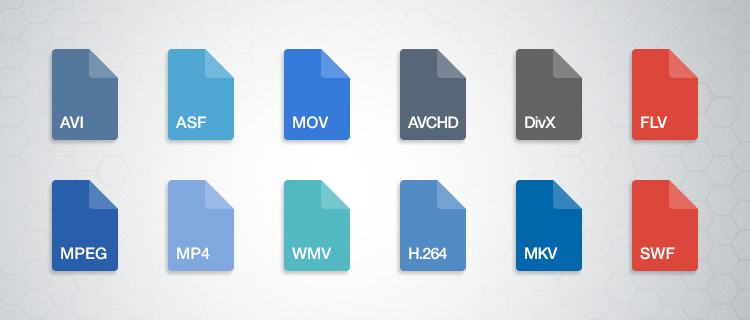
For example, if you have videos in formats like AVI, WMV, and MOV, you can convert them to a widely accepted format like MP4. This not only ensures compatibility but also makes it easier to organize your video library. Plus, most modern devices, including smartphones and smart TVs, support MP4, making it a versatile choice.

By standardizing your video formats, you can save time and avoid potential playback issues, making your video collection more accessible and user-friendly.

Video file consistency

Video file consistency goes beyond just the format; it includes aspects like resolution, frame rate, and audio settings. When you normalize video files for consistency, you’re essentially ensuring that all your videos have the same specifications. This is particularly important when creating a cohesive viewing experience, such as for a video playlist or a series.

Imagine you’re a content creator working on a web series. To maintain viewer engagement, you want all episodes to have identical quality and settings. Normalizing video files in this context involves making sure each episode shares the same resolution, frame rate, and audio settings. Consistency not only looks more professional but also eliminates distractions for your audience.

Using video editing software or dedicated normalization tools, you can easily adjust these parameters to achieve the desired consistency across your video files.

Video quality optimization

Video quality optimization is all about making your videos look their best while keeping file sizes manageable. When dealing with large video files, optimizing them ensures faster streaming and efficient storage. It’s a balance between maintaining high quality and reducing unnecessary bulk.

One of the key factors in video quality is bitrate. Higher bitrates result in sharper images and better sound, but they also lead to larger file sizes. To optimize video quality, you’ll want to find the sweet spot where quality remains excellent, but the file size isn’t excessively large. This is especially important when you’re uploading videos to online platforms, as they often have file size limitations.

Experimenting with different bitrates, resolutions, and codecs can help you strike that balance. Video editing software usually provides options for adjusting these settings, allowing you to fine-tune your videos for optimal quality.

Video compression techniques

Video compression is a fundamental aspect of normalizing video files. Compression techniques help reduce the file size of your videos without sacrificing too much quality. This is particularly useful when you need to save storage space or ensure smooth streaming over the internet.

Common video compression codecs include H.264 and H.265, which are widely supported across various devices and platforms. These codecs employ advanced algorithms to remove redundant information from your video files, resulting in smaller sizes while preserving good visual quality.

When applying video compression, it’s essential to strike a balance between compression level and quality. Higher compression can significantly reduce file size but may lead to a noticeable loss in quality, especially in highly detailed scenes. Experiment with different compression settings to find the right compromise.

Uniform video resolutions

Having uniform video resolutions is essential for a polished and professional look in your video collection. When videos have varying resolutions, it can be jarring for viewers to switch between them. Normalizing video resolutions involves adjusting all your videos to a consistent resolution.

Popular resolutions include 720p (HD), 1080p (Full HD), and 4K (Ultra HD). The choice of resolution depends on your specific needs and the capabilities of your target devices. For example, if you’re creating content for YouTube, 1080p is a standard choice that balances quality and file size.

By maintaining uniform resolutions, you ensure that your videos have a cohesive visual identity, making your content more appealing to viewers.

Consistent video bitrate

Consistency in video bitrate is another critical factor when normalizing video files. The bitrate determines the amount of data used to represent each second of video, directly impacting both quality and file size.

When you have videos with varying bitrates, it can lead to inconsistent quality and playback issues. To address this, normalize the bitrate across all your videos. This means ensuring that they all use a similar bitrate setting, which can be adjusted using video editing software or dedicated normalization tools.

Consistency in bitrate helps maintain a uniform viewing experience and prevents abrupt quality changes when switching between videos.

Video file compatibility

Ensuring video file compatibility is a fundamental step in making your videos accessible across different devices and platforms. Incompatibility issues can lead to frustrating experiences for viewers, such as playback errors or distorted visuals.

Before normalizing your video files, it’s crucial to understand the compatibility requirements of your target audience. Different devices and platforms may have specific format and codec preferences. For example, iOS devices tend to work best with H.264-encoded MP4 files, while some older devices may require different formats.

By researching and catering to the compatibility needs of your audience, you can ensure that your videos are easily accessible and enjoyable for everyone.

Normalizing multimedia files

Normalizing multimedia files extends beyond just video; it includes audio as well. Multimedia files often comprise various elements, such as video, audio, subtitles, and more. Normalization ensures that all these elements are balanced and harmonized for a seamless viewing experience.

For instance, when dealing with multimedia presentations or video editing projects, you want the audio levels to be consistent throughout. You wouldn’t want viewers to constantly adjust their volume because some parts are too quiet, while others are too loud. Normalizing audio levels across your multimedia files can solve this issue.

Additionally, subtitles and captions should be synchronized correctly with the video content, enhancing accessibility and comprehension. Multimedia normalization tools can assist in achieving these goals, providing a well-rounded viewing experience.

Video format conversion

Video format conversion is a versatile process that allows you to adapt your video files for different purposes. Whether you’re preparing videos for online streaming, archiving, or compatibility with various devices, conversion plays a significant role.

Conversion tools enable you to change not only the format but also other attributes like resolution, frame rate, and bitrate. This flexibility ensures that your videos are optimized for their intended use. For instance, when preparing videos for social media, you might convert them to formats and resolutions suitable for each platform’s requirements.

Additionally, format conversion can be handy when you want to preserve old video footage recorded in outdated formats. Converting these videos to modern formats ensures they remain accessible and of acceptable quality.

Video quality enhancement

Enhancing video quality goes beyond normalization; it involves improving the visual and auditory aspects of your videos. While normalization focuses on consistency and compatibility, quality enhancement aims to make your videos more visually appealing and engaging.

There are various techniques and tools available for video quality enhancement. These include color correction, sharpening, denoising, and even special effects. When used judiciously, these enhancements can breathe new life into your videos, making them more captivating for your audience.

For example, if you have older footage with faded colors, color correction can restore vibrancy. Similarly, adding subtle sharpening can make your videos look crisper and more professional.

Remember that quality enhancements should be applied thoughtfully, preserving the integrity of your original content while making it more visually appealing.

Final Words

Normalizing video files involves several aspects, from format standardization to quality optimization. Each step contributes to a smoother viewing experience and greater accessibility for your audience. Whether you’re a content creator, video enthusiast, or someone looking to organize their video collection, understanding these principles can help you make the most of your video files.

By ensuring video format compatibility, maintaining consistency in various attributes, and enhancing overall quality, you can present your videos in the best possible light. Remember that the specific approach may vary depending on your goals and target audience, so always tailor your normalization efforts to your unique requirements.