Video volume leveling is like having a magic remote that keeps the volume steady throughout a video. Think about watching a movie where the dialogue is whispered and the explosions are deafening. Annoying, right? Volume leveling smooths out those inconsistencies, so you don’t have to constantly fiddle with the remote. From my experience editing countless videos, I can tell you it’s a game-changer for improving the viewing experience. I once worked on a documentary where the interview audio was all over the place. Volume leveling saved the day, making it much easier to listen to.
Understanding Video Volume and Dynamics
Video volume, in my experience, is like the flow of water in a pipe. Sometimes it’s a trickle (quiet scenes), other times it’s a gush (loud scenes). Volume dynamics refer to these variations in loudness. Just like controlling the water flow with a valve, volume leveling controls the audio dynamics, making the loudness more consistent.
Why is Video Volume Leveling Important?
Volume leveling is crucial for creating professional-sounding videos. Here’s why I believe it’s so important:
Improved Viewing Experience:
No more jarring jumps in volume! It’s like smoothing out a bumpy road for a more comfortable ride.
Enhanced Audio Clarity:
When the volume is consistent, it’s easier to hear quiet dialogue and details. Imagine listening to a story where the storyteller speaks at the same volume throughout – much clearer!
Professionalism:
Volume leveling is a hallmark of professional video production. It shows you care about your audience’s experience.
Accessibility:
Consistent volume is especially helpful for viewers with hearing impairments.
How Video Volume Leveling Works
Volume leveling analyzes the audio in a video and adjusts the gain (loudness) of different sections to create a more consistent overall level. Think of it like adjusting the individual knobs on a sound mixer to balance all the instruments. Quiet parts are boosted, and loud parts are reduced.
Different Methods of Video Volume Leveling
There are several approaches to video volume leveling, each with its pros and cons:
Normalization:
Normalization boosts the overall volume to a target level without affecting the dynamics. It’s like turning up the main volume knob on a stereo.
Compression:
Compression reduces the dynamic range, making the loud parts quieter and the quiet parts louder. Think of it like squeezing a balloon – the overall volume is reduced, but it becomes more uniform.
Limiting:
Limiting prevents the audio from exceeding a certain threshold, preventing clipping and distortion. It’s like a safety valve on a pressure cooker.
Choosing the Right Video Volume Leveling Technique
From my experience, the best technique depends on the specific video. Normalization is good for boosting overall loudness. Compression is useful for taming wide dynamic ranges. Limiting prevents distortion. Often, a combination of techniques works best.
Common Challenges in Video Volume Leveling
Even with the best techniques, I’ve encountered some challenges:
Over-Compression:
Too much compression can make the audio sound flat and lifeless, like a deflated balloon.
Distortion:
Incorrect settings can lead to audio distortion, like a fuzzy radio signal.
Breathing:
Compression can sometimes create an audible “breathing” effect, which is an undesirable change in background noise levels.
Tips for Effective Video Volume Leveling
Over time, I’ve picked up some tips to get the best results:
Subtlety is Key:
Aim for natural-sounding volume adjustments. Avoid drastic changes that are noticeable to the ear.
Monitor with Headphones:
Headphones help you hear subtle details and identify any unwanted artifacts.
Experiment with Settings:
Don’t be afraid to try different settings to find what works best for your video.
Advanced Techniques in Video Volume Leveling
For more control, I often use advanced techniques like multiband compression and dynamic equalization. These techniques allow for more precise adjustments to specific frequency ranges.
The Future of Video Volume Leveling
The future of video volume leveling is exciting! I see more AI-powered tools emerging, automating the process and making it even easier to achieve professional-sounding results. Imagine a world where videos automatically adjust their volume to suit your listening environment – that’s the future I’m excited about!
Latest words on Video Volume Leveling
Video volume leveling is more than just a technical process; it’s about enhancing the emotional impact and overall enjoyment of your videos. By understanding the principles and techniques involved, you can create videos that truly captivate your audience. MP4Gain may be a suitable solution for your video volume leveling needs.
FAQ about Video Volume Leveling
What is video volume leveling?
Video volume leveling is the process of adjusting audio levels to create a consistent volume throughout a video.
Why is video volume leveling important?
It improves the viewing experience by eliminating jarring volume fluctuations and enhancing audio clarity.
How does video volume leveling work?
It analyzes the audio and adjusts the gain of different sections to achieve a consistent overall volume.
What are the different methods of video volume leveling?
Common methods include normalization, compression, and limiting.
What is audio normalization?
Normalization boosts the overall volume to a target level without significantly affecting the dynamic range.
What is audio compression?
Compression reduces the dynamic range by making loud parts quieter and quiet parts louder.
What is audio limiting?
Limiting prevents the audio from exceeding a certain threshold, preventing clipping and distortion.
What are some common challenges in video volume leveling?
Challenges can include over-compression, distortion, and breathing artifacts.
What are some tips for effective video volume leveling?
Tips include using subtle adjustments, monitoring with headphones, and experimenting with settings.
What is the future of video volume leveling?
The future may involve more AI-powered tools and automated processes.
Comments:
Great article! This explains why some of my videos sound so much better than others. Thanks! – VideoEnthusiast
I’ve been struggling with uneven audio in my videos. This is a lifesaver! – SoundStruggler
Super helpful tips! I’ll definitely be using these in my next project. – FutureFilmmaker
I’m still a little confused about the difference between normalization and compression. Maybe you could elaborate on that? – AudioNewbie
This is the best explanation of video volume leveling I’ve found online. Thanks for sharing your expertise! – GratefulLearner
I create videos for social media, and consistent volume is so important. This article was really helpful. Thanks! – SocialMediaPro
Awesome explanation. I finally understand why some videos are so jarring to listen to. – HappyViewer
I’m a musician, and I’m starting to make music videos. This will definitely come in handy! – MusicVideoMaker
I use mp4gain.com all the time for this, its great info tho! – mp4gainFan
Good stuff, but maybe add some visuals next time? – VisualLearner
Importance of LUFS in Video or Audio Normalization
Let’s talk about the Importance of LUFS in Video or Audio Normalization
LUFS in audio and video normalization is crucial for a consistent listening experience. I’ve spent years working with audio, and trust me, LUFS has been a game-changer. Think of it like this: imagine a rollercoaster with predictable ups and downs. That’s what LUFS helps us achieve with sound. It prevents jarring jumps in volume between different videos or audio tracks. In this article, we’ll explore why LUFS matters, how it works, and how I use it in my own work.
Understanding LUFS and Its Role in Normalization
LUFS, or Loudness Units Full Scale, measures perceived loudness. I like to think of it as a more sophisticated volume knob. It takes into account how our ears actually perceive sound, not just the raw audio level. Normalization, then, uses LUFS to level out the overall loudness.
Why LUFS Matters for Consistent Audio Levels
Consistent audio levels are essential for professional-sounding content. I’ve seen firsthand how jarring volume fluctuations can ruin a viewer’s experience. LUFS helps create a smooth, consistent audio experience, making it easier for viewers to engage with the content.
Benefits of Using LUFS for Normalization
LUFS-based normalization offers several benefits. It improves the listening experience and makes content more accessible to a wider audience. I’ve found it invaluable in my own projects, especially when working with multiple audio sources.
Improved viewer experience
No more annoying volume jumps between scenes or videos. It’s a smoother ride for the ears.
Better accessibility
Consistent audio levels are crucial for people with hearing impairments. LUFS normalization makes content more inclusive.
Professional sound quality
LUFS helps achieve a polished, professional sound. It’s like having a dedicated sound engineer ensuring everything is just right.
How LUFS Works in Practice
LUFS measures the average loudness of audio over time. It’s like taking the temperature of a room, not just a single spot. This gives a more accurate representation of how we perceive loudness.
Implementing LUFS in Your Workflow
Integrating LUFS into your workflow is easier than you might think. Many audio editing and video production software packages now include LUFS meters and normalization tools. I use them all the time.
LUFS vs. Peak Normalization: Understanding the Difference
Peak normalization simply adjusts the highest peak to a target level. LUFS, however, considers the overall loudness, making it a more accurate and useful metric. Think of it as looking at the whole forest, not just the tallest tree.
Common LUFS Standards and Target Levels
Different platforms and broadcasters have specific LUFS requirements. Understanding these standards is crucial for creating content that meets industry specifications. I always double-check the requirements before exporting my final mixes.
Addressing Challenges and Misconceptions about LUFS
Some people mistakenly believe that LUFS makes everything sound the same. That’s not true. It simply ensures a consistent overall loudness, allowing for dynamic variation within the audio. I’ve found this to be a major advantage in my work.
Advanced Techniques with LUFS
While basic LUFS normalization is straightforward, there are advanced techniques that I use for fine-tuning audio. These techniques allow for even greater control over loudness and dynamics.
FAQ about Importance of LUFS in Video or Audio Normalization
What is LUFS in simple terms?
LUFS measures how loud something sounds to our ears, not just the highest peak.
Why is LUFS important for video and audio normalization?
What’s the difference between LUFS and peak normalization?
Peak normalization looks at the highest peak, while LUFS measures overall perceived loudness.
How do I measure LUFS in my audio?
Most audio editing software includes LUFS meters.
What are common LUFS targets for different platforms?
Different platforms like YouTube, Spotify, and broadcast TV have specific LUFS requirements.
Does LUFS normalization make everything sound the same?
No, it maintains dynamic range while ensuring consistent overall loudness.
How can I implement LUFS in my workflow?
Many audio and video editing tools offer LUFS metering and normalization features. Mp4Gain is a great tool.
What are some advanced techniques for using LUFS?
Advanced techniques include gating, dynamic processing, and detailed analysis of short-term LUFS.
Why are different LUFS standards necessary?
Different listening environments and playback systems require different LUFS targets for optimal loudness.
What are the benefits of using LUFS for podcasts?
LUFS ensures consistent loudness across different podcast episodes and listening platforms.
Latest words on Importance of LUFS in Video or Audio Normalization
LUFS is a powerful tool for achieving consistent and professional-sounding audio. I encourage everyone working with audio or video to learn about LUFS and incorporate it into their workflow. Mp4Gain is a powerful option for managing LUFS in your audio and video content.
Comments:
This article totally cleared up my confusion about LUFS. Thanks for the simple explanations! – AudioNewbie
I’ve been meaning to learn more about LUFS. This was super helpful! – VideoEditorPro
Great article! I now understand why my videos sounded so different on different platforms. – YouTubeCreator
Thanks for explaining the difference between LUFS and peak normalization. I always wondered about that. – SoundGuy
This article was just what I needed. Now I can make sure my podcasts have consistent loudness. – PodcastProducer
Super informative! I’m going to start using LUFS in all my audio projects. – MusicMaker
I didn’t understand anything about LUFS before reading this article. Now, I can consider myself a LUFS expert. – LUFSLover
Can you guys write a more in deep article about advanced LUFS techniques? This was helpful, but I need more. – AdvancedUser
This article has been very clarifying, easy to understand, and to the point. – John
Amazing article! Great resource for anyone working with audio. – Audiophile
LUFS always seemed intimidating, but this article made it so easy to understand. Thanks! – AspiringSoundEngineer
Boost the Volume of Lossy Audio FilesBoost the Volume of Lossy Audio Files
Amplify Sound in Lossy Audio Files
When it comes to enhancing the audio quality of your favorite songs or podcasts, you might find yourself dealing with lossy audio files. These files, while space-efficient, often suffer from reduced sound quality. Fortunately, there are ways to amplify the sound in lossy audio files, giving your listening experience a significant boost.
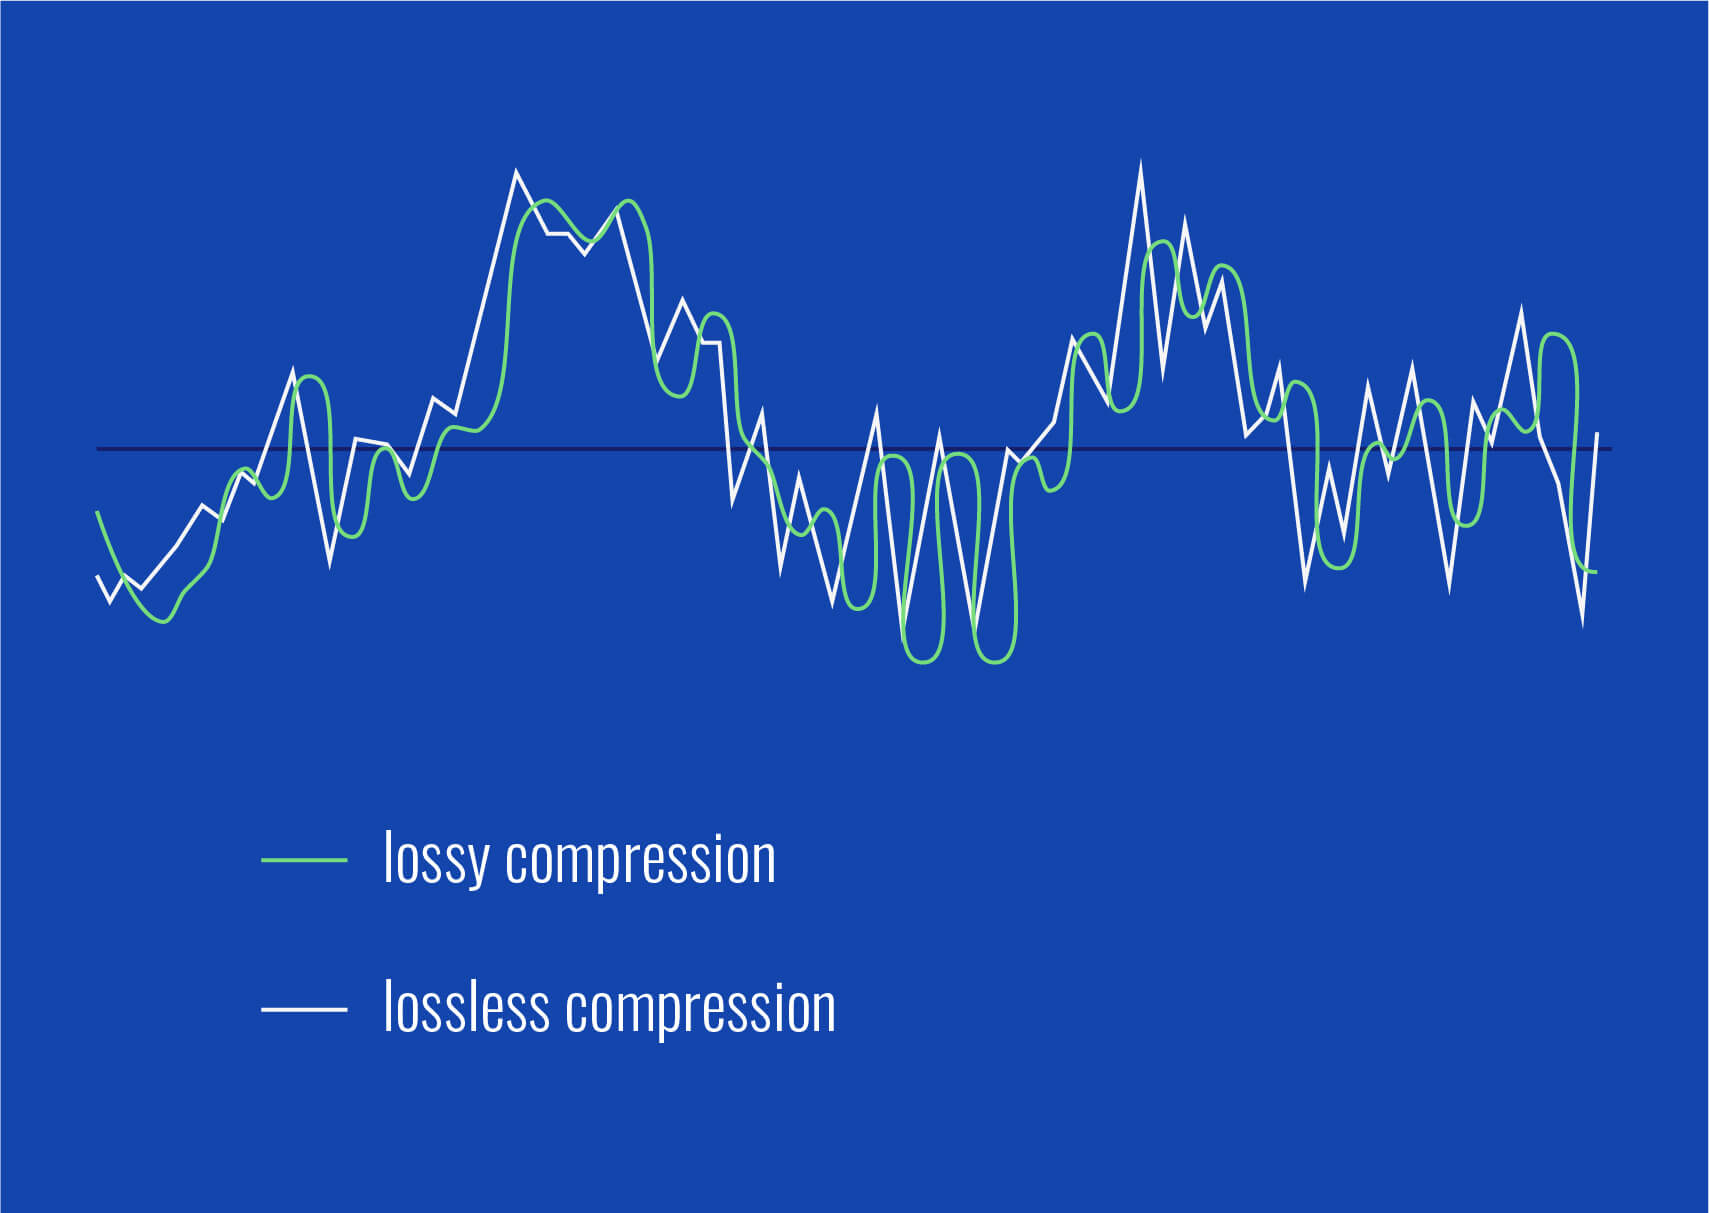
Lossy audio formats, such as MP3, AAC, or OGG, are designed to compress audio data to save storage space. However, this compression can lead to a loss of audio detail and a decrease in overall volume. To address this, you can use audio editing software to amplify the sound. By carefully adjusting the volume levels, you can make the audio more prominent and enjoyable. Just be cautious not to overdo it, as excessive amplification can lead to distortion.
Another effective way to amplify sound in lossy audio files is to use specialized audio processing tools. These tools often come with built-in volume normalization features that can help you increase the loudness while maintaining the audio’s quality. Whether you’re an aspiring musician, a podcast enthusiast, or simply looking to improve your music collection, amplifying sound in lossy audio files can breathe new life into your audio content.
Increase Volume of Compressed Audio
Compressed audio files have become the norm in today’s digital world due to their convenience and storage efficiency. However, one common drawback of these files is that they often lack the volume and punch of their uncompressed counterparts. If you’re wondering how to increase the volume of compressed audio, you’re in the right place.
To boost the volume of compressed audio files, you can start by using audio editing software. Most audio editing programs allow you to adjust the volume levels of individual tracks or sections of a file. Simply open your desired audio file in the software, locate the volume control, and gradually increase it until you achieve the desired loudness. Be cautious not to push the volume too high, as this can result in distortion and a loss of audio quality.
Additionally, consider using dynamic range compression (DRC) techniques. DRC helps balance the loud and quiet parts of an audio file, making it sound more consistent in volume. This technique is particularly useful when dealing with audio files that have uneven loudness levels. With the right adjustments, you can bring out the nuances in your compressed audio while maintaining clarity and preventing clipping.
By employing these techniques, you can effectively increase the volume of your compressed audio files, making them sound more vibrant and engaging.
Audio Volume Enhancement Techniques
Audio volume enhancement techniques are essential tools for anyone looking to improve the sound quality of their audio files, especially those in lossy formats. These techniques involve various methods to make audio files sound louder and more impactful.
One common technique is equalization, which allows you to adjust the balance of frequencies in your audio. By boosting certain frequency ranges, you can make your audio files sound fuller and more vibrant. This is particularly helpful for restoring lost detail in lossy audio files.
Another technique is the use of audio limiters and compressors. These tools help control the dynamic range of your audio, ensuring that loud parts aren’t too overpowering and quiet parts are audible. They can help you achieve a consistent and balanced volume throughout your audio file.
Additionally, you can explore mastering techniques. Mastering involves fine-tuning the overall sound of an audio file, including volume optimization. Professional mastering engineers use specialized software and hardware to enhance the loudness, clarity, and overall quality of audio recordings.
Enhance Audio Loudness in Lossy Formats
Enhancing audio loudness in lossy formats requires a combination of technical expertise and the right tools. Lossy formats like MP3 or AAC often sacrifice audio quality for smaller file sizes, which can result in lower volume levels. Here’s how you can address this issue effectively.
First, consider using audio editing software with volume normalization features. These features analyze the audio file and adjust the volume levels to ensure consistent loudness. This is particularly useful when dealing with a collection of lossy audio files with varying loudness levels.
Furthermore, explore dynamic range compression (DRC) to balance the audio’s dynamics. DRC reduces the difference between the loudest and quietest parts of an audio file, making it sound more uniform in volume. However, be cautious not to apply excessive compression, as it can lead to an unnatural and compressed sound.
Lastly, if you have a specific audio file that needs a volume boost, you can manually adjust the volume using your preferred audio editing software. Keep in mind that raising the volume too much may introduce distortion, so it’s crucial to find the right balance to enhance the loudness while preserving audio quality.
By utilizing these techniques, you can effectively enhance the audio loudness of your lossy format files and enjoy a more immersive listening experience.
Raise the Volume of Low-Quality Audio
Dealing with low-quality audio can be frustrating, especially when the volume is barely audible. Whether it’s an old recording or a poorly encoded audio file, there are ways to raise the volume and salvage the listening experience.
One approach is to use audio restoration software. These tools are designed to improve the quality of audio recordings, including boosting the volume. They often come with noise reduction features, which can help reduce background noise and further enhance the clarity of your audio.
Another option is to employ audio equalization. By adjusting the equalizer settings, you can emphasize the frequencies that are most critical for clarity and volume. Boosting the mid-range frequencies, for example, can make the vocals and instruments more prominent, resulting in a perceptible increase in volume.
If you have access to the original source of the audio, consider re-recording it or obtaining a higher-quality version. This approach eliminates the limitations of the existing low-quality audio file and ensures a better listening experience.
In summary, raising the volume of low-quality audio involves a combination of software tools and, when possible, improving the source material. These steps can help you enjoy clearer and louder audio, even from initially subpar recordings.
Boosting Sound Levels in Lossy Files
Boosting sound levels in lossy audio files is a common requirement for those looking to enhance their audio experience. Lossy formats, while efficient, often compromise on audio quality, resulting in lower volume levels. Here’s how you can effectively increase the sound levels in such files.
One of the simplest methods is to use audio editing software. Most audio editors provide volume adjustment controls that allow you to raise the volume of your lossy audio files. When doing this, be cautious not to push the volume too high, as it can lead to distortion and a loss of audio fidelity.
Additionally, you can explore the use of audio amplification plugins or tools. These specialized software options are designed to boost the loudness of audio files while minimizing the risk of distortion. They often come with presets and fine-tuning options to ensure optimal results.
When boosting sound levels, it’s essential to consider the intended playback environment. Different platforms and devices may have varying volume levels, so aim for a balance that ensures your audio remains clear and enjoyable across different systems.
By following these techniques and experimenting with volume adjustments, you can effectively boost sound levels in your lossy audio files and enjoy an improved listening experience.
Improving Audio Clarity in Compressed Formats
Improving audio clarity in compressed formats, such as MP3 or AAC, is a pursuit for audiophiles and music enthusiasts alike. While these formats offer excellent compression, they can sometimes sacrifice audio quality. Let’s explore how to enhance audio clarity in such files.
One approach is to use high-quality audio conversion tools. These tools can help you convert your compressed audio files into a lossless format, such as FLAC. Once in a lossless format, you can make edits and enhancements without further loss of audio quality. After the improvements, you can convert the file back to a compressed format with improved clarity.
Another technique involves applying equalization to your audio files. By fine-tuning the frequency balance, you can emphasize certain audio elements, such as vocals or instruments, and reduce any muddiness. This can result in clearer and more defined audio, even in compressed formats.
Furthermore, consider using noise reduction software to eliminate background noise and artifacts that may be present in your compressed audio. Reducing these unwanted elements can significantly enhance audio clarity.
Finally, if you have access to the original, uncompressed source of the audio, consider re-encoding it into a higher-quality compressed format. This can provide better clarity while still maintaining a smaller file size compared to lossless formats.
Enhancing audio clarity in compressed formats requires a combination of technical tools and careful adjustments. By experimenting with these techniques, you can achieve remarkable improvements in audio quality.
Loudness Enhancement for Lossy Audio
Loudness enhancement for lossy audio files can make a world of difference in your listening experience. Lossy formats, known for their space-saving benefits, often suffer from lower perceived volume levels. Here’s how you can effectively enhance the loudness of your lossy audio files.
One of the simplest methods is to use an audio player with built-in equalization settings. These settings allow you to boost specific frequency ranges, making the audio sound louder and more impactful. Experiment with different equalizer presets until you find the one that works best for your audio.
Another technique is to employ audio normalization. Many audio editing software tools provide normalization features that adjust the volume of your audio files to a consistent level. This ensures that all tracks play back at a similar loudness, enhancing the overall listening experience.
If you’re looking for a more advanced solution, consider using audio mastering techniques. Mastering involves fine-tuning the audio’s overall quality, including loudness optimization. Professional mastering engineers use specialized equipment and software to achieve the perfect balance of loudness and clarity.
Lastly, be mindful of the playback device you’re using. Some devices have built-in sound enhancements or equalization settings that can further enhance loudness. Experiment with these settings to find the right balance for your preferences.
By implementing these loudness enhancement techniques, you can breathe new life into your lossy audio files and enjoy them at a higher volume without sacrificing quality.
How to Make Quiet Audio Louder
Have you ever encountered audio that’s so quiet you strain to hear it even when you max out your volume controls? Learning how to make quiet audio louder is a valuable skill that can transform your listening experience.
One straightforward method is to use audio editing software. Open the quiet audio file in your chosen software and locate the volume adjustment controls. Gradually increase the volume until it reaches a comfortable level. Keep an eye on the audio waveform to ensure it doesn’t clip, which can result in distortion.
Another technique involves the use of audio normalization. This process analyzes the audio file and adjusts its volume to a consistent level, making quiet parts more audible without causing loud parts to become overly aggressive. Audio normalization is especially useful when you have multiple audio files with varying loudness levels.
Consider employing dynamic range compression (DRC) as well. DRC helps balance the dynamics of your audio, ensuring that the quietest parts are audible without overpowering the louder segments. However, use DRC judiciously to maintain natural audio quality.
Additionally, explore specialized audio enhancement software or plugins designed specifically for increasing the loudness of quiet audio. These tools often offer advanced algorithms to maximize loudness while minimizing distortion.
By mastering these techniques, you can effectively make quiet audio louder, bringing back the enjoyment in your audio content.
Audio Volume Optimization for Lossy Formats
Audio volume optimization for lossy formats is a crucial step to enhance the quality of your compressed audio files. These formats, while convenient, can suffer from reduced loudness. Let’s delve into the strategies for achieving audio volume optimization.
One method is to use audio editing software with volume adjustment capabilities. Open your lossy audio file in the software and increase the volume to your preferred level. Ensure that you maintain a balance between loudness and audio quality to prevent distortion.
Additionally, explore the use of volume normalization tools available in audio editing software. These tools analyze the audio and automatically adjust the volume to a consistent level. This is particularly useful when you have a collection of lossy audio files with varying loudness levels.
Dynamic range compression (DRC) is another technique to consider. DRC helps level out the loud and quiet parts of an audio file, resulting in a more uniform volume. However, exercise caution to avoid over-compression, which can lead to an unnatural sound.
Lastly, when exporting your audio, choose a higher bit rate if possible. This can improve the overall audio quality and contribute to better volume levels in lossy formats.
By applying these strategies for audio volume optimization, you can enjoy your favorite music and podcasts in lossy formats at a higher volume with improved clarity.
Final Words
In conclusion, whether you’re dealing with lossy audio files, compressed formats, or quiet audio, there are various techniques to boost volume and enhance your listening experience. Experiment with different methods, and remember to strike a balance between loudness and audio quality to achieve the best results. By mastering these techniques, you can enjoy your audio content at its fullest potential.
Loudness correction is a process used to adjust the volume of audio files. This can be especially important for music, videos, and other audio content that is meant to be listened to on different devices.
Loudness Correction
Why do we need Loudness Correction?
Have you ever noticed that some music or videos sound louder or quieter than others even when played at the same volume on your device? This is because different audio files have different loudness levels. Loudness correction helps to standardize these levels, making sure that all of your audio content sounds consistent and easy to listen to, no matter where you play it.
How does Loudness Correction work?
Loudness correction works by analyzing the audio file and determining its average loudness level. It then adjusts the volume of the audio file so that it matches a desired loudness level, known as the target loudness. This can be done automatically or manually, depending on the tool being used.
Once the correction process is complete, the audio file should sound the same volume as other audio files with similar content, making it easier to listen to and enjoy.
Benefits of Loudness Correction
There are several benefits of using loudness correction on your audio files, including:
Improved audio quality: By standardizing the loudness levels of your audio files, you can ensure that your audio content sounds clear and consistent, regardless of the device it’s played on.
Reduced listener fatigue: If you listen to audio content with widely varying loudness levels, it can be tiring and even painful over time. Loudness correction helps to eliminate these fluctuations, making it easier and more enjoyable to listen to your audio content for longer periods of time.
Enhanced user experience: By making your audio content more consistent and easy to listen to, you can improve the overall user experience for your listeners and viewers, making them more likely to return for more.
Conclusion
Loudness correction is a powerful tool for improving the quality and consistency of your audio files. Whether you’re creating music, videos, or other audio content, loudness correction can help to ensure that your work sounds its best, no matter where it’s played.
If you’re looking for the best solution for loudness correction, look no further than Mp4Gain.







Comments:
Great article! This explains why some of my videos sound so much better than others. Thanks! – VideoEnthusiast
I’ve been struggling with uneven audio in my videos. This is a lifesaver! – SoundStruggler
Super helpful tips! I’ll definitely be using these in my next project. – FutureFilmmaker
I’m still a little confused about the difference between normalization and compression. Maybe you could elaborate on that? – AudioNewbie
This is the best explanation of video volume leveling I’ve found online. Thanks for sharing your expertise! – GratefulLearner
I create videos for social media, and consistent volume is so important. This article was really helpful. Thanks! – SocialMediaPro
Awesome explanation. I finally understand why some videos are so jarring to listen to. – HappyViewer
I’m a musician, and I’m starting to make music videos. This will definitely come in handy! – MusicVideoMaker
I use mp4gain.com all the time for this, its great info tho! – mp4gainFan
Good stuff, but maybe add some visuals next time? – VisualLearner