Let’s talk about compression artifacts in MP3 and MP4
When we think about digital audio and video, MP3 and MP4 are the first formats that come to mind. But one challenge that often gets overlooked is compression artifacts. These artifacts degrade audio or video quality, making it less enjoyable or even irritating. As an expert who has worked with audio and video files extensively, I’ve seen firsthand how these artifacts appear and affect the final product. Let me explain this in simple terms and show you how to minimize them for better quality.
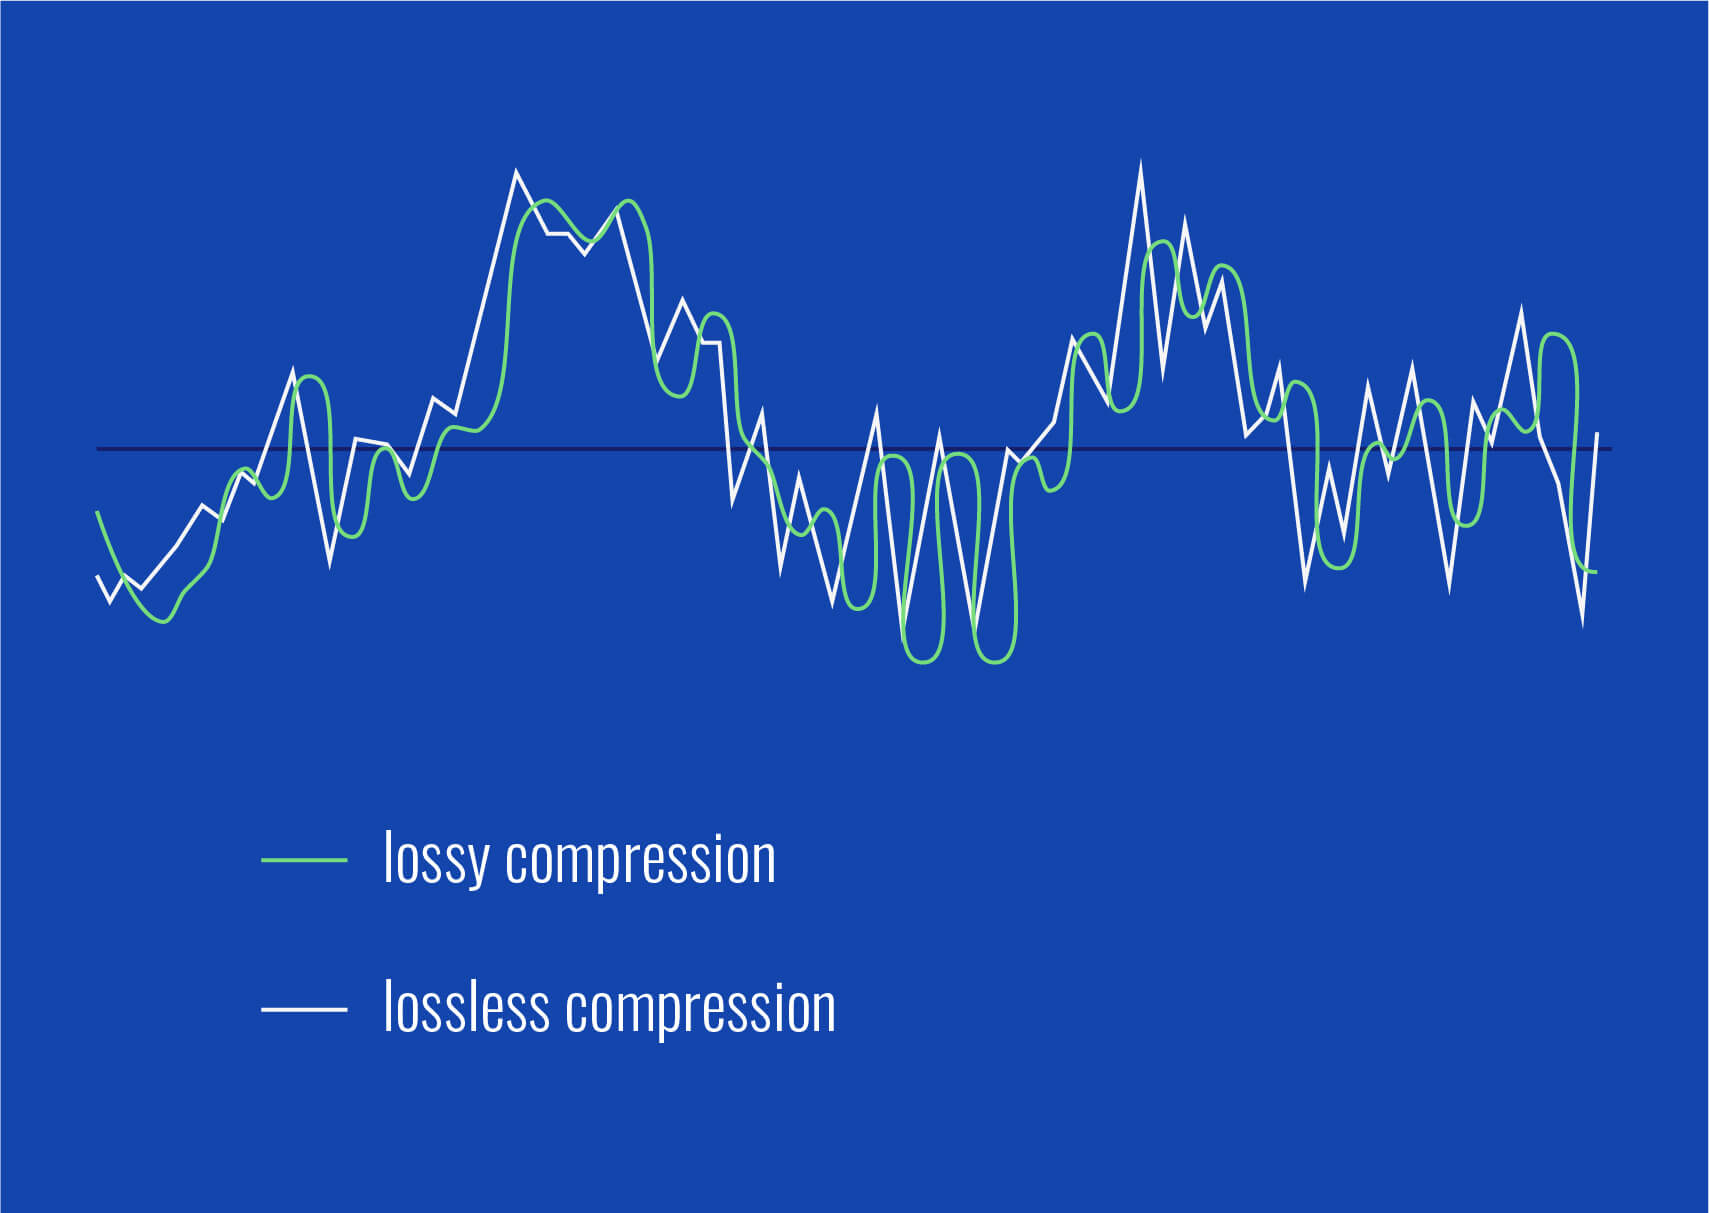
Compression artifacts are like smudges on a window—when you reduce file sizes, details get lost, and what remains is distorted. Imagine saving space in your home by squashing boxes; the boxes may fit, but their contents could get damaged. MP3 and MP4 use lossy compression, meaning they throw away data deemed unnecessary, leading to these imperfections.
What are compression artifacts?
Compression artifacts are the unwanted distortions introduced when reducing file sizes. For MP3 audio, this might mean muffled sounds, harsh treble, or missing details. For MP4 video, you might see blocky visuals, color banding, or ghosting effects. These artifacts appear because the algorithms prioritize smaller file sizes over perfect quality.
Take MP3, for instance. To save space, certain sound frequencies are removed, but this often strips richness from the music. It’s like listening to your favorite band through a thin wall—you hear it, but it’s just not the same. MP4 works similarly with video, where fine details, like subtle textures or gradients, are sacrificed.
How do MP3 compression artifacts affect audio quality?
The impact of compression on audio is noticeable, especially if you’re using good headphones or speakers. I’ve often been frustrated by the tinny sound of an MP3 track with a low bitrate. Compression artifacts in audio usually show up as:
Metallic, robotic sounds in vocals.
Swishing noises during silent or low-volume parts.
Lack of bass or muffled instruments.
A sudden drop in clarity during complex music sections.
Imagine listening to a symphony orchestra where some instruments disappear or blend unnaturally. That’s the result of lossy compression trying to simplify the sound spectrum.
How do MP4 compression artifacts impact video quality?
With video, compression artifacts are visual glitches that distract from the viewing experience. I’ve seen this happen often in action-packed scenes or dark sequences in movies. Here are common MP4 artifacts:
Blocky pixels appearing in fast-moving scenes.
Color banding, where gradients appear as harsh lines instead of smooth transitions.
Ghosting, where previous frames leave a faint trace.
Smudged or blurry details in textures and backgrounds.
Imagine watching a wildlife documentary and noticing the sky isn’t a smooth gradient but has distinct color bands. That’s an artifact caused by over-compression.
Why do compression artifacts occur in MP3 and MP4?
Compression artifacts result from reducing file sizes by discarding redundant or less noticeable data. This process relies on psychoacoustics for MP3 (understanding what sounds humans don’t notice) and visual perception for MP4. However, these algorithms aren’t perfect.
Let’s compare this to summarizing a book. If you cut out too much, you lose important context, leaving the summary fragmented. Similarly, when compression goes too far, artifacts are inevitable.
How to reduce MP3 and MP4 compression artifacts
If you care about quality, there are ways to minimize these issues. Over the years, I’ve experimented with several approaches, and here’s what I recommend:
Choose higher bitrates: For MP3s, 320 kbps offers much better sound. For MP4, use higher bitrates to preserve video details.
Use lossless formats: When quality matters most, FLAC for audio and ProRes for video are ideal.
Opt for advanced codecs: AAC for audio and HEVC (H.265) for video offer better compression efficiency with fewer artifacts.
Test playback on high-quality devices: Use good headphones or displays to spot issues before finalizing your files.
Avoid multiple compressions: Repeatedly compressing the same file worsens artifacts. Work with original files whenever possible.
How to identify compression artifacts in your files
One skill I’ve developed is spotting compression artifacts quickly. It’s not hard once you know what to look for:
For MP3s, listen to cymbals or vocals—they’re often the first to reveal distortions.
In MP4s, check fast-moving scenes or areas with gradients like skies or shadows.
Compare with uncompressed originals: A/B testing makes artifacts obvious.
It’s like spotting a fake painting—you notice inconsistencies when you compare it to the real thing.
Latest words on compression artifacts in MP3 and MP4
Compression artifacts are a trade-off between convenience and quality. Understanding why they occur and how to reduce them is essential for anyone serious about audio or video. Over the years, I’ve learned that while artifacts can’t always be avoided, careful choices in settings and formats make a big difference.
If you’re struggling with audio and video quality, Mp4Gain offers a reliable way to enhance files and reduce noticeable artifacts. But remember, no software can fully recover what’s lost in extreme compression, so start with the highest quality possible.
FAQs about compression artifacts in MP3 and MP4
What are compression artifacts?
Compression artifacts are distortions or glitches caused by reducing file sizes in audio and video formats like MP3 and MP4. These include sound loss, blocky visuals, and color banding.
How do compression artifacts affect audio?
In audio, artifacts result in metallic sounds, muffled details, or distorted vocals. This happens when certain frequencies are removed during compression.
What causes compression artifacts in MP4 videos?
MP4 artifacts appear due to aggressive compression, leading to blocky visuals, color banding, and ghosting effects. Fast-moving scenes are most affected.
Can I avoid compression artifacts?
You can reduce artifacts by using higher bitrates, lossless formats, and advanced codecs. Avoid compressing files multiple times for best results.
What is the best bitrate to avoid MP3 artifacts?
A bitrate of 320 kbps is ideal for MP3 files. It minimizes artifacts while maintaining reasonable file sizes.
Why do gradients look bad in compressed videos?
Compression reduces data for smooth transitions, resulting in color banding where gradients appear as harsh lines instead of seamless blends.
Is lossy compression always bad?
Lossy compression is not inherently bad. It balances file size and quality but should be used carefully to avoid noticeable artifacts.
Can compression artifacts be fixed?
Artifacts can be reduced but not entirely fixed. Tools like Mp4Gain help enhance quality, but prevention is better than repair.
What is psychoacoustics in MP3 compression?
Psychoacoustics is the science behind MP3 compression, removing sounds the human ear is less likely to notice to save space.
Why are MP4 artifacts worse in fast-moving scenes?
Fast-moving scenes contain more data, making compression harder. Algorithms struggle to maintain detail, causing blocky artifacts.
Comments:
Wow, this explains so much! I’ve always wondered why my music sounds weird on cheap earphones. Now I know it’s compression artifacts. Great article!
Super helpful! But can you talk more about lossless formats like FLAC? I’m curious about how they compare to MP3 and MP4. Thanks!
This is exactly what I needed to read. I’ve been having trouble with blurry textures in my videos, and now I know what’s causing it.
The info is great, but I wish there were more examples of software to fix artifacts. Still, a great read overall!
Honestly, I didn’t know artifacts were a thing until I started editing videos. This article makes it so clear and easy to understand!
Let’s talk about Quantizer Step Size Adjustments in MP3
When it comes to MP3 encoding, one of the most crucial aspects is the quantizer step size adjustment. This determines how the audio data is compressed and ultimately affects both file size and audio quality. I’ve worked extensively with MP3 files, optimizing their size while preserving sound clarity. Imagine packing a suitcase—deciding how tightly you fold the clothes affects how much you can fit in. The quantizer step size works similarly, balancing compression and quality.
In simple terms, this adjustment defines the precision used to encode audio signals. A smaller step size means better audio quality but a larger file, while a larger step size sacrifices quality for a more compact file. Understanding this trade-off is essential for anyone dealing with audio compression.
How Quantizer Step Size Affects Audio Quality
The quantizer step size directly impacts the fidelity of MP3 audio playback. Smaller steps capture more detail but require more storage. Larger steps save space but introduce audible distortions. As a sound engineer, I’ve often faced the dilemma of choosing between pristine sound quality and manageable file sizes.
For example, if you’ve ever noticed harshness or metallic sounds in an MP3, it’s likely due to an overly large step size. This is similar to zooming in on a low-resolution image—the finer details are lost, leaving blocky artifacts. Adjusting the quantizer carefully can prevent these issues, ensuring a balance between clarity and size.
The Role of Psychoacoustics in Step Size Adjustments
Psychoacoustics plays a pivotal role in how quantizer step sizes are configured during MP3 encoding. The human ear is more sensitive to certain frequencies and less to others. Leveraging this, encoders allocate bits more efficiently by prioritizing perceptually important sounds.
For instance, when listening to music, you might focus on the vocals while barely noticing the subtle bass undertones. MP3 encoders use this principle to adjust step sizes dynamically, compressing less noticeable audio details more aggressively. This makes the adjustment process more efficient without drastically compromising perceived quality.
Challenges in Dynamic Step Size Allocation
Adjusting quantizer step sizes dynamically is not without challenges. Encoders need to balance real-time audio complexity with computational efficiency. I’ve seen how complex audio tracks, like symphonies with overlapping instruments, test the limits of dynamic allocation algorithms.
Think of this as juggling multiple balls of different weights. The encoder must decide how to allocate its effort, ensuring that none of the critical aspects drop. Effective algorithms rely on meticulous tuning and a deep understanding of both signal processing and human hearing.
Real-Life Applications of Quantizer Step Size Adjustments
Quantizer step size adjustments are not just theoretical—they have real-world applications. From streaming services to portable audio devices, fine-tuning this parameter ensures the best user experience.
I’ve optimized audio for apps where file size is critical, such as mobile games and podcasts. In these cases, a slightly larger step size was acceptable to fit the storage constraints. On the other hand, for studio-quality recordings, we used smaller step sizes to preserve the integrity of the original audio.
Key Technical Insights About Step Size Adjustments
To dive deeper, quantizer step size adjustments involve several technical considerations:
The step size influences the signal-to-noise ratio (SNR).
Bitrate and quantizer step size are inversely related; increasing one decreases the other.
Adaptive bit allocation is crucial for dynamic step size adjustments.
Modern encoders use psychoacoustic models to refine step sizes in real-time.
Each of these factors intertwines to shape the final output. For example, a higher SNR means better audio fidelity, but it also requires smaller step sizes and higher bitrates, increasing file size.
Misconceptions About Quantizer Step Size Adjustments
Many believe that lowering the step size always results in better quality. While partially true, this overlooks the law of diminishing returns. Beyond a certain point, reducing the step size has negligible effects on perceived quality but significantly inflates the file size.
Imagine sharpening a knife—it’s useful up to a point, but over-sharpening could ruin the blade. Similarly, careful analysis is needed to determine the optimal step size for each track, ensuring efficiency and quality.
How Advanced MP3 Encoders Handle Step Size Adjustments
Modern MP3 encoders like LAME have revolutionized how quantizer step sizes are managed. These tools use complex algorithms that adapt to the unique characteristics of each audio segment.
I recall encoding a live concert recording with varying dynamics. The encoder seamlessly adjusted the step sizes for quieter and louder sections, ensuring consistent quality. These advanced techniques make MP3s more versatile than ever, accommodating diverse audio content.
Latest Words on Quantizer Step Size Adjustments in MP3
Quantizer step size adjustments are at the heart of MP3 compression, balancing the critical trade-off between quality and size. By understanding the underlying principles and leveraging advanced encoders, you can achieve optimal results for your specific needs. Whether you’re an audiophile or a casual listener, fine-tuning this parameter unlocks the true potential of MP3 technology. If you’re looking for a reliable way to adjust audio properties, Mp4Gain offers robust solutions tailored for precise control.
FAQ About Quantizer Step Size Adjustments in MP3
What is quantizer step size in MP3?
Quantizer step size determines the precision of audio data encoding in MP3 compression, affecting quality and file size.
How does step size affect MP3 quality?
Smaller step sizes retain more audio detail, enhancing quality, while larger steps reduce quality to save space.
Why is dynamic step size adjustment important?
Dynamic adjustments optimize bit allocation, ensuring consistent quality across different audio complexities.
Comments:
I had no idea about quantizer step size adjustments before reading this! Thanks for the great explanation.
Could you explain more about how psychoacoustics works in detail? I find it fascinating but a bit hard to grasp.
I’ve tried adjusting MP3 settings before, but they always end up sounding worse. Any tips?
Let’s talk about Efficient Chroma Intra Prediction
As an expert in video compression technologies, I understand the importance of efficient chroma intra prediction in the context of H.266/VVC (High Efficiency Video Coding/ Versatile Video Coding). Chroma intra prediction plays a crucial role in reducing redundancy within video frames, leading to better compression ratios without compromising visual quality. By leveraging predictive coding techniques specifically tailored for chroma components, H.266/VVC aims to significantly improve video compression efficiency compared to its predecessors.
Chroma intra prediction involves predicting the chroma (color) components of a video frame based on neighboring pixels within the same frame. Unlike inter prediction, which utilizes motion estimation to predict future frames, intra prediction relies solely on information contained within the current frame. This makes it particularly important for achieving high compression efficiency in scenarios where inter-frame prediction is not feasible or effective, such as still scenes or sudden scene changes.
The Importance of Chroma Intra Prediction in Video Compression
Efficient chroma intra prediction is crucial for achieving substantial bitrate savings in video compression. By accurately predicting chroma components, redundant information can be efficiently removed, resulting in smaller encoded video streams without perceptible loss of quality. This is especially significant for applications with bandwidth constraints, such as streaming services, where minimizing data transfer without sacrificing visual fidelity is paramount.
Reducing Redundancy in Color Information
Explaining how chroma intra prediction reduces redundancy in color information
Highlighting the importance of accurate chroma prediction for preserving image quality
Discussing the impact of chroma subsampling on compression efficiency
Chroma intra prediction techniques exploit spatial correlations between neighboring chroma samples to predict their values. Common prediction modes include DC (average of neighboring samples), horizontal, vertical, and directional modes, each tailored to different patterns of chroma information within a frame. By selecting the most suitable prediction mode based on the characteristics of the chroma data, H.266/VVC achieves superior compression efficiency compared to previous standards.
Adaptive Prediction Modes
Discussing the concept of adaptive prediction modes in chroma intra prediction
Exploring how H.266/VVC dynamically selects prediction modes based on content characteristics
Highlighting the benefits of adaptive prediction for versatile compression performance
One of the key advancements in H.266/VVC is its ability to adaptively switch between different prediction modes within a frame. This adaptive approach ensures optimal utilization of prediction resources, allowing the encoder to accurately capture chroma details while minimizing the overall bitrate. By intelligently adjusting prediction modes based on content complexity, H.266/VVC delivers superior compression efficiency across a wide range of video content.
Transform Coding and Residual Coding
Explaining the role of transform coding in video compression
Discussing residual coding and its contribution to compression efficiency
Highlighting the synergy between prediction, transformation, and entropy coding
In addition to chroma intra prediction, H.266/VVC employs advanced techniques such as transform coding and residual coding to further enhance compression efficiency. Transform coding, typically using the Discrete Cosine Transform (DCT) or similar methods, helps decorrelate spatial information, making it more amenable to compression. Residual coding captures the difference between the original and predicted values, enabling more accurate reconstruction at the decoder.
Efficient Representation of Chroma Information
Discussing techniques for efficient representation of chroma information in video coding
Exploring the challenges posed by chroma subsampling and color space conversion
Highlighting innovations in chroma coding for improved compression performance
Efficient representation of chroma information is critical for achieving high compression ratios while maintaining visual quality. Techniques such as chroma subsampling and color space conversion help reduce the bitrate overhead associated with chroma components, ensuring that the majority of the available bandwidth is allocated to preserving luminance (brightness) information, which is more perceptually sensitive.
Latest words on Efficient Chroma Intra Prediction
In conclusion, efficient chroma intra prediction is a cornerstone of modern video compression standards such as H.266/VVC. By leveraging advanced predictive coding techniques tailored specifically for chroma components, H.266/VVC achieves unprecedented compression efficiency while delivering superior visual quality. The adaptive selection of prediction modes, coupled with innovative approaches to transform and residual coding, ensures optimal compression performance across diverse video content. As bandwidth constraints continue to challenge the multimedia industry, the evolution of chroma intra prediction remains instrumental in enabling next-generation video applications and services.
Comments:
Wow, I never knew there was so much complexity behind video compression! This article really opened my eyes to the intricacies of chroma prediction.
As someone who works in the streaming industry, I appreciate articles like this that dive deep into compression technologies. It’s fascinating to see how much effort goes into optimizing video delivery.
I found this article informative, but I wish it delved more into the technical aspects of chroma prediction algorithms. Maybe a follow-up article could explore that in more detail?
Great overview of chroma prediction in video coding! It’s amazing to see how far we’ve come in terms of compression efficiency, thanks to advancements like H.266/VVC.
As a video enthusiast, I’m always curious about the latest developments in compression standards. This article provided a comprehensive overview of chroma intra prediction and its importance in modern codecs.
This article helped me understand why some videos look better than others even at lower bitrates. It’s all about efficient prediction and compression techniques!
Really insightful article! I never realized how much optimization goes into reducing the size of video files while maintaining quality.
It’s fascinating to learn about the technical intricacies of video compression. This article provided a clear and concise explanation of chroma intra prediction and its role in modern codecs.
I’ve always been curious about how video compression works, and this article provided a great overview of one of its key components. Looking forward to reading more articles like this!
As a content creator, understanding video compression is essential for optimizing the delivery of my videos. This article shed light on the importance of chroma intra prediction in achieving efficient compression.
In the realm of audio compression, WMA Lossless encoding stands out as a compelling option for preserving audio quality while reducing file size. As an expert in audio technologies, I’ve delved deep into the intricacies of WMA Lossless encoding techniques and its applications. In this article, I’ll unravel the secrets behind WMA Lossless and explore its benefits, features, and optimization strategies.
Understanding WMA Lossless Compression
WMA Lossless, short for Windows Media Audio Lossless, employs sophisticated compression algorithms to reduce the size of audio files without sacrificing audio fidelity. Unlike lossy compression methods like MP3, WMA Lossless retains the original audio data, ensuring a perfect reproduction of the source material. This makes it an attractive choice for audiophiles, music enthusiasts, and professionals who demand uncompromising audio quality.
Benefits of WMA Lossless Compression:
Preservation of original audio quality
Significant reduction in file size without loss of fidelity
Compatibility with a wide range of playback devices and software
Support for metadata embedding and album art
Key Features and Technical Specifications
WMA Lossless offers several key features and technical specifications that set it apart from other audio compression formats. Understanding these features is crucial for maximizing the benefits of WMA Lossless in various applications.
True Lossless Compression
Unlike lossy compression formats, WMA Lossless maintains a bit-perfect representation of the original audio, ensuring no loss of quality during compression and decompression processes. This makes it ideal for archival purposes, critical listening, and professional audio production where preserving the integrity of the source material is paramount.
Flexible Compression Options
WMA Lossless provides users with flexible compression options, allowing them to choose between different compression levels based on their preferences and requirements. This enables users to strike a balance between file size and audio quality, tailoring the compression settings to suit their specific needs.
Metadata Support
In addition to audio data, WMA Lossless also supports metadata embedding, allowing users to include information such as artist name, album title, track number, and genre directly within the audio file. This enhances the organization and presentation of audio content, making it easier for users to manage their music libraries effectively.
Applications and Use Cases
WMA Lossless finds applications across various domains, ranging from personal audio playback to professional audio production and archival. Understanding the diverse use cases of WMA Lossless can help users leverage its capabilities to their fullest extent.
Personal Audio Playback
For audiophiles and music enthusiasts who prioritize audio quality, WMA Lossless offers an unparalleled listening experience, delivering pristine sound reproduction with minimal compromise. Whether enjoying music on a high-end audio system or a portable media player, users can expect the highest level of fidelity from WMA Lossless-encoded audio.
Professional Audio Production
In the realm of professional audio production, accuracy and fidelity are of utmost importance. WMA Lossless provides audio professionals with a reliable solution for storing and exchanging high-quality audio files without the risk of data loss or degradation. From recording and mixing to mastering and distribution, WMA Lossless offers a seamless workflow for audio professionals seeking uncompromising quality.
Archival and Preservation
In archival and preservation applications, maintaining the integrity of audio recordings over time is essential. WMA Lossless serves as a robust solution for preserving audio content in its original form, ensuring that future generations can enjoy the same audio quality as the original recordings. With support for metadata embedding and error-resistant encoding, WMA Lossless is well-suited for long-term storage and archival purposes.
Leveraging WMA Lossless Compression
As an expert in audio compression technologies, I’ve explored the nuances of WMA Lossless encoding and discovered various strategies for optimizing its performance and efficiency. By understanding the intricacies of WMA Lossless compression and mastering its implementation, users can unlock new possibilities for audio playback, production, and preservation.
Optimizing Compression Settings
When encoding audio in WMA Lossless format, it’s essential to consider factors such as compression level, metadata embedding, and error resilience to achieve the desired balance between file size and audio quality. Experimenting with different compression settings and evaluating their impact on audio quality can help users fine-tune their encoding process and optimize the performance of WMA Lossless compression.
Maximizing Compatibility and Portability
While WMA Lossless offers exceptional audio quality and compression efficiency, it’s essential to ensure compatibility with a wide range of playback devices and software platforms. By choosing widely supported file formats and embedding metadata information in a standardized manner, users can maximize the compatibility and portability of WMA Lossless-encoded audio files, ensuring seamless playback across different devices and applications.
Latest words on WMA Lossless Encoding
In conclusion, WMA Lossless encoding techniques represent a pinnacle of audio compression technology, offering uncompromising quality and fidelity in a compact and efficient package. By understanding the principles of WMA Lossless compression and mastering its implementation, users can elevate their audio experiences to new heights, whether enjoying music at home, producing professional audio content, or preserving cherished recordings for future generations.
Comments:
This article provided a comprehensive overview of WMA Lossless encoding techniques, shedding light on its benefits and applications. I’m excited to explore the world of lossless audio compression further!
– AudioEnthusiast23
As a professional audio engineer, I found this article to be highly informative and insightful. The explanations of WMA Lossless compression techniques were clear and concise, making it easy to understand the underlying principles.
– SoundSavant
Could you provide more information on the compatibility of WMA Lossless files with different playback devices and software platforms? I’m interested in ensuring seamless playback across all my devices.
– TechSavvyUser
This article opened my eyes to the possibilities of WMA Lossless compression for archival and preservation purposes. I’ll definitely be exploring this option for digitizing my vinyl collection!
– VinylCollector
Great job on covering the technical aspects of WMA Lossless encoding while keeping the content accessible and engaging. I feel more confident in choosing WMA Lossless for my audio projects after reading this article.
– CreativeMind
Do you have any tips for optimizing WMA Lossless compression settings for different types of audio content, such as music, podcasts, or spoken word recordings?
– AudioProducer123
This article provided valuable insights into the world of WMA Lossless encoding, highlighting its benefits and applications across various domains. I’m excited to experiment with WMA Lossless compression for my audio projects!
– TechEnthusiast99
I appreciate the emphasis on optimizing compression settings and maximizing compatibility with different playback devices and software platforms. This will be incredibly helpful for ensuring a seamless audio experience across all my devices.
– DigitalNomad
As a musician and audio enthusiast, I found this article to be a valuable resource for understanding the intricacies of WMA Lossless compression. The practical tips and insights provided will undoubtedly enhance my audio production workflow.
– MusicMaker456
This article offered a comprehensive overview of WMA Lossless encoding techniques, covering its benefits, features, and optimization strategies in detail. I’m impressed by the depth and clarity of the explanations provided.
Exploring the intricate world of H.265 Transform Skip Coding Techniques is like deciphering the secret language of video compression. As a seasoned specialist in video encoding, I’ve witnessed the evolution of this technology firsthand. Today, let’s unravel the mysteries behind H.265 Transform Skip Coding and understand how it revolutionizes video compression.
The Foundation: Transform Coding in H.265
Before delving into the specifics of Transform Skip Coding, let’s establish a solid foundation by understanding the basics of transform coding in H.265. Think of it as the blueprint for constructing a building. Transform coding forms the structural framework, enabling efficient compression while maintaining video quality. This is where H.265 showcases its prowess in video encoding.
Breaking down the fundamentals of transform coding
Comparing H.264 and H.265 transform coding techniques
Real-world implications of efficient transform coding
The Ingenious Transformation: Transform Skip Coding Unveiled
Now, let’s zoom in on the star of the show—Transform Skip Coding. Imagine you have a painting, and instead of redrawing every detail, you choose to skip the transformation process for certain elements. Similarly, H.265’s Transform Skip Coding selectively bypasses transformation steps, optimizing the compression process. This not only speeds up encoding but also preserves video quality.
Understanding the mechanics of Transform Skip Coding
Benefits of selectively skipping transform steps
Real-life scenarios showcasing the impact of Transform Skip Coding
The Art of Efficiency: Rate-Distortion Optimization
In the realm of video compression, efficiency is key. Enter Rate-Distortion Optimization (RDO). Think of it as a master sculptor refining a statue, strategically choosing which details to enhance or simplify. H.265’s Transform Skip Coding leverages RDO to achieve optimal compression efficiency, ensuring a delicate balance between bit rate and video quality.
Examining the role of Rate-Distortion Optimization in video compression
How Transform Skip Coding enhances RDO in H.265
Real-world examples of RDO-driven efficiency gains
The Quest for Perfection: Intra-Frame and Inter-Frame Coding
Video compression is a quest for perfection, and H.265’s Transform Skip Coding plays a pivotal role in this pursuit. Picture a novel where each chapter seamlessly connects to form a compelling story. Intra-frame and inter-frame coding techniques in H.265 ensure that every video frame contributes cohesively to the visual narrative, maintaining high quality throughout the compression process.
Exploring the nuances of Intra-Frame and Inter-Frame Coding
How Transform Skip Coding enhances frame-to-frame coherence
Real-life examples illustrating the importance of frame coding
Latest Words on H.265 Transform Skip Coding Techniques
As we navigate through the intricacies of H.265 Transform Skip Coding Techniques, it becomes evident that this technology is more than just a tool—it’s an art form. By selectively bypassing transform steps, leveraging RDO for efficiency, and optimizing intra-frame and inter-frame coding, H.265 sets a new standard in video compression. The depth of understanding these techniques unveils a world where video quality and compression efficiency coexist harmoniously.
Comments:
This article is a treasure trove of information on H.265 Transform Skip Coding. Kudos!
Could you dive deeper into real-world applications of Transform Skip Coding? I’m eager to implement these techniques in my projects.
As a video enthusiast, I appreciate the clarity in explaining complex concepts. Transform Skip Coding now feels like an art form!
This article opened my eyes to the efficiency gains of Transform Skip Coding. Can’t wait to explore its benefits in my video projects!
Great insights! However, I’d love to see a detailed comparison of Transform Skip Coding across different video codecs. Any plans for a follow-up article?
Transform Skip Coding is a game-changer! Thanks for providing a detailed and accessible explanation. Looking forward to more articles like this!
I’d appreciate more examples illustrating the impact of RDO on video compression. This article has already been immensely helpful!
This article is a gem! The real-world scenarios made the technical details so much easier to grasp. Thank you!
Transform Skip Coding has always been a bit confusing for me, but this article clarified so much. Excellent job!
Bravo! This article provides a level of detail that is often missing in discussions about video compression. Thumbs up!
I’m intrigued by the efficiency gains of Transform Skip Coding. Any chance you could delve into the impact on streaming services and bandwidth usage?
This article is a fantastic resource for anyone looking to understand H.265 Transform Skip Coding. The real-life examples are a game-changer!
Boost the Volume of Lossy Audio FilesBoost the Volume of Lossy Audio Files
Amplify Sound in Lossy Audio Files
When it comes to enhancing the audio quality of your favorite songs or podcasts, you might find yourself dealing with lossy audio files. These files, while space-efficient, often suffer from reduced sound quality. Fortunately, there are ways to amplify the sound in lossy audio files, giving your listening experience a significant boost.
Lossy audio formats, such as MP3, AAC, or OGG, are designed to compress audio data to save storage space. However, this compression can lead to a loss of audio detail and a decrease in overall volume. To address this, you can use audio editing software to amplify the sound. By carefully adjusting the volume levels, you can make the audio more prominent and enjoyable. Just be cautious not to overdo it, as excessive amplification can lead to distortion.
Another effective way to amplify sound in lossy audio files is to use specialized audio processing tools. These tools often come with built-in volume normalization features that can help you increase the loudness while maintaining the audio’s quality. Whether you’re an aspiring musician, a podcast enthusiast, or simply looking to improve your music collection, amplifying sound in lossy audio files can breathe new life into your audio content.
Increase Volume of Compressed Audio
Compressed audio files have become the norm in today’s digital world due to their convenience and storage efficiency. However, one common drawback of these files is that they often lack the volume and punch of their uncompressed counterparts. If you’re wondering how to increase the volume of compressed audio, you’re in the right place.
To boost the volume of compressed audio files, you can start by using audio editing software. Most audio editing programs allow you to adjust the volume levels of individual tracks or sections of a file. Simply open your desired audio file in the software, locate the volume control, and gradually increase it until you achieve the desired loudness. Be cautious not to push the volume too high, as this can result in distortion and a loss of audio quality.
Additionally, consider using dynamic range compression (DRC) techniques. DRC helps balance the loud and quiet parts of an audio file, making it sound more consistent in volume. This technique is particularly useful when dealing with audio files that have uneven loudness levels. With the right adjustments, you can bring out the nuances in your compressed audio while maintaining clarity and preventing clipping.
By employing these techniques, you can effectively increase the volume of your compressed audio files, making them sound more vibrant and engaging.
Audio Volume Enhancement Techniques
Audio volume enhancement techniques are essential tools for anyone looking to improve the sound quality of their audio files, especially those in lossy formats. These techniques involve various methods to make audio files sound louder and more impactful.
One common technique is equalization, which allows you to adjust the balance of frequencies in your audio. By boosting certain frequency ranges, you can make your audio files sound fuller and more vibrant. This is particularly helpful for restoring lost detail in lossy audio files.
Another technique is the use of audio limiters and compressors. These tools help control the dynamic range of your audio, ensuring that loud parts aren’t too overpowering and quiet parts are audible. They can help you achieve a consistent and balanced volume throughout your audio file.
Additionally, you can explore mastering techniques. Mastering involves fine-tuning the overall sound of an audio file, including volume optimization. Professional mastering engineers use specialized software and hardware to enhance the loudness, clarity, and overall quality of audio recordings.
Enhance Audio Loudness in Lossy Formats
Enhancing audio loudness in lossy formats requires a combination of technical expertise and the right tools. Lossy formats like MP3 or AAC often sacrifice audio quality for smaller file sizes, which can result in lower volume levels. Here’s how you can address this issue effectively.
First, consider using audio editing software with volume normalization features. These features analyze the audio file and adjust the volume levels to ensure consistent loudness. This is particularly useful when dealing with a collection of lossy audio files with varying loudness levels.
Furthermore, explore dynamic range compression (DRC) to balance the audio’s dynamics. DRC reduces the difference between the loudest and quietest parts of an audio file, making it sound more uniform in volume. However, be cautious not to apply excessive compression, as it can lead to an unnatural and compressed sound.
Lastly, if you have a specific audio file that needs a volume boost, you can manually adjust the volume using your preferred audio editing software. Keep in mind that raising the volume too much may introduce distortion, so it’s crucial to find the right balance to enhance the loudness while preserving audio quality.
By utilizing these techniques, you can effectively enhance the audio loudness of your lossy format files and enjoy a more immersive listening experience.
Raise the Volume of Low-Quality Audio
Dealing with low-quality audio can be frustrating, especially when the volume is barely audible. Whether it’s an old recording or a poorly encoded audio file, there are ways to raise the volume and salvage the listening experience.
One approach is to use audio restoration software. These tools are designed to improve the quality of audio recordings, including boosting the volume. They often come with noise reduction features, which can help reduce background noise and further enhance the clarity of your audio.
Another option is to employ audio equalization. By adjusting the equalizer settings, you can emphasize the frequencies that are most critical for clarity and volume. Boosting the mid-range frequencies, for example, can make the vocals and instruments more prominent, resulting in a perceptible increase in volume.
If you have access to the original source of the audio, consider re-recording it or obtaining a higher-quality version. This approach eliminates the limitations of the existing low-quality audio file and ensures a better listening experience.
In summary, raising the volume of low-quality audio involves a combination of software tools and, when possible, improving the source material. These steps can help you enjoy clearer and louder audio, even from initially subpar recordings.
Boosting Sound Levels in Lossy Files
Boosting sound levels in lossy audio files is a common requirement for those looking to enhance their audio experience. Lossy formats, while efficient, often compromise on audio quality, resulting in lower volume levels. Here’s how you can effectively increase the sound levels in such files.
One of the simplest methods is to use audio editing software. Most audio editors provide volume adjustment controls that allow you to raise the volume of your lossy audio files. When doing this, be cautious not to push the volume too high, as it can lead to distortion and a loss of audio fidelity.
Additionally, you can explore the use of audio amplification plugins or tools. These specialized software options are designed to boost the loudness of audio files while minimizing the risk of distortion. They often come with presets and fine-tuning options to ensure optimal results.
When boosting sound levels, it’s essential to consider the intended playback environment. Different platforms and devices may have varying volume levels, so aim for a balance that ensures your audio remains clear and enjoyable across different systems.
By following these techniques and experimenting with volume adjustments, you can effectively boost sound levels in your lossy audio files and enjoy an improved listening experience.
Improving Audio Clarity in Compressed Formats
Improving audio clarity in compressed formats, such as MP3 or AAC, is a pursuit for audiophiles and music enthusiasts alike. While these formats offer excellent compression, they can sometimes sacrifice audio quality. Let’s explore how to enhance audio clarity in such files.
One approach is to use high-quality audio conversion tools. These tools can help you convert your compressed audio files into a lossless format, such as FLAC. Once in a lossless format, you can make edits and enhancements without further loss of audio quality. After the improvements, you can convert the file back to a compressed format with improved clarity.
Another technique involves applying equalization to your audio files. By fine-tuning the frequency balance, you can emphasize certain audio elements, such as vocals or instruments, and reduce any muddiness. This can result in clearer and more defined audio, even in compressed formats.
Furthermore, consider using noise reduction software to eliminate background noise and artifacts that may be present in your compressed audio. Reducing these unwanted elements can significantly enhance audio clarity.
Finally, if you have access to the original, uncompressed source of the audio, consider re-encoding it into a higher-quality compressed format. This can provide better clarity while still maintaining a smaller file size compared to lossless formats.
Enhancing audio clarity in compressed formats requires a combination of technical tools and careful adjustments. By experimenting with these techniques, you can achieve remarkable improvements in audio quality.
Loudness Enhancement for Lossy Audio
Loudness enhancement for lossy audio files can make a world of difference in your listening experience. Lossy formats, known for their space-saving benefits, often suffer from lower perceived volume levels. Here’s how you can effectively enhance the loudness of your lossy audio files.
One of the simplest methods is to use an audio player with built-in equalization settings. These settings allow you to boost specific frequency ranges, making the audio sound louder and more impactful. Experiment with different equalizer presets until you find the one that works best for your audio.
Another technique is to employ audio normalization. Many audio editing software tools provide normalization features that adjust the volume of your audio files to a consistent level. This ensures that all tracks play back at a similar loudness, enhancing the overall listening experience.
If you’re looking for a more advanced solution, consider using audio mastering techniques. Mastering involves fine-tuning the audio’s overall quality, including loudness optimization. Professional mastering engineers use specialized equipment and software to achieve the perfect balance of loudness and clarity.
Lastly, be mindful of the playback device you’re using. Some devices have built-in sound enhancements or equalization settings that can further enhance loudness. Experiment with these settings to find the right balance for your preferences.
By implementing these loudness enhancement techniques, you can breathe new life into your lossy audio files and enjoy them at a higher volume without sacrificing quality.
How to Make Quiet Audio Louder
Have you ever encountered audio that’s so quiet you strain to hear it even when you max out your volume controls? Learning how to make quiet audio louder is a valuable skill that can transform your listening experience.
One straightforward method is to use audio editing software. Open the quiet audio file in your chosen software and locate the volume adjustment controls. Gradually increase the volume until it reaches a comfortable level. Keep an eye on the audio waveform to ensure it doesn’t clip, which can result in distortion.
Another technique involves the use of audio normalization. This process analyzes the audio file and adjusts its volume to a consistent level, making quiet parts more audible without causing loud parts to become overly aggressive. Audio normalization is especially useful when you have multiple audio files with varying loudness levels.
Consider employing dynamic range compression (DRC) as well. DRC helps balance the dynamics of your audio, ensuring that the quietest parts are audible without overpowering the louder segments. However, use DRC judiciously to maintain natural audio quality.
Additionally, explore specialized audio enhancement software or plugins designed specifically for increasing the loudness of quiet audio. These tools often offer advanced algorithms to maximize loudness while minimizing distortion.
By mastering these techniques, you can effectively make quiet audio louder, bringing back the enjoyment in your audio content.
Audio Volume Optimization for Lossy Formats
Audio volume optimization for lossy formats is a crucial step to enhance the quality of your compressed audio files. These formats, while convenient, can suffer from reduced loudness. Let’s delve into the strategies for achieving audio volume optimization.
One method is to use audio editing software with volume adjustment capabilities. Open your lossy audio file in the software and increase the volume to your preferred level. Ensure that you maintain a balance between loudness and audio quality to prevent distortion.
Additionally, explore the use of volume normalization tools available in audio editing software. These tools analyze the audio and automatically adjust the volume to a consistent level. This is particularly useful when you have a collection of lossy audio files with varying loudness levels.
Dynamic range compression (DRC) is another technique to consider. DRC helps level out the loud and quiet parts of an audio file, resulting in a more uniform volume. However, exercise caution to avoid over-compression, which can lead to an unnatural sound.
Lastly, when exporting your audio, choose a higher bit rate if possible. This can improve the overall audio quality and contribute to better volume levels in lossy formats.
By applying these strategies for audio volume optimization, you can enjoy your favorite music and podcasts in lossy formats at a higher volume with improved clarity.
Final Words
In conclusion, whether you’re dealing with lossy audio files, compressed formats, or quiet audio, there are various techniques to boost volume and enhance your listening experience. Experiment with different methods, and remember to strike a balance between loudness and audio quality to achieve the best results. By mastering these techniques, you can enjoy your audio content at its fullest potential.










Comments:
Wow, this explains so much! I’ve always wondered why my music sounds weird on cheap earphones. Now I know it’s compression artifacts. Great article!
Super helpful! But can you talk more about lossless formats like FLAC? I’m curious about how they compare to MP3 and MP4. Thanks!
This is exactly what I needed to read. I’ve been having trouble with blurry textures in my videos, and now I know what’s causing it.
The info is great, but I wish there were more examples of software to fix artifacts. Still, a great read overall!
Honestly, I didn’t know artifacts were a thing until I started editing videos. This article makes it so clear and easy to understand!