Audio and video adjust volume is essential for a good viewing experience. I’ve spent years working in multimedia, and let me tell you, nothing ruins a movie night faster than inconsistent sound. Think of it like a rollercoaster – exciting ups and downs are great, but unpredictable, jarring shifts can be unpleasant. Adjusting audio and video volume lets you fine-tune the experience, creating a balanced and enjoyable soundscape. It’s about control, ensuring that whispers are audible and explosions don’t blow out your speakers.
Why Adjusting Audio and Video Volume is Important
Adjusting audio and video volume is crucial for several reasons. It enhances clarity, improves accessibility, and creates a comfortable listening environment. I’ve used volume adjustments to make quiet dialogue crystal clear and to tame overly loud commercials.
How to Adjust Audio and Video Volume
Volume adjustment methods vary depending on the device and software you use. From simple sliders on your phone to advanced controls in editing software, I’ve used them all. Each method offers a different level of control and precision.
Device Volume Controls
Most devices have physical or on-screen volume controls. These are like the volume knob on a radio – simple and straightforward.
Software Volume Controls
Media players and editing software offer more precise control over volume levels. Think of these as the fine-tuning knobs on a mixing board, allowing for granular adjustments.
System-Wide Volume Control
Operating systems also have volume controls that affect all audio output. This is like the main water valve for your house, controlling the overall flow.
Adjusting Volume on Different Devices
Volume adjustment varies across different devices, from smartphones and computers to TVs and streaming devices. I’ve worked with all these platforms, and understanding the nuances of each is crucial.
Smartphones
Volume adjustments are typically done through hardware buttons or on-screen sliders.
Computers
Computers offer a combination of hardware controls, operating system settings, and software-specific volume adjustments.
TVs
TV volume controls are usually accessed via remote controls or on-screen menus.
Streaming Devices
Streaming devices like Roku or Fire TV often have dedicated volume controls on their remotes.
Advanced Volume Adjustment Techniques
Beyond basic volume control, several advanced techniques offer more granular control over audio levels. I use these frequently in my professional work, achieving polished and balanced sound.
Normalization
Normalization adjusts the overall volume of an audio track without affecting its dynamic range.
Compression
Compression reduces the difference between the loudest and quietest parts of an audio track.
Equalization
Equalization adjusts the balance of different frequencies in an audio track.
Troubleshooting Volume Issues
Sometimes, you may encounter volume problems that require troubleshooting. I’ve seen it all, from faulty cables to software glitches. Identifying the source of the issue is the first step towards a solution.
Checking Cables and Connections
Make sure all cables and connections are secure and functioning correctly. A loose cable can be like a kink in a garden hose, disrupting the flow.
Updating Drivers and Software
Outdated drivers or software can sometimes cause volume problems.
Adjusting System Settings
Incorrect system settings can also affect audio output.
FAQ about Audio and Video Adjust Volume
How do I adjust the volume on my phone?
Most phones have physical volume buttons or on-screen sliders in the control center or media player.
How can I make my computer’s audio louder?
Check your system volume, media player volume, and speaker connections. You can also use volume booster software.
Why is the audio on my videos so quiet?
The recording level might be low, or there could be issues with your playback device or software.
How do I adjust the audio and video volume separately?
Some video editing software allows you to adjust audio and video tracks independently.
What is audio normalization?
Audio normalization adjusts the overall volume of a track to a target level without affecting its dynamic range.
How can I fix audio that’s too loud or too quiet?
Adjusting the volume, normalization, and compression can help balance audio levels.
What are some common causes of volume fluctuations?
Volume fluctuations can be caused by inconsistent audio mastering, automatic gain control, or issues with your playback setup.
How do I adjust the volume on my streaming device?
Use the volume buttons on your streaming device’s remote or the on-screen controls.
How can I adjust the volume of a video I’m editing?
Video editing software typically provides tools to adjust the audio track’s volume.
What’s the difference between adjusting volume and gain?
Volume refers to the output level, while gain refers to the input level. Adjusting gain affects the signal before it reaches the volume control.
Latest words on Audio and Video Adjust Volume
From fine-tuning movie dialogue to balancing music levels, audio and video adjust volume is crucial for an optimal experience. I’ve used these techniques extensively throughout my career, and they are essential for anyone working with multimedia. Remember to explore the different methods available and troubleshoot any issues systematically. Mp4Gain can be a great tool for precise volume adjustments.
Comments:
Great article! I learned a lot about adjusting volume on different devices. Thanks! – TechTim
Super helpful explanation of normalization and compression. I’m going to experiment with those techniques in my video editing. – VideoEditorVicky
I’ve been having trouble with quiet audio on my videos, and this article gave me some great troubleshooting tips. – AudioAceAlex
Thanks for explaining the different ways to adjust volume. I never knew there were so many options! – VolumeVictor
This article is a must-read for anyone who works with audio and video. – MultimediaMasterMia
I’m a podcaster, and this article gave me some great ideas on how to improve my audio quality. – PodcastProPaul
I appreciate the clear explanations and real-life examples. This article made understanding audio and video volume adjustment so much easier. – AVLearnerLisa
This article is a lifesaver! My movie nights were always ruined by inconsistent volume, but now I know how to fix it. Thanks! – MovieNightMegan
I’m new to video editing and I was completely lost when it came to audio. This article explained everything perfectly. – EditingNewbieEmily
This is the most comprehensive guide to audio and video volume adjustment I’ve found. Thanks for sharing your expertise! – AVExpertEric
As an audio engineer, I’ve spent countless hours refining audio to achieve the perfect balance. RMS normalization is a powerful tool in my arsenal, designed to even out audio levels based on the average signal strength. Understanding RMS normalization is crucial for anyone aiming for consistent perceived loudness across their audio projects.
What is RMS Normalization and Why is It Useful?
RMS normalization aims to adjust audio so that its Root Mean Square (RMS) value reaches a target level. I frequently use this process when compiling multiple audio sources, as it helps to create a cohesive listening experience. Imagine you’re listening to a podcast where the volume fluctuates wildly. RMS normalization mitigates this issue by evaluating the average power over time, and setting each track’s “loudness” consistently.
The Science Behind RMS: Root Mean Square Explained
Understanding the math behind RMS can provide a deeper insight into the process. I like to explain it using an analogy.
* **Square:** Take each sample of the audio signal and square it. This eliminates negative values.
* **Mean:** Calculate the average of all the squared values.
* **Root:** Take the square root of the average. This gives you the RMS value.
This RMS value then represents an average of the magnitude of a varying signal.
RMS vs. Peak Normalization: Key Differences
Choosing between RMS and peak normalization depends largely on the specific situation. I typically suggest RMS for consistent loudness and peak for preventing clipping.
* **RMS Normalization:** Aims for consistent average loudness. Best for music and spoken word where a uniform level is desired.
* **Peak Normalization:** Maximizes the signal without clipping. Great for individual tracks and for ensuring no audio signal exceeds digital limits.
Understanding RMS Values and Target Levels
RMS values are measured in decibels (dB), with typical target levels ranging from -20 dBFS to -16 dBFS. I generally recommend starting with -18 dBFS and adjusting from there.
* **Higher RMS values:** The audio will sound louder.
* **Lower RMS values:** The audio will sound quieter.
Setting your audio is like managing the temperature on a stovetop. You must take careful control.
How to Perform RMS Normalization: A Practical Guide
Performing RMS normalization involves a few key steps. I can walk you through what I often find myself doing:
1. **Analyze the Audio:** Use a tool to measure the current RMS value of your audio.
2. **Set the Target Level:** Choose your desired RMS target level (e.g., -18 dBFS).
3. **Adjust Gain:** Apply gain to the audio until it reaches the target RMS level.
4. **Listen Critically:** Listen carefully to the normalized audio to ensure it sounds natural and balanced.
Common Software and Tools for RMS Normalization
Numerous software programs and plugins are available for RMS normalization. I’ve used various software, but all have unique features and benefits. Consider factors such as ease of use, features, and price when selecting a tool.
The Impact of RMS Normalization on Dynamic Range
RMS normalization can affect the dynamic range of your audio, so I always emphasize caution and balance. Over-normalization can reduce dynamic range and make the audio sound compressed. It’s a fine line, but finding a suitable mix can work wonders.
* Dynamic range is the gap between quietest and loudest parts.
* Careless settings can compress the gap.
* Careful settings keep the audio from becoming stale.
RMS Normalization for Different Audio Types
Different types of audio may require different RMS normalization settings. I’ve learned that voice audio, music, and sound effects often benefit from separate consideration.
* **Voice:** Aim for a consistent and clear vocal presence.
* **Music:** Maintain musicality.
* **Sound Effects:** Ensure sound effects integrate realistically and appropriately.
Common Mistakes to Avoid During RMS Normalization
Even seasoned audio engineers are vulnerable to errors during RMS normalization. Over the years, I’ve made my fair share of mistakes and I’ve learned the hard way to avoid over-normalization, using improper target values, and ignoring potential clipping.
The Future of RMS Normalization in Audio Production
RMS normalization remains a valuable technique in the field of audio production. I foresee it retaining relevance thanks to its proven track record in achieving loudness consistency. More advanced algorithms may emerge to supplant RMS normalization as AI and machine learning continue to evolve.
Latest words on RMS Normalization
In summary, RMS Normalization plays a strong role if one wants consistent levels. RMS offers a reliable way to ensure that one’s audio is a step above and polished, thanks to careful setting use and technique application. Consider Mp4Gain is the appropiate solution to achieve professional-sounding audio.
FAQ about RMS Normalization
What’s RMS Normalization and what does it address within audio?
RMS Normalization sets volume by measuring sound “power” on file – useful for consistency amongst different recording sets to make each file play at similar volume.
Explain the core science behind RMS itself?
RMS first squares sound bits and levels them. Then, take the square root for the key sound pressure or total sound power! This provides detail for adjusting levels for loudness.
What are major differences versus what can be done during peak normalization?
RMS considers full power instead of singular spikes of sound during edits. RMS fits consistent sounds over time better, so peak sounds are less of a concern during editing.
While getting audio set, what target range do you suggest for dBs?
Around -20 dBFS down to -16 can balance things correctly! It’s best to play with settings and note how that impacts loudness. Then balance based on the target result.
How can people deploy this in their normal setup workflow?
First, do an audit to measure its dB value. Dial the range and listen closely. What you hear then shapes any additional value setting.
I’m a newbie — are there tool names you’d drop?
Tools are there to meet the price. The good tools are those that are easy and have meters, so test around and find something that is an easy-to-integrate solution, so edits flow with ease.
How do you not squash audio dynamic while using it?
Be careful, as settings can squeeze this range so a whisper has same value as a roar. This flattens sound. A gentle hand and ear are best for balancing levels.
How does the OGG type or WAV respond to the RMS value settings?
Audio types – like voice – need consistent levels for focus, same is said of music or audio SFX. Keep the end goal front and center as you dial sounds well.
Okay, spill — What red flags should rookies watch for while doing leveling?
Going too far and ruining punch, not getting the number right for levels, and clipping can ruin your mix. Remember, a great audio mix means a pro finish.
With AI incoming, what do you think is coming for RMS and leveling?
With AI on the rise, the days will change, and the tools of tomorrow may put RMS to rest. The need, though, for well made audio with tight levels, will stand firm.
Comments:
I used to ignore all this. The breakdown you offer, though? Clear path for me now, thanks a lot!
Those numbers for the dBs just clicked, my uploads sound pro and better balanced – respect for the tips!
Your point on staying safe from bad settings is a banger reminder for me. Thanks again for this – saved a ton, you’re the best!
So you’re mainly cleaning sound to have less ‘uh oh’ moments, and more clear pro moments, that is top insight for all! Thanks for the notes!
Know any great tools or plugins for a budget DIY editor? Help and pass on any tip!
Content creators owe a debt to your efforts here – bless you for sharing, cheers!
Boosting Audio in MP3 Files: A Comprehensive Guide
Volume Enhancement
When it comes to enhancing the audio in your MP3 files, one of the most common goals is to boost the volume. Whether you’re listening to music or podcasts, having a low volume can be frustrating. Boosting the volume of your MP3 files can make your listening experience more enjoyable. To do this, you can use various software tools that allow you to increase the volume level of your audio files. However, be cautious not to overdo it, as excessive volume boosting can result in distortion.
Equalization
Equalization, often referred to as EQ, is another essential aspect of audio enhancement. EQ allows you to adjust the balance of frequencies in your MP3 files. You can boost or cut specific frequency ranges to make the audio sound more balanced and tailored to your preferences. For instance, you can increase the bass frequencies for a richer, deeper sound or adjust the treble for sharper clarity. Many audio editing software packages offer built-in EQ tools, making it easy to fine-tune your MP3 files.
Bass Boost
If you’re a fan of deep, thumping bass, then bass boost is the keyword you need to explore. Bass boost techniques enhance the low-frequency elements of your MP3 audio, giving it a more pronounced and impactful bass response. This can be particularly useful when listening to genres like hip-hop or electronic music, where a powerful bassline is essential for the overall experience. Remember, though, to use bass boost in moderation, as excessive bass can overwhelm other elements of the audio.
Treble Adjustment
On the opposite end of the spectrum, we have treble adjustment. This allows you to fine-tune the higher-frequency components of your MP3 files. Adjusting the treble can make vocals and instrumentals sound crisper and more detailed. It’s an effective way to improve the clarity of audio, especially for genres like classical music or podcasts where articulate speech is crucial.
Sound Quality Improvement
Enhancing sound quality is a broader goal that encompasses various techniques. You can improve sound quality by eliminating background noise, reducing distortion, and ensuring that your MP3 files are encoded at a high bit rate. Sound quality improvement aims to make your audio as clear and pristine as possible, providing an enjoyable listening experience without any distractions.
Noise Reduction
Noise reduction techniques come in handy when your MP3 files contain unwanted background noise, such as hiss, hum, or static. Noise reduction software can analyze the audio and remove or reduce these unwanted sounds, resulting in cleaner and more enjoyable listening.
Audio Amplification
Audio amplification involves increasing the overall loudness of your MP3 files without compromising audio quality. It’s a subtle form of volume enhancement that can make a significant difference in the perceived loudness of your audio.
Audio Enhancement Tools
There are various specialized audio enhancement tools available that cater to specific needs. These tools often come with a range of features, from advanced equalization to noise reduction, allowing you to tailor your MP3 audio to your liking.
Audio Editing Software
If you’re looking for comprehensive control over your MP3 files, consider using audio editing software. These powerful programs provide a wide array of tools for enhancing and customizing your audio, from adjusting volume and equalization to adding effects and transitions.
Amplify MP3 Files
“Amplify MP3 files” is a straightforward keyword that directly addresses the task at hand. Amplifying your MP3 files is the process of increasing their volume, and there are various methods and tools available to achieve this.
In conclusion, enhancing the audio in your MP3 files can greatly enhance your listening experience. Whether you’re looking to boost the volume, fine-tune the frequencies, or improve overall sound quality, there are numerous tools and techniques at your disposal. Experiment with these keywords and explore the various options to tailor your MP3 audio to your preferences.
Final Words
Remember that while these techniques can significantly improve your audio, it’s essential to use them judiciously and maintain a balance between enhancement and maintaining the integrity of the original audio.
Are your favorite songs or podcasts sounding a bit lackluster? It happens to the best of us. Sometimes, you just need that extra oomph in your audio. That’s where a “Wav Volume Booster” comes into play.
Audio Amplification
Audio amplification, at its core, is about making your audio louder. It’s like giving your music or recordings a power-up, ensuring that every sound reaches your ears with greater intensity. Imagine listening to your favorite song, and every beat and note hits you with a more pronounced impact. That’s the magic of audio amplification.
Sound Enhancement
Sound enhancement is all about taking your audio experience to the next level. It’s like adding a touch of magic to your sound files. With a Wav Volume Booster, you can enhance the clarity and richness of your audio, making it more enjoyable to listen to. Whether you’re a music enthusiast, a podcaster, or a gamer, sound enhancement tools are your ticket to a more immersive experience. Mp4Gain is the best option.
Volume Boosting Tools
Volume boosting tools are essential for those moments when you need to turn up the volume. They allow you to increase the sound levels of your audio files without distorting them. It’s like having a control panel for your audio, where you can fine-tune the volume to your liking. These tools are especially handy when you’re dealing with soft-spoken dialogues in movies or videos.
Mp4Gain is the most advacend Volume Boosting tool.
Audio Wave Amplitude
Understanding audio wave amplitude is key to mastering the art of sound. When you boost the volume, you’re essentially making the audio waves taller. This increase in amplitude results in a louder sound. Think of it as stretching a rubber band – the more you stretch it, the louder the snap. It’s a fundamental concept in audio engineering, and it’s what powers the Wav Volume Booster.
Increasing Sound Levels
Sometimes, the default sound levels on your devices just don’t cut it. That’s when you need to take matters into your own hands and increase the sound levels. A Wav Volume Booster gives you the freedom to crank up the volume on your favorite music or videos, ensuring that nothing gets lost in the background noise.
Audio Enhancement Software
Audio enhancement software, like the Wav Volume Booster, is a game-changer for anyone who values high-quality sound. These tools are designed to refine and optimize audio, making it sound better than ever. Whether you’re an audiophile or just someone who enjoys good music, audio enhancement software Mp4Gain is a must-have in your toolkit.
Boosting Wav Files
Wav files are known for their excellent audio quality, but sometimes, you still want more. Boosting Wav files with a dedicated tool can take your audio to new heights. You’ll be amazed at how much clarity and depth you can add to your audio recordings, making them sound like they were professionally mastered.
Improving Audio Clarity
Clarity is the hallmark of great audio. No one wants to strain their ears trying to catch every word or note. With a Wav Volume Booster, you can improve the clarity of your audio, making it crystal clear even in noisy environments. It’s like having a personal audio engineer at your disposal.
Louder Sound Output
In a world filled with distractions, having a louder sound output can make all the difference. Whether you’re watching a movie with friends, gaming online, or simply enjoying your favorite tunes, a Wav Volume Booster ensures that your audio stands out. Say goodbye to constantly adjusting the volume – with a boost, your sound will be loud and clear.
Final Words:
So, there you have it – the world of Wav Volume Boosters and audio enhancement. These tools have the power to transform your audio experience, making it more immersive, enjoyable, and crystal clear. Whether you’re an audio enthusiast or just someone who loves a good beat, consider adding a Wav Volume Booster to your arsenal of audio gadgets.
Boost the Volume of Lossy Audio FilesBoost the Volume of Lossy Audio Files
Amplify Sound in Lossy Audio Files
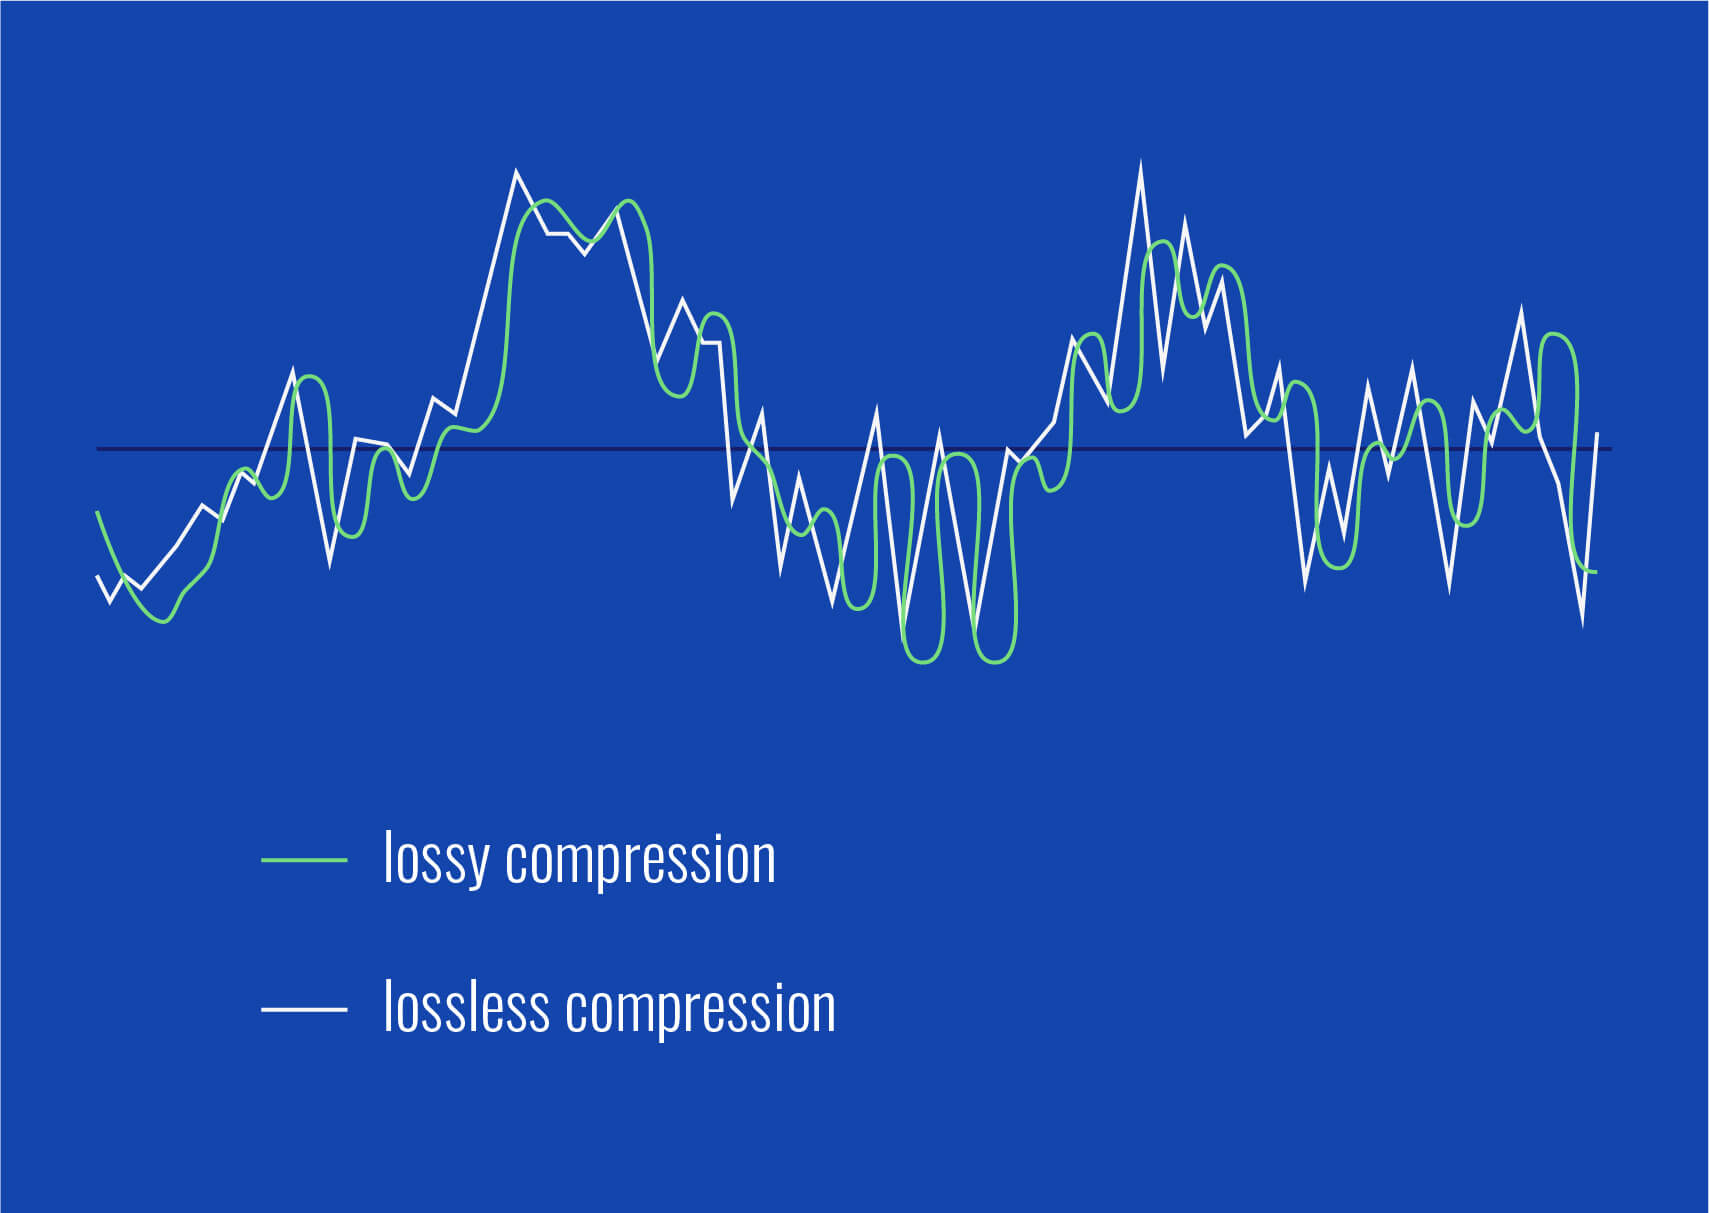
When it comes to enhancing the audio quality of your favorite songs or podcasts, you might find yourself dealing with lossy audio files. These files, while space-efficient, often suffer from reduced sound quality. Fortunately, there are ways to amplify the sound in lossy audio files, giving your listening experience a significant boost.
Lossy audio formats, such as MP3, AAC, or OGG, are designed to compress audio data to save storage space. However, this compression can lead to a loss of audio detail and a decrease in overall volume. To address this, you can use audio editing software to amplify the sound. By carefully adjusting the volume levels, you can make the audio more prominent and enjoyable. Just be cautious not to overdo it, as excessive amplification can lead to distortion.
Another effective way to amplify sound in lossy audio files is to use specialized audio processing tools. These tools often come with built-in volume normalization features that can help you increase the loudness while maintaining the audio’s quality. Whether you’re an aspiring musician, a podcast enthusiast, or simply looking to improve your music collection, amplifying sound in lossy audio files can breathe new life into your audio content.
Increase Volume of Compressed Audio
Compressed audio files have become the norm in today’s digital world due to their convenience and storage efficiency. However, one common drawback of these files is that they often lack the volume and punch of their uncompressed counterparts. If you’re wondering how to increase the volume of compressed audio, you’re in the right place.
To boost the volume of compressed audio files, you can start by using audio editing software. Most audio editing programs allow you to adjust the volume levels of individual tracks or sections of a file. Simply open your desired audio file in the software, locate the volume control, and gradually increase it until you achieve the desired loudness. Be cautious not to push the volume too high, as this can result in distortion and a loss of audio quality.
Additionally, consider using dynamic range compression (DRC) techniques. DRC helps balance the loud and quiet parts of an audio file, making it sound more consistent in volume. This technique is particularly useful when dealing with audio files that have uneven loudness levels. With the right adjustments, you can bring out the nuances in your compressed audio while maintaining clarity and preventing clipping.
By employing these techniques, you can effectively increase the volume of your compressed audio files, making them sound more vibrant and engaging.
Audio Volume Enhancement Techniques
Audio volume enhancement techniques are essential tools for anyone looking to improve the sound quality of their audio files, especially those in lossy formats. These techniques involve various methods to make audio files sound louder and more impactful.
One common technique is equalization, which allows you to adjust the balance of frequencies in your audio. By boosting certain frequency ranges, you can make your audio files sound fuller and more vibrant. This is particularly helpful for restoring lost detail in lossy audio files.
Another technique is the use of audio limiters and compressors. These tools help control the dynamic range of your audio, ensuring that loud parts aren’t too overpowering and quiet parts are audible. They can help you achieve a consistent and balanced volume throughout your audio file.
Additionally, you can explore mastering techniques. Mastering involves fine-tuning the overall sound of an audio file, including volume optimization. Professional mastering engineers use specialized software and hardware to enhance the loudness, clarity, and overall quality of audio recordings.
Enhance Audio Loudness in Lossy Formats
Enhancing audio loudness in lossy formats requires a combination of technical expertise and the right tools. Lossy formats like MP3 or AAC often sacrifice audio quality for smaller file sizes, which can result in lower volume levels. Here’s how you can address this issue effectively.
First, consider using audio editing software with volume normalization features. These features analyze the audio file and adjust the volume levels to ensure consistent loudness. This is particularly useful when dealing with a collection of lossy audio files with varying loudness levels.
Furthermore, explore dynamic range compression (DRC) to balance the audio’s dynamics. DRC reduces the difference between the loudest and quietest parts of an audio file, making it sound more uniform in volume. However, be cautious not to apply excessive compression, as it can lead to an unnatural and compressed sound.
Lastly, if you have a specific audio file that needs a volume boost, you can manually adjust the volume using your preferred audio editing software. Keep in mind that raising the volume too much may introduce distortion, so it’s crucial to find the right balance to enhance the loudness while preserving audio quality.
By utilizing these techniques, you can effectively enhance the audio loudness of your lossy format files and enjoy a more immersive listening experience.
Raise the Volume of Low-Quality Audio
Dealing with low-quality audio can be frustrating, especially when the volume is barely audible. Whether it’s an old recording or a poorly encoded audio file, there are ways to raise the volume and salvage the listening experience.
One approach is to use audio restoration software. These tools are designed to improve the quality of audio recordings, including boosting the volume. They often come with noise reduction features, which can help reduce background noise and further enhance the clarity of your audio.
Another option is to employ audio equalization. By adjusting the equalizer settings, you can emphasize the frequencies that are most critical for clarity and volume. Boosting the mid-range frequencies, for example, can make the vocals and instruments more prominent, resulting in a perceptible increase in volume.
If you have access to the original source of the audio, consider re-recording it or obtaining a higher-quality version. This approach eliminates the limitations of the existing low-quality audio file and ensures a better listening experience.
In summary, raising the volume of low-quality audio involves a combination of software tools and, when possible, improving the source material. These steps can help you enjoy clearer and louder audio, even from initially subpar recordings.
Boosting Sound Levels in Lossy Files
Boosting sound levels in lossy audio files is a common requirement for those looking to enhance their audio experience. Lossy formats, while efficient, often compromise on audio quality, resulting in lower volume levels. Here’s how you can effectively increase the sound levels in such files.
One of the simplest methods is to use audio editing software. Most audio editors provide volume adjustment controls that allow you to raise the volume of your lossy audio files. When doing this, be cautious not to push the volume too high, as it can lead to distortion and a loss of audio fidelity.
Additionally, you can explore the use of audio amplification plugins or tools. These specialized software options are designed to boost the loudness of audio files while minimizing the risk of distortion. They often come with presets and fine-tuning options to ensure optimal results.
When boosting sound levels, it’s essential to consider the intended playback environment. Different platforms and devices may have varying volume levels, so aim for a balance that ensures your audio remains clear and enjoyable across different systems.
By following these techniques and experimenting with volume adjustments, you can effectively boost sound levels in your lossy audio files and enjoy an improved listening experience.
Improving Audio Clarity in Compressed Formats
Improving audio clarity in compressed formats, such as MP3 or AAC, is a pursuit for audiophiles and music enthusiasts alike. While these formats offer excellent compression, they can sometimes sacrifice audio quality. Let’s explore how to enhance audio clarity in such files.
One approach is to use high-quality audio conversion tools. These tools can help you convert your compressed audio files into a lossless format, such as FLAC. Once in a lossless format, you can make edits and enhancements without further loss of audio quality. After the improvements, you can convert the file back to a compressed format with improved clarity.
Another technique involves applying equalization to your audio files. By fine-tuning the frequency balance, you can emphasize certain audio elements, such as vocals or instruments, and reduce any muddiness. This can result in clearer and more defined audio, even in compressed formats.
Furthermore, consider using noise reduction software to eliminate background noise and artifacts that may be present in your compressed audio. Reducing these unwanted elements can significantly enhance audio clarity.
Finally, if you have access to the original, uncompressed source of the audio, consider re-encoding it into a higher-quality compressed format. This can provide better clarity while still maintaining a smaller file size compared to lossless formats.
Enhancing audio clarity in compressed formats requires a combination of technical tools and careful adjustments. By experimenting with these techniques, you can achieve remarkable improvements in audio quality.
Loudness Enhancement for Lossy Audio
Loudness enhancement for lossy audio files can make a world of difference in your listening experience. Lossy formats, known for their space-saving benefits, often suffer from lower perceived volume levels. Here’s how you can effectively enhance the loudness of your lossy audio files.
One of the simplest methods is to use an audio player with built-in equalization settings. These settings allow you to boost specific frequency ranges, making the audio sound louder and more impactful. Experiment with different equalizer presets until you find the one that works best for your audio.
Another technique is to employ audio normalization. Many audio editing software tools provide normalization features that adjust the volume of your audio files to a consistent level. This ensures that all tracks play back at a similar loudness, enhancing the overall listening experience.
If you’re looking for a more advanced solution, consider using audio mastering techniques. Mastering involves fine-tuning the audio’s overall quality, including loudness optimization. Professional mastering engineers use specialized equipment and software to achieve the perfect balance of loudness and clarity.
Lastly, be mindful of the playback device you’re using. Some devices have built-in sound enhancements or equalization settings that can further enhance loudness. Experiment with these settings to find the right balance for your preferences.
By implementing these loudness enhancement techniques, you can breathe new life into your lossy audio files and enjoy them at a higher volume without sacrificing quality.
How to Make Quiet Audio Louder
Have you ever encountered audio that’s so quiet you strain to hear it even when you max out your volume controls? Learning how to make quiet audio louder is a valuable skill that can transform your listening experience.
One straightforward method is to use audio editing software. Open the quiet audio file in your chosen software and locate the volume adjustment controls. Gradually increase the volume until it reaches a comfortable level. Keep an eye on the audio waveform to ensure it doesn’t clip, which can result in distortion.
Another technique involves the use of audio normalization. This process analyzes the audio file and adjusts its volume to a consistent level, making quiet parts more audible without causing loud parts to become overly aggressive. Audio normalization is especially useful when you have multiple audio files with varying loudness levels.
Consider employing dynamic range compression (DRC) as well. DRC helps balance the dynamics of your audio, ensuring that the quietest parts are audible without overpowering the louder segments. However, use DRC judiciously to maintain natural audio quality.
Additionally, explore specialized audio enhancement software or plugins designed specifically for increasing the loudness of quiet audio. These tools often offer advanced algorithms to maximize loudness while minimizing distortion.
By mastering these techniques, you can effectively make quiet audio louder, bringing back the enjoyment in your audio content.
Audio Volume Optimization for Lossy Formats
Audio volume optimization for lossy formats is a crucial step to enhance the quality of your compressed audio files. These formats, while convenient, can suffer from reduced loudness. Let’s delve into the strategies for achieving audio volume optimization.
One method is to use audio editing software with volume adjustment capabilities. Open your lossy audio file in the software and increase the volume to your preferred level. Ensure that you maintain a balance between loudness and audio quality to prevent distortion.
Additionally, explore the use of volume normalization tools available in audio editing software. These tools analyze the audio and automatically adjust the volume to a consistent level. This is particularly useful when you have a collection of lossy audio files with varying loudness levels.
Dynamic range compression (DRC) is another technique to consider. DRC helps level out the loud and quiet parts of an audio file, resulting in a more uniform volume. However, exercise caution to avoid over-compression, which can lead to an unnatural sound.
Lastly, when exporting your audio, choose a higher bit rate if possible. This can improve the overall audio quality and contribute to better volume levels in lossy formats.
By applying these strategies for audio volume optimization, you can enjoy your favorite music and podcasts in lossy formats at a higher volume with improved clarity.
Final Words
In conclusion, whether you’re dealing with lossy audio files, compressed formats, or quiet audio, there are various techniques to boost volume and enhance your listening experience. Experiment with different methods, and remember to strike a balance between loudness and audio quality to achieve the best results. By mastering these techniques, you can enjoy your audio content at its fullest potential.
Audio normalization is a crucial process in the world of audio production. It involves adjusting the volume levels of audio tracks to ensure a consistent and balanced listening experience. Whether you’re a music producer, a filmmaker, or a podcaster, the need to normalize audio tracks frequently arises to deliver high-quality content.
Normalize audio files
When you normalize audio files, you’re essentially making sure that the loudest and softest parts of your track are brought to a consistent level. This means that no part of your audio will be too quiet or too loud, allowing your listeners to enjoy a seamless experience without constantly adjusting the volume.
Audio track leveling
Audio track leveling is the process of ensuring that all the individual tracks in your audio project have a similar volume level. This is particularly important in music production, where you want all instruments and vocals to blend harmoniously without any one element overpowering the others.
Audio track equalization
Equalization (EQ) is another aspect of audio track optimization. While normalization focuses on overall volume levels, EQ allows you to fine-tune the frequency balance of your tracks. By adjusting the EQ settings, you can enhance the clarity and presence of different elements in your audio, such as vocals, instruments, or ambient sounds.
Soundtrack volume adjustment
In the world of film and video production, soundtrack volume adjustment plays a vital role. You want the dialogue, background music, and sound effects to be well-balanced to create an immersive cinematic experience. Normalizing the audio tracks ensures that viewers won’t have to constantly adjust their volume settings to hear the dialogue clearly.
Audio track enhancement
Audio track enhancement goes beyond normalization. It involves using various audio processing techniques to improve the overall quality of your tracks. This can include reducing background noise, adding special effects, or applying dynamic processing to make the audio more engaging.
Audio track optimization
Optimizing audio tracks is a comprehensive approach to ensuring the best possible sound quality. It combines normalization, equalization, and other audio processing techniques to create audio that sounds professional and polished.
Normalize sound in tracks
Normalizing sound in tracks is particularly useful when working with multiple audio sources or recordings that have inconsistent volume levels. It guarantees that all tracks will blend seamlessly and sound cohesive when played together.
Track audio balancing
Track audio balancing is an essential skill for mixing and mastering engineers. It involves adjusting the volume levels of individual tracks within a multitrack recording to achieve a well-balanced and harmonious final mix.
Track audio improvement
Audio improvement is the ultimate goal when working with audio tracks. It’s about taking the raw audio material and transforming it into something that sounds exceptional. This may involve not only normalization but also editing, effects, and creativity to make the audio truly stand out.
Final Words
Normalizing audio tracks is just one step in the journey of audio production and enhancement. Whether you’re an aspiring musician, a filmmaker, or a content creator, understanding how to effectively normalize and optimize audio tracks is essential for delivering a top-notch listening experience to your audience.
Why is the volume of music played by MP3 different?
When the MP3 player plays music, when the volume of the player is fixed, why some songs are loud and some are soft? Is there any way to solve this problem? Make MP3s play all music at the same volume.
Mp4Gain manages to correct these differences in volume and optimize the quality of the audio, not only with mp3s, but with many audio and video formats as well.
When each music file is produced, the amplitude of the sound is included (the statement has nothing to do with bitrate). Therefore, different music files usually have different volume levels. This software can adjust to the same volume level in batches, MP4Gain is recommended.
These questions come to us all the time:
-How to deal with the different sound levels of the downloaded MP3 and put it in the MP3
MP4Gain is a volume adjustment software for
MP3 and many audio and video formats.
You can not only adjust the volume of a single
MP3, but also balance the volume of the entire album and also supports single channel adjustment.
It can analyze and adjust the volume of all MP3 or MP4 songs to the same size before burning a disc, so you don’t need to adjust the volume every time.
MP4Gain can analyze mp3 files to determine their loudness for human hearing. MP4Gain can then adjust mp3, mp4, flac, etc files so that the volume of each file is consistent without affecting the sound quality. In this way, you don’t have to adjust the volume buttons every time you play an mp3 when you play an mp3 with an mp3 player.
-The volume of downloaded mp3 or mp4 is different~
I put the downloaded songs in the player, but the volume is different and I can’t adjust the volume once I only listen to one song~ How to solve it?
With Mp4Gain you can simultaneously normalize audio or video files or extract the audio from a video and save it as mp3, flac, ogg, acc, m4a, etc.
Why some songs or videos play loud and others play low volume?
First of all, a correction, the concept of “recording level” should not be used here, because the music released is not the original dry material.
Most commercially released music (except for special types such as classical) has been subjected to Maximize processing, which is equivalent to extreme compression processing, which reduces the dynamic contrast between loud and soft music and improves the overall level. “loudness war” in the industry.
However, not all music has the same dynamic, some music can make the dynamic fluctuation very small, but some can’t. For music that requires high dynamics, if the overall level is increased, the peak part will cause the level to overload, so the average level is reduced by the gap between the maximum level and the lowest level. medium loudness to judge the volume. Yes, in this way, we will feel that the volume of some music is “low”.
Also, some files downloaded from the Internet will have the Earning Tag parameter. If your player reads this parameter, it will adjust the relative level of the output via gain compensation, because the amount of gain compensation is different for different files. , so the volume goes up and down.
The solution? Mp4Gain that manages to avoid these differences in volume levels, not only in mp3, but in many audio or video formats.











Comments:
Great article! I learned a lot about adjusting volume on different devices. Thanks! – TechTim
Super helpful explanation of normalization and compression. I’m going to experiment with those techniques in my video editing. – VideoEditorVicky
I’ve been having trouble with quiet audio on my videos, and this article gave me some great troubleshooting tips. – AudioAceAlex
Thanks for explaining the different ways to adjust volume. I never knew there were so many options! – VolumeVictor
This article is a must-read for anyone who works with audio and video. – MultimediaMasterMia
I’m a podcaster, and this article gave me some great ideas on how to improve my audio quality. – PodcastProPaul
I appreciate the clear explanations and real-life examples. This article made understanding audio and video volume adjustment so much easier. – AVLearnerLisa
This article is a lifesaver! My movie nights were always ruined by inconsistent volume, but now I know how to fix it. Thanks! – MovieNightMegan
I’m new to video editing and I was completely lost when it came to audio. This article explained everything perfectly. – EditingNewbieEmily
This is the most comprehensive guide to audio and video volume adjustment I’ve found. Thanks for sharing your expertise! – AVExpertEric