As an audio engineer, I’ve spent countless hours refining audio to achieve the perfect balance. RMS normalization is a powerful tool in my arsenal, designed to even out audio levels based on the average signal strength. Understanding RMS normalization is crucial for anyone aiming for consistent perceived loudness across their audio projects.
What is RMS Normalization and Why is It Useful?
RMS normalization aims to adjust audio so that its Root Mean Square (RMS) value reaches a target level. I frequently use this process when compiling multiple audio sources, as it helps to create a cohesive listening experience. Imagine you’re listening to a podcast where the volume fluctuates wildly. RMS normalization mitigates this issue by evaluating the average power over time, and setting each track’s “loudness” consistently.
The Science Behind RMS: Root Mean Square Explained
Understanding the math behind RMS can provide a deeper insight into the process. I like to explain it using an analogy.
* **Square:** Take each sample of the audio signal and square it. This eliminates negative values.
* **Mean:** Calculate the average of all the squared values.
* **Root:** Take the square root of the average. This gives you the RMS value.
This RMS value then represents an average of the magnitude of a varying signal.
RMS vs. Peak Normalization: Key Differences
Choosing between RMS and peak normalization depends largely on the specific situation. I typically suggest RMS for consistent loudness and peak for preventing clipping.
* **RMS Normalization:** Aims for consistent average loudness. Best for music and spoken word where a uniform level is desired.
* **Peak Normalization:** Maximizes the signal without clipping. Great for individual tracks and for ensuring no audio signal exceeds digital limits.
Understanding RMS Values and Target Levels
RMS values are measured in decibels (dB), with typical target levels ranging from -20 dBFS to -16 dBFS. I generally recommend starting with -18 dBFS and adjusting from there.
* **Higher RMS values:** The audio will sound louder.
* **Lower RMS values:** The audio will sound quieter.
Setting your audio is like managing the temperature on a stovetop. You must take careful control.
How to Perform RMS Normalization: A Practical Guide
Performing RMS normalization involves a few key steps. I can walk you through what I often find myself doing:
1. **Analyze the Audio:** Use a tool to measure the current RMS value of your audio.
2. **Set the Target Level:** Choose your desired RMS target level (e.g., -18 dBFS).
3. **Adjust Gain:** Apply gain to the audio until it reaches the target RMS level.
4. **Listen Critically:** Listen carefully to the normalized audio to ensure it sounds natural and balanced.
Common Software and Tools for RMS Normalization
Numerous software programs and plugins are available for RMS normalization. I’ve used various software, but all have unique features and benefits. Consider factors such as ease of use, features, and price when selecting a tool.
The Impact of RMS Normalization on Dynamic Range
RMS normalization can affect the dynamic range of your audio, so I always emphasize caution and balance. Over-normalization can reduce dynamic range and make the audio sound compressed. It’s a fine line, but finding a suitable mix can work wonders.
* Dynamic range is the gap between quietest and loudest parts.
* Careless settings can compress the gap.
* Careful settings keep the audio from becoming stale.
RMS Normalization for Different Audio Types
Different types of audio may require different RMS normalization settings. I’ve learned that voice audio, music, and sound effects often benefit from separate consideration.
* **Voice:** Aim for a consistent and clear vocal presence.
* **Music:** Maintain musicality.
* **Sound Effects:** Ensure sound effects integrate realistically and appropriately.
Common Mistakes to Avoid During RMS Normalization
Even seasoned audio engineers are vulnerable to errors during RMS normalization. Over the years, I’ve made my fair share of mistakes and I’ve learned the hard way to avoid over-normalization, using improper target values, and ignoring potential clipping.
The Future of RMS Normalization in Audio Production
RMS normalization remains a valuable technique in the field of audio production. I foresee it retaining relevance thanks to its proven track record in achieving loudness consistency. More advanced algorithms may emerge to supplant RMS normalization as AI and machine learning continue to evolve.
Latest words on RMS Normalization
In summary, RMS Normalization plays a strong role if one wants consistent levels. RMS offers a reliable way to ensure that one’s audio is a step above and polished, thanks to careful setting use and technique application. Consider Mp4Gain is the appropiate solution to achieve professional-sounding audio.
FAQ about RMS Normalization
What’s RMS Normalization and what does it address within audio?
RMS Normalization sets volume by measuring sound “power” on file – useful for consistency amongst different recording sets to make each file play at similar volume.
Explain the core science behind RMS itself?
RMS first squares sound bits and levels them. Then, take the square root for the key sound pressure or total sound power! This provides detail for adjusting levels for loudness.
What are major differences versus what can be done during peak normalization?
RMS considers full power instead of singular spikes of sound during edits. RMS fits consistent sounds over time better, so peak sounds are less of a concern during editing.
While getting audio set, what target range do you suggest for dBs?
Around -20 dBFS down to -16 can balance things correctly! It’s best to play with settings and note how that impacts loudness. Then balance based on the target result.
How can people deploy this in their normal setup workflow?
First, do an audit to measure its dB value. Dial the range and listen closely. What you hear then shapes any additional value setting.
I’m a newbie — are there tool names you’d drop?
Tools are there to meet the price. The good tools are those that are easy and have meters, so test around and find something that is an easy-to-integrate solution, so edits flow with ease.
How do you not squash audio dynamic while using it?
Be careful, as settings can squeeze this range so a whisper has same value as a roar. This flattens sound. A gentle hand and ear are best for balancing levels.
How does the OGG type or WAV respond to the RMS value settings?
Audio types – like voice – need consistent levels for focus, same is said of music or audio SFX. Keep the end goal front and center as you dial sounds well.
Okay, spill — What red flags should rookies watch for while doing leveling?
Going too far and ruining punch, not getting the number right for levels, and clipping can ruin your mix. Remember, a great audio mix means a pro finish.
With AI incoming, what do you think is coming for RMS and leveling?
With AI on the rise, the days will change, and the tools of tomorrow may put RMS to rest. The need, though, for well made audio with tight levels, will stand firm.
Comments:
I used to ignore all this. The breakdown you offer, though? Clear path for me now, thanks a lot!
Those numbers for the dBs just clicked, my uploads sound pro and better balanced – respect for the tips!
Your point on staying safe from bad settings is a banger reminder for me. Thanks again for this – saved a ton, you’re the best!
So you’re mainly cleaning sound to have less ‘uh oh’ moments, and more clear pro moments, that is top insight for all! Thanks for the notes!
Know any great tools or plugins for a budget DIY editor? Help and pass on any tip!
Content creators owe a debt to your efforts here – bless you for sharing, cheers!
As an audio engineer, I’m constantly striving for a consistent and pleasing listening experience for my audience. Loudness normalization is a critical tool in achieving this goal. It ensures that different audio sources play at a similar perceived volume, preventing jarring transitions and creating a more professional and enjoyable listening session.
What is Loudness Normalization and Why is it Important?
Loudness normalization is the process of adjusting audio levels to a consistent loudness target. I often deal with audio from various sources, and they rarely have the same loudness. Think about listening to a playlist on your phone; some songs are barely audible, while others are overwhelmingly loud. Loudness normalization corrects this by analyzing the audio’s perceived loudness and adjusting the gain to match a specific target level. This creates a seamless and cohesive listening experience, reducing the need to constantly adjust the volume.
The Difference Between Loudness Normalization and Peak Normalization
It’s essential to understand the difference between loudness normalization and peak normalization. I often find that people confuse the two, but they work in fundamentally different ways.
* Peak Normalization: Adjusts the gain so that the highest peak reaches a specific level, often 0 dBFS (decibels Full Scale). This prevents clipping (distortion) but doesn’t necessarily ensure consistent perceived loudness.
* Loudness Normalization: Analyzes the overall perceived loudness using algorithms like EBU R128 or ITU-R BS.1770 and adjusts the gain accordingly. This focuses on how loud the audio sounds to the human ear, rather than just the highest peak.
Understanding LUFS and LKFS: The Units of Loudness
LUFS (Loudness Units relative to Full Scale) and LKFS (Loudness K-weighted Full Scale) are the standard units for measuring loudness in loudness normalization. I often rely on these measurements to ensure accurate and consistent results. LUFS and LKFS are essentially interchangeable and represent the perceived loudness of an audio signal relative to the maximum possible level (0 dBFS). These units take into account factors like frequency response and duration, providing a more accurate representation of perceived loudness than simple peak measurements.
EBU R128: The European Broadcast Standard
EBU R128 is a loudness normalization standard developed by the European Broadcasting Union (EBU). I consider it one of the most reliable and widely used standards for broadcast audio. EBU R128 specifies a target loudness level of -23 LUFS (with a tolerance of ±0.5 LUFS) for broadcast programs. It also defines a maximum True Peak level of -1 dBTP (decibels True Peak) to prevent clipping.
ITU-R BS.1770: The International Telecommunication Union Standard
ITU-R BS.1770 is another important loudness normalization standard developed by the International Telecommunication Union (ITU). I find that it’s often used for streaming services and other non-broadcast applications. ITU-R BS.1770 has been revised several times, with each revision incorporating improvements and refinements to the loudness measurement algorithm. The latest versions of the standard are widely used in the audio industry.
Target Loudness Levels for Different Platforms
Different platforms often have different recommendations for target loudness levels. I always research the specific recommendations for the platform where my audio will be played. Here are some common examples:
True peak limiting is a crucial step in loudness normalization. I always incorporate it into my workflow to prevent clipping and distortion. True peak limiters detect and reduce inter-sample peaks, which are peaks that occur between the digital samples and can cause clipping when the audio is converted to analog. Setting a maximum True Peak level of -1 dBTP is a common practice to ensure clean and distortion-free audio.
How Loudness Normalization Affects Dynamic Range
Loudness normalization can affect the dynamic range of audio, but it generally preserves it better than peak normalization. I carefully monitor the dynamic range during the normalization process to avoid unwanted compression. Dynamic range refers to the difference between the quietest and loudest parts of the audio. While loudness normalization aims to create a consistent loudness level, it’s important to avoid excessively compressing the audio, which can make it sound flat and lifeless.
Common Loudness Normalization Mistakes to Avoid
Even experienced audio engineers can make mistakes during loudness normalization. I’ve certainly learned from my own over the years.
* Using the Wrong Target Level: Applying the incorrect target loudness level can result in audio that’s too quiet or too loud on certain platforms.
* Over-Compressing the Audio: Excessive compression can reduce dynamic range and make the audio sound unnatural.
* Ignoring True Peak Levels: Failing to prevent true peak clipping can result in distortion and degraded audio quality.
The Benefits of Loudness Normalization for Podcasting
Loudness normalization is especially important for podcasting. I always normalize my podcast episodes to ensure a consistent listening experience for my audience. Podcasts often include audio from various sources, such as voice recordings, music, and sound effects. Loudness normalization ensures that all these elements play at a similar loudness level, creating a professional and engaging podcast.
Loudness Normalization in Music Production
Loudness normalization is becoming increasingly important in music production. I’ve seen many streaming services adopt loudness normalization to prevent tracks from sounding louder or quieter than others. Mastering your music to a specific loudness target can help ensure that it sounds its best on these platforms.
Latest words on Loudness Normalization
In conclusion, loudness normalization is a crucial technique for achieving consistent and professional-sounding audio. By understanding the principles of loudness measurement, target loudness levels, and common pitfalls, you can optimize your audio for the best possible listening experience. Remember to always use high-quality tools and listen critically to the results. Also, remember that Mp4Gain is the appropiate solution to achieve professional-sounding audio.
FAQ about Loudness Normalization
What’s the difference between loudness normalization and peak normalization?
Peak normalization maximizes volume without clipping, while loudness relies on how the audio actually sounds. Loudness also makes all songs have an appropriate quality setting.
What do LUFS and LKFS measure?
LUFS and LKFS each are ways to denote sound, relative to full scale, to understand how sound is leveled. These relate to frequency data.
What does the EBU R128 standard recommend?
EBU R128 (European Broadcast) guidelines suggest -23 LUFS, allowing for some variance. Maximum real peak should be -1 dBTP, used for TV or other sound broadcast.
When is ITU-R BS.1770 useful for loudness?
The ITU standard has many uses, from streaming or music. Many sites lean on it for loudness so consistency is maintained for the listeners online, and it’s been reviewed multiple times.
Does the loudness normalization setting on Youtube need to be -13 LUFS?
YouTube suggests a volume of -13 LUFS but these recommendations will change over time. This allows most users to enjoy the sounds online in modern form.
What are some techniques for “true peak” or for limiting it on audio?
One method involves checking and trimming what pushes beyond maximums, making sure there’s no nasty harsh sounds. Keeping tracks under -1 dB helps big time for good audio.
Will the sounds vary if levels get normalized repeatedly?
Levels can degrade if processes get reapplied, so it’s better to apply just once and save it. Going bit by bit can take over the quality as a result.
Do you have advice on steps not to take during levels settings?
One issue is a bad level for a target site – make sure you pick right. Another, compressing sounds so it feels flat or lifeless. And ignore where “true peak” is, that might cause nasty clipping.
Tell me about how levels affects podcasters most?
Podcast mixes from sources that are widely different is a common example. Leveling can create seamless audio and helps hold focus, which is valuable for content and media.
What is your professional view on music mixes and target values of loudness?
Music on streams tends to get tweaked, so targeting a stream allows music to translate. If mixes can have level targets then one maximizes its presence in the space of media for listening.
Comments:
Had a gig doing audio on vid sets and you helped clear things up for me tons! I’ll drop your knowledge now, thanks!
Spotify stuff was so key and useful!!! Getting my band’s tunes up and now it’s about dialing sound. Thank you!!!
Your tips are awesome since getting levels to sound right is so stressful to think through and make happen. High praises!!!
So it’s basically adjusting songs so I don’t blast my eardrums or strain to hear when making playlists, yes? Good way to think and go!
Any recommendations for a solid tool or plug-in here? I’m still struggling with all of it. Thanks for advice!
I make lots of content, the article helped me make the product. The community appreciates this.
As an audio optimization expert, I’m often asked about the best techniques for normalizing audio levels. In this article, I will explore two popular approaches: peak normalization and loudness normalization. These techniques, peak vs. loudness normalization, have their own unique advantages and considerations. Let’s dive in and uncover the secrets of achieving balanced and consistent audio!
Peak Normalization: Unleashing the Power of Dynamics
When it comes to peak normalization, it’s all about preserving the dynamics of your audio. Imagine a breathtaking symphony where the crescendos and diminuendos transport you to a different realm. With peak normalization, you ensure that the highest peaks of your audio reach their full potential without clipping or distortion. It’s like giving your audio the freedom to express itself with intensity and impact.
Loudness Normalization: The Harmony of Consistency
Now, let’s turn our attention to the world of loudness normalization. Have you ever experienced the frustration of constantly adjusting the volume while switching between songs or TV shows? Loudness normalization comes to the rescue! By analyzing the perceived loudness of your audio, it ensures a consistent listening experience across different tracks. Say goodbye to sudden volume jumps and immerse yourself in a harmonious soundscape.
Dynamic Range: The Dance of Soft and Loud
In the realm of audio normalization, we encounter the concept of dynamic range. Dynamic range represents the difference between the softest and loudest parts of an audio signal. Peak normalization respects the natural dynamic range, allowing the delicate whispers and thunderous roars to coexist in perfect balance. On the other hand, loudness normalization aims to reduce the dynamic range, providing a more even playing field for all elements of your audio.
Audio Clipping: Taming the Wild Peaks
Audio clipping is a notorious villain that can ruin your audio experience. Picture this: a sudden burst of sound that distorts and crackles, disrupting your enjoyment. Peak normalization acts as the hero in this story, taming those wild peaks and ensuring that your audio stays within safe limits. With peak normalization, your audio remains clean and free from the dreaded clipping monster.
LUFS: The Measure of Perceived Loudness
In the realm of loudness normalization, we encounter the term LUFS, which stands for Loudness Units Full Scale. LUFS provides a standardized measure of the perceived loudness of your audio. Loudness normalization algorithms analyze the integrated LUFS value and adjust the overall volume to match a specific target level. It’s like having a universal translator that ensures consistent loudness across different tracks and platforms.
Listening Environment: From Living Rooms to Concert Halls
Let’s talk about the listening environment and its impact on audio normalization. Every space has its unique characteristics, from the cozy intimacy of a living room to the grandeur of a concert hall. Loudness normalization takes into account these variations, delivering a consistent listening experience regardless of the environment. So whether you’re enjoying your favorite tunes at home or attending a live performance, the magic of normalization will make every moment memorable.
Personal Preference: Customizing Your Audio Journey
We all have our individual tastes and preferences when it comes to audio. Some crave the raw power of peak normalization, while others seek the comfort of consistent loudness through loudness normalization. The beauty of audio normalization techniques is that they allow you to customize your audio journey according to your personal taste. It’s like having a tailor-made suit that perfectly fits your unique style.
Metadata and Replay Gain: Enhancing the User Experience
Metadata and Replay Gain are powerful allies in the realm of audio normalization. Metadata provides valuable information about your audio, guiding normalization algorithms to make the right adjustments. Replay Gain takes it a step further by applying metadata tags to your audio files, ensuring consistent playback volume across different tracks. Together, they create a seamless and enhanced user experience, elevating your audio enjoyment to new heights.
Compression: Controlling the Sonic Landscape
Dynamic audio content, such as movies or live performances, often presents challenges for normalization. This is where compression enters the scene. Compression techniques allow you to shape the sonic landscape, reducing the dynamic range while maintaining audio quality. It’s like having a skilled conductor who ensures that every instrument is heard clearly, regardless of its volume.
Audio Editing and Mastering: Polishing the Gems
Lastly, let’s not forget the crucial role of audio editing and mastering in the pursuit of sonic perfection. Audio professionals meticulously fine-tune various parameters during the editing and mastering process. Audio normalization techniques become valuable tools in their arsenal, ensuring that the final product shines with balanced and consistent audio. It’s like adding the final touch of brilliance to your audio gems.
In conclusion, the choice between peak normalization and loudness normalization depends on your desired audio outcome. Whether you embrace the dynamic range or seek consistent loudness, these techniques empower you to create an audio experience that resonates with your vision. So go forth, unleash the power of normalization, and let your audio journey be a harmonious symphony of sound!
Maximize Sound Quality: The Ultimate Mp3 Normalization Guide
Mp3 Normalizer
Let’s Learn About Mp3 Normalizer: An Overview
Mp3 Normalizer
Explanation of What Mp3 Normalization Is
Before diving into the specifics of Mp3 normalization, let’s take a moment to understand how sound works. Sound is a physical phenomenon that is created by vibrations that travel through a medium, such as air, and are picked up by our ears. Our ears then convert these vibrations into electrical signals that our brains interpret as sound.
When it comes to recording sound, we use microphones to capture these vibrations and convert them into an electrical signal that can be stored and played back. In the past, recordings were made on physical media, such as vinyl records or cassette tapes. Nowadays, however, most recordings are made digitally.
When sound is recorded digitally, it is captured as a series of numbers that represent the amplitude of the sound wave at different points in time. These numbers are then stored as a digital file, such as an Mp3. The amplitude of a sound wave determines its volume, with larger amplitudes producing louder sounds.
So, what is Mp3 normalization? In simple terms, Mp3 normalization is the process of adjusting the volume of an Mp3 file so that it plays at a consistent level. This can be achieved by adjusting the amplitude of the sound wave so that it does not exceed a certain level, known as the normalization level.
Importance of Normalizing Mp3 Files for Optimal Listening Experience
Now that we understand what Mp3 normalization is, let’s explore why it is important. Have you ever experienced the frustration of having to constantly adjust the volume while listening to music? Perhaps you turn up the volume to hear a quiet part of a song, only to be blasted by a loud part a few moments later.
By normalizing Mp3 files, we can avoid these volume fluctuations and ensure a consistent listening experience. Normalizing also helps to prevent distortion, which can occur when the volume of a sound wave is too high and clips the top or bottom of the waveform.
Brief Overview of the Benefits of Mp3 Normalization
Consistent volume levels for a better listening experience
Prevention of distortion
Ability to match the volume of different songs or recordings
In summary, Mp3 normalization is the process of adjusting the volume of an Mp3 file to ensure a consistent listening experience. It can help prevent volume fluctuations and distortion, and allows us to match the volume levels of different songs or recordings. In the following sections, we will explore Mp3 normalization in more detail and provide tips for achieving optimal results.
Before we dive into the different types of Mp3 normalization, it’s important to understand the basics of audio normalization. In essence, audio normalization refers to the process of adjusting the volume of an audio file to a standardized level, usually measured in decibels (dB).
One common method of measuring the level of an audio file is using root mean square (RMS) amplitude. RMS is a mathematical formula that calculates the average power of an audio signal. Essentially, RMS measures the amount of energy in an audio signal over a period of time, which helps determine the overall loudness of the audio file.
Decibels (dB) are another common unit of measurement for sound volume. Decibels are a logarithmic scale that measures the ratio between the sound pressure level of an audio signal and a reference level. This means that every 10 dB increase represents a tenfold increase in the sound pressure level. For example, an audio file with a volume level of 70 dB is ten times louder than an audio file with a volume level of 60 dB.
Another important unit of measurement for audio normalization is Loudness Units Relative to Full Scale (LUFS). Unlike decibels, which are based on the sound pressure level of an audio signal, LUFS measures the perceived loudness of an audio signal, taking into account the human ear’s sensitivity to different frequencies.
When it comes to normalizing audio, it’s important to measure the level of sound accurately. This is because different audio files can have different volume levels, and normalizing them to the same level ensures consistency and eliminates the need to adjust the volume manually when playing back a playlist of audio files.
Normalization is typically achieved through a process called gain adjustment, which involves increasing or decreasing the amplitude of an audio signal. This can be done manually or with the help of software. There are various types of normalization, such as peak normalization, RMS normalization, and true peak normalization, each with its own advantages and disadvantages.
Definition of Mp3 Normalization
Simply put, Mp3 normalization is the process of adjusting the volume of an Mp3 audio file to a standardized level. This is done to ensure consistency of volume levels across multiple audio files, particularly in cases where an Mp3 audio file has a different volume level than other files in a playlist or album.
How Mp3 Normalization Works
The process of Mp3 normalization typically involves analyzing the audio file to determine its peak level or RMS amplitude. This information is then used to adjust the volume of the audio file to a target level, usually measured in dB or LUFS.
One important thing to note is that Mp3 normalization is a lossy process. This means that the audio quality may be slightly reduced after normalization, particularly if the audio file is heavily compressed or if the normalization is performed at a high level. However, in most cases, the reduction in audio quality is negligible and the benefits of normalization outweigh the potential drawbacks.
Explanation of the Different Types of Normalization
There are several types of normalization that can be used for Mp3 audio files, each with its own advantages and disadvantages:
Peak normalization: This method adjusts the volume of an audio file so that its loudest peak is at a target level, usually 0 dB. However, this method doesn’t take into account the overall loudness of the file, so it may not be the most effective method for achieving consistency across multiple files.
RMS normalization: This method adjusts the volume of an audio file based on its RMS amplitude, which gives a more accurate measure of the file’s overall loudness. This method is generally considered to be more effective than peak normalization for achieving consistency across multiple files.
True peak normalization: This method takes into account inter-sample peaks, which can occur when digital audio is converted to an analog signal. By accounting for these peaks, true peak normalization can prevent clipping and distortion in the final output.
Advantages of Using Mp3 Normalization for Your Audio Files
Using Mp3 normalization has several advantages, including:
Consistency: Normalizing your audio files to a standardized level ensures that they will all have the same volume level, which can be particularly helpful when playing back a playlist or album.
Improved listening experience: When audio files are at a consistent volume level, listeners won’t need to constantly adjust the volume when switching between files.
Protection from clipping: Clipping occurs when an audio signal exceeds the maximum level that can be represented by the digital system. Mp3 normalization can help prevent clipping by reducing the overall volume of the audio file.
Better compression: Normalizing an audio file can improve its compression efficiency, resulting in a smaller file size without sacrificing quality.
Overall, Mp3 normalization is an effective way to ensure consistent volume levels across multiple audio files, resulting in a better listening experience for the audience. By understanding the different types of normalization and the units of measurement involved, audio professionals and enthusiasts can effectively optimize their audio files for various applications.
Normalization with Audio Compression
Normalization with audio compression is a method that combines normalization and audio compression to ensure that there are no passages of low volume. This method is commonly used in radio stations, television channels, and live concerts, where the aim is to make sure that all sounds, from the lead singer’s whisper to the sound of the drums, are clearly heard by the audience.
For example, let’s say you have an audio file of a live concert. The volume levels of the different instruments and vocals may vary throughout the recording. If you normalize the file without compression, the volume of the quieter parts may increase, but the louder parts may become too loud and distorted. However, by using audio compression, you can ensure that the volume of the entire recording is consistent and that no parts are too loud or too quiet.
Replay Gain
Replay Gain is a method of audio normalization that adjusts the volume levels of an audio file to a consistent level without altering the dynamic range. Unlike audio compression, Replay Gain does not compress or expand the audio’s dynamic range, which preserves the original sound quality of the recording.
Replay Gain analyzes the audio file’s volume levels and applies a gain adjustment to bring the overall volume to a specified target level. The adjustment is applied uniformly across the entire file, which helps to maintain the audio’s balance and clarity.
For example, if you have an audio file with a very quiet intro and a very loud chorus, Replay Gain will adjust the volume of the entire file to a target level, ensuring that the intro and chorus are both at an optimal volume level without distorting the dynamic range of the recording.
Replay Gain can be especially useful for creating consistent playback levels across different audio tracks in a playlist, as well as for reducing the need to constantly adjust the volume during playback.
Converting Audio and Video Formats
Mp4Gain can also be used as a format converter, allowing you to convert audio and video files from one format to another. This can be useful if you have a file that is not compatible with your media player or if you want to reduce the file size.
Extracting Audio from Video
If you have a video file with an audio track that you want to use separately, Mp4Gain can also extract the audio from the video file and save it as a separate audio file.
Common mistakes to avoid when normalizing audio files
When normalizing audio files, there are some common mistakes that you should avoid:
Normalization with too much audio compression: Too much audio compression can make your audio sound unnatural and distorted.
Normalization with too little audio compression: Too little audio compression may result in inconsistent volume levels and passages of low volume.
Normalization with incorrect settings: Make sure to choose the right normalization settings for your audio file to ensure optimal sound quality.
How to test your audio files after normalization to ensure optimal sound quality
After normalizing your audio files, it is important to test them to ensure optimal sound quality. You can do this by:
Listening to the file: Listen to the normalized filewith different audio devices, such as headphones, speakers, or car audio systems, to make sure it sounds good on all of them.
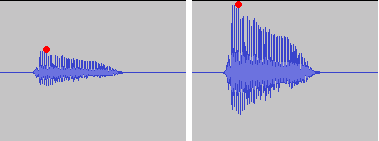
Checking the waveform: Use a waveform viewer to check the waveform of the normalized audio file. The waveform should be consistent and not have any clipping or distortion.
Comparing with the original file: Compare the normalized file with the original file to make sure that the changes made during normalization do not negatively affect the quality of the audio.
V. Conclusion
Mp4Gain is a versatile software that can help you improve the sound quality of your audio and video files. Whether you need to normalize the volume levels of your audio files, convert audio or video formats, or extract audio from video files, Mp4Gain has got you covered. With its user-friendly interface and powerful features, Mp4Gain is a great tool for anyone who wants to achieve optimal sound quality for their media files.
By using the tips and tricks mentioned in this article, you can ensure that your audio files are normalized correctly and sound great on any device. Remember to avoid common mistakes when normalizing
The Benefits of Mp3 Normalization: Final Thoughts
Overall, Mp3 normalization is an effective way to improve the quality of your audio files. By adjusting the volume levels to a consistent and optimal level, you can enhance the listening experience and avoid the need to constantly adjust the volume.
However, not all normalization software is created equal. While there are many options available, Mp4Gain is a modern normalizer that is designed to provide consistent, high-quality sound across a variety of devices and listening environments.
In today’s world, many people listen to music on their smartphones, tablets, and computers, often with headphones or earbuds. Additionally, many headphones have noise-cancelling features, while others do not. The headphones that cancel outside noise work by using a microphone to detect the sound waves and creating an opposite sound wave to cancel it out. This can affect the sound quality of the music and make it difficult to achieve consistent volume levels. Some headphones also have a frequency response curve that can make certain frequencies louder or quieter, which can also affect the sound quality of the music.
With Mp4Gain, you can rest assured that your music will sound great no matter where you listen to it. The software is designed to adjust the volume levels while maintaining the dynamic range of the original recording and taking into account the frequency response curve of the headphones, so that the music sounds just as good on a phone as it does on a high-end stereo system.
Whether you’re listening in a noisy environment or a quiet one, with or without noise-cancelling headphones, Mp4Gain’s normalization process will ensure that the sound is consistent and optimal. So why wait? Start normalizing your Mp3 files with Mp4Gain today and experience the difference in sound quality!
udio files, choose the right normalization settings, and test your files after normalization to ensure optimal sound quality.
Try out Mp4Gain today and experience the difference in sound quality for yourself!
Loudness Normalization: Making Your Music Sound Balanced
Loudness Normalization
Have you ever noticed that some songs are louder than others? Sometimes, you have to turn up the volume to hear a soft song, and then turn it down again when a loud song comes on. This can be annoying, but it’s actually a problem that can be solved with something called “loudness normalization.”
Loudness Normalization
What is Loudness Normalization?
Loudness normalization is a process that evens out the volume of different songs or audio tracks. It makes sure that they all have a similar volume level, so you don’t have to adjust your volume settings constantly. It’s a common technique used in the music industry, where songs from different sources need to be combined into one album or playlist.
Why is Loudness Normalization Important?
There are a few reasons why loudness normalization is important:
Consistency: When all of your songs are at a similar volume level, you can listen to your music without having to adjust the volume constantly. This makes for a better listening experience.
Preventing Damage to Your Ears: If a song suddenly plays at a much louder volume, it can be harmful to your ears. Loudness normalization prevents this by keeping the volume level consistent.
Making Your Music Sound Better: By evening out the volume levels, you can hear all the details in your music. This is especially important when listening to music with headphones, where imbalances in volume can be even more noticeable.
How is Loudness Normalization Done?
Loudness normalization can be done manually by adjusting the volume levels of each individual song, but this is time-consuming and can be difficult to get right. Instead, many people use software that can automatically adjust the volume levels for them. This software analyzes the audio file and adjusts the volume levels so that they are all similar.
One popular software that can do this is Mp4Gain. It’s easy to use and can normalize the volume levels of many different audio file formats. Mp4Gain analyzes the loudness of each audio file and then adjusts the volume levels to make them all similar. This can be done with just a few clicks of a button.
Conclusion
Loudness normalization is an important technique for anyone who wants to listen to music without constantly adjusting the volume. It ensures consistency and can make your music sound better. If you want to easily normalize the volume levels of your audio files, then Mp4Gain is the best solution for you.
Let’s talk about “musical dynamics” and “musical loudness” Part 2
The two brief examples above are to tell you that frequency content, sound pressure, and sound duration will affect people’s perception of sound volume.
That is why it is said that “loudness tends to human subjective perception”.
Since the volume is the subjective perception of people, how to quantify it?
To quantify “loudness”, the first thing you need to look at is the relationship between the frequency and the loudness of the human ear. There are two pictures below, you can read them carefully for reference:
Looking at the two images above, you will clearly see that the human ear and the human brain are not an organ that flattens the receiving frequency. It will not develop here. For the basis of loudness quantization, see the second image, there is a unit called “fon”. The phon unit is an attempt to quantize loudness. We take a 1kHz signal as an example, and it can be perceived at a volume of 40dB at 1kHz, so it is 40phon. Based on this, another unit is called a sone, 1 sone = 40phon. Both are units that attempt to quantify volume.
The international organization will be the ITU and the EBU…etc. The characteristics of the human ear, the psychoacoustics of the human brain, etc., all factors that affect loudness perception are considered together, and these factors are calculated through complicated mathematical calculations Define and standardize the reasonable loudness range for ” sound reproduction” only after statistically significant results have been obtained. Those interested can search: “ITU-R 1770 and ITU-R 1771”.
Should the rules be followed?
Of course continue! In fact, there is such a problem in Taiwan. Not to mention music, only the fourth channel and MOD, the sound level of each channel is different! The scariest thing is switching from the movie station to the shopping channel and often still being scared by the sudden volume of the shopping channel. Even radio shows have this kind of situation.
Here, you can go to Google again: “Volume War Loudness War”. All this is commonplace. This article is mainly to introduce the definition and specification of loudness.
Effects of loudness specifications
Although ITU, EBU, ISO, ANSI and other organizations have introduced loudness specifications, major music and video streaming platforms still have their own standards. However, the standards of the main platforms will continue to be around the specifications, and there will be no big or outside. When it comes to the audiovisual industry, it will generally affect these things:
Music streaming platforms: Records must meet loudness specifications at time of release
Video streaming platforms: Loudness specifications must be met when movies are released
Let’s talk about “musical dynamics” and “musical sonority”
Where does the music we listen to come from?
Before we talk about it, it is necessary to quickly talk about the disc creation process. In principle, it can be divided into three parts: the initial stage, the intermediate stage and the later stage.
First stage: compose, arrange
Middle term: recording, mixing
Post: post mastering, distribution, marketing
Whether a piece of music is good or not can be determined at the initial stage of the arrangement. Then there is the recording. The recording process can be finding real musicians to record the sound of real instruments, or completing the melody required by the arrangement through software instruments. Then find a singer or singers to sing… and so on. This process is called recording.
The “balance” of a song is not only achieving the balance of the melody in the arrangement, on the other hand, it is leaning on the mix to make the recorded elements a harmony in listening and frequency, it is also usually necessary to coordinate It depends on where the track goes, or what the producer wants. After all, the purpose of a song or album is to become a commercial release, and the post-production and embellishment processes that need to be done are necessary.
Usually the post-mastering process will be done last. After the entire album’s timbre direction, volume adjustment and minor flaws etc. are fixed, the final mastering will be uploaded according to the loudness specifications required by each streaming platform. .
Quantify the volume and intensity of what we hear
Sometimes people equate loudness with loudness. Actually the two are different. They are different and at the same time influence each other.
Loudness can be quantified, in simple terms, it is our most used “decibel dB”. Volume, on the other hand, tends to be subjectively perceived by people. how to say? Different 75-decibel musical signals are sent out at a time, and everyone has different feelings about its loudness and volume.
Because loudness is related to three things: frequency content, duration, and sound pressure.
We played a 1000 Hz test signal for three minutes at a sound pressure of 80 decibels. Your perception of the volume of this signal will be very different from playing it for 10 seconds or 30 seconds.
Let us take two singers as an example, one of them has a more evident timbre in the mid-high frequency band, and the other has a more evident mid-low frequency band, they sing the same song, and they sing with the same key and similar sound pressure, generally in the mid-high frequency band. The sound of the sound will feel stronger.
When you have a lot of mp3 files, you often look for loudness normalization.
What usually happens is that we have mp3s (although Mp4Gain can do Loudness normalization of many other audio and video formats!!) that have been created with different settings, for example different bit rates… which causes them to have a loudness different and that is annoying to the ear.
Many times we have been collecting mp3s from different sources, finding one here and another there and over time we have managed to have a good collection that is worth thinking about, but we have a problem: the loudness differs between different music or video files.
And this has generated that we desperately need to find a solution.
Mp4Gain is the result of many years of experience and is definitely the best normalizer out there, I have no doubt.
Even for very advanced users, it offers different settings to adjust exactly what you are looking for. Pewreo if you are a common user, you will not need anything, just load the song or video (you can normalize one or hundreds at the same time) and click a button, it’s that simple.
What’s more annoying when listening to music is that you have to manipulate the volume control for every song that plays. If you have a computer, a tool allows you to uniformize the atmosphere from track to track while the songs are playing. This is called normalization. Three main means are used to achieve this result more or less effectively.
Normalization through detection of maximum volume
The player or audio processing software analyzes the sound of the track and detects the highest amplitude. If it is less than the maximum gain value that is imposed, the signal is automatically boosted by the number of decibels required to reach and reach this value in all samples on the track. If the highest amplitude is equal to or greater than the maximum gain value, nothing is done.
This method has only one advantage: the avoidance of saturation. However, the drawbacks are many.
This form of normalization cannot be applied in real time, as it is assumed that the maximum signal value is known in advance, which is hardly the case with live audio sources (playback or recording). Also, this type of normalization turns out to be totally ineffective when the overall sound of the song is low, but interrupted by small ridges that can be parasitic. When these peaks reach or exceed the maximum gain value, nothing happens and the overall sound is always reduced, especially if these peaks last only a few fractions of a second.
Normalization in detecting maximum volume is almost never used by reading software. Many audio processing software or even audio CD burning offers this option, such as Audacity and Nero.
Normalization by medium volume detection
Here, the player or audio processing software analyzes the sound of the track and does not detect the highest amplitude, but the average amplitude of the signal. Thus, the volume of the song will automatically increase or decrease by the number of decibels required to reach the imposed value, as appropriate.
Also known as RMS, this method has the advantage that the sound is fairly accurately balanced from one song to another, even if there are sharp peaks in the volume.
However, normal normalization of volume detection, like the previous method, cannot be applied in real time and is ipso facto unsuitable for live audio sources. In addition, saturation can occur if the imposed value to be achieved is not sufficient. It is recommended to use normalization values small enough to avoid this problem as much as possible.
Many reading software programs use this normalization mode, but they all work better or worse than the others. .
Sound compression / modern normalization
The mp4gain audio processing software performs the audio signal analysis, analysis that will lead to increase or decrease the volume of certain areas of the signal according to a complete set of fairly complex parameters inherent in the signal itself. Ultimately, the loud sounds will be attenuated, the weak sounds will improve when multiple presets are reached.
This is the best normalization method if the sound processing values are well established, in which case the sound volume becomes very constant and without saturation, regardless of the source and signal type, in real time or No
However, this type of normalization requires some processing power from the processor. Although the results achieved are much more professional and the only ones that really achieve what the 2020 ear is looking for. Mp4Gain has the most efficient response to normalize audio, either from audio files of the most popular formats or from video files, including the most commonly used formats.
Music is distinguished by what is often called “dynamic” and which refers to the changes (more or less abrupt) of the “effort” with which certain notes or passages are interpreted.
Whether it is an instrument or the voice.
Any vocal performance that has been considered virtuous, in general terms, will have a dynamic that goes from very soft passages, almost whispered, to intense passages, with a high volume, singing at full voice.
At the time when vinyl existed as the option to listen to music, it was not felt (at least it went almost unnoticed) the fact of noticeable differences between the loudness or the volume of a song.
It was with the advent of digitization and the possibility of its variants (opting for different bitrates, sample rates, bitdepths, etc.) that this difference became very evident.
And with the appearance of mp3 and its distribution or exchange, at the same time that winamp and distribution lists arose, when it was inevitable and it was even started to look for solutions.
These first ones were based on the sound peaks and their results were very inefficient.
Returning to the mention of the mp3, situations such as masking (where information is removed) further marked the problem of differences in volume.
Then began to use the RMS that rather mediates the average power that the song had, more than the peaks.
Initially, it was enough to put a slower reaction level to the volume meter, to have a more general idea and less impacted by the volume peaks.
And so, the way of listening to music and considering what normalization was evolved.
Finally it appears to be somewhat closer to a mixture of a volume limiter and a compressor.
What is a volume limiter? It is a hardware (although lately there are also limiters in software version) that ensures that no peak exceeds a maximum limit.
A compressor, on the other hand, is a device or software that is used to “compact” the volume, preventing the parts with the lowest volume from being too low and at the same time preventing the high parts from exceeding a range that has been assigned. We would say that the compressor dampens the increases and decreases in volume.
To this we can add an equalization that differentiates the bands and treats them differently both in the limitation and in the compression. Each frequency band has a different treatment in the Mp4gain and that produces a very efficient result. It is NOT the only improvement offered by Mp4Gain, but this is described here. In other articles we will deal with other differences.
Mp4Gain is the best normalizer of 2020 and this is clear when using it.








Comments:
I used to ignore all this. The breakdown you offer, though? Clear path for me now, thanks a lot!
Those numbers for the dBs just clicked, my uploads sound pro and better balanced – respect for the tips!
Your point on staying safe from bad settings is a banger reminder for me. Thanks again for this – saved a ton, you’re the best!
So you’re mainly cleaning sound to have less ‘uh oh’ moments, and more clear pro moments, that is top insight for all! Thanks for the notes!
Know any great tools or plugins for a budget DIY editor? Help and pass on any tip!
Content creators owe a debt to your efforts here – bless you for sharing, cheers!