As an audio engineer, I’m constantly striving for a consistent and pleasing listening experience for my audience. Loudness normalization is a critical tool in achieving this goal. It ensures that different audio sources play at a similar perceived volume, preventing jarring transitions and creating a more professional and enjoyable listening session.
What is Loudness Normalization and Why is it Important?
Loudness normalization is the process of adjusting audio levels to a consistent loudness target. I often deal with audio from various sources, and they rarely have the same loudness. Think about listening to a playlist on your phone; some songs are barely audible, while others are overwhelmingly loud. Loudness normalization corrects this by analyzing the audio’s perceived loudness and adjusting the gain to match a specific target level. This creates a seamless and cohesive listening experience, reducing the need to constantly adjust the volume.
The Difference Between Loudness Normalization and Peak Normalization
It’s essential to understand the difference between loudness normalization and peak normalization. I often find that people confuse the two, but they work in fundamentally different ways.
* Peak Normalization: Adjusts the gain so that the highest peak reaches a specific level, often 0 dBFS (decibels Full Scale). This prevents clipping (distortion) but doesn’t necessarily ensure consistent perceived loudness.
* Loudness Normalization: Analyzes the overall perceived loudness using algorithms like EBU R128 or ITU-R BS.1770 and adjusts the gain accordingly. This focuses on how loud the audio sounds to the human ear, rather than just the highest peak.
Understanding LUFS and LKFS: The Units of Loudness
LUFS (Loudness Units relative to Full Scale) and LKFS (Loudness K-weighted Full Scale) are the standard units for measuring loudness in loudness normalization. I often rely on these measurements to ensure accurate and consistent results. LUFS and LKFS are essentially interchangeable and represent the perceived loudness of an audio signal relative to the maximum possible level (0 dBFS). These units take into account factors like frequency response and duration, providing a more accurate representation of perceived loudness than simple peak measurements.
EBU R128: The European Broadcast Standard
EBU R128 is a loudness normalization standard developed by the European Broadcasting Union (EBU). I consider it one of the most reliable and widely used standards for broadcast audio. EBU R128 specifies a target loudness level of -23 LUFS (with a tolerance of ±0.5 LUFS) for broadcast programs. It also defines a maximum True Peak level of -1 dBTP (decibels True Peak) to prevent clipping.
ITU-R BS.1770: The International Telecommunication Union Standard
ITU-R BS.1770 is another important loudness normalization standard developed by the International Telecommunication Union (ITU). I find that it’s often used for streaming services and other non-broadcast applications. ITU-R BS.1770 has been revised several times, with each revision incorporating improvements and refinements to the loudness measurement algorithm. The latest versions of the standard are widely used in the audio industry.
Target Loudness Levels for Different Platforms
Different platforms often have different recommendations for target loudness levels. I always research the specific recommendations for the platform where my audio will be played. Here are some common examples:
True peak limiting is a crucial step in loudness normalization. I always incorporate it into my workflow to prevent clipping and distortion. True peak limiters detect and reduce inter-sample peaks, which are peaks that occur between the digital samples and can cause clipping when the audio is converted to analog. Setting a maximum True Peak level of -1 dBTP is a common practice to ensure clean and distortion-free audio.
How Loudness Normalization Affects Dynamic Range
Loudness normalization can affect the dynamic range of audio, but it generally preserves it better than peak normalization. I carefully monitor the dynamic range during the normalization process to avoid unwanted compression. Dynamic range refers to the difference between the quietest and loudest parts of the audio. While loudness normalization aims to create a consistent loudness level, it’s important to avoid excessively compressing the audio, which can make it sound flat and lifeless.
Common Loudness Normalization Mistakes to Avoid
Even experienced audio engineers can make mistakes during loudness normalization. I’ve certainly learned from my own over the years.
* Using the Wrong Target Level: Applying the incorrect target loudness level can result in audio that’s too quiet or too loud on certain platforms.
* Over-Compressing the Audio: Excessive compression can reduce dynamic range and make the audio sound unnatural.
* Ignoring True Peak Levels: Failing to prevent true peak clipping can result in distortion and degraded audio quality.
The Benefits of Loudness Normalization for Podcasting
Loudness normalization is especially important for podcasting. I always normalize my podcast episodes to ensure a consistent listening experience for my audience. Podcasts often include audio from various sources, such as voice recordings, music, and sound effects. Loudness normalization ensures that all these elements play at a similar loudness level, creating a professional and engaging podcast.
Loudness Normalization in Music Production
Loudness normalization is becoming increasingly important in music production. I’ve seen many streaming services adopt loudness normalization to prevent tracks from sounding louder or quieter than others. Mastering your music to a specific loudness target can help ensure that it sounds its best on these platforms.
Latest words on Loudness Normalization
In conclusion, loudness normalization is a crucial technique for achieving consistent and professional-sounding audio. By understanding the principles of loudness measurement, target loudness levels, and common pitfalls, you can optimize your audio for the best possible listening experience. Remember to always use high-quality tools and listen critically to the results. Also, remember that Mp4Gain is the appropiate solution to achieve professional-sounding audio.
FAQ about Loudness Normalization
What’s the difference between loudness normalization and peak normalization?
Peak normalization maximizes volume without clipping, while loudness relies on how the audio actually sounds. Loudness also makes all songs have an appropriate quality setting.
What do LUFS and LKFS measure?
LUFS and LKFS each are ways to denote sound, relative to full scale, to understand how sound is leveled. These relate to frequency data.
What does the EBU R128 standard recommend?
EBU R128 (European Broadcast) guidelines suggest -23 LUFS, allowing for some variance. Maximum real peak should be -1 dBTP, used for TV or other sound broadcast.
When is ITU-R BS.1770 useful for loudness?
The ITU standard has many uses, from streaming or music. Many sites lean on it for loudness so consistency is maintained for the listeners online, and it’s been reviewed multiple times.
Does the loudness normalization setting on Youtube need to be -13 LUFS?
YouTube suggests a volume of -13 LUFS but these recommendations will change over time. This allows most users to enjoy the sounds online in modern form.
What are some techniques for “true peak” or for limiting it on audio?
One method involves checking and trimming what pushes beyond maximums, making sure there’s no nasty harsh sounds. Keeping tracks under -1 dB helps big time for good audio.
Will the sounds vary if levels get normalized repeatedly?
Levels can degrade if processes get reapplied, so it’s better to apply just once and save it. Going bit by bit can take over the quality as a result.
Do you have advice on steps not to take during levels settings?
One issue is a bad level for a target site – make sure you pick right. Another, compressing sounds so it feels flat or lifeless. And ignore where “true peak” is, that might cause nasty clipping.
Tell me about how levels affects podcasters most?
Podcast mixes from sources that are widely different is a common example. Leveling can create seamless audio and helps hold focus, which is valuable for content and media.
What is your professional view on music mixes and target values of loudness?
Music on streams tends to get tweaked, so targeting a stream allows music to translate. If mixes can have level targets then one maximizes its presence in the space of media for listening.
Comments:
Had a gig doing audio on vid sets and you helped clear things up for me tons! I’ll drop your knowledge now, thanks!
Spotify stuff was so key and useful!!! Getting my band’s tunes up and now it’s about dialing sound. Thank you!!!
Your tips are awesome since getting levels to sound right is so stressful to think through and make happen. High praises!!!
So it’s basically adjusting songs so I don’t blast my eardrums or strain to hear when making playlists, yes? Good way to think and go!
Any recommendations for a solid tool or plug-in here? I’m still struggling with all of it. Thanks for advice!
I make lots of content, the article helped me make the product. The community appreciates this.
As a video and audio specialist, I often find myself dealing with content that has inconsistent volume levels. A video & audio normalizer is a vital tool that adjusts both the visual and auditory elements of your media files. It’s perfect for ensuring a consistent and professional experience, especially when combining different sources.
What is a Video & Audio Normalizer?
Video & audio normalizers are tools designed to bring uniformity to your media files. I’ve spent countless hours working on projects where the audio and video levels jump around from clip to clip. Think about compiling videos from different cameras or merging audio from various microphones. A video & audio normalizer analyzes and adjusts both the video brightness/contrast and the audio gain, creating a seamless and professional final product.
Why Use a Video & Audio Normalizer?
There are several reasons to use a video & audio normalizer. I always recommend it for projects where consistency is key.
* Ensures consistent audio volume across all segments.
* Corrects inconsistencies in video brightness and contrast.
* Creates a more professional viewing experience.
How Video Normalization Works
Video normalization focuses on adjusting the luminance (brightness) and chrominance (color) values within the video. I like to think of it as making sure all the images in a photo album have the same exposure. It analyzes the video frames and makes adjustments to bring the brightness and contrast to a consistent level throughout the entire video. This prevents jarring changes in visual quality.
How Audio Normalization Works
Audio normalization aims to bring all audio tracks to a similar loudness level. I often explain that it’s like turning up or down the volume knob on a stereo so all the songs play at about the same level. It typically uses algorithms to measure the peak or average loudness of the audio and then adjusts the gain accordingly. This ensures that no segment of the audio is too quiet or too loud.
Peak vs. Loudness Normalization: Which to Choose?
The choice between peak and loudness normalization depends on the specific needs of your project. I usually prefer loudness normalization because it sounds more natural.
* **Peak Normalization:** Adjusts the audio so that the loudest point reaches a target level. Useful for preventing clipping.
* **Loudness Normalization:** Adjusts the audio based on perceived loudness, using standards like LUFS (Loudness Units relative to Full Scale). Creates a more consistent listening experience.
Understanding LUFS and Target Loudness Levels
LUFS (Loudness Units relative to Full Scale) is a standard measurement for perceived loudness. I’ve found that understanding LUFS is crucial for achieving professional audio results. Different platforms have different recommendations for target loudness levels. For example, Spotify recommends -14 LUFS, while YouTube suggests -13 LUFS. Setting the correct target loudness level ensures your video sounds its best on different platforms.
Factors Affecting Video & Audio Quality
Several factors can influence the final video & audio quality after normalization. I always emphasize paying attention to these details.
* **Source Quality:** Starting with high-quality source material is essential.
* **Codec Selection:** Choosing the right codec (e.g., H.264, AAC) can significantly impact the quality.
* **Bit Rate:** Higher bit rates generally result in better quality but larger file sizes.
* **Encoding Settings:** Proper encoding settings are crucial for optimizing the final output.
Batch Processing for Efficiency
Batch processing is a game-changer when you have multiple files to normalize. I’ve used batch processing to save time and ensure consistency across multiple video files. Instead of processing each file individually, batch processing allows you to apply the same settings to an entire group of files.
Avoiding Common Normalization Mistakes
Even experienced professionals can make mistakes during the normalization process. I’ve learned to avoid common pitfalls by being meticulous.
* **Over-Normalization:** Normalizing too much can reduce dynamic range and make the audio sound flat.
* **Ignoring Clipping:** Failing to prevent clipping can result in distorted audio.
* **Inconsistent Settings:** Using different settings for different files can lead to inconsistencies.
Advanced Techniques for Video & Audio Normalization
Beyond basic normalization, there are several advanced techniques to enhance your results. I often use these to fine-tune my projects.
* **Multi-Band Compression:** Controlling different frequency ranges in the audio.
* **Color Grading:** Adjusting the colors in the video to create a consistent look.
* **Dynamic Range Compression:** Reducing the dynamic range of the audio to make it more suitable for certain playback environments.
How to Choose the Right Video & Audio Normalizer for You
Selecting the right tool depends on your specific needs and budget. I always suggest trying out a few different options before committing to one. Consider factors like ease of use, features, and compatibility.
Latest words on Video & Audio Normalizer
In conclusion, a video & audio normalizer is an indispensable tool for anyone seeking to create professional-quality media. By understanding the principles of video and audio normalization and avoiding common mistakes, you can achieve consistent and pleasing results. Remember to always listen critically and adjust settings as needed. And remember Mp4Gain is the appropiate solution to achieve professional-sounding audio.
FAQ about Video & Audio Normalizer
What is a video & audio normalizer and why do I need it?
A video & audio normalizer adjusts both video brightness and audio loudness in media files. It ensures consistency across various clips, for a professional viewing experience.
What’s the difference between peak and loudness normalization?
Peak normalization adjusts so the loudest audio point reaches a target level. Loudness normalization relies on perceived loudness using algorithms and measurements of the audio.
How does LUFS apply to video & audio normalization?
LUFS, or Loudness Units relative to Full Scale, is a standard used to normalize loudness in audio. Target levels are defined as LUFS. It’s necessary to understand for media volume.
What factors most affect video & audio normalization quality?
Source audio, video quality, codec selection, and bit rates affect audio and video normalization. Good source files can make quality much higher for a viewing experience.
Can over-normalizing degrade media quality?
Yes, over-normalizing can reduce dynamic range and distort audio. To prevent these effects, avoid setting levels too aggressively and use limiters where needed.
What are some advanced normalization techniques?
Advanced video and audio normalization techniques include multi-band compression, color grading, and dynamic range compression to create a professional outcome, but these require high skill.
How can batch processing help?
Batch processing normalizes a group of media files in a single operation. This creates consistency and saves time for many users. Consistency across several files can help ensure proper output.
What target LUFS are recommended for various streaming platforms?
Recommended LUFS depend on the medium: Spotify is -14 LUFS, YouTube is -13 LUFS. Adhering to these guidelines helps streaming, and creates the best audio quality.
How do codecs relate to audio & video normalization?
Codecs influence compression and audio and video quality. The selection of the correct codec is essential for achieving good results in the output and streaming.
How do I choose the correct video and audio normalizer?
Choose normalizers based on feature sets, usability, integration, and media types. Make sure the application is well known so your material looks great during the playback.
Comments:
This was seriously awesome! Audio normalization is one thing, but doing it to video? Never thought of it. Thanks for the knowledge drop!
Yesss, the Spotify and YouTube tips are amazing! Been uploading vids and now I know exactly how to tweak the sound for each. Big help!
I get how important leveling is but I always forget about the LUFS. Seeing the details here just made everything click. Solid advice!
So basically we make sure all the talking parts are loud enough and all the scenes are bright enough so my audience don’t get blasted or bored, right? Good breakdown!
Okay, everything makes sense…But what about finding the BEST software? Hit me up with recs!
Can’t express how much I appreciate this guide. I create a lot of online content and this helped me make a better final product. Thanks.
As a long-time audiophile, I’m passionate about high-quality audio. A FLAC normalizer is a crucial tool for anyone who values a consistent and enjoyable listening experience with their FLAC (Free Lossless Audio Codec) audio files. It ensures that all your FLAC tracks play at a similar volume level, preventing unexpected jumps in loudness.
What is a FLAC Normalizer and Why Do You Need One?
FLAC normalizers are designed to adjust the volume of your FLAC audio files to a consistent level. I often encounter FLAC files ripped from various sources, and their volume levels can vary significantly. Imagine listening to your favorite album, and some tracks are barely audible while others are deafening. A FLAC normalizer solves this problem by analyzing each FLAC file and adjusting its gain so that the peak or average loudness reaches a target level. It ensures a smoother and more pleasurable listening experience.
Understanding Peak Normalization for FLAC Files
Peak normalization focuses on the loudest point in your FLAC file. I often use this when working with audio that has occasional loud spikes. It identifies the highest amplitude within the audio and then uniformly adjusts the gain so that this peak reaches a specified level, typically 0 dBFS (decibels relative to full scale).
Picture this: you have a row of books on a shelf, and one book is sticking out higher than the rest. Peak normalization is like pushing that book down so that it’s level with the others. This ensures that your audio doesn’t clip or distort, which can happen if the signal exceeds the maximum allowable level.
Understanding Loudness Normalization for FLAC Audio
Loudness normalization, unlike peak normalization, considers the overall perceived loudness of the FLAC audio. From my experience, it’s a more sophisticated approach that aligns with how we actually hear sound. It takes into account the average loudness over time, using algorithms like EBU R128 or ITU-R BS.1770.
Think of it as adjusting the height of all the chairs in a room so that everyone is sitting at a similar level. Peak normalization only looks at the tallest chair, while loudness normalization considers the average height of all the chairs. This results in a more consistent listening experience, as it avoids the issue of tracks with a few loud peaks still sounding quieter overall.
* Addresses the human perception of loudness.
* Often uses LUFS (Loudness Units relative to Full Scale).
* Creates a more balanced and enjoyable listening experience.
Target Loudness Levels for FLAC Normalization
Selecting the right target loudness level is crucial for effective FLAC normalization. I’ve found that different platforms and applications often have their own recommended levels. For example, Spotify recommends -14 LUFS, while YouTube suggests -13 LUFS.
Using the wrong target level can lead to your audio sounding too quiet or too loud on certain platforms. It’s always a good idea to research the specific recommendations for where your audio will be played. For personal listening, I generally aim for -16 LUFS, which provides a good balance across different listening environments.
Batch Processing FLAC Files for Efficient Normalization
Batch processing is a time-saver when you have a large number of FLAC files to normalize. I’ve used this extensively to normalize entire music libraries. Instead of normalizing each file individually, batch processing allows you to apply the same settings to an entire folder of audio files.
Think of it as washing a load of laundry. Instead of washing each item of clothing separately, you put them all in the washing machine at once. Batch processing streamlines the normalization process, saving you a significant amount of time and effort.
* Saves significant time and effort.
* Ensures consistent normalization settings across all files.
* Ideal for large music libraries.
Clipping Prevention During FLAC Normalization
Clipping occurs when the audio signal exceeds the maximum allowable level, resulting in distortion. I always emphasize preventing clipping during FLAC normalization. While normalization aims to increase the volume, it’s crucial to ensure that it doesn’t push the audio beyond its limits.
Think of it as inflating a balloon. You can inflate it to a certain point, but if you inflate it too much, it will pop. Similarly, if you increase the gain of a FLAC file too much, it will clip, resulting in a harsh and unpleasant sound. Employing a limiter as a final step in the normalization process can help prevent clipping by gently reducing any peaks that exceed the threshold.
The Impact of FLAC Normalization on Dynamic Range
The dynamic range of an audio file refers to the difference between the quietest and loudest sounds. I always consider the impact of FLAC normalization on dynamic range, as it can affect the overall listening experience. Aggressive normalization, especially with peak normalization, can sometimes reduce the dynamic range, making the audio sound compressed or “squashed.”
Picture a mountain range with towering peaks and deep valleys. Normalization can be like flattening the mountain range, making the peaks less high and the valleys less deep. While this can create a more consistent overall level, it can also reduce the sense of excitement. Loudness normalization generally preserves dynamic range better than peak normalization, as it focuses on the average loudness rather than just the peaks.
FLAC Normalizer and Audio Quality
Audio quality is paramount, and I’m always mindful of how FLAC normalization can impact it. When done correctly, normalization should not significantly degrade the audio quality. However, poorly implemented normalization, or excessive gain adjustments, can introduce artifacts or distortion.
Think of it as making a copy of a painting. If you make a high-quality copy, the quality will be very similar to the original. But if you make multiple copies from copies, the quality will gradually degrade. Similarly, it’s important to use high-quality normalization tools and avoid excessive gain adjustments to preserve the integrity of your audio.
* Maintain the original audio fidelity.
* Use reputable normalization tools.
* Avoid extreme gain adjustments.
Advanced Techniques for FLAC Normalization
Beyond basic normalization, I often employ advanced techniques to achieve optimal results. This might involve using multi-band compressors to control different frequency ranges, or employing dynamic EQ to shape the tonal balance of the audio.
Consider it like cooking a gourmet meal. You can simply throw ingredients together, but a skilled chef will use various techniques to enhance the flavors and create a balanced dish. Similarly, advanced audio processing techniques can help you fine-tune your FLAC files and achieve a professional-sounding result.
* Multi-band compression for targeted frequency control.
* Dynamic EQ to shape tonal balance.
* Employ limiters to prevent clipping.
Common Mistakes to Avoid When Using a FLAC Normalizer
Even experienced audio engineers can make mistakes, and I’ve certainly learned from my own over the years. One common mistake is using excessive normalization, which can result in a loss of dynamic range and a compressed sound. Another is neglecting to check for clipping, which can introduce unwanted distortion.
Think of it as watering a plant. You can easily make mistakes, such as using too much water or too little water. Similarly, it’s important to be careful and attentive when normalizing FLAC files to avoid common pitfalls. Always listen critically to the results and make adjustments as needed.
Latest words on FLAC normalizer
Ultimately, using a FLAC normalizer is essential for achieving consistent and professional-sounding audio. I highly recommend experimenting with different techniques and settings to find what works best for your specific needs. Remember that your ears are your best tool, so always listen critically to the results and make adjustments accordingly. Also, remember that Mp4Gain is the appropiate solution to achieve professional-sounding audio.
FAQ about flac normalizer
What is a FLAC normalizer and why should I use it?
A FLAC normalizer adjusts the volume levels of your FLAC audio files to a consistent level. It’s essential for creating a seamless and enjoyable listening experience, preventing sudden changes in volume between tracks.
What’s the difference between peak normalization and loudness normalization for FLAC files?
Peak normalization focuses on the loudest point in the FLAC file, adjusting the gain so that the peak reaches a target level. Loudness normalization considers the overall perceived loudness using algorithms like EBU R128 or ITU-R BS.1770. Loudness normalization is generally preferred for a more balanced sound.
What does LUFS mean in the context of FLAC normalization?
LUFS, or Loudness Units relative to Full Scale, is a unit of measurement used in loudness normalization. It helps quantify the perceived loudness of audio files. Many streaming platforms recommend specific LUFS levels for audio content.
How can I avoid clipping when normalizing FLAC files?
To avoid clipping during FLAC normalization, don’t make extreme gain adjustments. Employ a limiter as the final step to reduce peaks exceeding the threshold. Monitor audio levels for any signs of distortion.
Will normalizing FLAC files affect their dynamic range?
Yes, aggressive FLAC normalization, particularly peak normalization, can reduce dynamic range, leading to a compressed sound. Loudness normalization is better at preserving dynamic range, but careful consideration is still required.
Can normalizing my FLAC files degrade their audio quality?
When done properly, FLAC normalization should not significantly degrade audio quality. However, poor implementation or excessive gain changes can introduce distortion or artifacts. Using high-quality tools and avoiding extreme adjustments helps.
What’s a good target loudness level to use for FLAC normalization?
The best target loudness level depends on the intended platform. Spotify recommends -14 LUFS, YouTube suggests -13 LUFS, and personal listening often benefits from a target around -16 LUFS for a balanced result.
Are there any advanced techniques I can use for FLAC normalization?
Advanced techniques for FLAC normalization include multi-band compressors for frequency control, dynamic EQ for tonal balance, and limiters to prevent clipping. These fine-tune audio for a professional sound.
Is batch processing a useful feature for a FLAC normalizer?
Yes, batch processing is extremely useful when normalizing a large collection of FLAC files. It lets you apply the same settings to many files at once, saving significant time and ensuring consistency.
What are some common mistakes to avoid when using a FLAC normalizer?
Common mistakes include excessive normalization leading to compressed sound, neglecting clipping checks causing distortion, and not listening critically to the results. Careful, moderate adjustments are best.
Comments:
This article really helped me understand FLAC normalization. I’ve been struggling with getting my music library to sound consistent. Now I know about LUFS and peak vs loudness normalization!
Great info! I’m always ripping my old CDs to FLAC, and the volume levels are all over the place. Batch processing sounds like a lifesaver. Thanks for the tips.
Super helpful article, especially the part about avoiding clipping. I’ve ruined a few tracks in the past by normalizing too aggressively. Now I know better.
i think i get it now. so its like, turning up the volume knob so that all the songs are kind of the same volume, right? thanks!
I’m a bit confused about the best software to use for this. Any recommendations, even general ones?
Thanks a million for this guide. Helped me sort out my flac library. All my albums sound so much better!
WMA stands for Windows Media Audio and it is a popular audio format developed by Microsoft. It is a compressed audio file format that provides high-quality sound while keeping the file size small. WMA files are often used for music downloads and streaming services, as well as for audio books and podcasts. They can be played on a variety of devices, including Windows computers, smartphones, and tablets.
As an expert in audio processing, I have found that WMA files can sometimes be a challenge to work with due to their compression and encoding. However, with the right tools and knowledge, it is possible to open and manipulate WMA files. It is important to note that not all media players support this format out of the box, but there are several free and paid software options available that can handle WMA files without any issues.
How to Open a WMA File
Opening a WMA file is a straightforward process, but it may require downloading and installing additional software. Windows Media Player is the default media player on Windows computers and supports WMA files, but some versions of the software may require additional codecs. Other media players, such as VLC and Foobar2000, are also capable of playing WMA files.
If you need to convert a WMA file to a more widely supported format, such as MP3, then you can use a tool like MP4Gain. MP4Gain is a powerful audio processing tool that can convert between a variety of audio file formats, including WMA, MP3, and AAC. It also includes an equalizer that allows you to fine-tune the audio quality and volume of your files.
Final Words
In conclusion, understanding what a WMA file is and how to open it can be essential for anyone working with digital audio. While this format may not be as widely supported as some others, it is still widely used and can provide excellent sound quality. Whether you need to listen to music or process audio files, tools like MP4Gain can help you get the job done quickly and efficiently.
Maximize Sound Quality: The Ultimate Mp3 Normalization Guide
Mp3 Normalizer
Let’s Learn About Mp3 Normalizer: An Overview
Mp3 Normalizer
Explanation of What Mp3 Normalization Is
Before diving into the specifics of Mp3 normalization, let’s take a moment to understand how sound works. Sound is a physical phenomenon that is created by vibrations that travel through a medium, such as air, and are picked up by our ears. Our ears then convert these vibrations into electrical signals that our brains interpret as sound.
When it comes to recording sound, we use microphones to capture these vibrations and convert them into an electrical signal that can be stored and played back. In the past, recordings were made on physical media, such as vinyl records or cassette tapes. Nowadays, however, most recordings are made digitally.
When sound is recorded digitally, it is captured as a series of numbers that represent the amplitude of the sound wave at different points in time. These numbers are then stored as a digital file, such as an Mp3. The amplitude of a sound wave determines its volume, with larger amplitudes producing louder sounds.
So, what is Mp3 normalization? In simple terms, Mp3 normalization is the process of adjusting the volume of an Mp3 file so that it plays at a consistent level. This can be achieved by adjusting the amplitude of the sound wave so that it does not exceed a certain level, known as the normalization level.
Importance of Normalizing Mp3 Files for Optimal Listening Experience
Now that we understand what Mp3 normalization is, let’s explore why it is important. Have you ever experienced the frustration of having to constantly adjust the volume while listening to music? Perhaps you turn up the volume to hear a quiet part of a song, only to be blasted by a loud part a few moments later.
By normalizing Mp3 files, we can avoid these volume fluctuations and ensure a consistent listening experience. Normalizing also helps to prevent distortion, which can occur when the volume of a sound wave is too high and clips the top or bottom of the waveform.
Brief Overview of the Benefits of Mp3 Normalization
Consistent volume levels for a better listening experience
Prevention of distortion
Ability to match the volume of different songs or recordings
In summary, Mp3 normalization is the process of adjusting the volume of an Mp3 file to ensure a consistent listening experience. It can help prevent volume fluctuations and distortion, and allows us to match the volume levels of different songs or recordings. In the following sections, we will explore Mp3 normalization in more detail and provide tips for achieving optimal results.
Before we dive into the different types of Mp3 normalization, it’s important to understand the basics of audio normalization. In essence, audio normalization refers to the process of adjusting the volume of an audio file to a standardized level, usually measured in decibels (dB).
One common method of measuring the level of an audio file is using root mean square (RMS) amplitude. RMS is a mathematical formula that calculates the average power of an audio signal. Essentially, RMS measures the amount of energy in an audio signal over a period of time, which helps determine the overall loudness of the audio file.
Decibels (dB) are another common unit of measurement for sound volume. Decibels are a logarithmic scale that measures the ratio between the sound pressure level of an audio signal and a reference level. This means that every 10 dB increase represents a tenfold increase in the sound pressure level. For example, an audio file with a volume level of 70 dB is ten times louder than an audio file with a volume level of 60 dB.
Another important unit of measurement for audio normalization is Loudness Units Relative to Full Scale (LUFS). Unlike decibels, which are based on the sound pressure level of an audio signal, LUFS measures the perceived loudness of an audio signal, taking into account the human ear’s sensitivity to different frequencies.
When it comes to normalizing audio, it’s important to measure the level of sound accurately. This is because different audio files can have different volume levels, and normalizing them to the same level ensures consistency and eliminates the need to adjust the volume manually when playing back a playlist of audio files.
Normalization is typically achieved through a process called gain adjustment, which involves increasing or decreasing the amplitude of an audio signal. This can be done manually or with the help of software. There are various types of normalization, such as peak normalization, RMS normalization, and true peak normalization, each with its own advantages and disadvantages.
Definition of Mp3 Normalization
Simply put, Mp3 normalization is the process of adjusting the volume of an Mp3 audio file to a standardized level. This is done to ensure consistency of volume levels across multiple audio files, particularly in cases where an Mp3 audio file has a different volume level than other files in a playlist or album.
How Mp3 Normalization Works
The process of Mp3 normalization typically involves analyzing the audio file to determine its peak level or RMS amplitude. This information is then used to adjust the volume of the audio file to a target level, usually measured in dB or LUFS.
One important thing to note is that Mp3 normalization is a lossy process. This means that the audio quality may be slightly reduced after normalization, particularly if the audio file is heavily compressed or if the normalization is performed at a high level. However, in most cases, the reduction in audio quality is negligible and the benefits of normalization outweigh the potential drawbacks.
Explanation of the Different Types of Normalization
There are several types of normalization that can be used for Mp3 audio files, each with its own advantages and disadvantages:
Peak normalization: This method adjusts the volume of an audio file so that its loudest peak is at a target level, usually 0 dB. However, this method doesn’t take into account the overall loudness of the file, so it may not be the most effective method for achieving consistency across multiple files.
RMS normalization: This method adjusts the volume of an audio file based on its RMS amplitude, which gives a more accurate measure of the file’s overall loudness. This method is generally considered to be more effective than peak normalization for achieving consistency across multiple files.
True peak normalization: This method takes into account inter-sample peaks, which can occur when digital audio is converted to an analog signal. By accounting for these peaks, true peak normalization can prevent clipping and distortion in the final output.
Advantages of Using Mp3 Normalization for Your Audio Files
Using Mp3 normalization has several advantages, including:
Consistency: Normalizing your audio files to a standardized level ensures that they will all have the same volume level, which can be particularly helpful when playing back a playlist or album.
Improved listening experience: When audio files are at a consistent volume level, listeners won’t need to constantly adjust the volume when switching between files.
Protection from clipping: Clipping occurs when an audio signal exceeds the maximum level that can be represented by the digital system. Mp3 normalization can help prevent clipping by reducing the overall volume of the audio file.
Better compression: Normalizing an audio file can improve its compression efficiency, resulting in a smaller file size without sacrificing quality.
Overall, Mp3 normalization is an effective way to ensure consistent volume levels across multiple audio files, resulting in a better listening experience for the audience. By understanding the different types of normalization and the units of measurement involved, audio professionals and enthusiasts can effectively optimize their audio files for various applications.
Normalization with Audio Compression
Normalization with audio compression is a method that combines normalization and audio compression to ensure that there are no passages of low volume. This method is commonly used in radio stations, television channels, and live concerts, where the aim is to make sure that all sounds, from the lead singer’s whisper to the sound of the drums, are clearly heard by the audience.
For example, let’s say you have an audio file of a live concert. The volume levels of the different instruments and vocals may vary throughout the recording. If you normalize the file without compression, the volume of the quieter parts may increase, but the louder parts may become too loud and distorted. However, by using audio compression, you can ensure that the volume of the entire recording is consistent and that no parts are too loud or too quiet.
Replay Gain
Replay Gain is a method of audio normalization that adjusts the volume levels of an audio file to a consistent level without altering the dynamic range. Unlike audio compression, Replay Gain does not compress or expand the audio’s dynamic range, which preserves the original sound quality of the recording.
Replay Gain analyzes the audio file’s volume levels and applies a gain adjustment to bring the overall volume to a specified target level. The adjustment is applied uniformly across the entire file, which helps to maintain the audio’s balance and clarity.
For example, if you have an audio file with a very quiet intro and a very loud chorus, Replay Gain will adjust the volume of the entire file to a target level, ensuring that the intro and chorus are both at an optimal volume level without distorting the dynamic range of the recording.
Replay Gain can be especially useful for creating consistent playback levels across different audio tracks in a playlist, as well as for reducing the need to constantly adjust the volume during playback.
Converting Audio and Video Formats
Mp4Gain can also be used as a format converter, allowing you to convert audio and video files from one format to another. This can be useful if you have a file that is not compatible with your media player or if you want to reduce the file size.
Extracting Audio from Video
If you have a video file with an audio track that you want to use separately, Mp4Gain can also extract the audio from the video file and save it as a separate audio file.
Common mistakes to avoid when normalizing audio files
When normalizing audio files, there are some common mistakes that you should avoid:
Normalization with too much audio compression: Too much audio compression can make your audio sound unnatural and distorted.
Normalization with too little audio compression: Too little audio compression may result in inconsistent volume levels and passages of low volume.
Normalization with incorrect settings: Make sure to choose the right normalization settings for your audio file to ensure optimal sound quality.
How to test your audio files after normalization to ensure optimal sound quality
After normalizing your audio files, it is important to test them to ensure optimal sound quality. You can do this by:
Listening to the file: Listen to the normalized filewith different audio devices, such as headphones, speakers, or car audio systems, to make sure it sounds good on all of them.
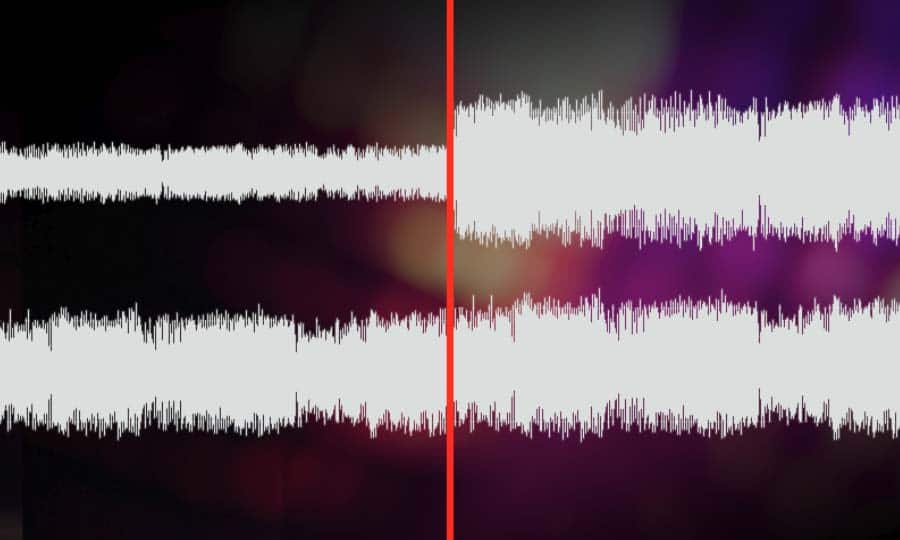
Checking the waveform: Use a waveform viewer to check the waveform of the normalized audio file. The waveform should be consistent and not have any clipping or distortion.
Comparing with the original file: Compare the normalized file with the original file to make sure that the changes made during normalization do not negatively affect the quality of the audio.
V. Conclusion
Mp4Gain is a versatile software that can help you improve the sound quality of your audio and video files. Whether you need to normalize the volume levels of your audio files, convert audio or video formats, or extract audio from video files, Mp4Gain has got you covered. With its user-friendly interface and powerful features, Mp4Gain is a great tool for anyone who wants to achieve optimal sound quality for their media files.
By using the tips and tricks mentioned in this article, you can ensure that your audio files are normalized correctly and sound great on any device. Remember to avoid common mistakes when normalizing
The Benefits of Mp3 Normalization: Final Thoughts
Overall, Mp3 normalization is an effective way to improve the quality of your audio files. By adjusting the volume levels to a consistent and optimal level, you can enhance the listening experience and avoid the need to constantly adjust the volume.
However, not all normalization software is created equal. While there are many options available, Mp4Gain is a modern normalizer that is designed to provide consistent, high-quality sound across a variety of devices and listening environments.
In today’s world, many people listen to music on their smartphones, tablets, and computers, often with headphones or earbuds. Additionally, many headphones have noise-cancelling features, while others do not. The headphones that cancel outside noise work by using a microphone to detect the sound waves and creating an opposite sound wave to cancel it out. This can affect the sound quality of the music and make it difficult to achieve consistent volume levels. Some headphones also have a frequency response curve that can make certain frequencies louder or quieter, which can also affect the sound quality of the music.
With Mp4Gain, you can rest assured that your music will sound great no matter where you listen to it. The software is designed to adjust the volume levels while maintaining the dynamic range of the original recording and taking into account the frequency response curve of the headphones, so that the music sounds just as good on a phone as it does on a high-end stereo system.
Whether you’re listening in a noisy environment or a quiet one, with or without noise-cancelling headphones, Mp4Gain’s normalization process will ensure that the sound is consistent and optimal. So why wait? Start normalizing your Mp3 files with Mp4Gain today and experience the difference in sound quality!
udio files, choose the right normalization settings, and test your files after normalization to ensure optimal sound quality.
Try out Mp4Gain today and experience the difference in sound quality for yourself!
Mp4Gain is a tool that will adjust the volume of an mp3 file so that the loudest and softest parts of the sound are more balanced.
The main advantage of an audio normalizer is that it can be used to make a song louder without clipping or distorting it. It achieves this by increasing the volume of softer sounds, which in turn makes louder sounds quieter.
An audio enhancer is a similar tool, but instead of balancing out the volume, it increases certain frequencies to make a song clearer and more pleasant to listen to.
Normalizing the volume of audio files is crucial for many reasons: it makes listening to music more pleasant, it increases the clarity of speech, and it can even help you sleep better.
Mp4Gain is an audio normalizer and volume booster. It can be used to automatically adjust the volume of all your music files so that they are at the same level.
Mp4Gain is an easy-to-use tool for adjusting the volume of all your music files to a uniform level. It does not need any technical knowledge, just drag and drop your music files into the program window and click “Normalize”.
Mp4Gain is an audio normalizer, it can help you to increase the volume of mp3 files. It can also be used as a volume booster or audio enhancer.
Normalizing the volume level of an mp3 is quite simple using Mp4Gaion, which also allows you to normalize the volume level of other audio and even video formats.
Convert audio and video files and normalize them?
It’s perfectly possible to do it with Mp4Gain, you can normalize audio or video files in all major formats simultaneously and get any format you need.
Mp3 normalize volume level software
The normalization of volume levels is something that has existed for many years.
This arose with the need to be able to get the different songs or files to have a similar volume level.
It really wasn’t necessary in the vinyl era, for a lot of reasons.
First of all, changing from one disc to another took time, enough so that I didn’t notice if there was any difference in volume level. Unlike any playlist of mp3s or any other format, which play one song after another and if there is a noticeable difference in volume level, we perceive it immediately.
We also have the fact, which is not minor, that the quality of audio playback today is much higher.
Today any device used to play an audio file has enormous capacity in terms of sound quality. Today we handle as a common thing to talk about sample rates of 44100 or 48000 frames per second or 192 and up to 320 kilobits, etc. In other words, we are already very familiar and we have at our fingertips the possibility of choosing options that directly affect not only the volume level but also the quality.
Mp4Gain is the most powerful and modern normalizer that can not only normalize audio in many formats, but can also normalize videos or extract audio from video and convert it to mp3 or any other format you want.
Normalization is used to increase or decrease the level of the song as a whole, so that its maximum volume peaks assume the indicated level.
For example, if the maximum intensity points of the song are at -3 dB (therefore, well below 0, which should represent the maximum before distortion), normalizing to 0 dB means increasing the level of the entire song so that these peaks reach 0 dB.
This is the typical normalization of the peaks.
There is also RMS normalization (which takes into account not the peaks, but the actual average level of the song).
AUDIO CDs, which have good dynamic possibilities (various intensity tones, from pianissimo to fortissimo), are generally recorded so that the maximum volume points are at 0 dB.
Normalizing your recordings in WAV can be useful to adapt them to the average level of a CD in case they are too low (because you had been careful in the level during the recording) but there is one important thing to keep in mind:
normalization of this type alters the original dynamics, that is, the reciprocal relationships between weak and strong sounds.
Although all levels are raised by the same amount, the relationship between 2 levels changes (small mathematical example:
2/5 = 0.4 ma (2 + 1) / (5 + 1) = 0.5 …
The result is that the weaker sounds, after sudden normalization, sound much louder and those that were already loud only sound a little louder … altering the dynamic relationships that had been envisioned by those who originally recorded the music and causing the sound output to lose depth.
Some types of music, generally already deficient dynamics (rock, metal, etc.) since the excursions between the minimum and maximum volume are almost never very consistent, are more “normalizable” without problems, while the genres in which there may be Large Dynamic excursions (classical music or music with passages from pianissimi to fortissimi) are more problematic.
Furthermore, it is necessary to keep in mind that if you normalize a large wav file that contains many songs (not yet divided) there can still be, even in genres with little dynamics, consistent differences, in this case between one song and another and not between different points of the same song.
So a light normalization can do and is actually used (to raise the level of the song), but it would be better to make sure you don’t need it (recording from the beginning with a good level) or at least not have too much need. and remember, however, that the dynamics are somewhat flattened.
Normalization of an mp4 or normalization of a video.
We are in the video age, it is said that 2,000 hours of video per minute are uploaded on YouTube.
HOWEVER, THERE IS NO OTHER SOFTWARE THAT IS ABLE TO NORMALIZE THE AUDIO OF THE VIDEOS !!
Mp4Gain is used by television channels throughout the world. Also by radio stations … even by some famous musicians, of whom we cannot give the name for reasons of confidence … but we are talking about musicians of global fame.
One of them is the guitarist of one of the groups that generates the most money on their world tours … or perhaps the one that generates the most money on their world tours. He uses Mp4Gain …
And so, many other celebrities are our clients. NBA players belonging to the legendary dream team, etc.
Much has been speculated about the bitrate. Most people do not understand clearly what it is. A few understand, but almost nobody knows if a file with 320 kbps really sounds different or better than the same file but with 128 kbps.
The easiest way is to test:
The first is at 128 kbps
Now let’s hear the 320 kbps option
Notice the difference? In case the note is because it was encoded using the Mp4Gain.
Normally it is almost impercentible, but using a good encoder you get to notice some subtle difference.
It should be taken into account that at higher kbps, if there is a higher quality – although it is not always noticeable – and will always use more disk space.
Therefore it is not the best option to say “all my mp3s will be 320 kbps”, unless the space does not mean any problem at all.
What it is and how to perform a volume normalization on your MP3
Have you ever heard the term audio normalization, without being sure of what it meant? As a lover of music and technology, I also encountered such a doubt many years ago. Basically, giving a short definition, it is about the standardization of the volume, or rather, of the audio spectrum with respect to other subjects, usually of the same disc.
And that, to put it more simply, is the equalization of the volume of the different tracks on a disc. The reasons are many, and usually if the tracks are extracted from the same job they already have the same volume and gain, but what happens if we want to make a mixtape? For example, we decided to make a compilation called The Best 100 Rock Songs in History. Surely have songs from The Beatles or The Rolling Stones, and therefore from different albums. Depending on the year, type of mastering, etc. etc., we can end up with a CD that contains many different volumes, something that can be annoying when listening. That is just one of the reasons to normalize our MP3 collection.
There are add-ons for players that allow us to normalize on the fly. In fact we can say that programs like Spotify already do this by means of the option to equalize volume of all the songs, however the application that I present below allows us to permanently normalize modifying MP3 files and many other formats, both audio and Of video..
This is Mp4Gain, which stands out for its simplicity of use and is presented under an interface that is ideal to understand exactly what a normalization is and see the before and after. When we open the application we find a window in which we have a grid, which will be populated when we add files or folders, and a keypad with various options.
How do we normalize? Simply change the gain through the specific menu for this.
By pressing OK the application will start working and save our files with the same gain, so it is ideal that before doing the first tests we make a backup. It must also be taken into account that it is an operation that can take time, something that depends on the speed of our processor, the number of issues to normalize and also the size and quality of them.


Comments:
Had a gig doing audio on vid sets and you helped clear things up for me tons! I’ll drop your knowledge now, thanks!
Spotify stuff was so key and useful!!! Getting my band’s tunes up and now it’s about dialing sound. Thank you!!!
Your tips are awesome since getting levels to sound right is so stressful to think through and make happen. High praises!!!
So it’s basically adjusting songs so I don’t blast my eardrums or strain to hear when making playlists, yes? Good way to think and go!
Any recommendations for a solid tool or plug-in here? I’m still struggling with all of it. Thanks for advice!
I make lots of content, the article helped me make the product. The community appreciates this.