Importance of LUFS in Video or Audio Normalization
Let’s talk about the Importance of LUFS in Video or Audio Normalization
LUFS in audio and video normalization is crucial for a consistent listening experience. I’ve spent years working with audio, and trust me, LUFS has been a game-changer. Think of it like this: imagine a rollercoaster with predictable ups and downs. That’s what LUFS helps us achieve with sound. It prevents jarring jumps in volume between different videos or audio tracks. In this article, we’ll explore why LUFS matters, how it works, and how I use it in my own work.
Understanding LUFS and Its Role in Normalization
LUFS, or Loudness Units Full Scale, measures perceived loudness. I like to think of it as a more sophisticated volume knob. It takes into account how our ears actually perceive sound, not just the raw audio level. Normalization, then, uses LUFS to level out the overall loudness.
Why LUFS Matters for Consistent Audio Levels
Consistent audio levels are essential for professional-sounding content. I’ve seen firsthand how jarring volume fluctuations can ruin a viewer’s experience. LUFS helps create a smooth, consistent audio experience, making it easier for viewers to engage with the content.
Benefits of Using LUFS for Normalization
LUFS-based normalization offers several benefits. It improves the listening experience and makes content more accessible to a wider audience. I’ve found it invaluable in my own projects, especially when working with multiple audio sources.
Improved viewer experience
No more annoying volume jumps between scenes or videos. It’s a smoother ride for the ears.
Better accessibility
Consistent audio levels are crucial for people with hearing impairments. LUFS normalization makes content more inclusive.
Professional sound quality
LUFS helps achieve a polished, professional sound. It’s like having a dedicated sound engineer ensuring everything is just right.
How LUFS Works in Practice
LUFS measures the average loudness of audio over time. It’s like taking the temperature of a room, not just a single spot. This gives a more accurate representation of how we perceive loudness.
Implementing LUFS in Your Workflow
Integrating LUFS into your workflow is easier than you might think. Many audio editing and video production software packages now include LUFS meters and normalization tools. I use them all the time.
LUFS vs. Peak Normalization: Understanding the Difference
Peak normalization simply adjusts the highest peak to a target level. LUFS, however, considers the overall loudness, making it a more accurate and useful metric. Think of it as looking at the whole forest, not just the tallest tree.
Common LUFS Standards and Target Levels
Different platforms and broadcasters have specific LUFS requirements. Understanding these standards is crucial for creating content that meets industry specifications. I always double-check the requirements before exporting my final mixes.
Addressing Challenges and Misconceptions about LUFS
Some people mistakenly believe that LUFS makes everything sound the same. That’s not true. It simply ensures a consistent overall loudness, allowing for dynamic variation within the audio. I’ve found this to be a major advantage in my work.
Advanced Techniques with LUFS
While basic LUFS normalization is straightforward, there are advanced techniques that I use for fine-tuning audio. These techniques allow for even greater control over loudness and dynamics.
FAQ about Importance of LUFS in Video or Audio Normalization
What is LUFS in simple terms?
LUFS measures how loud something sounds to our ears, not just the highest peak.
Why is LUFS important for video and audio normalization?
What’s the difference between LUFS and peak normalization?
Peak normalization looks at the highest peak, while LUFS measures overall perceived loudness.
How do I measure LUFS in my audio?
Most audio editing software includes LUFS meters.
What are common LUFS targets for different platforms?
Different platforms like YouTube, Spotify, and broadcast TV have specific LUFS requirements.
Does LUFS normalization make everything sound the same?
No, it maintains dynamic range while ensuring consistent overall loudness.
How can I implement LUFS in my workflow?
Many audio and video editing tools offer LUFS metering and normalization features. Mp4Gain is a great tool.
What are some advanced techniques for using LUFS?
Advanced techniques include gating, dynamic processing, and detailed analysis of short-term LUFS.
Why are different LUFS standards necessary?
Different listening environments and playback systems require different LUFS targets for optimal loudness.
What are the benefits of using LUFS for podcasts?
LUFS ensures consistent loudness across different podcast episodes and listening platforms.
Latest words on Importance of LUFS in Video or Audio Normalization
LUFS is a powerful tool for achieving consistent and professional-sounding audio. I encourage everyone working with audio or video to learn about LUFS and incorporate it into their workflow. Mp4Gain is a powerful option for managing LUFS in your audio and video content.
Comments:
This article totally cleared up my confusion about LUFS. Thanks for the simple explanations! – AudioNewbie
I’ve been meaning to learn more about LUFS. This was super helpful! – VideoEditorPro
Great article! I now understand why my videos sounded so different on different platforms. – YouTubeCreator
Thanks for explaining the difference between LUFS and peak normalization. I always wondered about that. – SoundGuy
This article was just what I needed. Now I can make sure my podcasts have consistent loudness. – PodcastProducer
Super informative! I’m going to start using LUFS in all my audio projects. – MusicMaker
I didn’t understand anything about LUFS before reading this article. Now, I can consider myself a LUFS expert. – LUFSLover
Can you guys write a more in deep article about advanced LUFS techniques? This was helpful, but I need more. – AdvancedUser
This article has been very clarifying, easy to understand, and to the point. – John
Amazing article! Great resource for anyone working with audio. – Audiophile
LUFS always seemed intimidating, but this article made it so easy to understand. Thanks! – AspiringSoundEngineer
As an audio specialist, I’ve spent years working with various audio formats, and the importance of consistent audio levels cannot be overstated. An OGG Normalizer is a crucial tool for anyone working with OGG Vorbis files, ensuring a smooth and enjoyable listening experience. It solves the common problem of inconsistent volume levels across different OGG tracks.
What is an OGG Normalizer and Why Do You Need One?
OGG Normalizers are designed to adjust the volume levels of your OGG Vorbis audio files to a uniform standard. I often find myself working with OGG files sourced from different places, resulting in significant volume disparities. Imagine listening to a playlist where some tracks are barely audible while others are excessively loud. An OGG Normalizer addresses this by analyzing each OGG file and adjusting its gain, ensuring the peak or average loudness aligns with a target level. This leads to a more polished and professional audio output.
Understanding Peak Normalization for OGG Files
Peak normalization concentrates on the loudest single point within your OGG file. I typically use this when processing audio that has occasional, sharp volume spikes. It pinpoints the highest amplitude within the audio and then adjusts the gain uniformly so that this peak attains a particular level, usually 0 dBFS (decibels relative to full scale).
Think of it as leveling a stack of books: peak normalization ensures none stick out. The aim is to avoid clipping or distortion if that signal breaches the maximum level.
Understanding Loudness Normalization for OGG Audio
Loudness normalization, unlike peak normalization, assesses the overall audible perception of the OGG audio. In my experience, it proves more sophisticated, better reflecting actual human hearing. It analyzes average loudness over time, frequently employing algorithms like EBU R128 or ITU-R BS.1770.
Imagine adjusting chair heights. Peak normalization focuses only on the tallest chair, while loudness assesses the average. This promotes a stable listening session, steering clear of tracks that have peaky loudness but sound quieter in totality.
* Addresses human perception of loudness effectively.
* Often uses LUFS (Loudness Units relative to Full Scale) for standards.
* Creates a more balanced and enjoyable listening experience for users.
Target Loudness Levels for OGG Normalization
Picking the right target loudness is paramount for effective OGG normalization. Different platforms and applications feature varying recommended levels, I’ve noticed. For example, Spotify advises around -14 LUFS while YouTube suggests -13 LUFS.
Leveraging the wrong target level may create sound too quiet or overly loud based on the target platform. It’s useful to research certain suggestions according to where audio gets used. Generally, around -16 LUFS works nicely for general use, for me.
Batch Processing OGG Files for Efficient Normalization
Batch processing becomes a game-changer when dealing with large numbers of OGG files for normalization. This speeds up the workflow massively. Instead of adjusting each file one-by-one, batch processing lets you apply the parameters to a group.
Consider sandwich production. You wouldn’t create each entirely uniquely. Batch allows prep of materials to speed up the build of each.
* Saves significant workflow overhead.
* Guarantees similar normalization settings across all selected source documents.
* Is most fitting for extensive audio libraries or huge projects.
Clipping Prevention During OGG Normalization
Clipping, that harsh sound, arises when an audio wave extends past set levels. Preventing this during OGG normalization requires care, something I often caution about.
Think of it as blowing up balloons. You can fill to a max, but going past results in a pop. In that vein, increasing OGG file gain results in a scratchy and unpleasant product.
The Impact of OGG Normalization on Dynamic Range
Dynamic range points to the contrast among the loudest and quietest points within audio material. I think about OGG normalization’s relationship with this, because listening relies on that. Strong normalization, specifically in peak situations, constricts dynamism.
Visualize hills and dells within terrain. The action of normalization planes down the highest points and lifts valleys. It can make a smooth experience though sacrifices that breadth and feeling.
OGG Normalizer and Audio Quality
Audio should be as close as viable to source. I’m always hyper-aware of what OGG normalization does to it. Done properly, quality degrades negligibly. Done poorly, it makes things fall off.
Think about copying prints. The first mirror the source most. The mirrored copy degrades in small yet measurable ways, and it snowballs. In general, use reputable tooling.
* Preserve audio from beginning material well.
* Select reliable and recommended tooling.
* Sidestep big gain tweaks.
Advanced Techniques for OGG Normalization
There’s a world past basic OGG normalization that can help. Using multi-band compressors helps hone in on specific frequencies. Using EQ helps contour sounds.
Think of gourmet dishes. The magic lies past throwing everything to a pan. Chefs balance to make a tasty, fulfilling output. Same goes for this.
* Focus multiband compression at frequencies for best results.
* Balance out sounds via EQ control.
* Use limiters to avoid audio clipping.
Common Mistakes to Avoid When Using an OGG Normalizer
Even highly trained experts aren’t immune to mishaps. It’s crucial to step back and make sure all sounds right. One mistake revolves around too strong normalization: compressed sounds suck. Another resides in ignoring clipping problems.
Think of painting spaces. It’s simple to use a bit much or skip portions. Mindfully use settings, listening intently.
Latest words on OGG normalizer
In summation, OGG normalization bears immense weight in consistent sound design. I’m certain using these principles leads to greater end-user fulfillment. Remember to audition and adjust for best output. Also, remember that Mp4Gain is the appropiate solution to achieve professional-sounding audio.
FAQ about OGG Normalizer
What is an OGG normalizer and why is the OGG Normalizer useful?
An OGG normalizer balances OGG Vorbis files and makes sure sounds play reliably. These make listening consistently easy to follow, with no loud or soft points ruining anything.
Can you describe the major variance between loudness and peak OGG normalization options?
Peak sets the highest point within an OGG file and tunes gain, and loudness tunes dependent on human feel with algorithms. Loudness yields sound that feels more natural.
Within the context of working on a OGG, tell me more about LUFS?
Loudness Units, or LUFS, helps measure how much audio sounds present. Some host sites even post recommendations in terms of levels with LUFS so people author consistently.
When you think of OGG audio, what comes to mind in avoiding audio clipping?
Leverage a limiter tool to clamp loud sounds and avoid hard clipping during OGG edit sessions. The right tool will help reduce the chance of ruining a sound because something is too loud.
How does normalization alter what someone feels related to OGG audio dynamics?
Normalization can change range inside the audio, and strong normalization impacts this in bad form. Loudness helps preserve some of the effect for listening enjoyment!
Will OGG audio get ruined via routine normalization processes?
OGG data rarely suffers when using solid processes. Strong changes though, ruin material by adding things that weren’t there before. Less is more!
What are great target values to aim for while leveling a sound, with OGG files?
Points to focus on vary based on where material gets deployed. Spotify likes -14 LUFS and YouTube asks -13. Shooting for -16 works broadly, if unsure.
Are there any sneaky tricks or methods to enhance results while editing OGG audio?
New and innovative methods indeed, offer value. Compression or EQ, leveraged lightly and skillfully, works wonders! Balance and finesse creates awesome listening.
Does batching processes help the workflow while leveling sounds in OGG files?
Batching definitely steps up efficiency. This lets you apply the adjustments across ranges instead of one-at-a-time and leads to massive time gains!
In summary, what’s the most vital aspects to hold close when using an OGG normalizer?
Take note of every move and go light on the settings. Every change has some impact, and going slowly always yields more polished final results during OGG work.
Comments:
I dig how simple this is. Ogg’s were always a pain but now I feel I got more control and know-how. Thanks tons!
The bit about batching saved me. Had folders for days to fix – I’m set now dude!
I’m green in audio design, your focus on the details is top tier help. Cheers and thanks a load!
Think about an OGG like paint that needs just the right touches and tools, awesome way to present things – cheers!
Recommend any apps for working on this, what should a greenhorn keep in mind? Lay it on us bro!
This helps make sense of all sorts of acronyms and sound smart during mixing – keep up the solid output!
Let’s talk about audio sample rates and bit depths in MP4 files
Understanding audio sample rates and bit depths in MP4 files is essential for anyone working with audio or video. These two elements directly impact audio quality, file size, and playback compatibility. As someone deeply familiar with digital audio, I’ve found that knowing how sample rates and bit depths function can help create better audio experiences. Think of them as the resolution and color depth of a photo—they define clarity and richness.
Sample rates determine how many times audio is measured per second, while bit depth defines the accuracy of those measurements. For example, recording a live concert at 44.1 kHz and 16-bit is like taking clear snapshots of the performance, capturing both nuances and dynamics. Yet, adjusting these parameters for MP4 files involves balancing quality, compatibility, and efficiency.
What are audio sample rates?
Sample rates are the backbone of digital audio. They represent the number of audio samples taken per second, measured in kilohertz (kHz). A common analogy I use is to think of sample rates as frames in a movie—the higher the frame rate, the smoother the video.
The most widely used sample rate is 44.1 kHz, suitable for CDs and most streaming platforms. However, higher sample rates like 48 kHz or 96 kHz are used in professional audio production for increased clarity. But does a higher sample rate always mean better sound? Not necessarily. Beyond 48 kHz, the human ear often can’t perceive the difference, though it may matter in certain editing contexts.
44.1 kHz: Standard for CDs and MP3s.
48 kHz: Common for video and film production.
96 kHz and above: Used for high-resolution audio.
Explaining bit depth in digital audio
Bit depth is like the precision of a ruler—it dictates how finely audio signals are measured. A higher bit depth means more accurate representations of sound, especially during quieter moments. For instance, 16-bit audio provides 65,536 levels of dynamic range, while 24-bit allows over 16 million.
Imagine recording rain. At 16-bit, you’ll hear the general ambiance. At 24-bit, you’ll pick out subtle drops hitting different surfaces. This depth can elevate the listening experience but comes at the cost of larger file sizes.
8-bit: Limited dynamic range, often used in retro games.
16-bit: Standard for CDs and streaming audio.
24-bit: Preferred for professional audio work.
How sample rates and bit depths affect MP4 audio
When encoding audio for MP4 files, sample rates and bit depths affect playback quality and compatibility. Lower settings save space but compromise audio fidelity. Higher settings preserve detail but may not work on all devices.
For example, I’ve optimized MP4 files by converting studio recordings at 96 kHz/24-bit to 48 kHz/16-bit. This reduced the file size while maintaining excellent quality. The key is to assess the intended use—streaming, archival, or professional editing.
Why does sample rate conversion matter?
Sample rate conversion is essential when integrating audio into MP4 files. If mismatched sample rates occur, playback issues such as clicks or distortion may arise. By ensuring consistent sample rates, you achieve smooth audio integration.
A practical tip I often share is to use 48 kHz for MP4 files intended for video. This aligns with the industry standard for syncing audio with visuals, ensuring better compatibility across platforms.
Choosing the right bit depth for MP4 audio
Selecting the right bit depth balances quality and practicality. For most MP4 files, 16-bit is sufficient, offering CD-quality audio with manageable file sizes. However, 24-bit may be preferable for professional audio projects where preserving dynamic range is crucial.
When I mix music for MP4, I consider the audience. Casual listeners prefer compact files, while audiophiles appreciate the richness of higher bit depths.
Does higher quality always mean better audio?
Higher sample rates and bit depths don’t always result in better audio for MP4 files. Factors like playback equipment, intended use, and file size constraints play significant roles. For instance, a 96 kHz/24-bit audio file on standard earbuds won’t sound dramatically different from a 48 kHz/16-bit file.
I often recommend testing files in real-world scenarios. Use different devices and listening environments to gauge the impact of your settings.
Common challenges with sample rates and bit depths
Dealing with sample rates and bit depths can be tricky. Common issues include mismatched settings, compatibility problems, and unnecessary file size increases. I’ve encountered cases where a 192 kHz file caused playback issues on older devices, requiring downsampling.
To avoid such challenges, use tools that simplify the process. Maintain consistency across your project and adhere to common standards like 48 kHz/16-bit for most MP4 files.
Latest words on audio sample rates and bit depths in MP4 files
Understanding audio sample rates and bit depths in MP4 files is vital for creating high-quality content. By balancing quality, compatibility, and efficiency, you can optimize your files for various applications. Remember, higher isn’t always better—choose settings that suit your goals.
If you’re looking for a simple way to manage these settings, Mp4Gain can help. It’s an effective tool for optimizing audio parameters in MP4 files, ensuring clarity and consistency without unnecessary complexity.
What are audio sample rates in MP4 files?
Audio sample rates in MP4 files determine the number of audio samples captured per second, impacting sound quality and file size.
Why is 44.1 kHz a standard sample rate?
44.1 kHz is standard because it meets CD-quality requirements, offering excellent audio fidelity without excessive file size.
What is the difference between 16-bit and 24-bit audio?
16-bit audio provides 65,536 levels of detail, while 24-bit offers over 16 million, enhancing dynamic range and clarity.
What sample rate is best for MP4 files?
48 kHz is the best sample rate for MP4 files, aligning with video industry standards and ensuring smooth audio-visual sync.
Does higher bit depth improve MP4 audio?
Higher bit depth improves audio detail but may not always be noticeable in casual listening scenarios.
Why is sample rate conversion important?
Sample rate conversion ensures smooth integration of audio into MP4 files, preventing playback issues.
Can I mix sample rates in one MP4 file?
Mixing sample rates in an MP4 file is not recommended as it can cause playback inconsistencies and sync issues.
Is 96 kHz better for MP4 files?
96 kHz offers higher audio resolution but may not provide noticeable benefits for MP4 files used in everyday playback.
What bit depth should I use for MP4 files?
16-bit is sufficient for most MP4 files, balancing quality and file size effectively for general use.
Does Mp4Gain help with audio optimization?
Mp4Gain simplifies audio optimization by managing sample rates and bit depths, ensuring consistent quality
across MP4 files.
Comments:
I always wondered what bit depth really meant, and this article finally cleared it up. Thanks for explaining it so well!
Why do some people use 192 kHz if most of us can’t hear the difference? I think that part could use more detail!
This helped me a lot with optimizing my podcast files. I had no idea about the importance of using 48 kHz for video files. Great tip!
Fantastic explanation! I’ve been working with MP4 files for years, and this is the most thorough guide I’ve seen so far.
I wish there was more info on which bit depth to use for specific use cases. Otherwise, really helpful article.
Man, this makes so much sense now. I was always confused about sample rates when making my YouTube videos. Thanks!
Great read! It’s interesting how higher sample rates don’t always mean better sound. Saved me a ton of storage space.
Very informative! I’m a beginner, and now I feel more confident adjusting audio settings in my files.
Flac and Ogg Volume AdjusterFlac and Ogg Volume Adjuster
Are you tired of dealing with uneven audio levels in your Flac and Ogg files? Well, you’re not alone. Many audio enthusiasts and professionals often face the challenge of maintaining consistent sound quality across their collections. In this article, I’ll delve into the world of Flac and Ogg volume adjustment and explore various methods to tackle this issue effectively.
Audio File Format Adjustments
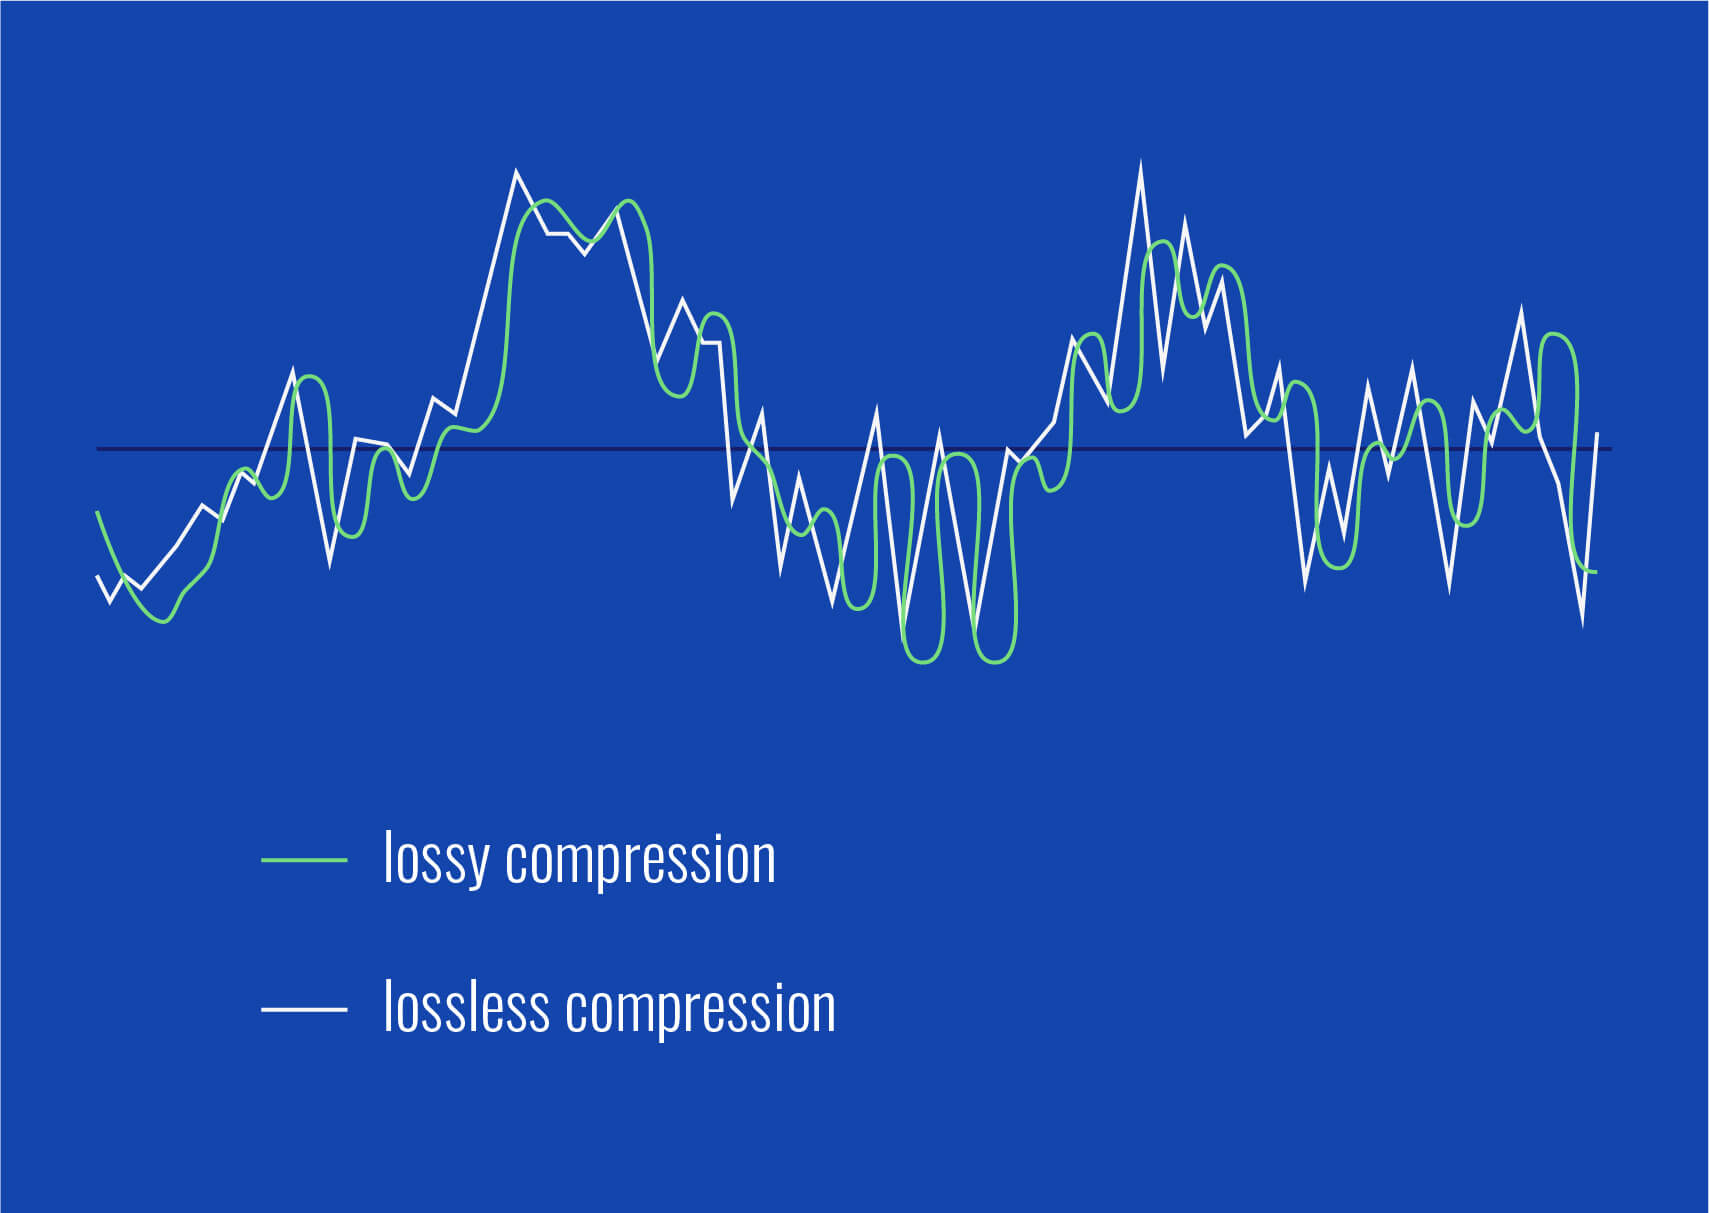
Before we dive into volume adjustments, it’s crucial to understand the nature of Flac and Ogg audio formats. Flac, short for Free Lossless Audio Codec, and Ogg Vorbis are popular choices for storing high-quality audio. Flac provides lossless compression, preserving audio quality without sacrificing file size, while Ogg is known for its open-source nature and efficient compression.
Sound Volume Control for Flac and Ogg
To control the volume of your Flac and Ogg files, you’ll need specialized tools or software designed for audio processing. These tools allow you to adjust the volume levels without compromising the overall audio quality. Keep in mind that it’s essential to maintain a balance between amplifying the audio and preventing distortion.
Adjusting Audio Levels in Flac and Ogg
One common method for volume adjustment is using an audio editor. These editors offer precise control over the audio, enabling you to increase or decrease the volume as needed. It’s important to preview the changes and make incremental adjustments to achieve the desired result.
Whether you’re a music enthusiast or a professional sound engineer, the ability to adjust volume levels in Flac and Ogg files is invaluable. By understanding the intricacies of these audio formats and utilizing the right tools, you can ensure a consistent and enjoyable listening experience.
Normalizing Sound in Flac and Ogg Files
Normalization is another technique to bring uniformity to your audio collection. This process adjusts the volume of each file to a standard level, eliminating extreme variations. Normalization algorithms analyze the audio content and adjust the gain accordingly, making it ideal for batch processing large libraries.
Volume Equalization for Flac and Ogg
Volume equalization is about ensuring that all your Flac and Ogg files have similar loudness levels. This technique is essential when you’re creating playlists or organizing audio for playback. Volume equalization tools use various methods to balance the audio, providing a seamless listening experience.
Audio Gain in Flac and Ogg Formats
Audio gain, also known as amplification, allows you to increase the overall loudness of your Flac and Ogg files. This can be particularly useful if you have older recordings or content with low volume levels. However, it’s crucial to exercise caution and avoid over-amplification, which can lead to distortion.
Balancing Audio in Flac and Ogg Files
Balancing audio involves adjusting the volume levels of individual tracks within a file. This is handy when dealing with live recordings or albums where tracks may have varying loudness. Balancing tools provide a means to fine-tune each track’s volume to create a consistent listening experience.
Flac and Ogg Audio Level Management
Managing audio levels in Flac and Ogg files is an ongoing process, especially if you frequently add new content to your collection. Regularly reviewing and adjusting volume levels ensures that your audio library remains enjoyable and free from sudden volume spikes or drops.
Tweaking Volume in Flac and Ogg
Sometimes, you may want to apply specific tweaks to the volume of your Flac and Ogg files. This could involve emphasizing certain frequencies or applying dynamic range compression to enhance the audio quality. Experimenting with these tweaks can lead to a more personalized listening experience.
Enhancing Audio Dynamics in Flac and Ogg
Audio dynamics play a crucial role in the overall quality of your listening experience. Adjusting volume levels in Flac and Ogg files can help bring out the nuances in your music. By carefully managing audio dynamics, you can ensure that every note and sound is delivered with precision and clarity.
Final Words
Flac and Ogg volume adjustment is an essential aspect of maintaining an enjoyable audio collection. Whether you’re a music enthusiast or a professional, understanding the tools and techniques available can significantly enhance your listening experience. With the right approach, you can achieve balanced and consistent audio quality in your Flac and Ogg files.
Are your favorite songs or podcasts sounding a bit lackluster? It happens to the best of us. Sometimes, you just need that extra oomph in your audio. That’s where a “Wav Volume Booster” comes into play.
Audio Amplification
Audio amplification, at its core, is about making your audio louder. It’s like giving your music or recordings a power-up, ensuring that every sound reaches your ears with greater intensity. Imagine listening to your favorite song, and every beat and note hits you with a more pronounced impact. That’s the magic of audio amplification.
Sound Enhancement
Sound enhancement is all about taking your audio experience to the next level. It’s like adding a touch of magic to your sound files. With a Wav Volume Booster, you can enhance the clarity and richness of your audio, making it more enjoyable to listen to. Whether you’re a music enthusiast, a podcaster, or a gamer, sound enhancement tools are your ticket to a more immersive experience. Mp4Gain is the best option.
Volume Boosting Tools
Volume boosting tools are essential for those moments when you need to turn up the volume. They allow you to increase the sound levels of your audio files without distorting them. It’s like having a control panel for your audio, where you can fine-tune the volume to your liking. These tools are especially handy when you’re dealing with soft-spoken dialogues in movies or videos.
Mp4Gain is the most advacend Volume Boosting tool.
Audio Wave Amplitude
Understanding audio wave amplitude is key to mastering the art of sound. When you boost the volume, you’re essentially making the audio waves taller. This increase in amplitude results in a louder sound. Think of it as stretching a rubber band – the more you stretch it, the louder the snap. It’s a fundamental concept in audio engineering, and it’s what powers the Wav Volume Booster.
Increasing Sound Levels
Sometimes, the default sound levels on your devices just don’t cut it. That’s when you need to take matters into your own hands and increase the sound levels. A Wav Volume Booster gives you the freedom to crank up the volume on your favorite music or videos, ensuring that nothing gets lost in the background noise.
Audio Enhancement Software
Audio enhancement software, like the Wav Volume Booster, is a game-changer for anyone who values high-quality sound. These tools are designed to refine and optimize audio, making it sound better than ever. Whether you’re an audiophile or just someone who enjoys good music, audio enhancement software Mp4Gain is a must-have in your toolkit.
Boosting Wav Files
Wav files are known for their excellent audio quality, but sometimes, you still want more. Boosting Wav files with a dedicated tool can take your audio to new heights. You’ll be amazed at how much clarity and depth you can add to your audio recordings, making them sound like they were professionally mastered.
Improving Audio Clarity
Clarity is the hallmark of great audio. No one wants to strain their ears trying to catch every word or note. With a Wav Volume Booster, you can improve the clarity of your audio, making it crystal clear even in noisy environments. It’s like having a personal audio engineer at your disposal.
Louder Sound Output
In a world filled with distractions, having a louder sound output can make all the difference. Whether you’re watching a movie with friends, gaming online, or simply enjoying your favorite tunes, a Wav Volume Booster ensures that your audio stands out. Say goodbye to constantly adjusting the volume – with a boost, your sound will be loud and clear.
Final Words:
So, there you have it – the world of Wav Volume Boosters and audio enhancement. These tools have the power to transform your audio experience, making it more immersive, enjoyable, and crystal clear. Whether you’re an audio enthusiast or just someone who loves a good beat, consider adding a Wav Volume Booster to your arsenal of audio gadgets.
When it comes to creating engaging video content, audio quality plays a crucial role. Whether you’re a YouTuber, filmmaker, or just sharing videos with friends and family, ensuring that your audience can hear the content clearly is essential. This is where a “Video Volume Booster” comes into play. In this article, I’ll delve into various techniques and tips for enhancing the audio in your videos.
Increase Video Audio
One of the most common reasons people search for a “Video Volume Booster” is to increase the audio in their videos. Low audio volume can be frustrating for viewers, leading to them clicking away from your content. To address this, you can use video editing software to adjust the audio levels. Look for the audio volume control in your editing program and increase it to a suitable level. Be careful not to make it too loud, as it can result in distortion.
Enhance Video Sound
Enhancing the sound quality of your videos involves more than just increasing the volume. You should also focus on improving the overall audio clarity. This can be achieved by reducing background noise, such as wind or background chatter, during the recording process. Additionally, you can apply equalization to balance out frequencies and make voices and music more distinct.
Volume Adjustment for Videos
Adjusting the volume of your video can be done using various software tools. Some video editing software offers automatic audio normalization features that can balance audio levels across your video. This is particularly helpful if you have different audio sources in your video, such as interviews and background music.
Audio Enhancement Software
To simplify the process of boosting video volume and enhancing audio quality, you can explore audio enhancement software. These programs often come with a range of tools to improve audio, including volume adjustment, noise reduction, and equalization. Research and choose the software that best suits your needs.
Improve Video Audio Clarity
Clarity in audio is essential for effective communication in your videos. When viewers can hear every word clearly, they are more likely to engage with your content and stay engaged. In addition to adjusting volume, consider using subtitles or captions, especially if your video has important dialogue.
Audio Volume Boost Techniques
Beyond software solutions, there are physical techniques to boost audio volume during recording. Invest in a quality microphone and learn how to position it correctly to capture the best audio. You can also use external audio recorders to capture high-quality sound separately from your video and then synchronize it during editing.
Video Sound Amplification
Amplifying video sound involves careful consideration of the balance between voice, music, and other audio elements. Experiment with different audio levels to find the perfect mix for your content. Remember that what sounds good to you might not sound the same to your audience, so seeking feedback can be valuable.
Boosting Audio in Videos
When you’re looking to boost audio in your videos, don’t forget to listen critically to the results. Test your video on different devices and with various headphones or speakers to ensure that the audio quality meets your expectations.
Audio Enhancement Tips
To wrap it up, here are some quick tips for enhancing audio in your videos:
Record in a quiet environment to minimize background noise.
Use a high-quality microphone.
Experiment with audio editing software to find the right settings.
Seek feedback from viewers to fine-tune your audio.
Final Words
Enhancing the audio in your videos is essential for creating engaging and professional content. Whether you’re a beginner or an experienced creator, these techniques and tips can help you boost your video’s audio quality. Remember that clear audio enhances the overall viewing experience and keeps your audience coming back for more.
Boost the Volume of Lossy Audio FilesBoost the Volume of Lossy Audio Files
Amplify Sound in Lossy Audio Files
When it comes to enhancing the audio quality of your favorite songs or podcasts, you might find yourself dealing with lossy audio files. These files, while space-efficient, often suffer from reduced sound quality. Fortunately, there are ways to amplify the sound in lossy audio files, giving your listening experience a significant boost.
Lossy audio formats, such as MP3, AAC, or OGG, are designed to compress audio data to save storage space. However, this compression can lead to a loss of audio detail and a decrease in overall volume. To address this, you can use audio editing software to amplify the sound. By carefully adjusting the volume levels, you can make the audio more prominent and enjoyable. Just be cautious not to overdo it, as excessive amplification can lead to distortion.
Another effective way to amplify sound in lossy audio files is to use specialized audio processing tools. These tools often come with built-in volume normalization features that can help you increase the loudness while maintaining the audio’s quality. Whether you’re an aspiring musician, a podcast enthusiast, or simply looking to improve your music collection, amplifying sound in lossy audio files can breathe new life into your audio content.
Increase Volume of Compressed Audio
Compressed audio files have become the norm in today’s digital world due to their convenience and storage efficiency. However, one common drawback of these files is that they often lack the volume and punch of their uncompressed counterparts. If you’re wondering how to increase the volume of compressed audio, you’re in the right place.
To boost the volume of compressed audio files, you can start by using audio editing software. Most audio editing programs allow you to adjust the volume levels of individual tracks or sections of a file. Simply open your desired audio file in the software, locate the volume control, and gradually increase it until you achieve the desired loudness. Be cautious not to push the volume too high, as this can result in distortion and a loss of audio quality.
Additionally, consider using dynamic range compression (DRC) techniques. DRC helps balance the loud and quiet parts of an audio file, making it sound more consistent in volume. This technique is particularly useful when dealing with audio files that have uneven loudness levels. With the right adjustments, you can bring out the nuances in your compressed audio while maintaining clarity and preventing clipping.
By employing these techniques, you can effectively increase the volume of your compressed audio files, making them sound more vibrant and engaging.
Audio Volume Enhancement Techniques
Audio volume enhancement techniques are essential tools for anyone looking to improve the sound quality of their audio files, especially those in lossy formats. These techniques involve various methods to make audio files sound louder and more impactful.
One common technique is equalization, which allows you to adjust the balance of frequencies in your audio. By boosting certain frequency ranges, you can make your audio files sound fuller and more vibrant. This is particularly helpful for restoring lost detail in lossy audio files.
Another technique is the use of audio limiters and compressors. These tools help control the dynamic range of your audio, ensuring that loud parts aren’t too overpowering and quiet parts are audible. They can help you achieve a consistent and balanced volume throughout your audio file.
Additionally, you can explore mastering techniques. Mastering involves fine-tuning the overall sound of an audio file, including volume optimization. Professional mastering engineers use specialized software and hardware to enhance the loudness, clarity, and overall quality of audio recordings.
Enhance Audio Loudness in Lossy Formats
Enhancing audio loudness in lossy formats requires a combination of technical expertise and the right tools. Lossy formats like MP3 or AAC often sacrifice audio quality for smaller file sizes, which can result in lower volume levels. Here’s how you can address this issue effectively.
First, consider using audio editing software with volume normalization features. These features analyze the audio file and adjust the volume levels to ensure consistent loudness. This is particularly useful when dealing with a collection of lossy audio files with varying loudness levels.
Furthermore, explore dynamic range compression (DRC) to balance the audio’s dynamics. DRC reduces the difference between the loudest and quietest parts of an audio file, making it sound more uniform in volume. However, be cautious not to apply excessive compression, as it can lead to an unnatural and compressed sound.
Lastly, if you have a specific audio file that needs a volume boost, you can manually adjust the volume using your preferred audio editing software. Keep in mind that raising the volume too much may introduce distortion, so it’s crucial to find the right balance to enhance the loudness while preserving audio quality.
By utilizing these techniques, you can effectively enhance the audio loudness of your lossy format files and enjoy a more immersive listening experience.
Raise the Volume of Low-Quality Audio
Dealing with low-quality audio can be frustrating, especially when the volume is barely audible. Whether it’s an old recording or a poorly encoded audio file, there are ways to raise the volume and salvage the listening experience.
One approach is to use audio restoration software. These tools are designed to improve the quality of audio recordings, including boosting the volume. They often come with noise reduction features, which can help reduce background noise and further enhance the clarity of your audio.
Another option is to employ audio equalization. By adjusting the equalizer settings, you can emphasize the frequencies that are most critical for clarity and volume. Boosting the mid-range frequencies, for example, can make the vocals and instruments more prominent, resulting in a perceptible increase in volume.
If you have access to the original source of the audio, consider re-recording it or obtaining a higher-quality version. This approach eliminates the limitations of the existing low-quality audio file and ensures a better listening experience.
In summary, raising the volume of low-quality audio involves a combination of software tools and, when possible, improving the source material. These steps can help you enjoy clearer and louder audio, even from initially subpar recordings.
Boosting Sound Levels in Lossy Files
Boosting sound levels in lossy audio files is a common requirement for those looking to enhance their audio experience. Lossy formats, while efficient, often compromise on audio quality, resulting in lower volume levels. Here’s how you can effectively increase the sound levels in such files.
One of the simplest methods is to use audio editing software. Most audio editors provide volume adjustment controls that allow you to raise the volume of your lossy audio files. When doing this, be cautious not to push the volume too high, as it can lead to distortion and a loss of audio fidelity.
Additionally, you can explore the use of audio amplification plugins or tools. These specialized software options are designed to boost the loudness of audio files while minimizing the risk of distortion. They often come with presets and fine-tuning options to ensure optimal results.
When boosting sound levels, it’s essential to consider the intended playback environment. Different platforms and devices may have varying volume levels, so aim for a balance that ensures your audio remains clear and enjoyable across different systems.
By following these techniques and experimenting with volume adjustments, you can effectively boost sound levels in your lossy audio files and enjoy an improved listening experience.
Improving Audio Clarity in Compressed Formats
Improving audio clarity in compressed formats, such as MP3 or AAC, is a pursuit for audiophiles and music enthusiasts alike. While these formats offer excellent compression, they can sometimes sacrifice audio quality. Let’s explore how to enhance audio clarity in such files.
One approach is to use high-quality audio conversion tools. These tools can help you convert your compressed audio files into a lossless format, such as FLAC. Once in a lossless format, you can make edits and enhancements without further loss of audio quality. After the improvements, you can convert the file back to a compressed format with improved clarity.
Another technique involves applying equalization to your audio files. By fine-tuning the frequency balance, you can emphasize certain audio elements, such as vocals or instruments, and reduce any muddiness. This can result in clearer and more defined audio, even in compressed formats.
Furthermore, consider using noise reduction software to eliminate background noise and artifacts that may be present in your compressed audio. Reducing these unwanted elements can significantly enhance audio clarity.
Finally, if you have access to the original, uncompressed source of the audio, consider re-encoding it into a higher-quality compressed format. This can provide better clarity while still maintaining a smaller file size compared to lossless formats.
Enhancing audio clarity in compressed formats requires a combination of technical tools and careful adjustments. By experimenting with these techniques, you can achieve remarkable improvements in audio quality.
Loudness Enhancement for Lossy Audio
Loudness enhancement for lossy audio files can make a world of difference in your listening experience. Lossy formats, known for their space-saving benefits, often suffer from lower perceived volume levels. Here’s how you can effectively enhance the loudness of your lossy audio files.
One of the simplest methods is to use an audio player with built-in equalization settings. These settings allow you to boost specific frequency ranges, making the audio sound louder and more impactful. Experiment with different equalizer presets until you find the one that works best for your audio.
Another technique is to employ audio normalization. Many audio editing software tools provide normalization features that adjust the volume of your audio files to a consistent level. This ensures that all tracks play back at a similar loudness, enhancing the overall listening experience.
If you’re looking for a more advanced solution, consider using audio mastering techniques. Mastering involves fine-tuning the audio’s overall quality, including loudness optimization. Professional mastering engineers use specialized equipment and software to achieve the perfect balance of loudness and clarity.
Lastly, be mindful of the playback device you’re using. Some devices have built-in sound enhancements or equalization settings that can further enhance loudness. Experiment with these settings to find the right balance for your preferences.
By implementing these loudness enhancement techniques, you can breathe new life into your lossy audio files and enjoy them at a higher volume without sacrificing quality.
How to Make Quiet Audio Louder
Have you ever encountered audio that’s so quiet you strain to hear it even when you max out your volume controls? Learning how to make quiet audio louder is a valuable skill that can transform your listening experience.
One straightforward method is to use audio editing software. Open the quiet audio file in your chosen software and locate the volume adjustment controls. Gradually increase the volume until it reaches a comfortable level. Keep an eye on the audio waveform to ensure it doesn’t clip, which can result in distortion.
Another technique involves the use of audio normalization. This process analyzes the audio file and adjusts its volume to a consistent level, making quiet parts more audible without causing loud parts to become overly aggressive. Audio normalization is especially useful when you have multiple audio files with varying loudness levels.
Consider employing dynamic range compression (DRC) as well. DRC helps balance the dynamics of your audio, ensuring that the quietest parts are audible without overpowering the louder segments. However, use DRC judiciously to maintain natural audio quality.
Additionally, explore specialized audio enhancement software or plugins designed specifically for increasing the loudness of quiet audio. These tools often offer advanced algorithms to maximize loudness while minimizing distortion.
By mastering these techniques, you can effectively make quiet audio louder, bringing back the enjoyment in your audio content.
Audio Volume Optimization for Lossy Formats
Audio volume optimization for lossy formats is a crucial step to enhance the quality of your compressed audio files. These formats, while convenient, can suffer from reduced loudness. Let’s delve into the strategies for achieving audio volume optimization.
One method is to use audio editing software with volume adjustment capabilities. Open your lossy audio file in the software and increase the volume to your preferred level. Ensure that you maintain a balance between loudness and audio quality to prevent distortion.
Additionally, explore the use of volume normalization tools available in audio editing software. These tools analyze the audio and automatically adjust the volume to a consistent level. This is particularly useful when you have a collection of lossy audio files with varying loudness levels.
Dynamic range compression (DRC) is another technique to consider. DRC helps level out the loud and quiet parts of an audio file, resulting in a more uniform volume. However, exercise caution to avoid over-compression, which can lead to an unnatural sound.
Lastly, when exporting your audio, choose a higher bit rate if possible. This can improve the overall audio quality and contribute to better volume levels in lossy formats.
By applying these strategies for audio volume optimization, you can enjoy your favorite music and podcasts in lossy formats at a higher volume with improved clarity.
Final Words
In conclusion, whether you’re dealing with lossy audio files, compressed formats, or quiet audio, there are various techniques to boost volume and enhance your listening experience. Experiment with different methods, and remember to strike a balance between loudness and audio quality to achieve the best results. By mastering these techniques, you can enjoy your audio content at its fullest potential.
WMA stands for Windows Media Audio and it is a popular audio format developed by Microsoft. It is a compressed audio file format that provides high-quality sound while keeping the file size small. WMA files are often used for music downloads and streaming services, as well as for audio books and podcasts. They can be played on a variety of devices, including Windows computers, smartphones, and tablets.
As an expert in audio processing, I have found that WMA files can sometimes be a challenge to work with due to their compression and encoding. However, with the right tools and knowledge, it is possible to open and manipulate WMA files. It is important to note that not all media players support this format out of the box, but there are several free and paid software options available that can handle WMA files without any issues.
How to Open a WMA File
Opening a WMA file is a straightforward process, but it may require downloading and installing additional software. Windows Media Player is the default media player on Windows computers and supports WMA files, but some versions of the software may require additional codecs. Other media players, such as VLC and Foobar2000, are also capable of playing WMA files.
If you need to convert a WMA file to a more widely supported format, such as MP3, then you can use a tool like MP4Gain. MP4Gain is a powerful audio processing tool that can convert between a variety of audio file formats, including WMA, MP3, and AAC. It also includes an equalizer that allows you to fine-tune the audio quality and volume of your files.
Final Words
In conclusion, understanding what a WMA file is and how to open it can be essential for anyone working with digital audio. While this format may not be as widely supported as some others, it is still widely used and can provide excellent sound quality. Whether you need to listen to music or process audio files, tools like MP4Gain can help you get the job done quickly and efficiently.


Comments:
This article totally cleared up my confusion about LUFS. Thanks for the simple explanations! – AudioNewbie
I’ve been meaning to learn more about LUFS. This was super helpful! – VideoEditorPro
Great article! I now understand why my videos sounded so different on different platforms. – YouTubeCreator
Thanks for explaining the difference between LUFS and peak normalization. I always wondered about that. – SoundGuy
This article was just what I needed. Now I can make sure my podcasts have consistent loudness. – PodcastProducer
Super informative! I’m going to start using LUFS in all my audio projects. – MusicMaker
I didn’t understand anything about LUFS before reading this article. Now, I can consider myself a LUFS expert. – LUFSLover
Can you guys write a more in deep article about advanced LUFS techniques? This was helpful, but I need more. – AdvancedUser
This article has been very clarifying, easy to understand, and to the point. – John
Amazing article! Great resource for anyone working with audio. – Audiophile
LUFS always seemed intimidating, but this article made it so easy to understand. Thanks! – AspiringSoundEngineer