Sound leveling is like having a perfect balance on a seesaw. In my years working with audio, I’ve seen firsthand how jarring uneven audio can be. Think about listening to a music album where one song is whisper-quiet and the next blasts your eardrums. That’s where sound leveling comes in. It creates a consistent listening experience, so you don’t have to constantly fiddle with the volume. Sound leveling smooths out the sonic rollercoaster, making everything a pleasant and predictable ride.
Why Sound Leveling Matters
Sound leveling is crucial for a smooth and enjoyable listening experience. It’s the difference between a bumpy dirt road and a freshly paved highway for your ears. I’ve used it to create professional-sounding podcasts, even out audio in home movies, and make music compilations flow seamlessly.
How Sound Leveling Works
Sound leveling analyzes audio and adjusts the volume to achieve a consistent target loudness. Think of it as a sculptor chipping away at a block of stone (the audio) to create a smooth, even surface (consistent volume).
Peak Normalization
Peak normalization adjusts the audio so the loudest peak reaches a target level. It’s like trimming the tallest branches of a tree to make it a uniform height.
Loudness Normalization
Loudness normalization considers the perceived loudness of the audio, not just the peaks. This method takes into account how our ears perceive sound, resulting in a more natural and balanced result. I find this particularly useful for dialogue-heavy content, ensuring voices are always clear.
Different Sound Leveling Techniques
There are several ways to achieve sound leveling, each with its advantages and disadvantages. Over the years, I’ve experimented with various methods, and each has its place depending on the type of audio.
ReplayGain
ReplayGain is a standard that embeds metadata in audio files to inform players how to adjust the volume. It’s like attaching instructions to a piece of furniture for easy assembly.
Normalization
Normalization is a process that adjusts the overall gain of an audio file. It’s similar to adjusting the brightness of a photo to achieve a consistent look.
Compression
Compression reduces the dynamic range, making quieter parts louder and louder parts quieter. Think of it as squeezing a sponge – the overall size changes, but the shape becomes more uniform.
Sound Leveling in Different Media
Sound leveling plays a vital role in various media, from music and movies to podcasts and broadcasts. I’ve worked on projects across these mediums, and consistent sound levels are always key.
Music
Sound leveling ensures consistent volume across tracks on an album.
Movies and TV
It balances dialogue, music, and sound effects for a cohesive experience.
Podcasts and Broadcasts
Sound leveling creates a professional and engaging listening experience.
Benefits of Sound Leveling
Sound leveling offers numerous benefits, from a more enjoyable listening experience to increased accessibility and professional-sounding results. I’ve seen it transform messy audio projects into polished, professional pieces.
Consistent Volume
No more sudden jumps in volume or quiet passages.
Improved Clarity
Dialogue and other important sounds become more distinct.
Enhanced Accessibility
Sound leveling can make audio easier to understand for people with hearing impairments.
Common Sound Leveling Mistakes
While sound leveling is a powerful tool, there are some common pitfalls to avoid. I’ve learned these through experience, and avoiding them can significantly improve your results.
Over-Compression
Over-compressing audio can make it sound flat and lifeless. It’s like over-mixing a cake batter – it loses its texture and becomes dense.
Ignoring Perceived Loudness
Focusing solely on peak levels can result in an unnatural and unbalanced sound.
Incorrect Target Levels
Choosing the wrong target level can lead to either too quiet or too loud audio.
FAQ about Sound Leveling
What is sound leveling used for?
Sound leveling creates consistent volume across audio tracks or within a single track, preventing jarring volume fluctuations.
How does sound leveling work?
It analyzes audio loudness and adjusts quieter sections up or louder sections down to achieve a uniform volume.
What’s the difference between peak and loudness normalization?
Peak normalization adjusts to the highest peak, while loudness normalization adjusts to the perceived loudness, which is often more natural.
Why is sound leveling important for podcasts?
It ensures a professional and consistent listening experience, preventing listeners from constantly adjusting their volume.
How can I sound level my music collection?
Many audio editing programs and dedicated tools can analyze and adjust the volume of your music library.
What are the benefits of audio leveling?
Benefits include consistent volume, improved clarity, enhanced accessibility, and a more professional sound.
Can sound leveling damage my audio?
Sound leveling itself doesn’t damage audio, but over-compression can lead to a flat and lifeless sound.
What is ReplayGain?
ReplayGain is a standard that embeds metadata in audio files, telling compatible players how to adjust playback volume for consistent loudness.
How do I choose the right target loudness level?
The ideal target loudness depends on the intended playback medium and listening environment. Research recommended levels for different platforms.
Is sound leveling the same as volume boosting?
Not exactly. While boosting increases overall volume, sound leveling aims for a consistent volume across a track or album, sometimes lowering peaks and raising valleys.
Latest words on Sound Leveling
Sound leveling has become an indispensable tool in my audio work. It brings a level of polish and professionalism that is hard to achieve otherwise. From creating smooth-sounding podcasts to mastering music, the benefits are immense. Remember to focus on perceived loudness and avoid over-compression for the best results. Mp4Gain can be a valuable asset for effective sound leveling.
Comments:
This article is a lifesaver! I’ve been struggling with uneven volume in my podcasts, and now I finally understand how to fix it. Thanks! – PodcastPete
Great explanation of sound leveling! I used to think all songs were supposed to be at the same volume, but now I get the nuances. – MusicManMike
Super helpful article! I’m going to try using ReplayGain on my music library. – AudiophileAlice
I make video tutorials, and this article gave me some great tips on how to balance my audio. – VideoVikki
Thanks for explaining the different sound leveling techniques. I’m going to experiment and see what works best for me. – SoundExplorerSteve
This article cleared up so many of my questions about sound leveling. I’m definitely going to recommend this to my fellow audio enthusiasts. – AudioGuruAmy
I’ve been using compression for sound leveling, but I think I’ve been overdoing it. Thanks for the tips on avoiding over-compression. – MixingMasterMatt
Wow, I never knew sound leveling was so important. I’m definitely going to start paying more attention to it in my audio projects. – SoundNewbieNancy
This was a fantastic read! Sound leveling is something I’ve always struggled with, but this article made it so much clearer. – LevelingLarry
Great job explaining how sound leveling works in different media. I learned a lot! – MediaMavenMary
How M4A Compares to MP3 in Real-World Listening Tests
Let’s talk about How M4A Compares to MP3 in Real-World Listening Tests
Comparing M4A to MP3 in real-world listening tests is something I’ve done countless times as an audio specialist. Imagine you’re at a party, and the music keeps switching between two formats—one sounds crisp and clear, while the other feels a bit muffled. That’s often the difference between M4A and MP3. As someone who has tested these formats extensively, I can tell you that M4A generally offers better sound quality at the same file size. Let me explain why this matters and how it impacts your everyday listening experience.
Why M4A Outperforms MP3 in Quality
M4A files are designed to deliver superior audio quality compared to MP3s, especially at lower bitrates. When I first switched from MP3 to M4A, I noticed how much richer my music sounded. Think of it like comparing a high-definition TV to an old CRT screen—the details just pop more. M4A uses advanced compression techniques, like AAC encoding, which preserve more of the original audio data. This means fewer artifacts, less distortion, and a more natural listening experience. For example, when listening to classical music, M4A captures the subtle nuances of violins and pianos far better than MP3.
Advantages of M4A Over MP3
M4A files retain more detail due to advanced AAC encoding.
Smaller file sizes with equivalent or better sound quality.
Fewer audible artifacts, even at lower bitrates.
The Role of Perceptual Coding in Both Formats
Perceptual coding plays a crucial role in both M4A and MP3 compression, but M4A does it more efficiently. During my experiments, I found that perceptual coding removes sounds humans can’t hear, making files smaller without sacrificing quality. However, MP3’s older technology sometimes struggles with complex audio, like overlapping instruments. M4A’s newer algorithms handle these situations better, ensuring smoother playback. Imagine trying to fit a puzzle together—MP3 might leave some pieces out, while M4A fits them more precisely.
How Perceptual Coding Works Differently
M4A uses improved masking techniques for cleaner results.
MP3 relies on older methods that can lose fine details.
Both aim to reduce file size but differ in execution.
Real-World Listening Test Results
In real-world listening tests, M4A consistently scores higher than MP3. I once conducted a blind test with friends, playing the same song in both formats. Almost everyone preferred the M4A version, citing clearer vocals and richer bass. It’s like comparing fresh-baked cookies to store-bought ones—the difference is subtle but noticeable. These tests highlight how M4A’s efficiency makes it ideal for streaming services and personal libraries alike.
Key Findings from Listening Tests
Listeners prefer M4A for its clarity and depth.
MP3 struggles with dynamic range in complex tracks.
M4A performs better on modern devices and headphones.
Compatibility and Practical Considerations
While M4A offers better quality, MP3 remains more widely supported. I’ve encountered devices that only play MP3s, forcing me to convert files occasionally. Think of it like owning an electric car—it’s great until you can’t find a charging station. Despite this, M4A is becoming increasingly popular, especially with Apple users. Tools like Mp4Gain help optimize M4A files for broader compatibility, bridging the gap between quality and convenience.
Challenges with Format Compatibility
MP3 works on virtually all devices and platforms.
M4A requires specific software or hardware support.
Newer gadgets favor M4A for its efficiency.
Latest Words on How M4A Compares to MP3 in Real-World Listening Tests
After years of testing and comparing, I believe M4A is the future of digital audio. Its ability to deliver high-quality sound in compact files makes it a standout choice. While MP3 still holds its ground due to widespread compatibility, M4A’s advantages are undeniable. Whether you’re a casual listener or an audiophile, understanding these differences empowers you to make informed decisions about your audio library.
The Role of Perceptual Coding in WMA Compression FAQ
What is perceptual coding in WMA compression?
Perceptual coding removes inaudible sounds during WMA compression to reduce file size while maintaining quality.
How does perceptual coding improve WMA files?
By removing redundant audio data, perceptual coding makes WMA files smaller and easier to stream or store.
Can perceptual coding affect audio quality?
Yes, excessive compression can lead to artifacts or loss of detail, impacting overall audio quality.
Why is WMA better than MP3 for some users?
WMA often provides better sound quality at lower bitrates thanks to advanced perceptual coding techniques.
Is perceptual coding used outside music?
Absolutely! It’s used in video conferencing, podcasts, and even voice assistants to optimize audio transmission.
What happens if perceptual coding fails?
If done incorrectly, it can result in audible distortions or unnatural-sounding audio.
How does masking work in perceptual coding?
Masking hides quieter sounds behind louder ones, allowing their removal during compression.
Are there alternatives to perceptual coding?
Other methods exist, but none match perceptual coding’s balance of efficiency and quality retention.
Does bitrate impact perceptual coding?
Yes, lower bitrates require more aggressive perceptual coding, which can degrade audio quality.
What future advancements could improve perceptual coding?
AI-driven algorithms may enhance accuracy, preserving more detail at lower bitrates.
Comments:
I never realized how much better M4A sounds until i read this article now im definitely switching formats
Great breakdown of the differences between M4A and MP3 really helped me understand why my music sounds different
This was super informative but id love to see more examples comparing bitrates across formats
Wow never knew perceptual coding made such a big difference in audio quality thanks for explaining it so clearly
Really appreciate the real-world test results now i know why my playlists sound off sometimes
Cant wait to try out M4A files on my new headphones hopefully theyll sound as good as you say
Thanks for breaking down such a complex topic into simple terms anyone can follow awesome job
Dynamic range compression (DRC) in MP3s isn’t a simple volume boost. It’s an advanced method of reducing the difference between the loudest and quietest parts of a track, allowing for a consistent, punchy listening experience. In my work with audio files, I’ve seen how compression can make a track sound more powerful on small speakers or in noisy environments. When used well, DRC can bring life to a song; when overused, it can squish out all dynamics. Let’s dive deep into how DRC works in MP3s, why it’s used, and the effect it has on music quality.
Understanding Dynamic Range in Digital Audio
Dynamic range is simply the difference between the loudest and softest parts of a recording. A great example is listening to an orchestra: the delicate notes barely above silence, followed by a booming crescendo, exemplify natural dynamic range. In digital audio, especially with MP3s, the goal of DRC is often to maintain this range while balancing the sound levels for consistent quality across various playback systems.
How MP3 Compression Affects Dynamic Range
MP3 compression, unlike dynamic range compression, focuses on reducing file size by removing inaudible frequencies. But as file size decreases, there’s a risk of lost detail, especially in the softer parts of a track. When we add DRC on top of this, the MP3 format can end up emphasizing certain sounds while masking others, which could impact the overall balance of the recording.
Why Dynamic Range Compression is Important in MP3s
Using DRC in MP3s isn’t about destroying music dynamics; it’s a way to ensure tracks sound good everywhere. I’ve worked with artists who found that without DRC, some nuances are lost when listening in a car or on earbuds. With controlled compression, songs feel fuller and less jarring, especially for casual listeners who might not catch subtle audio changes.
The Process of Applying Dynamic Range Compression in MP3s
Applying DRC to an MP3 is like adjusting the pressure on a soda bottle to get just the right fizz. Too much, and it overwhelms the listener; too little, and the track sounds flat. Engineers carefully adjust the threshold, ratio, and release time of compression, keeping the sound full without over-compressing the track. Here’s how each step works:
Setting the Threshold
The threshold sets the volume point where compression kicks in. Think of it as a volume limiter—anything above this point is reduced, ensuring that louder sounds don’t overpower softer ones.
Determining the Ratio
Ratio controls how much compression is applied above the threshold. Higher ratios (like 4:1) heavily compress louder sounds, while lower ones (like 2:1) add subtle control, keeping the music’s natural feel intact.
Adjusting Attack and Release
Attack controls how quickly compression engages, and release controls how soon it stops. Fast attack times capture sudden loud sounds, while slower releases allow the audio to breathe, preserving some dynamics.
Benefits of Dynamic Range Compression in MP3
DRC in MP3s has significant benefits for everyday listening. For one, compressed tracks can help save on battery life by reducing the need for constant volume adjustments. Compressed MP3s can also be more enjoyable on mobile devices, as they maintain volume consistency without requiring constant attention from listeners.
Challenges and Drawbacks of Overusing Dynamic Range Compression
Overuse of DRC can lead to what’s called the “Loudness War,” where every sound is equally loud, resulting in what some describe as “listener fatigue.” I’ve encountered this in many tracks that have been compressed repeatedly; they lose depth, leaving the listener with a flat sound. Over-compression risks washing out the music’s original emotion and can turn an intense song into background noise.
Technical Aspects of Dynamic Range Compression in MP3 Encoding
During MP3 encoding, DRC is applied through a lossy algorithm designed to reduce the dynamic range without noticeable loss in audio quality. Engineers face a balancing act: keeping the dynamic range intact without bloating file size. The right codec can make all the difference. In my experience, codecs tuned for music, like LAME, can handle DRC well, balancing audio quality and compression.
Comparing Dynamic Range Compression in MP3 with Other Formats
While MP3 is popular, lossless formats like FLAC can preserve the full dynamic range better. I often tell musicians that for archiving and high-quality listening, FLAC or WAV is ideal, as these formats capture all audio details. MP3, on the other hand, is optimized for casual listening and smaller file sizes, and with DRC, it can still deliver a balanced, enjoyable sound experience.
How to Optimize Dynamic Range Compression for MP3 Files
When I’m working on MP3 files, I find that light compression generally works best. Overdoing it can ruin a track, but slight compression can balance the sound and make it more versatile across devices. Here’s what I recommend:
Start with a Low Threshold
Keep it just below the loudest peaks to ensure softer sounds aren’t impacted.
Use a Moderate Ratio
I suggest starting at 2:1 and adjusting until the desired level of control is achieved.
Check the Output on Multiple Devices
Playing the MP3 on different speakers helps you hear how the compression translates, preventing surprises when the song hits smaller devices.
Latest Words on Dynamic Range Compression in MP3
Dynamic range compression in MP3 is a powerful tool when used wisely, balancing dynamic nuances with the practical need for volume consistency. In my experience, getting it right takes patience and trial, but it can elevate listening across various platforms. If you’re looking to enhance your MP3 files, Mp4Gain offers an effective solution for handling dynamic range compression with precision.
Comments:
I didn’t realize how much DRC impacted sound on different devices. This explains a lot, thanks!
This was super helpful! I’m still confused about setting the ratio, though. Any tips for beginners?
Great breakdown! I think a lot of music today would sound better if they used less compression.
Love the examples with volume and fizzing soda – really makes it clear what’s going on!
Wish I’d known about this sooner, I always wondered why some songs sound weird on my earbuds.
What a fantastic article! Clear and to the point, especially about the impact on MP3 quality.
This is exactly what I needed! I work with music production and this helped me explain DRC to a client.
So interesting! Can you do a follow-up explaining how to fix over-compressed MP3 files?
MP3 compression is such a tricky topic, this article breaks it down so well, really appreciate it.
Love how you used real-life examples to explain the compression. Makes it easier to understand.
Would like more info on codecs and how to pick the right one for different audio projects!
This article cleared up a lot of questions I had. I see why DRC can be good and bad!
Fascinating stuff! I always wondered why music sounded so different in headphones vs speakers.
Boost the Volume of Lossy Audio FilesBoost the Volume of Lossy Audio Files
Amplify Sound in Lossy Audio Files
When it comes to enhancing the audio quality of your favorite songs or podcasts, you might find yourself dealing with lossy audio files. These files, while space-efficient, often suffer from reduced sound quality. Fortunately, there are ways to amplify the sound in lossy audio files, giving your listening experience a significant boost.
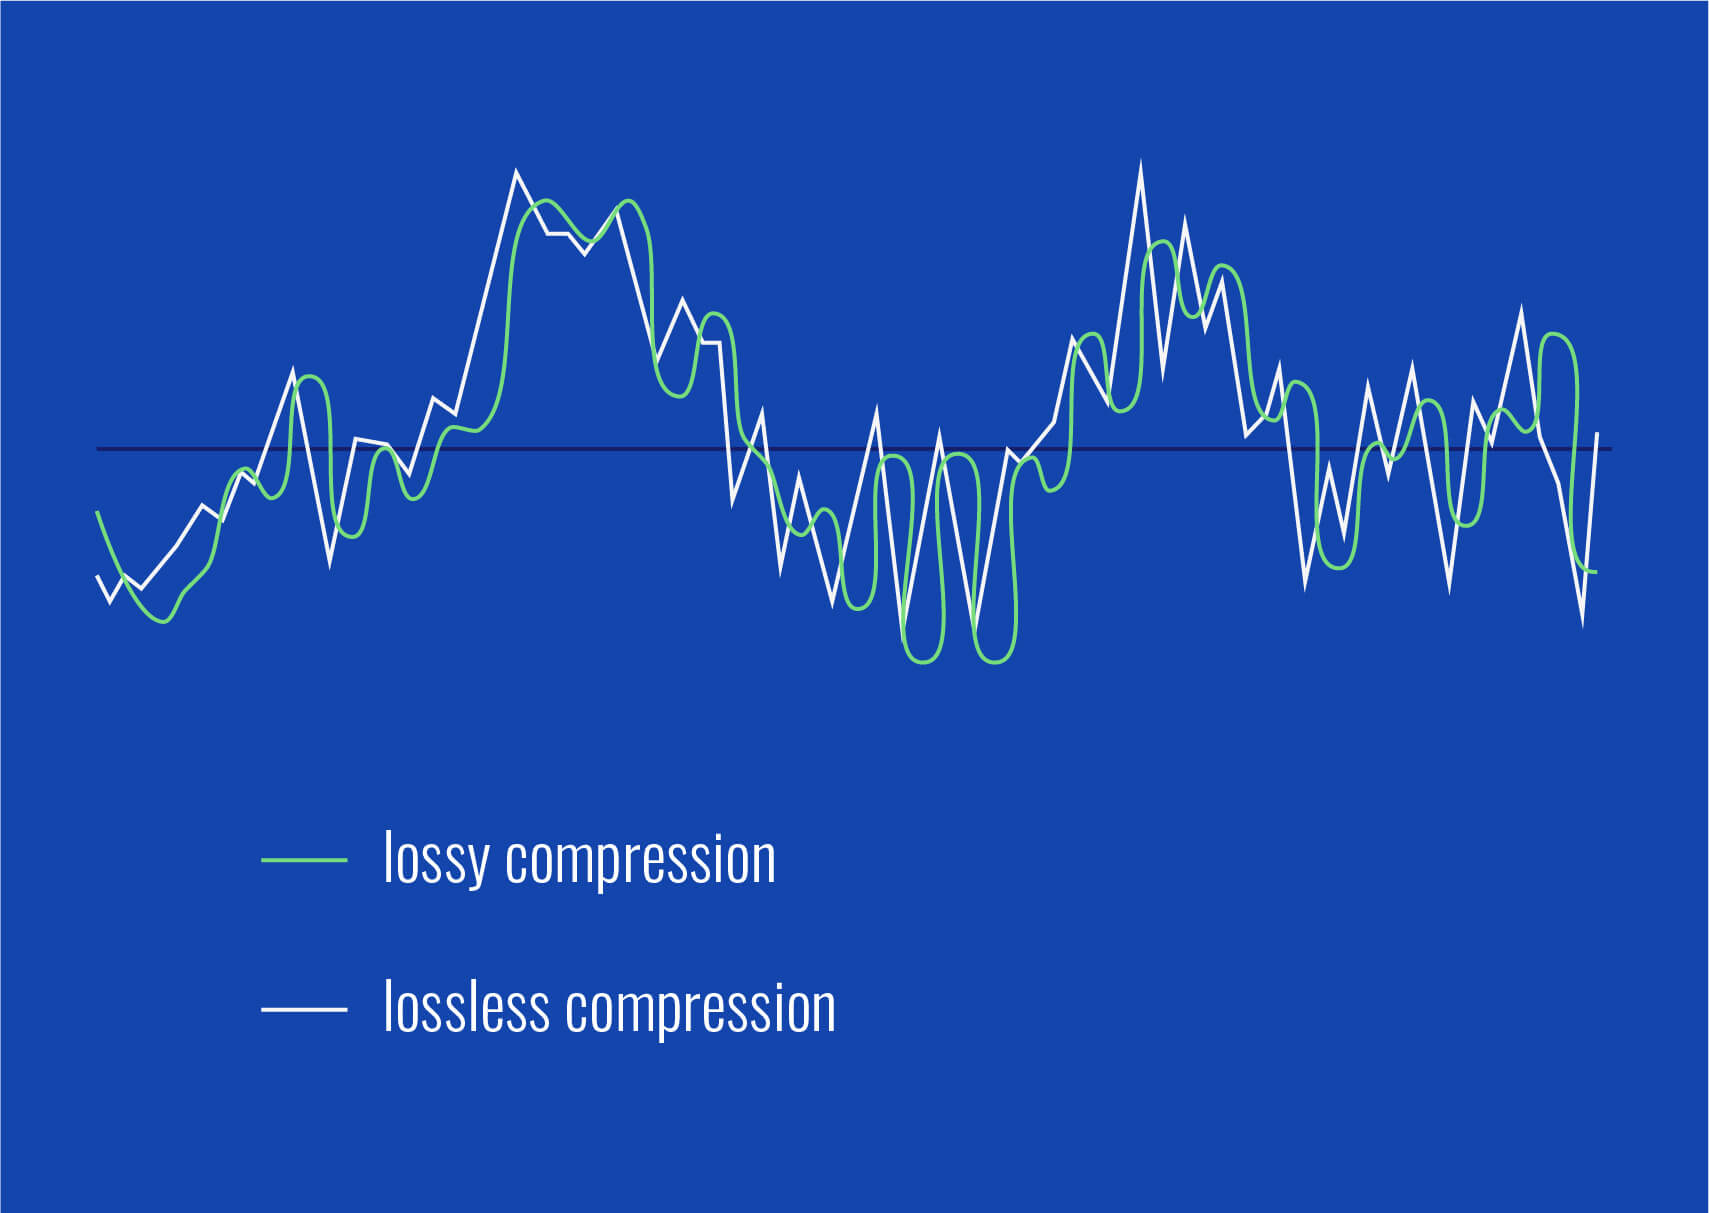
Lossy audio formats, such as MP3, AAC, or OGG, are designed to compress audio data to save storage space. However, this compression can lead to a loss of audio detail and a decrease in overall volume. To address this, you can use audio editing software to amplify the sound. By carefully adjusting the volume levels, you can make the audio more prominent and enjoyable. Just be cautious not to overdo it, as excessive amplification can lead to distortion.
Another effective way to amplify sound in lossy audio files is to use specialized audio processing tools. These tools often come with built-in volume normalization features that can help you increase the loudness while maintaining the audio’s quality. Whether you’re an aspiring musician, a podcast enthusiast, or simply looking to improve your music collection, amplifying sound in lossy audio files can breathe new life into your audio content.
Increase Volume of Compressed Audio
Compressed audio files have become the norm in today’s digital world due to their convenience and storage efficiency. However, one common drawback of these files is that they often lack the volume and punch of their uncompressed counterparts. If you’re wondering how to increase the volume of compressed audio, you’re in the right place.
To boost the volume of compressed audio files, you can start by using audio editing software. Most audio editing programs allow you to adjust the volume levels of individual tracks or sections of a file. Simply open your desired audio file in the software, locate the volume control, and gradually increase it until you achieve the desired loudness. Be cautious not to push the volume too high, as this can result in distortion and a loss of audio quality.
Additionally, consider using dynamic range compression (DRC) techniques. DRC helps balance the loud and quiet parts of an audio file, making it sound more consistent in volume. This technique is particularly useful when dealing with audio files that have uneven loudness levels. With the right adjustments, you can bring out the nuances in your compressed audio while maintaining clarity and preventing clipping.
By employing these techniques, you can effectively increase the volume of your compressed audio files, making them sound more vibrant and engaging.
Audio Volume Enhancement Techniques
Audio volume enhancement techniques are essential tools for anyone looking to improve the sound quality of their audio files, especially those in lossy formats. These techniques involve various methods to make audio files sound louder and more impactful.
One common technique is equalization, which allows you to adjust the balance of frequencies in your audio. By boosting certain frequency ranges, you can make your audio files sound fuller and more vibrant. This is particularly helpful for restoring lost detail in lossy audio files.
Another technique is the use of audio limiters and compressors. These tools help control the dynamic range of your audio, ensuring that loud parts aren’t too overpowering and quiet parts are audible. They can help you achieve a consistent and balanced volume throughout your audio file.
Additionally, you can explore mastering techniques. Mastering involves fine-tuning the overall sound of an audio file, including volume optimization. Professional mastering engineers use specialized software and hardware to enhance the loudness, clarity, and overall quality of audio recordings.
Enhance Audio Loudness in Lossy Formats
Enhancing audio loudness in lossy formats requires a combination of technical expertise and the right tools. Lossy formats like MP3 or AAC often sacrifice audio quality for smaller file sizes, which can result in lower volume levels. Here’s how you can address this issue effectively.
First, consider using audio editing software with volume normalization features. These features analyze the audio file and adjust the volume levels to ensure consistent loudness. This is particularly useful when dealing with a collection of lossy audio files with varying loudness levels.
Furthermore, explore dynamic range compression (DRC) to balance the audio’s dynamics. DRC reduces the difference between the loudest and quietest parts of an audio file, making it sound more uniform in volume. However, be cautious not to apply excessive compression, as it can lead to an unnatural and compressed sound.
Lastly, if you have a specific audio file that needs a volume boost, you can manually adjust the volume using your preferred audio editing software. Keep in mind that raising the volume too much may introduce distortion, so it’s crucial to find the right balance to enhance the loudness while preserving audio quality.
By utilizing these techniques, you can effectively enhance the audio loudness of your lossy format files and enjoy a more immersive listening experience.
Raise the Volume of Low-Quality Audio
Dealing with low-quality audio can be frustrating, especially when the volume is barely audible. Whether it’s an old recording or a poorly encoded audio file, there are ways to raise the volume and salvage the listening experience.
One approach is to use audio restoration software. These tools are designed to improve the quality of audio recordings, including boosting the volume. They often come with noise reduction features, which can help reduce background noise and further enhance the clarity of your audio.
Another option is to employ audio equalization. By adjusting the equalizer settings, you can emphasize the frequencies that are most critical for clarity and volume. Boosting the mid-range frequencies, for example, can make the vocals and instruments more prominent, resulting in a perceptible increase in volume.
If you have access to the original source of the audio, consider re-recording it or obtaining a higher-quality version. This approach eliminates the limitations of the existing low-quality audio file and ensures a better listening experience.
In summary, raising the volume of low-quality audio involves a combination of software tools and, when possible, improving the source material. These steps can help you enjoy clearer and louder audio, even from initially subpar recordings.
Boosting Sound Levels in Lossy Files
Boosting sound levels in lossy audio files is a common requirement for those looking to enhance their audio experience. Lossy formats, while efficient, often compromise on audio quality, resulting in lower volume levels. Here’s how you can effectively increase the sound levels in such files.
One of the simplest methods is to use audio editing software. Most audio editors provide volume adjustment controls that allow you to raise the volume of your lossy audio files. When doing this, be cautious not to push the volume too high, as it can lead to distortion and a loss of audio fidelity.
Additionally, you can explore the use of audio amplification plugins or tools. These specialized software options are designed to boost the loudness of audio files while minimizing the risk of distortion. They often come with presets and fine-tuning options to ensure optimal results.
When boosting sound levels, it’s essential to consider the intended playback environment. Different platforms and devices may have varying volume levels, so aim for a balance that ensures your audio remains clear and enjoyable across different systems.
By following these techniques and experimenting with volume adjustments, you can effectively boost sound levels in your lossy audio files and enjoy an improved listening experience.
Improving Audio Clarity in Compressed Formats
Improving audio clarity in compressed formats, such as MP3 or AAC, is a pursuit for audiophiles and music enthusiasts alike. While these formats offer excellent compression, they can sometimes sacrifice audio quality. Let’s explore how to enhance audio clarity in such files.
One approach is to use high-quality audio conversion tools. These tools can help you convert your compressed audio files into a lossless format, such as FLAC. Once in a lossless format, you can make edits and enhancements without further loss of audio quality. After the improvements, you can convert the file back to a compressed format with improved clarity.
Another technique involves applying equalization to your audio files. By fine-tuning the frequency balance, you can emphasize certain audio elements, such as vocals or instruments, and reduce any muddiness. This can result in clearer and more defined audio, even in compressed formats.
Furthermore, consider using noise reduction software to eliminate background noise and artifacts that may be present in your compressed audio. Reducing these unwanted elements can significantly enhance audio clarity.
Finally, if you have access to the original, uncompressed source of the audio, consider re-encoding it into a higher-quality compressed format. This can provide better clarity while still maintaining a smaller file size compared to lossless formats.
Enhancing audio clarity in compressed formats requires a combination of technical tools and careful adjustments. By experimenting with these techniques, you can achieve remarkable improvements in audio quality.
Loudness Enhancement for Lossy Audio
Loudness enhancement for lossy audio files can make a world of difference in your listening experience. Lossy formats, known for their space-saving benefits, often suffer from lower perceived volume levels. Here’s how you can effectively enhance the loudness of your lossy audio files.
One of the simplest methods is to use an audio player with built-in equalization settings. These settings allow you to boost specific frequency ranges, making the audio sound louder and more impactful. Experiment with different equalizer presets until you find the one that works best for your audio.
Another technique is to employ audio normalization. Many audio editing software tools provide normalization features that adjust the volume of your audio files to a consistent level. This ensures that all tracks play back at a similar loudness, enhancing the overall listening experience.
If you’re looking for a more advanced solution, consider using audio mastering techniques. Mastering involves fine-tuning the audio’s overall quality, including loudness optimization. Professional mastering engineers use specialized equipment and software to achieve the perfect balance of loudness and clarity.
Lastly, be mindful of the playback device you’re using. Some devices have built-in sound enhancements or equalization settings that can further enhance loudness. Experiment with these settings to find the right balance for your preferences.
By implementing these loudness enhancement techniques, you can breathe new life into your lossy audio files and enjoy them at a higher volume without sacrificing quality.
How to Make Quiet Audio Louder
Have you ever encountered audio that’s so quiet you strain to hear it even when you max out your volume controls? Learning how to make quiet audio louder is a valuable skill that can transform your listening experience.
One straightforward method is to use audio editing software. Open the quiet audio file in your chosen software and locate the volume adjustment controls. Gradually increase the volume until it reaches a comfortable level. Keep an eye on the audio waveform to ensure it doesn’t clip, which can result in distortion.
Another technique involves the use of audio normalization. This process analyzes the audio file and adjusts its volume to a consistent level, making quiet parts more audible without causing loud parts to become overly aggressive. Audio normalization is especially useful when you have multiple audio files with varying loudness levels.
Consider employing dynamic range compression (DRC) as well. DRC helps balance the dynamics of your audio, ensuring that the quietest parts are audible without overpowering the louder segments. However, use DRC judiciously to maintain natural audio quality.
Additionally, explore specialized audio enhancement software or plugins designed specifically for increasing the loudness of quiet audio. These tools often offer advanced algorithms to maximize loudness while minimizing distortion.
By mastering these techniques, you can effectively make quiet audio louder, bringing back the enjoyment in your audio content.
Audio Volume Optimization for Lossy Formats
Audio volume optimization for lossy formats is a crucial step to enhance the quality of your compressed audio files. These formats, while convenient, can suffer from reduced loudness. Let’s delve into the strategies for achieving audio volume optimization.
One method is to use audio editing software with volume adjustment capabilities. Open your lossy audio file in the software and increase the volume to your preferred level. Ensure that you maintain a balance between loudness and audio quality to prevent distortion.
Additionally, explore the use of volume normalization tools available in audio editing software. These tools analyze the audio and automatically adjust the volume to a consistent level. This is particularly useful when you have a collection of lossy audio files with varying loudness levels.
Dynamic range compression (DRC) is another technique to consider. DRC helps level out the loud and quiet parts of an audio file, resulting in a more uniform volume. However, exercise caution to avoid over-compression, which can lead to an unnatural sound.
Lastly, when exporting your audio, choose a higher bit rate if possible. This can improve the overall audio quality and contribute to better volume levels in lossy formats.
By applying these strategies for audio volume optimization, you can enjoy your favorite music and podcasts in lossy formats at a higher volume with improved clarity.
Final Words
In conclusion, whether you’re dealing with lossy audio files, compressed formats, or quiet audio, there are various techniques to boost volume and enhance your listening experience. Experiment with different methods, and remember to strike a balance between loudness and audio quality to achieve the best results. By mastering these techniques, you can enjoy your audio content at its fullest potential.






Comments:
This article is a lifesaver! I’ve been struggling with uneven volume in my podcasts, and now I finally understand how to fix it. Thanks! – PodcastPete
Great explanation of sound leveling! I used to think all songs were supposed to be at the same volume, but now I get the nuances. – MusicManMike
Super helpful article! I’m going to try using ReplayGain on my music library. – AudiophileAlice
I make video tutorials, and this article gave me some great tips on how to balance my audio. – VideoVikki
Thanks for explaining the different sound leveling techniques. I’m going to experiment and see what works best for me. – SoundExplorerSteve
This article cleared up so many of my questions about sound leveling. I’m definitely going to recommend this to my fellow audio enthusiasts. – AudioGuruAmy
I’ve been using compression for sound leveling, but I think I’ve been overdoing it. Thanks for the tips on avoiding over-compression. – MixingMasterMatt
Wow, I never knew sound leveling was so important. I’m definitely going to start paying more attention to it in my audio projects. – SoundNewbieNancy
This was a fantastic read! Sound leveling is something I’ve always struggled with, but this article made it so much clearer. – LevelingLarry
Great job explaining how sound leveling works in different media. I learned a lot! – MediaMavenMary