adjust audio and video volume


Free Download Mp4Gain
picture

adjust audio and video volume

adjust audio and video volume

Let’s talk about Audio and Video Adjust Volume

Audio and video adjust volume is essential for a good viewing experience. I’ve spent years working in multimedia, and let me tell you, nothing ruins a movie night faster than inconsistent sound. Think of it like a rollercoaster – exciting ups and downs are great, but unpredictable, jarring shifts can be unpleasant. Adjusting audio and video volume lets you fine-tune the experience, creating a balanced and enjoyable soundscape. It’s about control, ensuring that whispers are audible and explosions don’t blow out your speakers.

Why Adjusting Audio and Video Volume is Important

Adjusting audio and video volume is crucial for several reasons. It enhances clarity, improves accessibility, and creates a comfortable listening environment. I’ve used volume adjustments to make quiet dialogue crystal clear and to tame overly loud commercials.

How to Adjust Audio and Video Volume

Volume adjustment methods vary depending on the device and software you use. From simple sliders on your phone to advanced controls in editing software, I’ve used them all. Each method offers a different level of control and precision.

Device Volume Controls

Most devices have physical or on-screen volume controls. These are like the volume knob on a radio – simple and straightforward.

Software Volume Controls

Media players and editing software offer more precise control over volume levels. Think of these as the fine-tuning knobs on a mixing board, allowing for granular adjustments.

System-Wide Volume Control

Operating systems also have volume controls that affect all audio output. This is like the main water valve for your house, controlling the overall flow.

Adjusting Volume on Different Devices

Volume adjustment varies across different devices, from smartphones and computers to TVs and streaming devices. I’ve worked with all these platforms, and understanding the nuances of each is crucial.

Smartphones

Volume adjustments are typically done through hardware buttons or on-screen sliders.

Computers

Computers offer a combination of hardware controls, operating system settings, and software-specific volume adjustments.

TVs

TV volume controls are usually accessed via remote controls or on-screen menus.

Streaming Devices

Streaming devices like Roku or Fire TV often have dedicated volume controls on their remotes.

Advanced Volume Adjustment Techniques

Beyond basic volume control, several advanced techniques offer more granular control over audio levels. I use these frequently in my professional work, achieving polished and balanced sound.

Normalization

Normalization adjusts the overall volume of an audio track without affecting its dynamic range.

Compression

Compression reduces the difference between the loudest and quietest parts of an audio track.

Equalization

Equalization adjusts the balance of different frequencies in an audio track.

Troubleshooting Volume Issues

Sometimes, you may encounter volume problems that require troubleshooting. I’ve seen it all, from faulty cables to software glitches. Identifying the source of the issue is the first step towards a solution.

Checking Cables and Connections

Make sure all cables and connections are secure and functioning correctly. A loose cable can be like a kink in a garden hose, disrupting the flow.

Updating Drivers and Software

Outdated drivers or software can sometimes cause volume problems.

Adjusting System Settings

Incorrect system settings can also affect audio output.

FAQ about Audio and Video Adjust Volume

How do I adjust the volume on my phone?

Most phones have physical volume buttons or on-screen sliders in the control center or media player.

How can I make my computer’s audio louder?

Check your system volume, media player volume, and speaker connections. You can also use volume booster software.

Why is the audio on my videos so quiet?

The recording level might be low, or there could be issues with your playback device or software.

How do I adjust the audio and video volume separately?

Some video editing software allows you to adjust audio and video tracks independently.

What is audio normalization?

Audio normalization adjusts the overall volume of a track to a target level without affecting its dynamic range.

How can I fix audio that’s too loud or too quiet?

Adjusting the volume, normalization, and compression can help balance audio levels.

What are some common causes of volume fluctuations?

Volume fluctuations can be caused by inconsistent audio mastering, automatic gain control, or issues with your playback setup.

How do I adjust the volume on my streaming device?

Use the volume buttons on your streaming device’s remote or the on-screen controls.

How can I adjust the volume of a video I’m editing?

Video editing software typically provides tools to adjust the audio track’s volume.

What’s the difference between adjusting volume and gain?

Volume refers to the output level, while gain refers to the input level. Adjusting gain affects the signal before it reaches the volume control.

Latest words on Audio and Video Adjust Volume

From fine-tuning movie dialogue to balancing music levels, audio and video adjust volume is crucial for an optimal experience. I’ve used these techniques extensively throughout my career, and they are essential for anyone working with multimedia. Remember to explore the different methods available and troubleshoot any issues systematically. Mp4Gain can be a great tool for precise volume adjustments.

Comments:

Great article! I learned a lot about adjusting volume on different devices. Thanks! – TechTim

Super helpful explanation of normalization and compression. I’m going to experiment with those techniques in my video editing. – VideoEditorVicky

I’ve been having trouble with quiet audio on my videos, and this article gave me some great troubleshooting tips. – AudioAceAlex

Thanks for explaining the different ways to adjust volume. I never knew there were so many options! – VolumeVictor

This article is a must-read for anyone who works with audio and video. – MultimediaMasterMia

I’m a podcaster, and this article gave me some great ideas on how to improve my audio quality. – PodcastProPaul

I appreciate the clear explanations and real-life examples. This article made understanding audio and video volume adjustment so much easier. – AVLearnerLisa

This article is a lifesaver! My movie nights were always ruined by inconsistent volume, but now I know how to fix it. Thanks! – MovieNightMegan

I’m new to video editing and I was completely lost when it came to audio. This article explained everything perfectly. – EditingNewbieEmily

This is the most comprehensive guide to audio and video volume adjustment I’ve found. Thanks for sharing your expertise! – AVExpertEric


Free Download Mp4Gain
picture


Mp4Gain Main Window
picture


Mp4Gain Features
picture


Free Download Mp4Gain
picture

What is a De-Esser?

What is a De-Esser?

De-Esser
De-Esser
De-Esser
De-Esser

As a music producer and audio engineer, I’ve encountered my fair share of challenging vocal recordings. One common issue is sibilance, which occurs when the “s” and “sh” sounds are overly pronounced, causing harsh and piercing frequencies in the mix. This is where a de-esser comes in handy.

De-Esser Plugin

A de-esser is a specialized audio plugin that reduces or eliminates sibilance from vocal recordings. It works by detecting the offending frequencies and applying gain reduction to them, effectively taming the harshness and allowing the vocals to sit better in the mix.

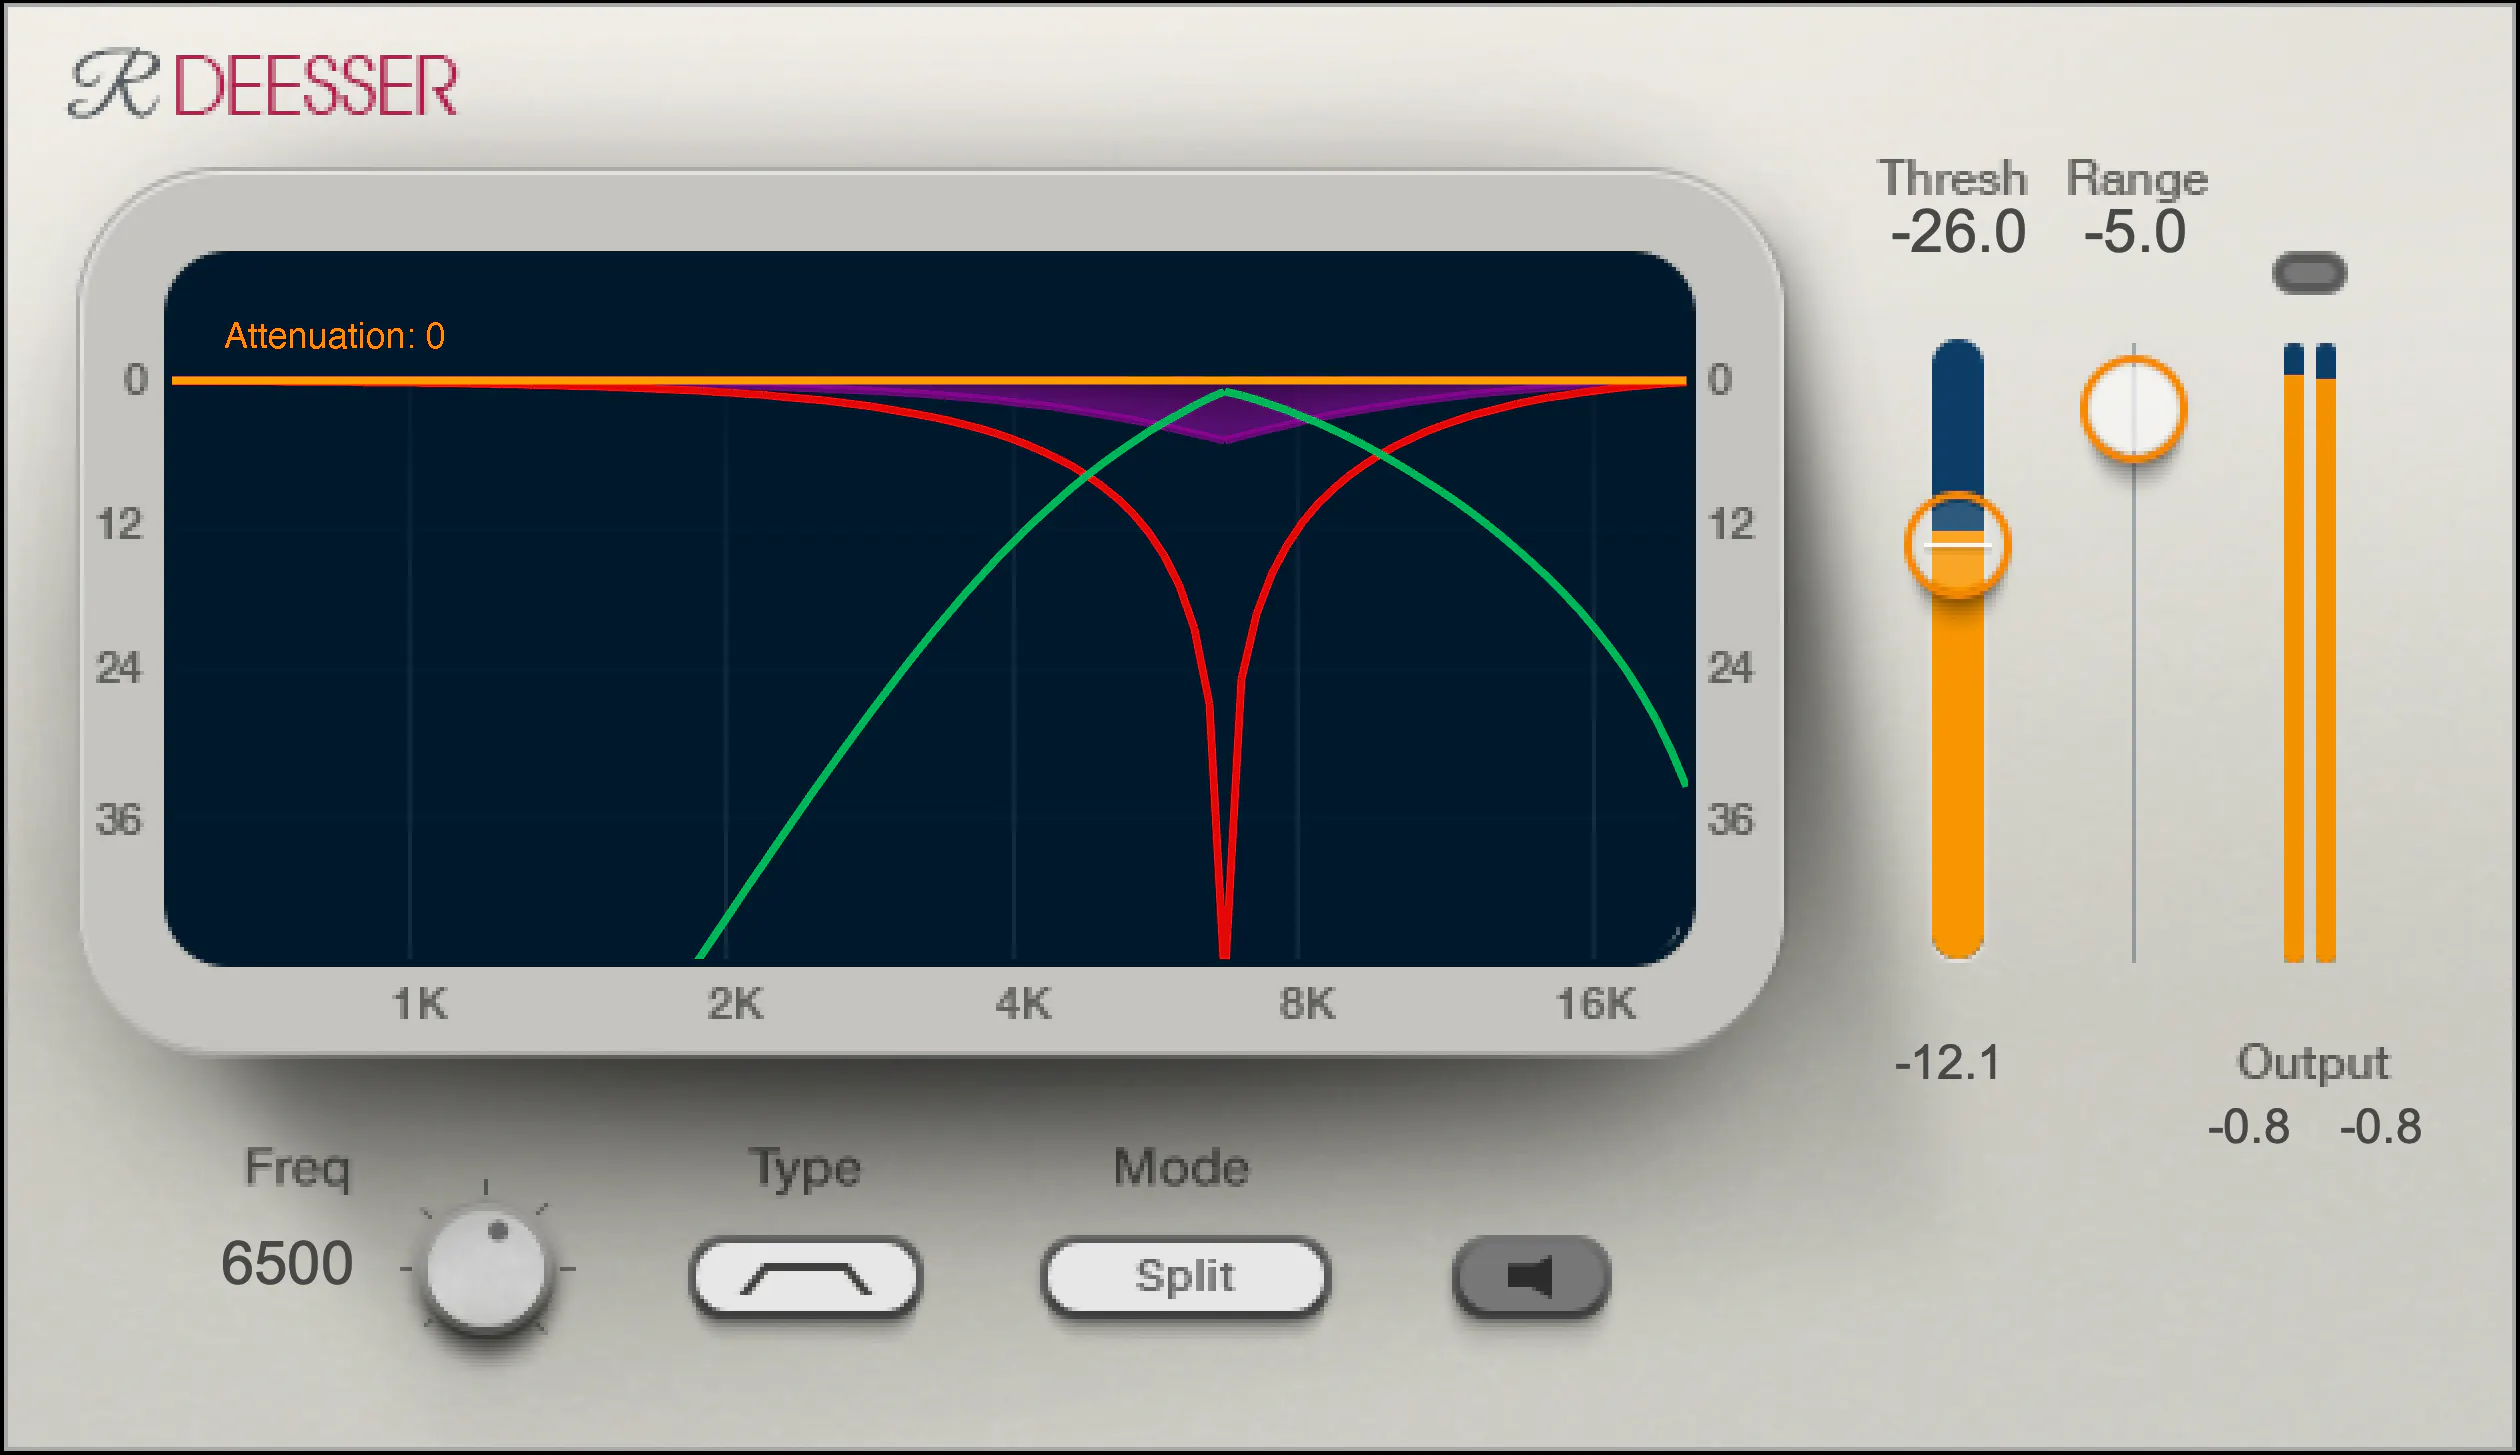
One of my go-to de-esser plugins is Waves Renaissance DeEsser, which offers precise control over the detection frequency, threshold, and reduction amount. Another popular option is FabFilter Pro-DS, which includes a natural-sounding “single vocal” mode for easy and effective de-essing.

De-Essing Vocals

De-essing can be a delicate process, as overuse can result in a dull and lifeless vocal sound. It’s important to strike a balance between reducing sibilance and maintaining the natural tone and character of the vocal recording.

When de-essing vocals, I typically start by soloing the vocal track and listening for the most pronounced sibilant sounds. I then apply the de-esser plugin with a gentle reduction amount, gradually increasing until the sibilance is under control but the vocal still sounds natural.

Best De-Esser for Vocals

In my experience, the best de-esser for vocals is one that offers precise control over the detection and reduction parameters, while still maintaining a natural sound. As mentioned earlier, Waves Renaissance DeEsser and FabFilter Pro-DS are both excellent options in this regard.

It’s also worth considering the de-esser included in your DAW of choice. For example, Logic Pro’s built-in de-esser is simple yet effective, with a straightforward interface that allows for quick and easy de-essing.

De-Esser Settings

When using a de-esser, it’s important to understand the various settings and how they affect the sound. The most important parameters to adjust are the detection frequency, threshold, and reduction amount.

The detection frequency determines which frequencies the de-esser will target, while the threshold sets the level at which the gain reduction will be applied. The reduction amount controls how much gain reduction is applied to the offending frequencies.

It’s worth experimenting with these settings to find the sweet spot for each individual vocal recording.

Tips for Using a De-Esser

Here are a few tips for getting the most out of your de-esser:

Use the de-esser sparingly, as overuse can result in a dull and lifeless vocal sound.
Always listen for sibilance in solo mode before applying the de-esser to the full mix.
Experiment with different de-esser plugins and settings to find the best sound for each individual recording.
If you’re unsure about how much de-essing to apply, start with a small reduction amount and gradually increase until the sibilance is under control but the vocal still sounds natural.
As the legendary producer Quincy Jones once said, “The most important thing in the studio is your ears.” And this is especially true when it comes to managing sibilance in vocal recordings. A de-esser is a tool that helps to control sibilance, or the harsh “s” and “t” sounds that can be distracting or unpleasant in a recording.

What is a de-esser?

Simply put, a de-esser is a type of audio processor that is designed to reduce or remove sibilance from a recording. It works by detecting and attenuating the specific frequency range where sibilance occurs in a vocal recording. This can help to smooth out the sound of the recording and make it more pleasing to the ear.

How does a de-esser work?

A de-esser typically uses a narrow-band compressor to reduce the level of the sibilant frequencies. The compressor is set to activate only when the sibilant frequencies exceed a certain threshold level. This allows the de-esser to reduce sibilance without affecting other parts of the recording. Some de-essers also use dynamic equalization to selectively attenuate sibilant frequencies, which can provide a more natural-sounding result.

Why is a de-esser important?

Sibilance can be a major distraction in vocal recordings, and can make a recording sound amateurish or unprofessional. A de-esser can help to smooth out the sound of a recording and make it more pleasant to listen to. This can be especially important in situations where the recording will be played over a large sound system or in a professional setting.

As the legendary producer Quincy Jones once said, “The most important thing in the studio is your ears.” And this is especially true when it comes to managing sibilance in vocal recordings. One personal experience I’ve had with sibilance was during a recording session with a vocalist who had a very pronounced lisp. Despite the fact that the vocal performance was excellent, the lisp made the recording almost unlistenable. However, with the use of a de-esser, we were able to remove the harsh sibilant sounds and salvage the recording.

Another personal experience was with a different vocalist who had a lot of sibilance in her recordings. Initially, we tried to use EQ to reduce the sibilance, but found that this also affected other parts of the recording and made it sound unnatural. However, once we introduced a de-esser into the signal chain, we were able to achieve a more natural-sounding result that still effectively reduced the sibilance.

In conclusion, a de-esser is a powerful tool for managing sibilance in vocal recordings. By detecting and attenuating specific frequency ranges where sibilance occurs, a de-esser can help to smooth out the sound of a recording and make it more pleasing to the ear. Whether you’re a professional audio engineer or a hobbyist recording at home, a de-esser is an important tool to have in your audio processing toolkit.

sibilance reduction, vocal processing, audio engineering, dynamic equalization, narrow-band compressor, vocal recording, audio processor, professional recording, recording studio, audio production, sound quality, sound engineering, audio post-production, de-essing, audio editing, audio restoration, sound treatment, audio technology, audio software, mixing and mastering, audio mastering, audio plugins, music production, audio effects, sound design, audio signal processing, audio post-processing, audio filtering, audio frequency, audio dynamics, audio post-production techniques, vocal performance, audio compression, audio enhancement, audio editing software, audio hardware, audio mixer, audio signal chain, audio equipment, audio tools, sound recording, audio clean-up, audio post, audio mastering software, audio workflow, audio clarity

How can I prevent aliasing and harmonic distortion in audio?

How can I prevent aliasing and harmonic distortion in audio?

Digital Audio Aliasing


Digital Audio Aliasing


Introduction

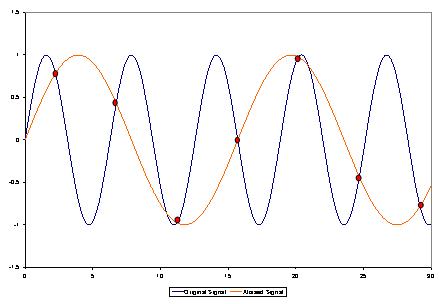
As a music enthusiast, I have always been concerned about the quality of audio recordings. Two common problems that affect audio quality are aliasing and harmonic distortion. Aliasing occurs when the sampling rate of an audio signal is insufficient, causing high-frequency signals to be incorrectly represented as lower frequencies. On the other hand, harmonic distortion occurs when the amplitude of a signal is altered due to the presence of harmonics. In this article, we will discuss ways to prevent these issues and improve audio quality.

What is aliasing and how to prevent it?

Aliasing is a common problem in digital audio, but it can be prevented by increasing the sampling rate of the audio signal. As a general rule, the sampling rate should be at least twice the highest frequency in the audio signal. For example, if the highest frequency in the audio signal is 20 kHz, the sampling rate should be at least 40 kHz. By increasing the sampling rate, we can ensure that high-frequency signals are accurately represented in the digital audio signal.

My personal experience

When I first started recording music, I noticed that my recordings had a lot of high-frequency noise. After doing some research, I realized that this was due to aliasing. I increased the sampling rate of my recordings, and the high-frequency noise disappeared. Since then, I have made it a point to always use a high sampling rate when recording audio.

What is harmonic distortion and how to reduce it?

Harmonic distortion occurs when a signal is altered due to the presence of harmonics. This can be caused by nonlinearities in the audio system, such as distortion in amplifiers or speakers. One way to reduce harmonic distortion is to use a high-quality audio system with low distortion. Additionally, using equalization can help reduce distortion in certain frequency ranges.

Quote from a book

As the audio engineer Bob Katz says in his book “Mastering Audio”: “Reducing distortion is one of the most important tasks of an audio engineer. Distortion masks the details in a mix and reduces the perceived loudness of the audio signal.”

Improving audio quality

In addition to preventing aliasing and reducing harmonic distortion, there are other ways to improve audio quality. One way is to use a high-quality audio codec when encoding audio files. Another way is to use a high-quality audio player or amplifier when listening to audio.

My personal opinion

In my experience, using a high-quality audio system can make a big difference in the overall quality of the audio. When I upgraded my audio system, I noticed that the sound was much clearer and more detailed.

Conclusion

Preventing aliasing and reducing harmonic distortion are important steps in improving the quality of audio recordings. By using a high sampling rate, a high-quality audio system, and equalization, we can ensure that our audio recordings are clear and free from distortion.

Final words

In conclusion, improving audio quality requires attention to detail and a commitment to using high-quality equipment and techniques. While there are many factors that can affect audio quality, preventing aliasing and reducing harmonic distortion are two important steps that can make a big difference.


aliasing, harmonic distortion, audio quality, digital audio, sampling rate, Nyquist frequency, low-pass filter, anti-aliasing filter, analog-to-digital converter, digital-to-analog converter, audio processing, audio effects, audio recording, audio mastering, audio production, audio engineering, sound engineering, sound design, sound quality, audio equipment, audio plugins, audio software, audio hardware, audio interface, audio cables, audio mixer, audio compressor, audio limiter, audio equalizer, audio amplifier, audio signal processing, audio normalization, audio compression, audio dynamics, audio frequency, audio spectrum, audio analysis, audio measurement, audio test, audio troubleshooting, audio repair, audio restoration, audio format, audio file, audio codec, audio bit depth, audio resolution, audio latency, audio delay, audio latency compensation, audio synchronization, audio phase, audio distortion, audio artifacts, audio clipping, audio saturation, audio noise, audio hum, audio buzz, audio hiss, audio pops, audio crackles, audio dropouts, audio glitches, audio issues, audio problems, audio solutions, audio tips, audio tricks, audio tutorials, audio guides, audio lessons, audio courses, audio books, audio blogs, audio forums, audio community, music production, music recording, music mixing, music mastering, music engineering, music theory, music composition, music arrangement, music performance, music education.