WMV Container Efficiency in Video Streaming Applications


Free Download Mp4Gain
picture

WMV Container Efficiency in Video Streaming Applications


Let’s talk about WMV container efficiency. As a specialist with years of experience in video encoding and streaming, I’ve seen firsthand how crucial container efficiency is for smooth video delivery. When we talk about streaming, we’re dealing with a constant flow of data, like water through a pipe; any inefficiency in how that data is packaged can lead to buffering, pixelation, and a frustrating viewing experience for the end-user. Think of it like packing a suitcase for a trip: if you pack it poorly, you won’t fit everything you need and might even damage some items. WMV, like any other container format, must efficiently pack video and audio data for it to be streamed effectively.

Understanding the WMV Container Format

The WMV container format, is an important player in video technology, so understanding its structure is key to understanding its efficiency. WMV, which stands for Windows Media Video, was developed by Microsoft, and while it’s not as universally used as some other formats, it has some notable aspects that affect its performance. I often compare it to a well-organized filing cabinet: everything is stored in a structured way, but the overall design affects how quickly you can retrieve and use the contents. Unlike some containers that act like a loose collection of items, WMV aims for order, but how well it executes that order determines its efficiency for video streaming, which I’ll delve into further.

Key Factors Influencing WMV Streaming Efficiency

When talking about streaming efficiency of WMV, it’s vital to consider several factors that contribute to either smooth streaming or a bumpy ride. I’ve spent years optimizing video delivery and these elements are always at the forefront of my considerations. Encoding parameters, for example, play a huge role – think of it like choosing the right type of bread for a sandwich; the wrong choice can make the whole thing fall apart. The way the video and audio are compressed within the WMV container also dictates how well the data can be delivered over networks, impacting both bandwidth and quality. Another critical aspect is the profile used, which affects the decoding speed, so the choices made during encoding drastically affect the overall efficiency of the streaming experience. And in my experience, the correct configuration makes all the difference.

WMV Container Overhead and its Impact on Streaming

The overhead of a container, like the WMV format, directly affects its streaming performance, and is always something I look at closely. Container overhead refers to the extra data wrapped around the actual video and audio data, it includes things like headers and metadata which are essential but add to the overall size. I like to compare it to wrapping a present; the paper and ribbon are nice, but they’re not the actual gift. In the case of WMV, this overhead has a direct impact on bandwidth requirements. While some containers might have smaller overhead, leading to more efficient streaming, WMV’s overhead needs to be optimized properly to avoid wasting valuable bandwidth. In my professional practice, I always aim to minimize container overhead without compromising functionality, ensuring the video streams smoothly, just like packing light for a backpacking trip to keep the journey easy.

WMV Streaming Performance in Different Network Conditions

Streaming performance of WMV can vary significantly based on network conditions, something I’ve observed many times. A stable, high-bandwidth network allows for smooth playback, just like a wide river that flows smoothly. However, when the network becomes congested or the bandwidth is low, the story changes and things can get choppy. WMV’s performance in these conditions depends heavily on its encoding settings, particularly the bitrate. Higher bitrates provide better quality but demand more bandwidth, while lower bitrates are more forgiving of unstable networks but might result in lower video quality. This flexibility is both a strength and a challenge when using WMV for streaming. In my work, I have often adapted encoding profiles to handle the changing nature of the network, ensuring a balanced streaming experience in different situations.

WMV vs. Other Container Formats: A Streaming Comparison

Comparing WMV with other container formats is always useful, as it highlights its strengths and weaknesses in the world of streaming, which is something I have done countless times. Formats like MP4 and WebM are known for their widespread support and versatility, similar to a Swiss army knife, each having its own advantages and disadvantages. MP4, often used with the H.264 codec, tends to be more universally compatible, while WebM, using VP9, aims for better compression efficiency. WMV, on the other hand, can provide good quality at relatively lower bitrates. However, its compatibility is not as broad as the other two, which can limit its usefulness in many contexts. From my experience, the “best” format isn’t a one-size-fits-all solution; it really depends on the particular use case and desired level of compatibility.

Practical Tips for Optimizing WMV Streaming

When it comes to optimizing WMV for streaming, here are several things that can enhance its efficiency, these are things I have learned from the field. Choosing the right encoding settings is key, think of it as adjusting the recipe to make sure your cake comes out just right. Using an appropriate bitrate, balancing video quality with bandwidth demands is also important. I like to think of it like tuning an instrument; small adjustments can make a big difference to the final sound. Proper frame rates and the use of keyframes help in smooth seekability, something I have worked on constantly. Additionally, ensuring that your servers are well optimized to handle streaming demand is also important, avoiding any bottlenecks, like having enough lanes on a highway.

Adjust bitrate according to network conditions.

Use proper frame rates to avoid choppiness.

Optimize your servers for streaming load.

Select keyframe intervals wisely.

Common Pitfalls and How to Avoid Them in WMV Streaming

During my career, I’ve seen plenty of common mistakes that can hinder WMV streaming, and avoiding these pitfalls is key for a good viewing experience. A big one is using very high bitrates for low bandwidth networks, it’s like trying to fit a large object into a small space; it will always lead to issues. Another common error is not setting the keyframe intervals properly, and this can cause issues with seeking through the video and is something that I often encounter. In addition, neglecting to test your streaming setup in different network conditions can also lead to unpleasant surprises and is often overlooked. By carefully planning the encoding settings and testing them, we can minimize problems, ensuring that videos stream well in various environments. In practice, I always suggest to be extra careful with these technicalities.

The Future of WMV Container in Streaming Technology

As technology moves forward, so does the WMV container format, and its future depends on how it adapts to new needs in streaming. Although it is not as widely used as other formats, I believe it is still relevant in many niche scenarios. Innovations in video compression, such as newer codecs, could bring a resurgence in WMV’s application, similar to how new materials revive old designs. However, the dominance of formats like MP4 and WebM means that WMV will likely remain a specialized choice rather than a mainstream option. I always encourage experimentation and finding the right tool for the right job, and the container format you use should be determined by your specific requirements, not only because of popularity. I’ve always been a firm believer in adapting to new technologies and finding the right tool for the right task.

Latest words on WMV container efficiency

So, what have we learned about WMV container efficiency? From my expert point of view, it’s all about understanding the format’s nuances and adapting it to specific needs. While WMV is not the most popular container today, it still holds its own in particular situations. Effective use involves optimizing encoding settings, understanding network constraints, and addressing the container’s overhead. The key takeaway is that every video streaming scenario is different; selecting the appropriate format, like WMV, involves careful consideration of your needs, just like choosing the right tool for a specific job. Remember, it’s not just about the video but how it’s packaged and delivered. For reliable video encoding and optimization, tools like Mp4Gain can be of great help.

What is the WMV container format used for?

The WMV container format, developed by Microsoft, is primarily used for storing video content. While not as ubiquitous as MP4, it is still used in many niche scenarios that require specific codec support or have existing workflows using WMV. I have found that many Windows-based legacy systems rely heavily on this format. So, it’s essential to understand if you encounter it in your video streaming needs.

How does WMV container overhead affect streaming quality?

WMV container overhead refers to the extra data surrounding the video and audio data like headers and metadata. Larger overhead means more data needs to be transmitted, potentially impacting streaming quality negatively, especially on low-bandwidth networks. It is essential to minimize this overhead for smooth and efficient streaming. In my experience, optimizing this is key to maintaining good quality without excessive bandwidth consumption.

Is WMV good for live streaming applications?

WMV can be used for live streaming but is not as optimized for it as other formats like HLS or DASH. Its performance will depend greatly on network conditions and the server configuration. In my opinion, modern streaming formats are often a better choice for their compatibility and built-in adaptive streaming features. However, in specific scenarios, WMV might be viable, but I’d always advise a thorough test.

What are the ideal encoding settings for streaming WMV videos?

Ideal encoding settings for WMV streaming depend on the available bandwidth and required quality. Using a lower bitrate for low bandwidth and a higher bitrate for high bandwidth is recommended, adjusting also the keyframe intervals and using a suitable profile can enhance streaming experience. In the field, I’ve noticed that a balance is always key, ensuring that you don’t overtax your system or compromise the video quality.

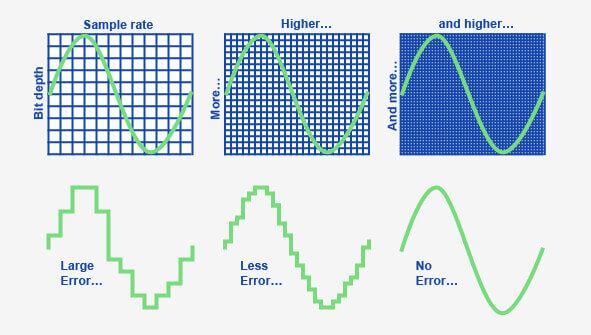
How does the use of Keyframes influence streaming of WMV videos?

Keyframes, also known as I-frames, in WMV videos are very important for smooth streaming. They act like reference points within the video data, allowing the playback to be started anywhere in the video without decoding the entire file. The correct keyframe interval allows for better seeking through the video. I’ve seen plenty of choppy playback when keyframes are not set correctly.

Why is the choice of container important when video streaming?

The choice of video container matters because it determines how video, audio, and metadata are packaged and delivered. Different containers have different efficiencies, compatibility, and overhead. Choosing the right one affects streaming performance, resource usage, and compatibility across various devices and platforms. Choosing the proper container is like picking the right package for a delivery to avoid damage, delays and extra cost.

What are the differences in streaming efficiency between WMV and MP4?

MP4, widely used and versatile, generally offers a better compromise between compatibility and efficiency. WMV, while capable, might not be as universally supported. MP4 using codecs like H.264 or H.265 is often preferred for its wide range of compatibility. In my experience MP4 is a more suitable option in the current ecosystem.

Can I use WMV files for mobile video streaming efficiently?

While WMV can be used for mobile streaming, I would advise caution. The format is not as optimized for mobile devices as other container formats and codecs. Mobile devices often have varied support for WMV. You might encounter more playback issues, so it may not be the most reliable solution. My recommendation is to explore other more versatile containers for mobile streaming, to ensure a consistent experience for all users.

What impact does the codec have on the performance of WMV streaming?

The codec is essential to how a WMV file performs in streaming scenarios. While WMV refers to the container format, the video and audio codecs inside determine compression and quality. Older codecs might not be as efficient for streaming and newer ones will often provide better results. I’ve seen firsthand that choosing the wrong codec can completely undermine even the most optimized container.

WMV container efficiency in video streaming applications

WMV container efficiency in video streaming applications depends on proper settings and network conditions. Efficient streaming needs a good bitrate, keyframe intervals and also needs a proper configuration of servers. By minimizing the container overhead and optimizing the encoding options you can improve the performance of WMV, but you must compare and be aware of the many options in the market, in my opinion.

Comments:

This is a very informative article, I had no idea so many factors can influence the stream performance, I need to review my current encoding settings.

– TechGeek

Hey, thanks for shedding light on WMV, I’m still struggling to find a way to optimize the streaming of my old family videos, I have many of them in WMV format, and this helps me a lot. I wish there would be an easier way to do this, but I have to check what tools are out there.

– OldVideoFan

Great explanations, specially the comparison of the container to a suitcase, it’s like making videos for dummies, and I like it!. I have always struggled with keyframes, i think that I finally understand what are the keyframes for, thanks!

– VideoNoob

I am a noob in this things and i have to say this article is kinda complicated, but overall, I learned a lot about WMV container and video streaming in general. Its good to know that the container is as important as the video itself. Thank you for sharing your expertise.

– ConfusedUser

Very in-depth explanation. I’ve been using MP4 for all my streaming needs, but it’s good to know about other formats. I wonder why is WMV less popular, is there a particular reason?

– CuriousCoder

This is exactly what I was looking for! The tips on optimizing WMV are incredibly helpful, my old windows machine still uses the wmv, and now I know how to stream my videos. Thanks so much for this!

– StreamerJoe

I really appreciate the FAQ section, it answered a lot of my questions. This whole article is a gold mine. I need to learn more about video streaming to get better results.

– Learner123


Free Download Mp4Gain
picture


Mp4Gain Main Window
picture


Mp4Gain Features
picture


Free Download Mp4Gain
picture

Video Compression in MP4 Containers

Video Compression in MP4 Containers

Video Compression in MP4 Containers

Let’s Talk About Video Compression in MP4 Containers

Understanding video compression within MP4 containers opens up a world of efficient video storage and high-quality playback. If you’ve ever watched videos online or saved space on your phone by compressing files, you’ve encountered video compression in action. My goal here is to clarify what video compression does within MP4 files, why it’s used across devices, and how it balances quality and file size. Think of it as the perfect tool for squeezing a massive video into a manageable size without losing that crisp, clear image you want.

So, let’s dive into the how, what, and why of video compression in MP4 containers, covering the technical details and sharing insights from real-world applications. By the end, you’ll know why MP4 is the top choice for video format, how it compresses videos, and why it’s so efficient. I’ll also share some practical examples to make it easy to understand.

What is Video Compression, and Why is it Essential?

Video compression is like folding a large map into a small, pocket-sized square. You’re shrinking the original content to save space while keeping the important parts intact. In video terms, compression allows large video files to fit into the smaller storage spaces of our devices, making them easier to download, store, and stream. When you compress a video, you’re balancing between file size and quality, which means a well-compressed video still looks sharp and clear without hogging too much space.

Most of us don’t realize it, but compression plays a huge role every time we watch videos on platforms like YouTube or Netflix. Without it, high-quality video would need massive amounts of data and storage. Thanks to compression, we can access these videos smoothly, even on lower data speeds. With MP4 files, compression becomes efficient and universal, working across different devices and keeping video quality high while reducing space.

How Does Video Compression Work in an MP4 Container?

Compression within an MP4 container is a clever process that removes unnecessary information from each video frame, keeping only what’s essential to maintain visual quality. The MP4 format is incredibly popular because it efficiently holds compressed video and audio data. To make this possible, an MP4 file uses codecs, or “coders-decoders,” that encode (compress) and decode (play back) video and audio.

Most MP4 files use codecs like H.264 or H.265, which are standards in video compression technology. Think of these codecs as high-tech filters that decide which parts of the video need to be kept and which parts can be simplified or removed. By simplifying certain visual details, the codec reduces the amount of data stored, making the file size smaller without visible quality loss to the human eye. This process ensures that when you play back the video, the device knows exactly how to reconstruct those compressed frames accurately.

Advantages of Using MP4 for Video Compression

There are many reasons why MP4 is the industry standard for video storage and streaming. For starters, MP4 offers exceptional compatibility with nearly all devices—phones, tablets, smart TVs, computers—making it the go-to format. This means you can download, upload, or share MP4 videos without worrying about compatibility issues. I like to think of MP4 as a universal “language” for video that any device can understand.

Another great advantage is that MP4 compresses videos effectively, maintaining high quality at lower file sizes. This efficiency makes MP4 perfect for high-resolution video, especially when sharing or streaming, without hogging bandwidth. MP4 files are also flexible; they can handle different resolutions, from low to ultra-high-definition, adapting well to both older devices and the latest 4K screens.

Types of Compression: Lossless vs. Lossy in MP4 Videos

In the world of video compression, there are two main types: lossless and lossy compression. These two methods work differently, each with its own strengths and best use cases. When compressing MP4 files, you might be using one or the other, depending on the balance between quality and file size you need.

Lossless Compression
Lossless compression is like storing a folded piece of paper without making any permanent changes. This method keeps every bit of original data, meaning no quality is lost, but the file size remains relatively large. If you’re archiving high-quality videos or working in professional video production, you might use lossless compression to preserve every pixel.

Lossy Compression
On the other hand, lossy compression sacrifices some data to achieve a much smaller file size. By removing details that aren’t easily noticeable, lossy compression maintains a high-quality appearance without all the original data. This type is commonly used in MP4 files, especially for streaming or sharing videos online, where file size matters more than absolute quality.

Techniques Used in MP4 Video Compression

MP4 video compression uses several key techniques to balance file size and quality effectively. Understanding these methods helps explain why MP4 performs so well. One major approach is intra-frame compression, which compresses each frame individually. It’s similar to reducing a single photo’s size without considering what comes before or after it. This method is used when the video needs high quality, like in professional video editing.

Another technique, inter-frame compression, looks at groups of frames, only saving changes from one frame to the next. For example, in a scene where only the background changes, inter-frame compression saves data on that background, avoiding duplication. This type of compression dramatically reduces file sizes and works particularly well for video playback and streaming. Together, these techniques ensure MP4 files are both compact and high-quality, able to store data efficiently without sacrificing much of what the eye sees.

Challenges in Video Compression and How to Overcome Them

Video compression in MP4 containers has some common challenges, often involving the balance between quality and file size. Compressing too much can cause visible artifacts, like blurring or pixelation, especially in fast-motion scenes. You may have noticed these issues when watching videos with poor resolution, where the image looks distorted or blocky.

One way to tackle these problems is by choosing the correct codec settings, like adjusting the bit rate. The bit rate determines how much data is allocated per second of video; a higher bit rate generally keeps quality high but increases file size. When I work with MP4 compression, I adjust the bit rate based on my needs, lowering it for online videos where file size matters and increasing it for higher-quality videos. Additionally, using variable bit rates (VBR) instead of fixed bit rates (CBR) can help manage these trade-offs by allowing more data for complex scenes and less for simpler ones. This dynamic adjustment ensures that both quality and size are optimized.

Balancing Quality and Compression in MP4 Files

Achieving the perfect balance between quality and compression in MP4 videos requires fine-tuning based on the intended use. If you’re compressing videos for personal storage, prioritizing quality with a moderate level of compression often works best. For web streaming, reducing the file size significantly can be more important than preserving every visual detail. I often choose settings based on where the video will be used, opting for higher compression for online videos and lower compression for high-definition display.

Experimenting with settings like resolution, frame rate, and bit rate can also influence the final file size. Lowering the resolution or frame rate reduces file size, but it can make the video less smooth or detailed. For instance, reducing a video’s resolution from 1080p to 720p lowers file size and compression requirements, making it ideal for web videos without noticeable quality loss. On the other hand, maintaining high frame rates and resolution for action-heavy videos ensures clarity, especially when watched on larger screens.

Choosing the Right Settings for Different Uses

When deciding on the best compression settings, it’s essential to consider where the video will be viewed. For example, a video meant for social media may prioritize smaller file sizes over perfect clarity, while a video for a professional presentation might demand higher quality. Here’s how I break it down:

  • Web Streaming: Medium to high compression to reduce buffering.
  • Social Media Sharing: High compression for quicker uploads and downloads.
  • Professional Video: Minimal compression to maintain top quality.

These practical settings help balance quality with usability, making MP4 a versatile choice for any purpose.

Latest Words on Video Compression in MP4 Containers

Video compression within MP4 containers is an essential tool for creating efficient, high-quality video files. By using techniques like intra-frame and inter-frame compression, adjusting bit rates, and choosing the right settings, we can maintain excellent visual quality while reducing file sizes for easy sharing and storage. For everyday use, MP4 is an ideal choice, providing compatibility, compression, and quality in a single, versatile format. Whether you’re watching a movie on your phone or sharing videos on social media, MP4 makes the experience seamless and efficient.

For those seeking a reliable tool to optimize their MP4 videos, Mp4Gain offers an effective solution for handling compression while preserving quality. It’s designed to simplify the balance between quality and file size, making it easy to store, share, and stream video without compromising on clarity.

Comments:

JohnDoe99: Really great article! I’ve always wondered how video compression works, especially in MP4s. This explained it so clearly. Thanks for the tips on bit rate settings, that was super helpful.

VideoGuru88: I use MP4 all the time but didn’t know about intra-frame vs. inter-frame compression. Makes sense now why some videos look better on my phone! Great read!

TechSavvyChris: Wish there was even more detail on how to adjust settings for different devices. But otherwise, this covered so much! Definitely saving this one.

PixelPusher22: The section on challenges is so relatable. I always get frustrated with artifacts in compressed videos. Thanks for breaking down how to avoid them!

CamcoderGal: This helped a ton with my YouTube uploads. I finally understand bit rate and why some videos look pixelated. Loved the easy explanations!

HappyViewer123: Never realized there was so much behind video compression! I always just clicked ‘compress’. Thanks for the info, really cool stuff!

GoGetEmVideoFan: Super insightful article! The tips about choosing the right compression based on where the video will be used is exactly what I needed.

VideoEditorPro: Nicely done! Appreciate the balance between technical detail and readability. Wish I’d read this sooner.

SocMediaBuff: Very helpful for making social media videos look good without using up all my data. Learned a lot about codec settings, so thanks!

TechyMike: Just tried Mp4Gain and found it super easy to use. Great tip at the end!

StaceyVids: I liked this article but would have loved to see a bit more about lossy vs. lossless. Still, really informative and helped clear up a lot of confusion!

CompressionFan23: This article hit all the right points. I’m a bit of a compression geek, and this added to my knowledge. Thanks!

HDMovieMaker: I didn’t realize MP4 was so flexible. Really useful for keeping high quality without big files. Appreciate the insight!

JonTheEditor: This was so interesting. Made me rethink how I approach compression in my own projects. Thanks for the practical advice.

VideoFan2020: This was an eye-opener! I thought compression just meant losing quality, but this showed me there’s a lot more to it. Kudos for a well-written piece!


https://mx.pinterest.com/pin/1088041591224461968
https://mx.pinterest.com/pin/1090011916061424096
https://www.tumblr.com/mp3-mp4/765443525138644992/video-compression-in-mp4-containers-mp4gaincom

Bitrate and the 4K Video Experience

Bitrate and the 4K Video Experience

4K Video
4K Video

Understanding 4K Video Bitrate

4K video, with its stunning resolution, has become a favorite for those seeking the ultimate visual experience. But what about the less-talked-about factor: bitrate? 4K video bitrate is a crucial element that influences the quality of your 4K content. In this article, I’ll explain what 4K video bitrate is, how it affects the 4K video experience, and why optimizing it is vital.

4K video bitrate is essentially the amount of data processed per second to create that beautiful, high-resolution image. It determines the level of detail and clarity you see on your screen. Think of it as the paint a talented artist uses to create a masterpiece—bitrate is the quality of that paint, and it directly affects the visual quality of your 4K video.

How Bitrate Impacts 4K Video Quality

The relationship between bitrate and 4K video quality is straightforward: the higher the bitrate, the better the quality. Higher bitrate means more data is allocated to each frame, resulting in a richer, more detailed image. If the bitrate is too low, you may notice compression artifacts, pixelation, and a loss of detail, which can be jarring in the context of 4K.

Imagine you have a high-definition painting of a scenic landscape. If you view it up close, every brushstroke and detail is clear and vivid—this is akin to high bitrate. On the other hand, if you were to stretch the same painting to cover an entire wall, you might notice pixelation and loss of detail, much like what happens with low bitrate 4K video.

Optimizing Bitrate for a Seamless 4K Experience

To enjoy a seamless 4K video experience, optimizing bitrate is key. Streaming services and platforms aim to find the right balance between image quality and efficient data transmission. As a viewer, you can help by ensuring a stable and high-speed internet connection. Additionally, when creating or encoding 4K content, it’s essential to select an appropriate bitrate setting that aligns with your content’s intended quality.

Think of bitrate optimization as finding the right balance in a recipe. Too much spice can overwhelm the dish, while too little can make it bland. In the world of 4K video, the right bitrate ensures a visually pleasing experience without unnecessary data bloat or loss of quality.

Enhancing the 4K Video Experience

In conclusion, bitrate plays a pivotal role in your 4K video experience. Understanding its importance and finding that sweet spot between quality and efficiency is the key to unlocking the full potential of 4K content. So, whether you’re a content creator or a 4K enthusiast, keep in mind that bitrate is the paintbrush that adds the final strokes to your visual masterpiece.

Last Words

Bitrate and 4K video quality go hand in hand, and with the right knowledge and adjustments, you can enjoy a truly immersive 4K experience.

What is the difference between bit depth and bitrate?

What is the difference between bit depth and bitrate?

Bit Depth
Bit Depth
Bit depth
Bit Depth

Understanding Bit Depth and Bitrate

When it comes to audio and video files, there are two terms that are often used interchangeably: bit depth and bitrate. However, they are not the same thing. Bit depth refers to the number of bits used to represent each sample in an audio or video file, while bitrate refers to the amount of data transmitted per second.
Bit depth determines the number of possible values for each sample in a digital audio or video file. For example, an 8-bit audio file can have 256 possible values per sample, while a 16-bit file can have 65,536. The higher the bit depth, the more accurate the representation of the original sound or image.

On the other hand, bitrate refers to the amount of data transmitted per second in a digital file. In other words, it’s the rate at which data is encoded in a file. Higher bitrates typically mean higher quality files with more information, but also larger file sizes.

Audio Bit Depth vs Bitrate

When it comes to audio files, the bit depth and bitrate are both important factors in determining the quality of the sound. A higher bit depth means a more accurate representation of the original sound, while a higher bitrate means more data is transmitted per second, resulting in a higher quality sound.
However, it’s important to note that a higher bitrate does not necessarily mean a higher quality sound. If the original recording is of poor quality, increasing the bitrate will not improve the sound. In fact, it can actually result in larger file sizes with no improvement in sound quality.

Video Bit Depth vs Bitrate

Video files also have bit depth and bitrate, but they work slightly differently than in audio files. Bit depth determines the number of colors that can be represented in a video file, while bitrate determines the amount of data transmitted per second.
A higher bit depth means a wider range of colors can be represented in the video, resulting in a more accurate and vibrant image. However, a higher bitrate is also important for video files, as it determines the amount of detail that can be captured in each frame.

It’s important to find the right balance between bit depth and bitrate for video files, as increasing one can have a negative impact on the other. For example, a high bit depth with a low bitrate can result in a choppy or pixelated image, while a low bit depth with a high bitrate can result in a washed-out or blurry image.

Final Words

In conclusion, bit depth and bitrate are both important factors to consider when working with audio and video files. While they may seem similar, they serve different purposes and have different effects on the quality of the final product. It’s important to find the right balance between the two to ensure the best possible sound or image quality.
Keywords: audio bit depth, video bit depth, bit depth vs bitrate, bitrate definition, bitrate vs quality, audio quality, video quality, digital audio, digital video, file size, data transmission, accuracy, color representation, image quality, sound quality, audio recording, video recording, data encoding, pixelation, file format, media production, sound engineering, video editing, multimedia, digital media, technology, mp4gain, audio normalization, audio conversion, equalizer, windows, digital signal processing, dynamic