M4a Normalizer – How to Normalize M4A Files with mp4gain

How to Normalize M4A Files with mp4gain

M4a Normalizer
M4a Normalizer
M4a Normalizer
M4a Normalizer

M4A is a popular audio format that is used to store lossless and lossy audio files. However, the volume of M4A files can vary, which can be annoying when listening to music. Normalization is the process of adjusting the volume of audio files so that they have a consistent level. This can help to ensure that your M4A files sound their best, regardless of the playback device or software you use.

Why Normalize M4A Files?

There are a few reasons why you might want to normalize M4A files. First, normalization can help to improve the overall sound quality of your M4A files. When M4A files are not normalized, the volume of each file can vary, which can make it difficult to listen to music in a consistent way. Normalization helps to ensure that all of your M4A files have a consistent volume level, which can make your music sound better.

Second, normalization can help to prevent clipping. Clipping occurs when the volume of an audio file is too high and the waveform reaches the maximum level. This can cause distortion and make your music sound unpleasant. Normalization can help to prevent clipping by ensuring that the volume of your M4A files is not too high.

Finally, normalization can help to make your M4A files more compatible with different playback devices and software. Some playback devices and software have different volume settings, which can make it difficult to get your M4A files to sound the same on all devices. Normalization can help to ensure that your M4A files sound consistent regardless of the playback device or software you use.

How to Use mp4gain to Normalize M4A Files

Using mp4gain to normalize M4A files is very simple. Here are the steps involved:

Download and install mp4gain on your computer.
Open mp4gain and select the M4A files that you want to normalize.
Adjust the target volume level. The default target volume level is 89dB, but you may want to adjust this level depending on your preferences.
Click on the “Normalize” button. mp4gain will then normalize the M4A files and save them to your computer.

Final Words About Normalization

Normalization is a simple but effective way to improve the sound quality of your M4A files. If you want to make sure that your M4A files sound their best, I recommend using mp4gain to normalize them.

I hope this article has been helpful. If you have any questions, please feel free to leave a comment below.

Additional Information

Normalization is a process that can be applied to any type of audio file, not just M4A files.
There are other tools available that can be used to normalize M4A files, such as SoX and Audacity.
The target volume level that you choose for normalization will depend on your personal preferences.
Normalization can slightly reduce the dynamic range of an audio file, but this is usually not noticeable.

Conclusion

Normalization is a great way to improve the sound quality of your M4A files. It is a simple process that can be done using mp4gain or other tools. If you want to make sure that your M4A files sound their best, I recommend normalizing them.

Which Method Should I Use?

The best method for normalizing M4A files will depend on your individual needs and preferences. If you are looking for a free and easy-to-use tool, then mp4gain is a good option. If you need to normalize M4A files online, then Audacity or CloudConvert are both good choices.

Ultimately, the best way to normalize your M4A files is the way that works best for you. Experiment with different methods and see what gives you the best results.

Final Words About Normalization

Normalization is a simple but effective way to improve the sound quality of your M4A files. By following the steps in this article, you can ensure that your M4A files sound their best, regardless of the playback device or software you use.

I hope this article has been helpful. If you have any questions, please feel free to leave a comment below.

Ogg Normalizer – How to Normalize Ogg Files with mp4gain

Ogg Normalizer – How to Normalize Ogg Files with mp4gain

Ogg Normalizer
Ogg Normalizer
Ogg Normalizer
Ogg Normalizer

Ogg is a lossless audio format that offers excellent sound quality. However, the volume of Ogg files can vary, which can be annoying when listening to music. Normalization is the process of adjusting the volume of audio files so that they have a consistent level. This can help to ensure that your Ogg files sound their best, regardless of the playback device or software you use.

There are a number of different ways to normalize Ogg files. One popular option is to use mp4gain. mp4gain is a  tool that can be used to normalize Ogg files on Windows.

Why Normalize Ogg Files?

There are a few reasons why you might want to normalize Ogg files. First, normalization can help to improve the overall sound quality of your Ogg files. When Ogg files are not normalized, the volume of each file can vary, which can make it difficult to listen to music in a consistent way. Normalization helps to ensure that all of your Ogg files have a consistent volume level, which can make your music sound better.

Second, normalization can help to prevent clipping. Clipping occurs when the volume of an audio file is too high and the waveform reaches the maximum level. This can cause distortion and make your music sound unpleasant. Normalization can help to prevent clipping by ensuring that the volume of your Ogg files is not too high.

Finally, normalization can help to make your Ogg files more compatible with different playback devices and software. Some playback devices and software have different volume settings, which can make it difficult to get your Ogg files to sound the same on all devices. Normalization can help to ensure that your Ogg files sound consistent regardless of the playback device or software you use.

How to Use mp4gain

Using mp4gain to normalize Ogg files is very simple. Here are the steps involved:

Download and install mp4gain on your computer.
Open mp4gain and select the Ogg files that you want to normalize.
Adjust the target volume level. The default target volume level is 89dB, but you may want to adjust this level depending on your preferences.
Click on the “Normalize” button. mp4gain will then normalize the Ogg files and save them to your computer.
**

Final Words About Normalization

Normalization is a simple but effective way to improve the sound quality of your Ogg files. If you want to make sure that your Ogg files sound their best, I recommend using mp4gain to normalize them.

I hope this article has been helpful. If you have any questions, please feel free to leave a comment below.

Additional Information

Normalization is a process that can be applied to any type of audio file, not just Ogg files.
There are other tools available that can be used to normalize Ogg files, such as SoX and Audacity.
The target volume level that you choose for normalization will depend on your personal preferences.
Normalization can slightly reduce the dynamic range of an audio file, but this is usually not noticeable.

Ogg Normalizer

Normalization is a great way to improve the sound quality of your Ogg files. It is a simple process that can be done using mp4gain or other tools. If you want to make sure that your Ogg files sound their best, I recommend normalizing them.

Flac Normalizer – How to Normalize FLAC Files with mp4gain

How to Normalize FLAC Files with mp4gain

Flac Normalizer
Flac Normalizer
Flac Normalizer
Flac Normalizer


FLAC is a lossless audio format that offers excellent sound quality. However, the volume of FLAC files can vary, which can be annoying when listening to music. Normalization is the process of adjusting the volume of audio files so that they have a consistent level. This can help to ensure that your FLAC files sound their best, regardless of the playback device or software you use.

There are a number of different ways to normalize FLAC files. One popular option is to use mp4gain. mp4gain is a tool that can be used to normalize FLAC files on Windows.

To use mp4gain, simply download the software and install it on your computer. Once installed, open mp4gain and select the FLAC files that you want to normalize. You can then adjust the target volume level. The default target volume level is 89dB, but you may want to adjust this level depending on your preferences.

Once you have set the target volume level, click on the “Normalize” button. mp4gain will then normalize the FLAC files and save them to your computer.

Why Normalize FLAC Files?

There are a few reasons why you might want to normalize FLAC files. First, normalization can help to improve the overall sound quality of your FLAC files. When FLAC files are not normalized, the volume of each file can vary, which can make it difficult to listen to music in a consistent way. Normalization helps to ensure that all of your FLAC files have a consistent volume level, which can make your music sound better.

Second, normalization can help to prevent clipping. Clipping occurs when the volume of an audio file is too high and the waveform reaches the maximum level. This can cause distortion and make your music sound unpleasant. Normalization can help to prevent clipping by ensuring that the volume of your FLAC files is not too high.

Finally, normalization can help to make your FLAC files more compatible with different playback devices and software. Some playback devices and software have different volume settings, which can make it difficult to get your FLAC files to sound the same on all devices. Normalization can help to ensure that your FLAC files sound consistent regardless of the playback device or software you use.

How to Use mp4gain

Using mp4gain to normalize FLAC files is very simple. Here are the steps involved:

Download and install mp4gain on your computer.
Open mp4gain and select the FLAC files that you want to normalize.
Adjust the target volume level. The default target volume level is 89dB, but you may want to adjust this level depending on your preferences.
Click on the “Normalize” button. mp4gain will then normalize the FLAC files and save them to your computer.
**

Final Words About Normalization

Normalization is a simple but effective way to improve the sound quality of your FLAC files. If you want to make sure that your FLAC files sound their best, I recommend using mp4gain to normalize them.

Video Codec Profiles and Levels: A Guide for Video Creators

Video Codec Profiles and Levels: A Guide for Video Creators

Video Codec Profiles and Levels: A Guide for Video Creators

When you’re creating a video, one of the most important decisions you’ll make is the video codec you’ll use. The codec will determine the quality and size of your video, as well as the compatibility with different devices.

Video codecs are divided into profiles and levels. Profiles define the features that are supported by a codec, while levels define the maximum quality and size of a video encoded with that profile.

What are Video Codec Profiles?

Video codec profiles define the features that are supported by a codec. This includes things like the type of frames that are supported, the resolution of the video, and the chroma subsampling.

There are a number of different video codec profiles available, each with its own strengths and weaknesses. Some of the most common profiles include:

Main Profile: This is the most common profile and is supported by most devices. It supports a wide range of resolutions and chroma subsamplings.
High Profile: This profile offers higher quality than the Main Profile, but it is not supported by as many devices.
High 10 Profile: This profile supports 10-bit color, which can provide even higher quality than the High Profile.

What are Video Codec Levels?

Video codec levels define the maximum quality and size of a video encoded with a particular profile. This is determined by factors such as the maximum bitrate and the maximum frame rate.

There are a number of different video codec levels available, each with its own quality and size requirements. Some of the most common levels include:

Level 3: This is the lowest level and supports a maximum bitrate of 10,000 kbps.
Level 4: This level supports a maximum bitrate of 20,000 kbps.
Level 5: This level supports a maximum bitrate of 40,000 kbps.
**

Choosing the Right Profile and Level

The best way to choose the right profile and level for your video depends on a number of factors, including:

The desired quality of the video.
The target audience.
The devices that the video will be played on.
If you’re creating a video for a wide audience, then you’ll want to choose a profile and level that is supported by most devices. If you’re creating a video for a specific audience, then you may be able to choose a higher quality profile and level.

**

Final Words about Video Codec Profiles and Levels

Video codec profiles and levels are an important part of video encoding. By understanding the different profiles and levels, you can choose the right settings for your video, ensuring that it is both high quality and compatible with the devices that you want to play it on.

I hope this article has helped you to understand video codec profiles and levels.

Codecs: The Building Blocks of Digital Media

Codecs: The Building Blocks of Digital Media

codecs
codecs
Codecs
Codecs

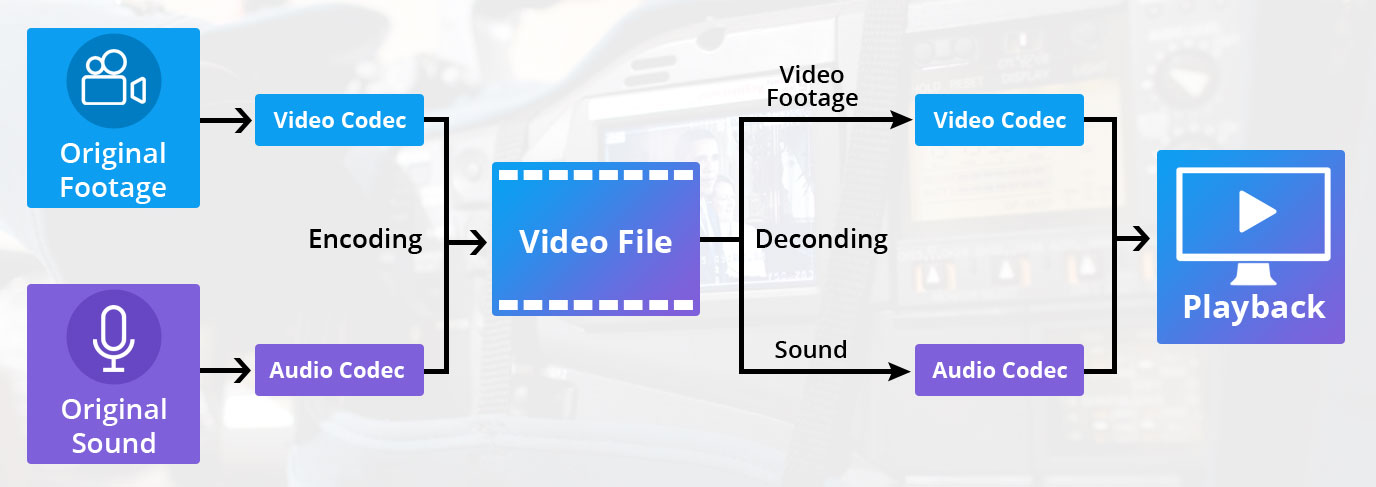
Codecs are the building blocks of digital media. They are software or hardware that encode and decode digital data streams. This means that they can take a raw digital signal, such as a video or audio recording, and compress it into a smaller file size, or they can take a compressed file and expand it back into its original form.

Codecs are essential for the transmission, storage, and playback of digital media. They are used in a wide variety of applications, including streaming video, video conferencing, and digital broadcasting.

How Codecs Work

Codecs work by using a variety of techniques to reduce the size of digital data streams. These techniques include:

Entropy coding: This technique takes advantage of the fact that some parts of a digital signal are more likely to occur than others. By assigning shorter codes to the more likely parts of the signal, entropy coding can significantly reduce the size of the file.
Transform coding: This technique breaks the digital signal down into smaller components, and then compresses each component individually. This can be more efficient than entropy coding, but it is also more complex.
Prediction: This technique uses the past values of a signal to predict future values. By predicting future values, the codec can reduce the amount of data that needs to be stored.
**

Types of Codecs

There are two main types of codecs: lossy and lossless. Lossy codecs reduce the size of a digital data stream by discarding some of the data. This can result in a loss of quality, but it also allows for much smaller file sizes. Lossless codecs do not discard any data, so they do not suffer from any loss of quality. However, they also produce larger file sizes.

Some of the most common lossy codecs include:

MPEG-1: This codec is used for a variety of applications, including video CDs and digital television.
MPEG-2: This codec is used for DVD-Video and high-definition television.
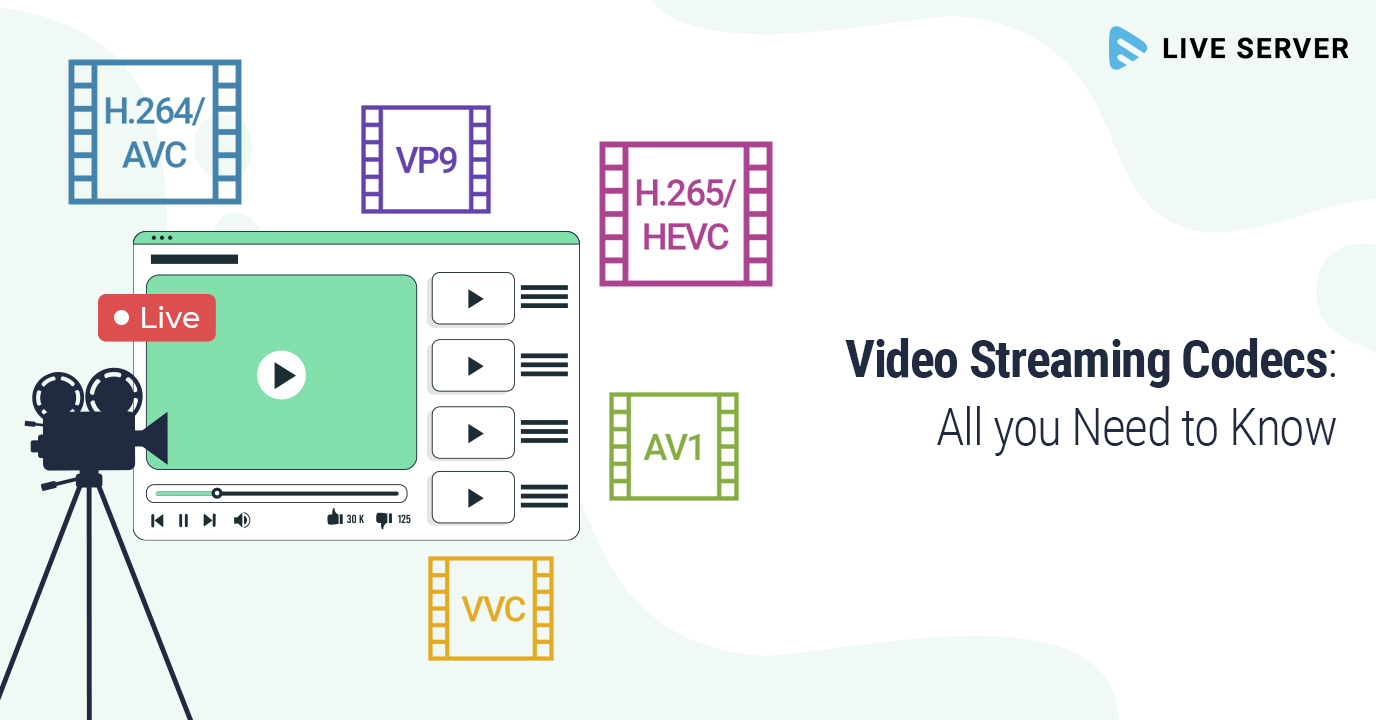
H.264: This codec is the most widely used codec for streaming video and online video.
Some of the most common lossless codecs include:

FLAC: This codec is used for lossless audio compression.
WAV: This codec is a lossless audio format that is used by many professional audio applications.
ALAC: This codec is a lossless audio format that is used by Apple’s iTunes and iPod products.
**

Conclusion

Codecs are essential for the transmission, storage, and playback of digital media. They are used in a wide variety of applications, and they have made it possible to enjoy digital media on a variety of devices.

Final Words about Codecs

Codecs are a complex topic, but they are essential for understanding how digital media works. By understanding how codecs work, you can make better decisions about the quality and size of your digital media files.

I hope this article has given you a better understanding of codecs.

Resampling Audio: Concepts and Methods

Resampling Audio: Concepts and Methods

Resampling Audio
Resampling Audio
Resampling Audio
Resampling Audio

Introduction

Resampling is the process of changing the sample rate of an audio signal. This can be done to increase or decrease the playback speed of the signal, or to convert it from one sample rate to another.

In this article, I will discuss the concepts and methods of resampling audio. I will also provide some tips on how to resample audio effectively.

What is Resampling?

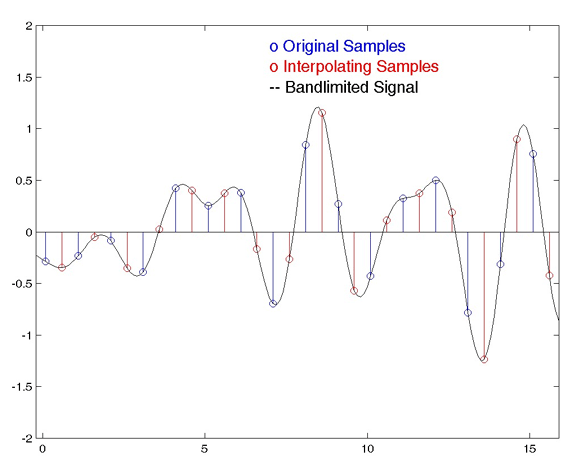
Resampling is the process of changing the number of samples per second in an audio signal. The sample rate is the number of times per second that an audio signal is sampled. For example, a CD-quality audio signal has a sample rate of 44,100 samples per second.

When you resample an audio signal, you are changing the number of samples per second. This can be done to increase or decrease the playback speed of the signal, or to convert it from one sample rate to another.

Why Resample Audio?

There are a number of reasons why you might want to resample audio. For example, you might want to:

Increase or decrease the playback speed of an audio file.
Convert an audio file from one sample rate to another.
Optimize an audio file for playback on a specific device.
Remove unwanted noise from an audio file.
How Does Resampling Work?

Resampling works by inserting or removing samples from the audio signal. When samples are inserted, the playback speed of the signal is increased. When samples are removed, the playback speed of the signal is decreased.

There are two main types of resampling:

Linear resampling is the most common type of resampling. It works by inserting or removing samples in a linear fashion. This means that the spacing between samples is constant throughout the audio signal.
Non-linear resampling is a more sophisticated type of resampling. It works by inserting or removing samples in a non-linear fashion. This means that the spacing between samples is not constant throughout the audio signal.
Which Type of Resampling Should I Use?

The type of resampling that you should use depends on the specific application. For most applications, linear resampling is sufficient. However, if you need to preserve the quality of the audio signal, then you should use non-linear resampling.

How to Resample Audio

There are a number of software applications that can be used to resample audio. Some popular examples include Audacity, Adobe Audition, and FL Studio.

Resampling Tips

Here are a few tips for resampling audio:

Use a high-quality resampling algorithm. This will help to preserve the quality of the audio signal.
Set the sample rate of the output file to the same sample rate as the input file. This will avoid any changes in the playback speed of the signal.
Use a high-quality audio converter. This will help to ensure that the resampled audio signal is of the highest quality.
Final Words About Resampling Audio

Resampling is a powerful tool that can be used to change the sample rate of an audio signal. It can be used to increase or decrease the playback speed of an audio file, to convert an audio file from one sample rate to another, or to optimize an audio file for playback on a specific device.

When resampling audio, it is important to use a high-quality resampling algorithm and to set the sample rate of the output file to the same sample rate as the input file. This will help to preserve the quality of the audio signal.

Resampling Audio for Beginners

Resampling audio can be a daunting task for beginners. However, it is not as difficult as it seems. Here are a few tips to help you get started:

Start by using a simple resampling algorithm. There are many free and open-source resampling algorithms available online.
Set the sample rate of the output file to the same sample rate as the input file. This will avoid any changes in the playback speed of the signal.
Use a high-quality audio converter. This will help to ensure that the resampled audio signal is of the highest quality.
With a little practice, you will be able to resample audio like a pro!

Conclusion

Resampling audio is a powerful tool that can be used to change the sample rate of an audio signal. It can be used to increase or decrease the playback speed of an audio file, to convert an audio file from one sample rate to another, or to optimize an audio file for playback on a specific device.