MP3 vs Lossless


Free Download Mp4Gain
picture

MP3 vs Lossless

MP3 vs Lossless
MP3 vs Lossless
MP3 vs Lossless
MP3 vs Lossless

Meta Description: Discover the difference between MP3 and lossless audio formats and understand which one suits your listening preferences.

Introduction

Music is an essential part of our lives. It can evoke emotions, motivate us, and even help us relax. The format we listen to music in can have a significant impact on our listening experience. Two of the most popular audio formats are MP3 and lossless. While MP3 is widely used, lossless audio formats are gaining popularity. This article will explore the differences between MP3 and lossless audio formats and help you understand which one is best for your listening preferences.

MP3 vs Lossless: What’s the Difference?

MP3 is a compressed audio format that reduces the file size of audio recordings while maintaining reasonable sound quality. Lossless audio formats, on the other hand, preserve the audio quality of the original recording. Let’s delve deeper into the differences between MP3 and lossless audio formats.

Compression

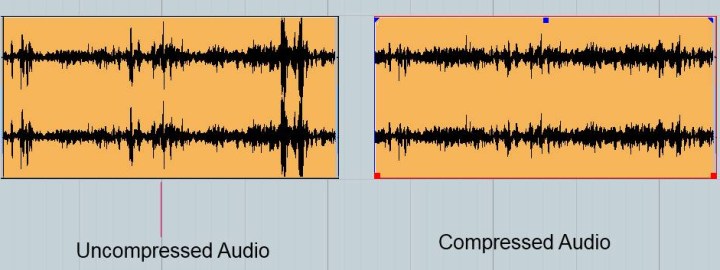
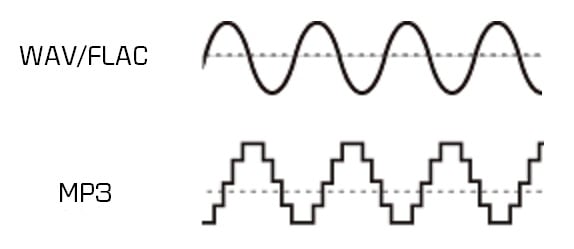
MP3 audio files are compressed to reduce the file size. This compression results in some data loss, which affects the audio quality. Lossless audio formats, such as FLAC or ALAC, compress audio files without losing any data. This compression is possible due to the fact that these audio formats eliminate redundancy in audio data.

Audio Quality

MP3 audio files have a lower audio quality than lossless audio formats. The audio quality is reduced due to data compression. Lossless audio formats maintain the audio quality of the original recording, making them a better choice for audiophiles and music enthusiasts who want the best possible sound quality.

File Size

MP3 files are significantly smaller in size than lossless audio formats. This small size makes MP3 files easy to share and store, making them a popular choice for digital music distribution. Lossless audio formats, on the other hand, are larger in size, which makes them more challenging to share and store.

Compatibility

MP3 audio files are compatible with a wide range of devices and media players, making them an accessible audio format. Lossless audio formats, on the other hand, have limited compatibility and require specialized software or hardware to play them.

Head-to-Head Comparison: MP3 vs Lossless

Let’s compare MP3 and lossless audio formats head-to-head based on the following factors:

Audio Quality: MP3 compresses audio data, which results in reduced audio quality. Lossless audio formats preserve the audio quality of the original recording.

File Size: MP3 files are significantly smaller in size than lossless audio formats.

Compatibility: MP3 files are compatible with a wide range of devices and media players. Lossless audio formats have limited compatibility and require specialized software or hardware to play them.

Portability: MP3 files are easy to share and store due to their small size. Lossless audio formats are larger in size, making them more challenging to share and store.

Ease of Use: MP3 files are easy to use and require no specialized software or hardware. Lossless audio formats require specialized software or hardware to play them.

Based on the above comparison, MP3 audio files are an excellent choice for those who value portability and ease of use, while lossless audio formats are a better choice for audiophiles who value audio quality over file size.

FAQs

Q: Is MP3 audio quality good enough? A: MP3 audio quality is good enough for most casual listeners. However, audiophiles and music enthusiasts may prefer lossless audio formats for their superior audio quality.

Q: Are lossless audio formats worth the larger file size? A: Lossless audio formats are worth the larger file size for audiophiles and music enthusiasts who value audio quality over file size.

Q: Converting MP3 to Lossless Audio Formats

It is possible to convert MP3 files to lossless audio formats like FLAC or ALAC. However, this conversion does not improve the audio quality of the original MP3 file. The converted file will have the same audio quality as the original MP3 file. Converting an MP3 file to a lossless format only increases the file size and does not improve the audio quality.

Choosing the Right Audio Format for You

When choosing between MP3 and lossless audio formats, it is essential to consider your listening preferences. If you value portability and ease of use, MP3 is the way to go. MP3 files are compatible with a wide range of devices and media players and have a small file size, making them easy to share and store. However, if you are an audiophile or music enthusiast who values audio quality over file size, lossless audio formats like FLAC or ALAC are the way to go. These formats preserve the audio quality of the original recording and provide a superior listening experience.

Conclusion

In conclusion, the choice between MP3 and lossless audio formats ultimately depends on your listening preferences. MP3 files are excellent for those who value portability and ease of use, while lossless audio formats are the better choice for those who prioritize audio quality over file size. Regardless of which format you choose, music is a universal language that brings people together and enhances our lives in countless ways.


Free Download Mp4Gain
picture


Mp4Gain Main Window
picture


Mp4Gain Features
picture


Free Download Mp4Gain
picture

Audio Noise Reduction

Audio Noise Reduction

Audio Noise Reduction


Audio Noise Reduction

Noise reduction – Introduction

Audio noise is the unwanted sound that gets recorded or produced along with the desired sound. It can be caused by various factors, such as electrical interference, background noise, microphone hiss, or low-quality equipment. Audio noise can be a significant distraction and can ruin the listening experience for the listener.

Types of Audio Noise

1. Electrical Interference

Electrical interference is caused by electrical devices or wiring that can generate electromagnetic fields. These fields can interfere with the audio signal, causing a buzzing or humming sound. Examples of electrical interference include power cables, fluorescent lights, and electronic devices such as smartphones or computers.

2. Background Noise

Background noise is any noise that is present in the recording environment. It can be caused by environmental factors such as wind, rain, traffic, or people talking. Background noise can be challenging to remove without affecting the desired audio signal.

3. Microphone Hiss

Microphone hiss is caused by the internal noise of the microphone itself. This noise is more apparent in lower-quality microphones and can be reduced by using high-quality microphones or by using a noise reduction filter.

Methods for Audio Noise Reduction

1. Audio Editing Software

Audio editing software, such as Adobe Audition or Audacity, has built-in noise reduction tools that can remove unwanted noise from audio recordings. These tools work by analyzing the audio signal and removing any frequencies that match the noise profile. The effectiveness of the tool depends on the complexity and type of noise present in the recording.

2. Noise Reduction Filters

Noise reduction filters are hardware devices that can be used to remove unwanted noise from audio recordings. These filters work by analyzing the audio signal and removing any frequencies that match the noise profile. They are particularly useful for removing electrical interference and microphone hiss.

3. Dynamic Noise Reduction

Dynamic noise reduction is a technique that can be used to reduce unwanted noise from audio recordings in real-time. This technique works by analyzing the audio signal and dynamically adjusting the noise reduction filter to remove any unwanted noise. This method is particularly useful for removing background noise during live performances or recording sessions.

Tips for Effective Audio Noise Reduction

  • Record in a quiet environment
  • Use high-quality equipment
  • Use a noise reduction filter or software
  • Use dynamic noise reduction if recording in a live environment
  • Avoid over-processing the audio signal

Conclusion

Audio noise can be a significant distraction and can ruin the listening experience for the listener. Fortunately, there are several methods available for removing unwanted noise from audio recordings. By following the tips mentioned above and using appropriate noise reduction methods, you can produce high-quality audio recordings with minimal noise.

FAQs

What is the best software for audio noise reduction?

There are several audio editing software available that have built-in noise reduction tools, such as Adobe Audition and Audacity. However, the effectiveness of the tool depends on the complexity and type of noise present in the recording.

What is the difference between noise reduction and noise suppression?

Noise reduction and noise suppression are both techniques used to remove unwanted
Copy to Clipboard

clipboard emoji

[email protected]
continua dpnde te quedaste que fue en:

Noise reduction and noise suppression are both techniques used to remove unwanted
background noise from audio recordings, but they work differently.

Noise Reduction

Noise reduction is a technique that involves reducing the noise level in an audio recording without affecting the quality of the audio. The goal is to minimize the unwanted noise and leave the audio intact. This technique is often used in post-production and editing of audio recordings.

There are different ways to perform noise reduction, including:

  • Equalization: This technique involves adjusting the frequency response of the audio recording to remove unwanted frequencies that cause noise.
  • Filtering: This technique involves using a high-pass filter to remove low-frequency noise and a low-pass filter to remove high-frequency noise.
  • Noise gates: This technique involves setting a threshold level below which the audio is muted, effectively removing any noise below that level.
  • Spectral editing: This technique involves analyzing the spectral content of the audio and selectively removing unwanted noise.

Noise Suppression

Noise suppression is a technique that involves removing unwanted noise by actively suppressing it. This technique is often used in real-time audio processing and is commonly used in applications such as noise-cancelling headphones and conference call software.

There are different ways to perform noise suppression, including:

  • Adaptive filtering: This technique involves analyzing the noise signal and creating an adaptive filter that actively removes the noise in real-time.
  • Subtraction: This technique involves recording a sample of the noise and then subtracting it from the audio signal to remove the noise.
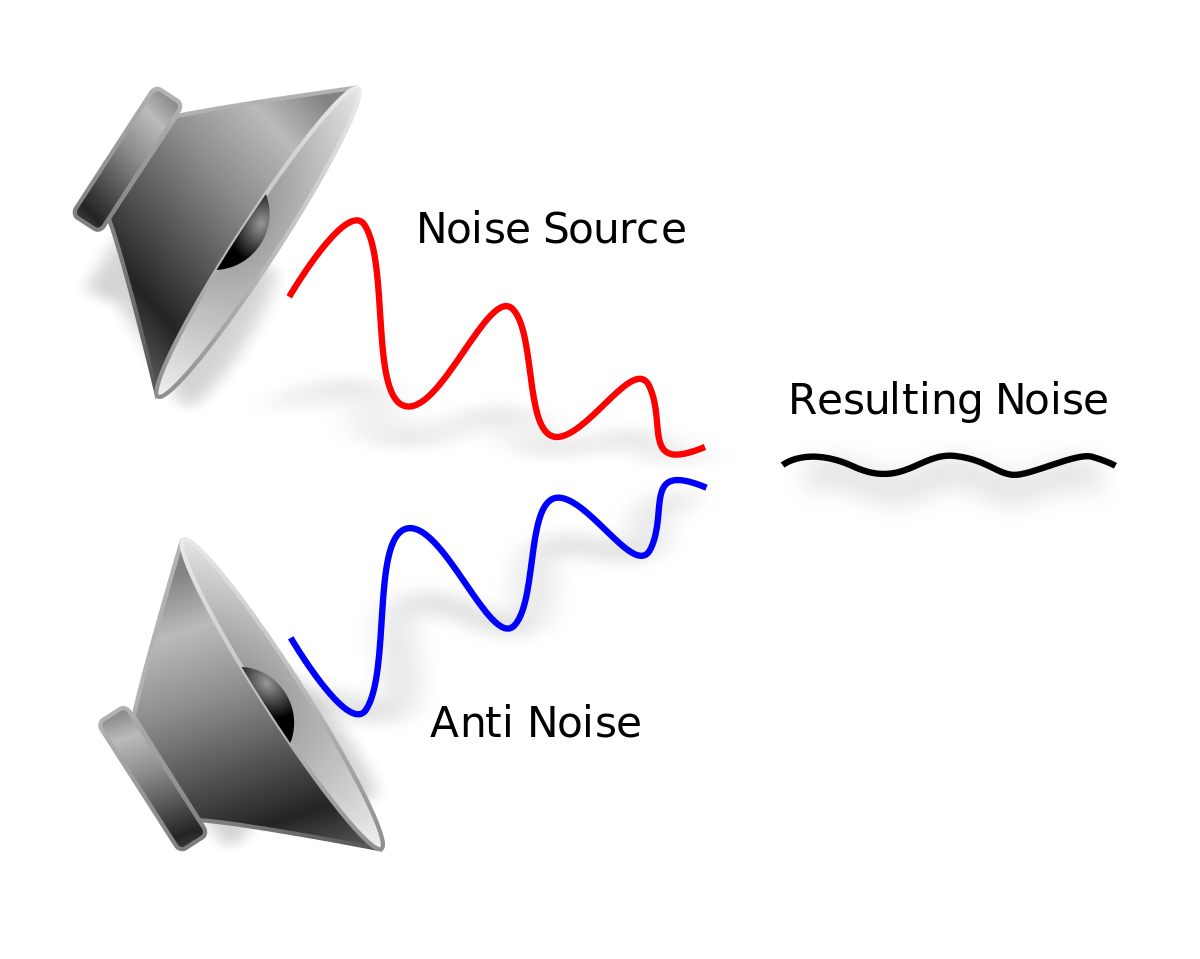
  • Active noise cancellation: This technique involves using an anti-noise signal that cancels out the unwanted noise.

Best Practices for Audio Noise Reduction

When performing audio noise reduction, it is important to follow some best practices to achieve the best results:

  • Record in a quiet environment: The best way to reduce noise is to avoid recording it in the first place. Record in a quiet environment, away from sources of noise.
  • Use a good microphone: A good microphone will capture the audio with high quality and reduce the noise level.
  • Use a pop filter: A pop filter is a device that reduces the popping sound when speaking into a microphone, which can help reduce unwanted noise.
  • Record at the correct level: Recording at the correct level ensures that the signal is strong enough to minimize the noise level.
  • Perform noise reduction as the last step: Perform noise reduction as the last step in the audio editing process to avoid degrading the quality of the audio.

FAQ

What is audio noise?

Audio noise is any unwanted sound that is captured during audio recording. It can be caused by a variety of sources, including electronic interference, background noise, and environmental factors.

What is the difference between noise reduction and noise suppression?

Noise reduction involves reducing the noise level in an audio recording without affecting the quality of the audio, while noise suppression involves actively suppressing unwanted noise in real-time.

What are the best practices for audio noise reduction?

The best practices for audio noise reduction include recording in a quiet environment, using a good microphone, using a pop filter, recording at the correct level, and performing noise reduction as the last step in the audio editing process.

What are some common techniques used for audio noise reduction?

Common techniques used for audio noise reduction include equalization involves adjusting the levels of different frequency components in the audio signal to reduce the effect of noise. The process involves boosting or reducing certain frequencies using an equalizer. For example, if noise is concentrated at a particular frequency range, an equalizer can be used to attenuate that range.

Filtering is a technique that involves removing unwanted frequencies from an audio signal. High-pass filters, low-pass filters, and band-pass filters are commonly used for this purpose. High-pass filters remove frequencies below a certain threshold, while low-pass filters remove frequencies above a certain threshold. Band-pass filters allow frequencies within a certain range to pass while attenuating frequencies outside that range.

Spectral subtraction is a more sophisticated technique that involves estimating the spectral content of the noise and subtracting it from the original signal. The process involves first analyzing the spectral content of the noise and then creating a noise profile. The noise profile is then subtracted from the original signal to reduce the noise.

Other techniques used for audio noise reduction include adaptive filtering, which involves dynamically adjusting a filter to remove noise, and wavelet analysis, which involves decomposing the signal into different frequency bands and selectively removing noise from each band.

Challenges of Audio Noise Reduction

While there are several techniques for audio noise reduction, the process is not always straightforward. In some cases, removing noise can result in a loss of signal quality, leading to artifacts such as distortion, clipping, and phasing. Additionally, different types of noise require different techniques for effective reduction.

Moreover, it can be challenging to distinguish between noise and signal components in some cases, making it difficult to remove noise without affecting the signal. For example, in the case of speech signals, noise can be difficult to distinguish from the natural variation in the speaker’s voice.

Conclusion

Audio noise reduction is a crucial technique for improving the quality of audio recordings. There are several techniques available for reducing noise, including equalization, filtering, and spectral subtraction. However, the process can be challenging, and it is essential to understand the different types of noise and the appropriate techniques for reducing them.

In conclusion, noise reduction is an essential process that can help improve the quality of audio recordings. By understanding the different techniques available for reducing noise and the challenges associated with the process, it is possible to achieve effective noise reduction without compromising signal quality.

Audio Streaming

Audio Streaming

Audio Streaming
Audio Streaming
Audio Streaming
Audio Streaming

Audio Streaming Introduction

Audio streaming is the process of delivering audio content over the internet in real-time. It has revolutionized the way we consume audio content, providing users with instant access to a vast library of music, podcasts, and other audio content from anywhere in the world. Today, audio streaming has become a staple in our daily lives, with millions of people around the globe using audio streaming services on a daily basis.

The Evolution of Audio Streaming

Audio streaming has come a long way since its inception in the 1990s. Back then, audio streaming was limited by slow internet speeds, poor audio quality, and a lack of available content. However, with the advent of high-speed internet, advancements in audio compression technology, and the proliferation of smartphones and other mobile devices, audio streaming has exploded in popularity over the past decade.

Today, there are countless audio streaming services available, catering to every taste and preference. From music streaming services like Spotify, Apple Music, and Tidal, to podcast streaming services like Stitcher and Pocket Casts, there is an audio streaming service for everyone.

The Benefits of Audio Streaming

There are many benefits to using audio streaming services. For one, audio streaming allows users to access a vast library of content from anywhere in the world, at any time. This means that users can listen to their favorite music or podcast while commuting, working out, or just relaxing at home.

Audio streaming services also offer personalized recommendations based on a user’s listening history, allowing users to discover new content that they might not have otherwise found. Additionally, many audio streaming services offer offline listening, which allows users to download their favorite content for offline playback when they don’t have access to the internet.

The Future of Audio Streaming

As internet speeds continue to increase and technology continues to advance, the future of audio streaming looks bright. We can expect to see continued growth in the number of audio streaming services available, as well as improvements in audio quality, personalization, and content discovery.

Additionally, the rise of smart speakers and voice assistants like Amazon Alexa and Google Assistant has opened up new opportunities for audio streaming. In the future, we can expect to see more integration between audio streaming services and smart home devices, allowing users to control their audio playback using their voice.

Conclusion

Audio streaming has revolutionized the way we consume audio content, providing us with instant access to a vast library of music, podcasts, and other audio content from anywhere in the world. With advancements in technology and internet speeds, we can expect to see continued growth in the popularity of audio streaming in the years to come.

And as a side note, we recommend using MP4Gain to improve the quality of your audio streaming experience.

FAQ

What is the difference between audio streaming and downloading?

Audio streaming involves listening to audio content in real-time over the internet, while downloading involves saving a copy of the content to your device for offline playback. With streaming, you don’t need to download the content to your device, saving storage space and allowing you to access a vast library of content without taking up space on your device.

Are audio streaming services free?

Many audio streaming services offer both free and paid options. Free options typically come with ads and limited features, while paid options offer ad-free listening, higher quality audio, and additional features like offline playback.

What is the best audio streaming service?

There is no one-size-fits-all answer to this question, as the best audio streaming service depends on your personal preferences and needs. Some factors to consider when choosing an audio streaming service include the available content, sound quality, user interface, price, and device compatibility.

Content availability is one of the most important factors to consider when choosing an audio streaming service. Some services offer a more extensive music library than others, and the availability of specific genres or artists can vary. You should also consider if the streaming service has exclusive content, such as live sessions, concerts, or podcasts that may interest you.

Another important factor is sound quality. If you’re an audiophile or someone who values high-quality sound, you should choose a streaming service that offers lossless or high-fidelity audio. However, keep in mind that higher sound quality often comes with higher prices.

User interface and ease of use are also essential considerations. A user-friendly interface can make your experience more enjoyable and intuitive. Look for a streaming service that offers personalized recommendations and curated playlists that cater to your music preferences.

Price is also an important factor. While some streaming services offer free access, they may come with ads and limited features. Paid subscription services, on the other hand, offer more features, higher quality sound, and ad-free listening experiences. However, the cost of these services can vary significantly, so it’s important to consider your budget.

Lastly, device compatibility is essential. Make sure the streaming service you choose is compatible with your devices, including your smartphone, tablet, and smart speakers. Some services may also have limitations on the number of devices you can use simultaneously.

Overall, when choosing an audio streaming service, it’s important to consider your individual preferences and needs. Take advantage of free trials and explore different services to find the one that works best for you.

Digital Audio Dynamic Range: What You Need to Know

Digital Audio Dynamic Range: What You Need to Know

dynamic range
dynamic range
dynamic range
dynamic range

Digital audio dynamic range is an important aspect of audio production that affects the quality and clarity of audio. In this article, we’ll explore the basics of dynamic range, how it applies to digital audio, and what you need to know to ensure that your audio recordings have optimal dynamic range.

What is Dynamic Range?

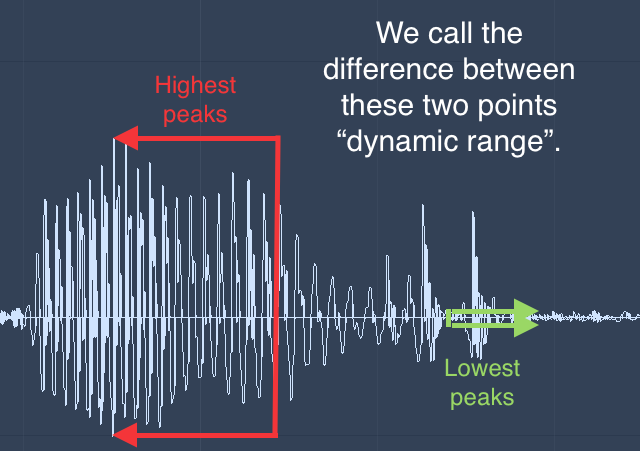
Dynamic range refers to the range of volume levels in an audio signal. It is the difference between the quietest and loudest parts of the audio signal. A wider dynamic range means that the audio signal can capture a greater range of sound levels, resulting in a more realistic and dynamic sound.

In audio production, dynamic range is typically measured in decibels (dB). The dynamic range of an audio signal is the difference between the peak level (the loudest part of the signal) and the noise floor (the quietest part of the signal).

Dynamic Range in Digital Audio

Dynamic range is particularly important in digital audio because digital audio signals are made up of discrete values or “samples” that represent the amplitude of the audio signal at a specific point in time. The number of bits used to represent each sample determines the dynamic range of the audio signal.

For example, a 16-bit audio signal can represent 65,536 different amplitude levels, resulting in a dynamic range of about 96 dB. In contrast, a 24-bit audio signal can represent 16,777,216 different amplitude levels, resulting in a dynamic range of about 144 dB. This is why 24-bit audio is often preferred for professional audio production.

Factors That Affect Dynamic Range

There are several factors that can affect the dynamic range of a digital audio signal:

  1. Recording environment: The recording environment can have a significant impact on dynamic range. A noisy recording environment can increase the noise floor of the recording, reducing the overall dynamic range.
  2. Microphone placement: The placement of the microphone can also affect dynamic range. A poorly placed microphone may capture too much ambient noise, reducing the dynamic range of the recording.
  3. Audio processing: The processing of the audio signal can also affect dynamic range. Compression and limiting can be used to increase the apparent loudness of an audio signal, but they can also reduce dynamic range if used excessively.
  4. Playback system: The dynamic range of a recording can also be affected by the playback system. A low-quality playback system may not be able to reproduce the full dynamic range of the recording.

How to Ensure Optimal Dynamic Range

To ensure optimal dynamic range in your digital audio recordings, there are several things you can do:

  1. Choose the right recording environment: Choose a quiet environment with good acoustics to minimize the noise floor of your recordings.
  2. Use proper microphone placement: Use proper microphone placement to capture the sound source while minimizing ambient noise.
  3. Use appropriate audio processing: Use compression and limiting sparingly to maintain dynamic range while still achieving the desired loudness.
  4. Use high-quality playback systems: Use high-quality headphones or speakers to ensure that the full dynamic range of the recording is reproduced.

FAQs

Here are some frequently asked questions about digital audio dynamic range:

What is dynamic range?

Dynamic range refers to the difference between the quietest and loudest parts of an audio signal. A high dynamic range means that the signal has a large difference between the quietest and loudest parts, while a low dynamic range means that the signal has a small difference between the quietest and loudest parts.

What is the importance of dynamic range in digital audio?

Dynamic range is crucial in digital audio because it affects the quality of the sound. If the dynamic range is too small, the sound can become compressed and lose detail. On the other hand, if the dynamic range is too large, the sound can become distorted and lose clarity. A well-balanced dynamic range ensures that the sound is clear, detailed, and realistic.

How is dynamic range measured?

Dynamic range is measured in decibels (dB). The difference between the quietest and loudest parts of the audio signal is measured in dB, and this value is used to determine the dynamic range of the signal. A higher dynamic range is indicated by a higher dB value.

What is compression and how does it affect dynamic range?

Compression is a technique used in digital audio to reduce the dynamic range of a signal. This is done by reducing the volume of the loudest parts of the signal and increasing the volume of the quietest parts of the signal. Compression can be useful in some cases, such as when recording vocals or instruments with a wide dynamic range. However, excessive compression can result in a loss of detail and clarity in the sound.

What is limiting and how does it affect dynamic range?

Limiting is a technique used in digital audio to prevent the signal from exceeding a certain level. This is done by reducing the volume of the loudest parts of the signal when they reach a certain threshold. Limiting can be useful in preventing distortion in a signal, but it can also reduce the dynamic range of the signal if used excessively.

What is normalization and how does it affect dynamic range?

Normalization is a technique used in digital audio to adjust the overall volume of a signal to a standard level. This is done by increasing or decreasing the volume of the entire signal to match a predetermined level. Normalization can be useful in bringing the volume of a signal up to a standard level, but it can also reduce the dynamic range of the signal if used excessively.

What is MP4Gain and how can it help with digital audio dynamic range?

MP4Gain is a software application that allows users to adjust the volume of MP3 and MP4 audio files. It can help with digital audio dynamic range by allowing users to adjust the volume of the audio signal to a level that balances dynamic range while ensuring the sound is clear and detailed. It can also help prevent distortion and loss of detail caused by excessive compression, limiting, or normalization.

Conclusion

Digital audio dynamic range is an important aspect of audio production and playback. It affects the quality and clarity of the sound and can impact the overall listening experience. By understanding the principles of dynamic range and the techniques used to manipulate it, audio producers and engineers can create high-quality, well-balanced audio that is clear, detailed, and realistic. While compression, limiting, and normalization can be useful tools in digital audio, they should be used judiciously to avoid distorting or compressing the sound excessively. By maintaining a well-balanced dynamic range, audio producers and engineers can ensure that their audio recordings are of the highest quality possible.

Video File Formats: Everything You Need to Know

Video File Formats: Everything You Need to Know

Video File Formats
Video File Formats
Video File Formats
Video File Formats

Introduction

In the world of digital media, video file formats are an essential component of video production, storage, and distribution. Video file formats are used to compress and encode video data, allowing it to be stored and transmitted efficiently without losing quality.

There are many different video file formats available, each with its own advantages and disadvantages. In this article, we will explore some of the most common video file formats, their features, and their best use cases.

Types of Video File Formats

There are two main categories of video file formats: compressed and uncompressed. Compressed video file formats use various compression techniques to reduce the size of the video file, while uncompressed video file formats store the video data without compression.

Compressed Video File Formats

Here are some of the most commonly used compressed video file formats:

1. MPEG-4

MPEG-4 is a widely used video file format that is known for its high compression rate and ability to deliver high-quality video content. It is commonly used for streaming video content over the internet, as well as for mobile devices and video conferencing.

2. H.264

H.264 is a popular video file format that is known for its high compression rate and ability to deliver high-quality video content. It is commonly used for streaming video content over the internet, as well as for Blu-ray discs, HD DVD, and digital television.

3. AVI

AVI (Audio Video Interleave) is a popular video file format that was introduced by Microsoft in 1992. It is widely supported by most media players and is commonly used for storing video content on personal computers.

4. WMV

WMV (Windows Media Video) is a video file format developed by Microsoft. It is commonly used for streaming video content over the internet and for storing video content on personal computers.

Uncompressed Video File Formats

Here are some of the most commonly used uncompressed video file formats:

1. AVCHD

AVCHD (Advanced Video Coding High Definition) is a high-definition video file format that is commonly used for recording and storing high-quality video content. It is widely used by professional videographers and is compatible with most high-definition televisions.

2. RAW

RAW is an uncompressed video file format that is commonly used by professional videographers and filmmakers. It stores the raw data captured by the camera, allowing for maximum flexibility in post-production.

3. ProRes

ProRes is an uncompressed video file format developed by Apple. It is widely used in the film and television industry and is known for its ability to store high-quality video content without compression.

Choosing the Right Video File Format

Choosing the right video file format depends on the intended use of the video content. Here are some factors to consider when choosing a video file format:

  • The intended distribution method (e.g., streaming, physical media)
  • The required video quality
  • The amount of storage space available
  • The desired level of video compression
  • The compatibility with the intended playback device or software

Conclusion

Video file formats are a crucial aspect of video production and distribution. Choosing the right video file format can impact the quality, size, and compatibility of the video content. By understanding the different video file formats available and their best use cases, video producers can ensure that their content reaches the widest possible audience while maintaining its quality.

While there are many video file formats available, some of the most popular ones include MP4, AVI, MOV, and WMV. Each of these formats has its strengths and weaknesses, and it’s essential to understand their differences to choose the right one for your project.

MP4 is a widely used video file format that is compatible with most devices and platforms, making it an excellent choice for online video distribution. MP4 files are typically small in size, making them easy to upload and download, and they can contain high-quality video and audio.

AVI is an older video file format that was popular in the early days of digital video. While it’s less common today, AVI files can still be useful in certain situations. AVI files tend to be large, making them less suitable for online video distribution. However, they can contain high-quality video and are compatible with most video editing software.

MOV is a video file format developed by Apple for use on its devices and platforms. MOV files are typically high-quality and can contain multiple audio and video tracks, making them an excellent choice for video editing. However, MOV files can be large in size, and they may not be compatible with all devices and platforms.

WMV is a video file format developed by Microsoft for use on its devices and platforms. Like MOV files, WMV files can contain multiple audio and video tracks, making them an excellent choice for video editing. However, WMV files tend to be larger in size, and they may not be compatible with all devices and platforms.

When choosing a video file format, it’s also essential to consider the intended use of the video content. For example, if you’re creating a video for use on social media, you’ll want to choose a format that is compatible with the platform’s requirements. If you’re creating a video for use in a presentation, you’ll want to choose a format that is compatible with the presentation software you’ll be using.

In conclusion, video file formats play a critical role in video production and distribution. By understanding the different formats available and their best use cases, video producers can ensure that their content reaches the widest possible audience while maintaining its quality. Whether you’re creating a video for online distribution or a corporate presentation, choosing the right video file format can make all the difference in the success of your project.

Video Quality: Understanding the Factors that Determine it

Video Quality: Understanding the Factors that Determine it

Video Quality
Video Quality
Video Quality
Video Quality

Video quality is the most crucial aspect of any video, whether it’s a movie, TV show, or a YouTube clip. In today’s world, where video streaming is the norm, video quality is even more critical. However, not everyone understands the factors that determine video quality and how to optimize it.

What is Video Quality?

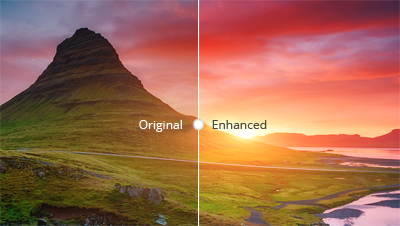
Video quality refers to the level of visual and audio fidelity of a video. A high-quality video has a clear, sharp picture, vibrant colors, and excellent audio quality. On the other hand, a low-quality video may have pixelated images, distorted colors, and muffled audio.

Video quality is determined by several factors, including resolution, bitrate, codec, and frame rate. Understanding these factors is crucial to optimizing video quality.

Resolution

Resolution refers to the number of pixels that make up a video image. The higher the resolution, the more pixels, and the sharper the image. The most common video resolutions are 720p, 1080p, and 4K.

When choosing a resolution, it’s important to consider the display device’s capabilities. For example, if you’re watching a video on a smartphone screen, a 720p resolution is sufficient. However, if you’re watching the same video on a large TV screen, a 4K resolution would provide a better viewing experience.

Bitrate

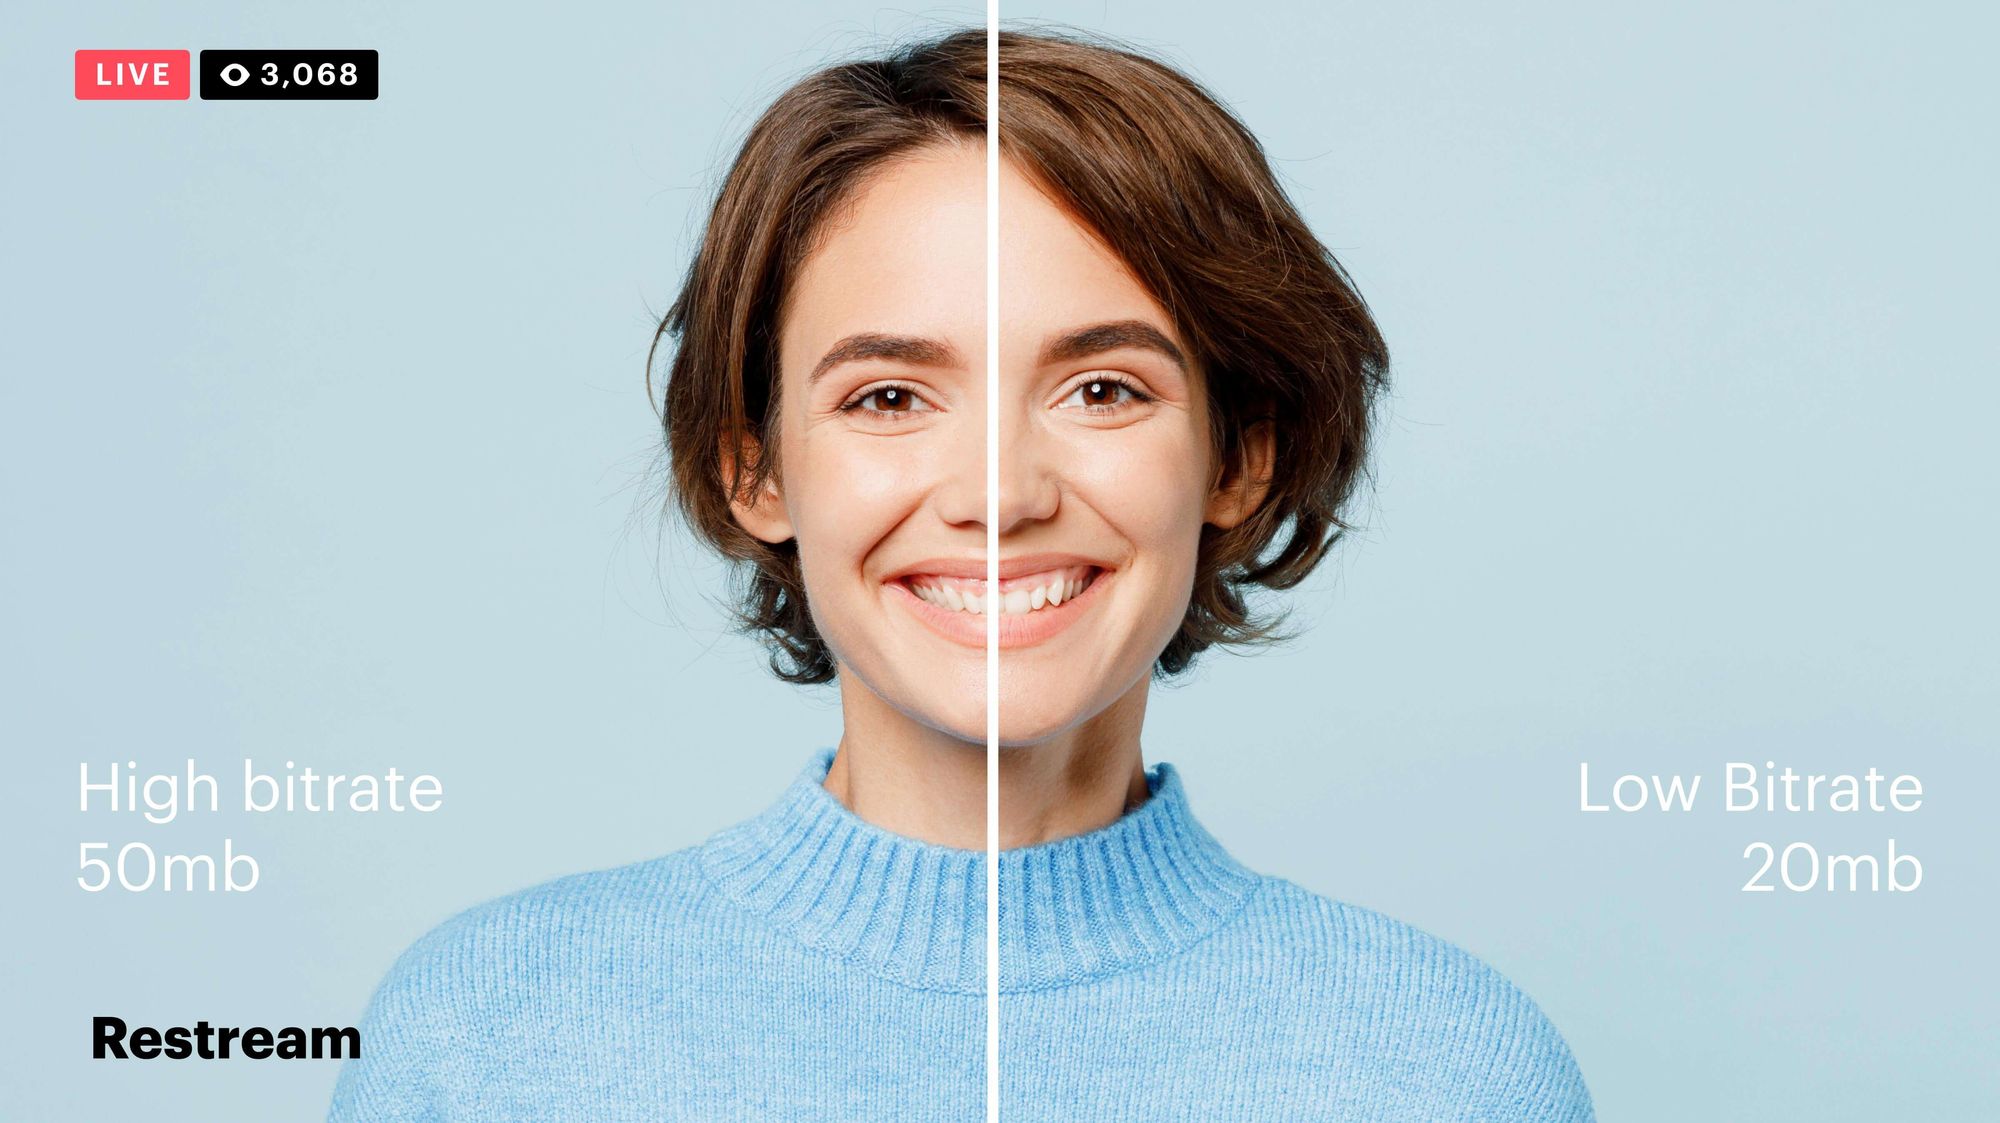
Bitrate refers to the amount of data that is used to encode a video. It affects both the video’s quality and file size. A higher bitrate results in a higher-quality video but also a larger file size.

When choosing a bitrate, it’s important to consider the available bandwidth. A higher bitrate requires more bandwidth, which may result in buffering or slow streaming. Therefore, it’s important to balance quality and file size with available bandwidth.

Codec

A codec is a software that compresses and decompresses video data. It affects the video’s quality, file size, and compatibility with different devices and players. The most common codecs are H.264 and H.265.

When choosing a codec, it’s important to consider compatibility with the playback device and the available processing power. For example, H.265 provides better compression than H.264, resulting in smaller file sizes, but requires more processing power to decode.

Frame Rate

Frame rate refers to the number of frames per second (fps) in a video. A higher frame rate results in smoother and more fluid motion. The standard frame rate for video is 24 fps, but higher frame rates, such as 60 fps, are becoming more common.

When choosing a frame rate, it’s important to consider the content and the intended viewing experience. For example, a higher frame rate is more suitable for action scenes, while a lower frame rate may be sufficient for a dialogue-driven drama.

Conclusion

Optimizing video quality requires a balance of resolution, bitrate, codec, and frame rate. Understanding these factors and choosing the right combination can result in high-quality videos that provide a better viewing experience. One tool that can help optimize video quality is MP4Gain, which can normalize the audio volume of a video and improve overall quality.

FAQ

  • What is the best video resolution?

    The best video resolution depends on the purpose of the video and the device on which it will be played. For example, a video intended for social media or online streaming may have a lower resolution than a video intended for a cinema screen or high-end TV. However, there are some video resolutions that are widely considered to be the best for certain purposes.

    1080p (Full HD)

    1080p (1920 x 1080 pixels) is a video resolution commonly used for Blu-ray discs, HDTV broadcasts, and online streaming platforms such as YouTube and Netflix. This resolution provides a clear and detailed image that is suitable for most purposes, including watching movies, playing games, and general computer use. However, it may not be sufficient for larger screens or high-end devices that require higher resolutions.

    4K Ultra HD

    4K Ultra HD (3840 x 2160 pixels) is a video resolution that provides four times the number of pixels as 1080p. This resolution is becoming increasingly popular for high-end devices, such as gaming consoles, high-end TVs, and high-end smartphones. It provides a significantly more detailed and immersive image, particularly on larger screens or when viewed up close. However, it requires a powerful device and may not be necessary for all purposes.

    8K Ultra HD

    8K Ultra HD (7680 x 4320 pixels) is the highest video resolution currently available. It provides sixteen times the number of pixels as 1080p and is primarily used for professional applications, such as video production and digital signage. It requires a very powerful device and is not necessary for most consumer purposes.

    Factors that affect video quality

    Video quality is affected by a variety of factors, including resolution, frame rate, bitrate, and codecs. Understanding these factors can help you choose the right settings for your video and ensure the best possible quality.

    Resolution

    As discussed above, resolution refers to the number of pixels in a video image. Higher resolutions generally result in better image quality, but also require more storage space and processing power. However, the benefits of higher resolutions may not be noticeable on smaller screens or at normal viewing distances.

    Frame rate

    Frame rate refers to the number of individual frames that make up a video per second. The most common frame rates are 24, 25, and 30 frames per second (fps). Higher frame rates can result in smoother motion and reduce motion blur, but also require more storage space and processing power. However, higher frame rates may not be noticeable for certain types of video, such as still images or talking heads.

    Bitrate

    Bitrate refers to the amount of data used to represent a video image per second. Higher bitrates generally result in better image quality, but also require more storage space and may cause playback issues on slower devices or internet connections. However, lower bitrates may result in compression artifacts or pixelation.

    Codecs

    Codecs are software programs that compress and decompress video data for playback. Different codecs use different algorithms to compress video data, resulting in different levels of compression and image quality. Some codecs are better suited for certain types of video or devices, while others may be more versatile but less efficient.

    Conclusion

    Video quality is a complex and multifaceted topic that is influenced by a variety of factors. Choosing the right video resolution, frame rate, bitrate, and codec can help you achieve the best possible results for your specific needs. However, it is important to keep in mind that there is no one-size-fits-all solution, and the best settings will vary depending on the intended use of the video.

    How can I improve video quality?

    There are several ways to improve video quality, depending on the specific issue you are facing. Here are some tips:

    • Use a higher video resolution and bitrate.
    • Ensure proper lighting and exposure when shooting the video.
    • Stabilize the camera to avoid shaky footage.
    • Use a high-quality codec for encoding the video.
    • Reduce noise and grain in post-processing.
    • Use color correction to enhance the colors and contrast.
    • Use a high-quality audio recording device and ensure proper sound levels.

    Conclusion

    Video quality is an important aspect of video production that can greatly impact the viewer’s experience. By understanding the key factors that influence video quality and choosing the appropriate settings for your specific needs, you can achieve the best possible results. Remember to consider the intended use of the video, as well as the device and platform on which it will be viewed, when selecting video settings. With the right tools and techniques, you can create high-quality videos that will captivate and engage your audience.

    FAQ

    What is video resolution?

    Video resolution refers to the number of pixels that make up a video image. A higher resolution means a larger number of pixels, resulting in a clearer and more detailed image.

    What is video bitrate?

    Video bitrate refers to the amount of data used to encode a video stream. A higher bitrate means more data is used, resulting in a higher-quality video with fewer compression artifacts.

    What is a video codec?

    A video codec is a software algorithm used to compress and decompress video data. Different codecs offer varying levels of compression and quality, and the choice of codec will depend on the specific needs and requirements of the video project.

YouTube to FLAC

YouTube to FLAC downloader or converter

YouTube to FLAC
YouTube to FLAC
YouTube to FLAC
YouTube to FLAC

YouTube is a great platform for streaming and watching videos. However, sometimes you may want to listen to the audio of a YouTube video without the need for the video itself. This is where converting YouTube videos to FLAC format comes in handy. FLAC is a lossless audio format that provides high-quality audio playback, making it an ideal choice for music enthusiasts.

YouTube to FLAC
YouTube to FLAC

Why Convert YouTube Videos to FLAC Format?

There are several reasons why you might want to convert YouTube videos to FLAC format:

  • Higher quality audio: FLAC is a lossless audio format, which means that the audio quality is not compromised during compression. This provides a better listening experience for music enthusiasts.
  • Reduced file size: YouTube videos can take up a lot of storage space, especially if you have many of them. Converting them to FLAC format can help reduce the file size, making it easier to store and manage your music collection.
  • Offline listening: If you want to listen to your favorite music tracks without an internet connection, you can convert them to FLAC format and save them on your device.
YouTube to FLAC
YouTube to FLAC

How to Convert YouTube Videos to FLAC Format

There are several ways to convert YouTube videos to FLAC format. Here are the steps:

Method 1: Using an Online Converter

One of the easiest ways to convert YouTube videos to FLAC format is by using an online converter. Here are the steps:

  1. Go to YouTube and copy the link of the video you want to convert.
  2. Open a new tab and go to a YouTube to FLAC converter website, such as FLVTO.
  3. Paste the YouTube link into the converter’s input box.
  4. Select FLAC as the output format.
  5. Click the convert button and wait for the conversion process to complete.
  6. Download the converted FLAC file to your device.

Method 2: Using a Desktop Software

If you prefer to use desktop software for converting YouTube videos to FLAC format, there are several options available, such as Any Video Converter and Freemake Video Converter. Here are the steps:

  1. Download and install the desktop software of your choice.
  2. Copy the link of the YouTube video you want to convert.
  3. Open the desktop software and paste the YouTube link into the input box.
  4. Select FLAC as the output format.
  5. Click the convert button and wait for the conversion process to complete.
  6. Save the converted FLAC file to your device.

FAQs

Q: Is it legal to convert YouTube videos to FLAC format?

A: The legality of converting YouTube videos to FLAC format depends on the terms of service of YouTube and your local copyright laws. It is always advisable to check the terms of service and copyright laws in your country before converting YouTube videos to any format.

Q: Can I convert YouTube videos to other audio formats besides FLAC?

A: Yes, you can convert YouTube videos to various audio formats, such as MP3, AAC, and WAV, among others.

Convert Youtube Videos to FLAC

Convert Youtube videos to FLAC format to enjoy high-quality audio playback. FLAC, or Free Lossless Audio Codec, is a popular audio format known for its lossless compression, preserving the original audio quality without any loss of data.

Extract Audio from Youtube Videos as FLAC

Extracting audio from Youtube videos and saving them as FLAC files allows you to build a collection of high-fidelity audio tracks. FLAC provides excellent sound quality and is well-suited for audiophiles and music enthusiasts.

Preserving Youtube Sound in Lossless FLAC

Preserve the sound quality of Youtube videos by converting them to FLAC. This lossless format ensures that every detail of the audio, including subtle nuances and dynamics, remains intact for an immersive listening experience.

High-Quality Youtube to FLAC Conversion

Ensure a high-quality conversion from Youtube to FLAC with the right tools and techniques. By utilizing reliable conversion methods, you can achieve an accurate representation of the original audio, delivering an enjoyable listening experience.

Converting Youtube Audio to Lossless FLAC

Converting Youtube audio to lossless FLAC format eliminates any loss of quality during the conversion process. This means that the resulting FLAC files will faithfully reproduce the original audio, maintaining its full dynamic range and clarity.

Youtube Video to Studio-Quality FLAC

Transform Youtube videos into studio-quality FLAC audio files. FLAC’s lossless compression ensures that you can experience the same audio quality as professional studio recordings, enhancing your listening pleasure.

Enjoy Youtube Music in FLAC Format

Enjoy your favorite Youtube music tracks in FLAC format for an enhanced audio experience. FLAC’s lossless compression allows you to hear the music as it was intended, with all the nuances and details preserved.

Lossless Conversion: Youtube to FLAC

Perform lossless conversion of Youtube videos to FLAC for the best audio quality. This conversion method guarantees that the resulting FLAC files will be a perfect replica of the original audio, maintaining the highest fidelity.

Preserve Youtube Sound Quality with FLAC

Preserve the original sound quality of Youtube videos by converting them to FLAC. By choosing FLAC as the output format, you ensure that the audio is faithfully reproduced without any degradation, providing a true-to-source listening experience.

Youtube to FLAC Converter: Retain Audio Integrity

Use a Youtube to FLAC converter to retain the audio integrity of Youtube videos. FLAC’s lossless compression algorithm ensures that the converted files maintain the same audio quality as the original, guaranteeing a seamless transition.

Lossless Audio Extraction: Youtube to FLAC

Perform lossless audio extraction from Youtube videos and save them as FLAC files. This method ensures that every detail of the audio is preserved, allowing you to enjoy the highest quality sound reproduction.

Youtube Audio Download in FLAC Format

Download Youtube audio in FLAC format for superior audio quality. FLAC’s lossless compression guarantees that you can enjoy the music without any compromise in sound fidelity, capturing all the nuances and dynamics.

Convert Youtube Music Videos to FLAC

Convert Youtube music videos to FLAC format to enjoy them as high-quality audio files. FLAC’s lossless compression ensures that the converted files retain the original audio quality, offering an immersive listening experience.

Lossless Youtube to FLAC Conversion Process

Follow a lossless Youtube to FLAC conversion process to preserve the audio quality. This process ensures that there is no loss of data during the conversion, resulting in FLAC files that faithfully represent the original audio.

Youtube to FLAC: Uncompromised Audio Quality

Choose Youtube to FLAC conversion for uncompromised audio quality. FLAC’s lossless compression allows you to enjoy Youtube audio tracks with the same level of detail and fidelity as the source material.

MP4 Bitrate

MP4 Bitrate

MP4 Bitrate
MP4 Bitrate
MP4 Bitrate
MP4 Bitrate

What is MP4 Bitrate?

MP4 is a popular video format that is widely used in digital media. It uses a specific compression algorithm to compress video files to make them smaller and easier to share. The bitrate of an MP4 video refers to the amount of data that is used to represent each second of the video. It is typically measured in kilobits per second (kbps) or megabits per second (Mbps). A higher bitrate means that the video will have more data and will be of higher quality, but the file size will also be larger.

Why is MP4 Bitrate Important?

The bitrate of an MP4 video is important because it affects the quality and size of the video file. If the bitrate is too low, the video may appear pixelated or blurry. On the other hand, if the bitrate is too high, the file size will be larger, and it may take longer to upload or download the video. In addition, a higher bitrate requires more bandwidth to stream the video, which may be an issue for viewers with slower internet connections.

How to Choose the Right MP4 Bitrate

When choosing the bitrate for your MP4 video, you should consider the intended use of the video, the resolution of the video, and the file size. For example, a video that is intended to be viewed on a large screen should have a higher bitrate than a video that will be viewed on a smaller screen. Similarly, a video that has a higher resolution will require a higher bitrate to maintain the same quality as a lower resolution video.

As a general rule of thumb, a bitrate of 5-10 Mbps is suitable for 1080p HD video, while a bitrate of 2-5 Mbps is suitable for 720p HD video. For lower resolution videos, such as 480p or 360p, a bitrate of 1-2 Mbps may be sufficient. It’s also important to consider the file size of the video, as larger files will take longer to upload or download and may be more difficult to share.

How to Change MP4 Bitrate

To change the bitrate of an MP4 video, you will need to use video editing software that allows you to adjust the bitrate settings. There are many different video editing software options available, including Adobe Premiere Pro, Final Cut Pro, and Handbrake. These programs allow you to adjust the bitrate settings and other video parameters to optimize the video for your specific needs.

MP4 Bitrate FAQ

What is the maximum bitrate for MP4 videos?

The maximum bitrate for MP4 videos is 10 Mbps. However, this may vary depending on the specific device or platform where the video will be played.

What is the minimum bitrate for MP4 videos?

The minimum bitrate for MP4 videos will depend on the intended use of the video and the resolution of the video. In general, a bitrate of at least 1 Mbps is recommended for standard definition video, while a bitrate of at least 2 Mbps is recommended for high definition video.

What is the recommended bitrate for streaming MP4 videos?

The recommended bitrate for streaming MP4 videos will depend on the resolution of the video and the available bandwidth. As a general rule of thumb, a bitrate of 5-10 Mbps is suitable for 1080p HD video, while a bitrate of 2-5 Mbps is suitable for 720p HD video. For lower resolution videos, such as 480p or 360p, a bitrate of 1-2 Mbps may be sufficient.

However, it’s important to note that these are just general guidelines, and the optimal bitrate will also depend on factors such as the complexity of the video content, the encoding settings used, and the target audience’s viewing preferences.

For example, videos with fast-moving scenes or complex visual effects may require a higher bitrate to maintain a high level of image quality and avoid compression artifacts, while simpler videos with less motion may be able to use a lower bitrate without sacrificing quality.

Additionally, the target audience’s internet connection speed will also affect the recommended bitrate. For viewers with slower internet connections, a lower bitrate may be necessary to ensure that the video plays smoothly without buffering or interruptions.

What are the advantages of using a higher bitrate?

Using a higher bitrate can result in higher quality video with more detail and fewer compression artifacts. This is because a higher bitrate allows for more data to be transmitted and encoded per second, resulting in a more faithful representation of the original video source.

A higher bitrate can also be beneficial for videos with a lot of movement or detail, as it allows the encoding algorithm to capture more information and produce a more detailed image.

However, it’s important to note that using a higher bitrate will also result in larger file sizes and require more bandwidth to stream or download. This can be a disadvantage for viewers with slower internet connections or limited data plans.

What are the disadvantages of using a lower bitrate?

Using a lower bitrate can result in lower quality video with more compression artifacts, such as blurring or pixelation. This is because a lower bitrate means that less data is being transmitted and encoded per second, resulting in a loss of detail and fidelity.

Lower bitrates may also result in a lower overall resolution or frame rate, which can further degrade the quality of the video.

However, using a lower bitrate can also have benefits, such as smaller file sizes and reduced bandwidth requirements. This can be advantageous for viewers with slower internet connections or limited data plans.

Can the bitrate of an MP4 video be adjusted after it’s been encoded?

Yes, it is possible to adjust the bitrate of an MP4 video after it has been encoded. This can be done using video editing software or specialized tools designed for this purpose, such as MP4Gain.

However, it’s important to note that changing the bitrate of a video after it has been encoded can result in a loss of quality or introduce additional compression artifacts. For best results, it’s recommended to encode the video at the desired bitrate from the beginning.

Conclusion

In summary, the bitrate of an MP4 video is an important factor that can affect its quality, file size, and streaming performance. The optimal bitrate will depend on factors such as the resolution of the video, the complexity of the content, and the available bandwidth.

Using a higher bitrate can result in higher quality video with more detail and fewer compression artifacts, while using a lower bitrate can result in smaller file sizes and reduced bandwidth requirements.

If you need to adjust the bitrate of an MP4 video, it is possible to do so using specialized tools such as MP4Gain. However, it’s recommended to encode the video at the desired bitrate from the beginning for best results.

Overall, understanding how bitrate affects MP4 video quality can help you create and deliver video content that meets your needs and those of your audience.

MP4 to MPEG

MP4 to MPEG

MP4 to MPEG
MP4 to MPEG


MP4 to MPEG
MP4 to MPEG


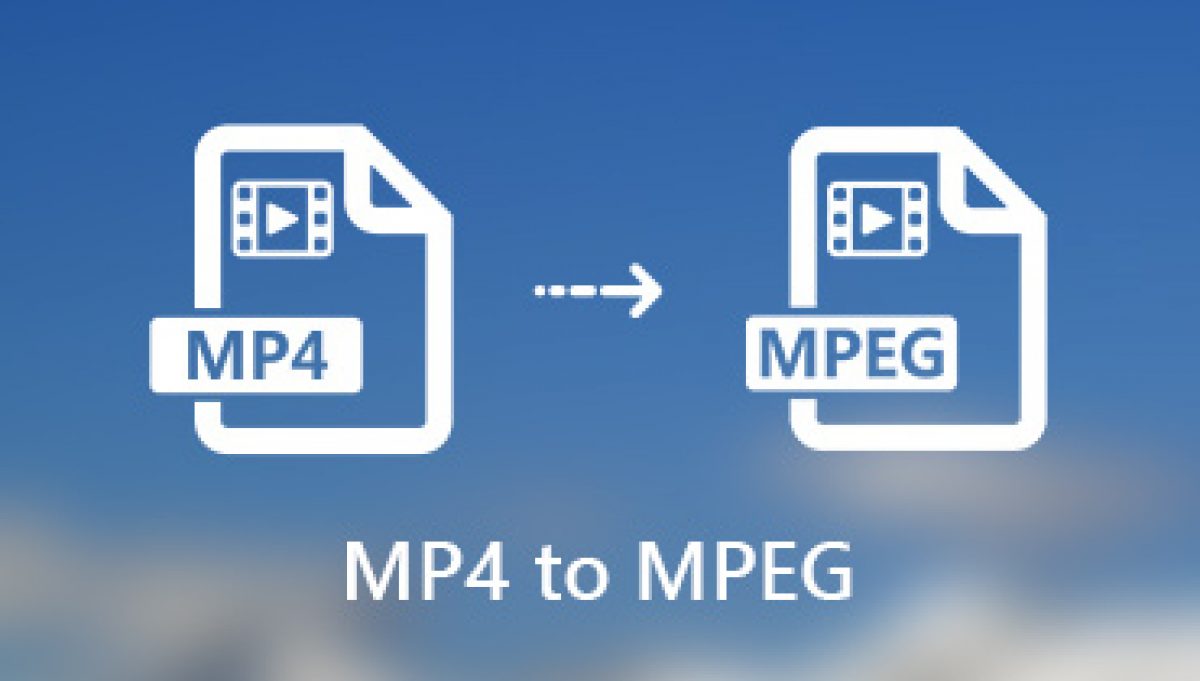
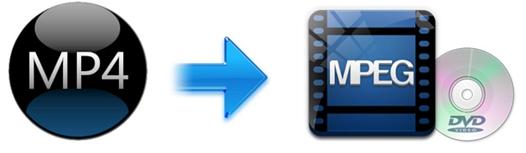
MP4 is a popular video format that is widely used to store and distribute videos on the internet. However, some devices and media players do not support MP4 files, which can be frustrating for those who want to play these videos on these devices. MPEG is a more widely supported format that can play on most devices and media players, making it a popular choice for those who need to convert their MP4 videos to MPEG.

What is mp4gain?

mp4gain is a software tool that can be used to convert MP4 videos to MPEG. It is a simple and easy-to-use tool that can be used by anyone, regardless of their technical expertise. The tool works by converting the audio of the MP4 video to a format that is compatible with MPEG. This allows users to convert their MP4 videos to MPEG without losing any quality.

Why use mp4gain to convert MP4 to MPEG?

mp4gain is a popular choice for those who want to convert their MP4 videos to MPEG for several reasons. Firstly, it is a simple and easy-to-use tool that can be used by anyone. Secondly, it is a fast and efficient tool that can convert large MP4 videos to MPEG in a matter of minutes. Thirdly, it preserves the quality of the original video, ensuring that there is no loss of quality during the conversion process.

How to use mp4gain to convert MP4 to MPEG

The process of converting MP4 videos to MPEG using mp4gain is simple and straightforward. First, you need to download and install the software on your computer. Once you have installed the software, you can open it and select the MP4 video that you want to convert. Then, you need to select the MPEG format that you want to convert the video to. Finally, you need to click on the “Convert” button to start the conversion process. The software will convert the video to MPEG format in a matter of minutes.

FAQ

What is the difference between MP4 and MPEG?

MP4 and MPEG are both video formats, but there are some differences between the two. MP4 is a more modern format that is widely used to store and distribute videos on the internet. It is a more flexible format that can support a wide range of video and audio codecs. MPEG, on the other hand, is a more established format that is widely supported by most devices and media players. It is a more standardized format that is used for broadcasting and DVD production.

Can mp4gain convert other video formats?

Yes, Mp4Gain support all major audio and video formats.

Conclusion

Converting MP4 videos to MPEG is a simple process that can be done using mp4gain. mp4gain is a fast, efficient, and easy-to-use tool that can convert MP4 videos to MPEG without losing any quality. It is a popular choice for those who need to convert their MP4 videos to MPEG for compatibility reasons.

The History of MPEG

Introduction

The Moving Picture Experts Group (MPEG) is a working group of the International Organization for Standardization (ISO) and the International Electrotechnical Commission (IEC) that specializes in the development of standards for digital audio and video compression. MPEG has been responsible for some of the most widely used video and audio compression standards, including MPEG-1, MPEG-2, MPEG-4, and more recently, MPEG-H.

Early Years

MPEG was formed in 1988 with the goal of developing standards for digital audio and video compression. At the time, digital audio and video were in their infancy, and there was a need for standardized compression algorithms that could be used across different systems and platforms.

The first MPEG standard, MPEG-1, was released in 1993 and was designed to compress audio and video for CD-ROMs. MPEG-1 was a significant milestone in the development of digital audio and video because it provided a way to store and transmit multimedia content efficiently.

MPEG-2

MPEG-2 was released in 1995 and was designed to provide high-quality video for digital television and DVD. MPEG-2 is still widely used today and is the standard for digital television broadcasting.

MPEG-4

MPEG-4 was released in 1998 and was designed to provide a standard for multimedia content delivery over the internet. MPEG-4 introduced many new features, such as object-oriented audio and video, which allowed for more interactive and immersive multimedia experiences.

MPEG-H

MPEG-H is the most recent standard developed by MPEG and was released in 2015. MPEG-H is designed to provide a more immersive and interactive multimedia experience, with features such as 3D audio and support for ultra-high definition video.

Conclusion

MPEG has played a significant role in the development of digital audio and video, and its standards have been instrumental in the adoption of digital multimedia across different platforms and systems. The use of MPEG standards has enabled the efficient storage and transmission of multimedia content, making it possible to deliver high-quality multimedia experiences to audiences around the world.

  • MPEG was formed in 1988 to develop standards for digital audio and video compression.
  • MPEG-1 was released in 1993 and was designed for CD-ROMs.
  • MPEG-2 was released in 1995 and is still widely used for digital television broadcasting.
  • MPEG-4 was released in 1998 and introduced many new features for multimedia delivery over the internet.
  • MPEG-H was released in 2015 and provides a more immersive multimedia experience.

MP4 Codec

The MP4 Codec: A Comprehensive Guide

MP4 Codec
MP4 Codec
MP4 Codec
MP4 Codec

What is the MP4 Codec?

The MP4 codec is a compression algorithm used to compress digital audio and video files into a smaller size. The MP4 file format is a popular container format used to store compressed video and audio files. The MP4 codec is widely used in the multimedia industry due to its efficiency, high-quality output, and compatibility with different devices and operating systems.

How Does the MP4 Codec Work?

The MP4 codec uses a lossy compression method to reduce the size of digital video and audio files. In lossy compression, some data is lost during the compression process, resulting in a smaller file size. The MP4 codec uses various compression techniques, such as intra-frame and inter-frame compression, to reduce the size of digital video and audio files.

In intra-frame compression, each frame of video is compressed independently of the other frames. In inter-frame compression, the codec looks for similarities between frames and compresses the data that is redundant. This method results in a smaller file size than intra-frame compression, but it requires more processing power.

Advantages of the MP4 Codec

The MP4 codec offers several advantages over other codecs. Firstly, it provides high-quality output with a relatively small file size, making it ideal for streaming and sharing content online. Secondly, the MP4 codec is compatible with different devices and operating systems, making it easy to share and play multimedia files across multiple platforms.

Thirdly, the MP4 codec supports multiple audio and video streams, enabling users to add different languages, subtitles, and alternative audio tracks to their video files. Fourthly, the MP4 codec supports a wide range of video resolutions, from low-resolution videos to 4K and 8K videos, making it versatile for different use cases.

Disadvantages of the MP4 Codec

While the MP4 codec offers several advantages, it also has some disadvantages. Firstly, the compression process can result in some loss of data and quality, especially when compressing videos with high resolutions or high bitrates. Secondly, the compression process requires significant processing power, which can be a challenge for low-powered devices such as smartphones and tablets.

Thirdly, the MP4 codec is not suitable for archival purposes as the compressed files may degrade over time, resulting in data loss or corruption. Lastly, the MP4 codec may not be compatible with some older devices or media players that do not support the format.

Applications of the MP4 Codec

The MP4 codec has various applications in different industries. It is widely used in the entertainment industry for streaming videos, films, and TV shows on different platforms such as Netflix, Hulu, and Amazon Prime Video. The MP4 codec is also used in online gaming and e-sports for live streaming and recording gameplays.

In addition, the MP4 codec is used in education and training for creating e-learning courses, tutorials, and webinars. The MP4 codec is also used in the security and surveillance industry for recording and streaming CCTV footage.

FAQ

Q: Is the MP4 codec the same as the H.264 codec?

A: No, the MP4 codec is a container format that can use various compression algorithms, including the H.264 codec. The H.264 codec is a video compression algorithm used in different file formats, including MP4.

Q: Can I edit MP4 files without losing quality?

A: Yes, To minimize this loss, it’s recommended to work with a high-quality original file and export in the highest possible quality settings.

Q: Is MP4 the best format for video?

A: It depends on your needs and intended use. MP4 is a widely used and versatile format that works well for most purposes. It offers a good balance between file size and quality, making it ideal for streaming, sharing, and storing videos. However, for professional or high-end video production, other formats such as ProRes, DNxHD, or RAW may be more suitable.

Q: How do I convert other video formats to MP4?

A: Using Mp4Gain.

Q: How can I improve the audio quality of an MP4 file?

A: One way to improve the audio quality of an MP4 file is to use MP4Gain, a specialized software that analyzes and adjusts the volume and gain of the audio track without re-encoding the video. MP4Gain can also equalize the sound and add a ReplayGain tag for compatibility with other players. Other options include using a dedicated audio editor or adding an external audio track.