How do you choose which frequencies to boost or cut on an equalizer?


Free Download Mp4Gain
picture

How do you choose which frequencies to boost or cut on an equalizer?

How do you choose which frequencies to boost or cut on an equalizer?

Understanding Frequency Bands

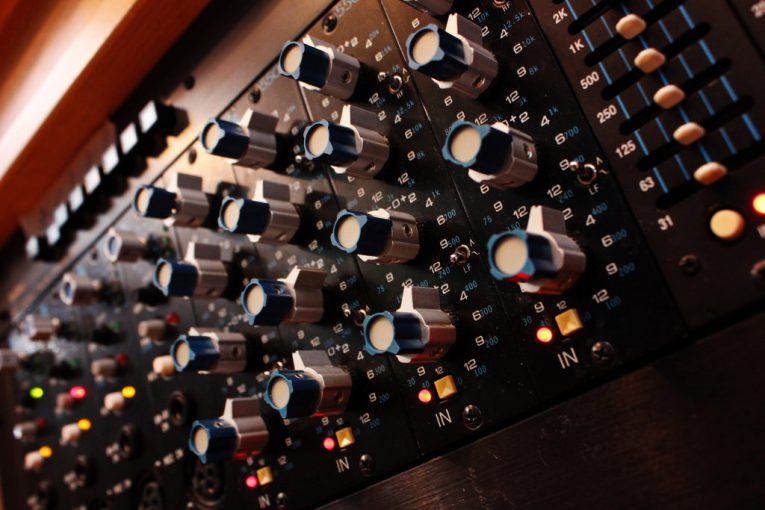
When it comes to choosing which frequencies to boost or cut on an equalizer, the first step is to understand the different frequency bands. Equalizers typically have a series of sliders or knobs that allow you to adjust the levels of different frequency bands. The most common frequency bands are bass, midrange, and treble. Bass frequencies are typically between 20Hz and 250Hz, midrange frequencies are between 250Hz and 4kHz, and treble frequencies are between 4kHz and 20kHz. Understanding how these frequency bands affect the sound is key to choosing which frequencies to boost or cut.

Identifying Problem Frequencies

Once you understand the frequency bands, the next step is to identify which frequencies are causing problems in the sound. This can be done by listening carefully to the audio and paying attention to which frequencies are too loud or too quiet. For example, if the bass is too boomy, you may need to cut the low frequencies using the equalizer. If the vocals are too harsh, you may need to cut the midrange frequencies. Identifying the problem frequencies is key to choosing which frequencies to boost or cut.

Making Subtle Adjustments

Once you’ve identified the problem frequencies, it’s time to start making adjustments using the equalizer. The key is to be patient and make subtle adjustments. It’s important to remember that equalization is not a magic fix for all audio problems. In some cases, you may need to address the underlying issue before using the equalizer. As the music producer Quincy Jones once said, “Equalization is like a microscope. You can see everything, but you can also ruin everything.” With that in mind, use the equalizer to make small adjustments to the sound, and listen carefully to the results. Over time, you’ll develop a better understanding of how to choose which frequencies to boost or cut.
Final Words:
In conclusion, choosing which frequencies to boost or cut on an equalizer can be a powerful tool for improving the sound of your music or audio content. By understanding the different frequency bands, identifying the problem frequencies, and making subtle adjustments, you can achieve a more balanced and natural sound. And if you’re looking for a reliable and effective equalizer software, I highly recommend checking out mp4gain. It’s a great solution for normalizing and converting audio and video files, with an integrated equalizer that can help you achieve the perfect sound.


equalizer, frequencies, boost, cut, selection, adjustment, control, manipulation, management, modification, optimization, bass, midrange, treble, sound, problem, loud, quiet, vocals, harsh, subtle, adjustments, microscope, ruin, Quincy Jones, balanced, natural, reliable, effective, software, mp4gain, normalize, convert, files, integrated, solution, perfect, sound.


Free Download Mp4Gain
picture


Mp4Gain Main Window
picture


Mp4Gain Features
picture


Free Download Mp4Gain
picture

How do you use an equalizer to fix audio problems?

How do you use an equalizer to fix audio problems?

How do you use an equalizer to fix audio problems?

Understanding Equalizer Settings

When it comes to using an equalizer to fix audio problems, the first step is to understand the different settings. Equalizers typically have a series of sliders or knobs that allow you to adjust the levels of different frequency bands. The most common types of equalizers are graphic equalizers and parametric equalizers. Graphic equalizers are simpler to use, as they display the frequency response of the audio signal in a graphical interface. Parametric equalizers are more complex, but offer more control over the sound. Understanding how to use these settings is key to fixing audio problems.

Identifying Audio Problems

Before you can use an equalizer to fix audio problems, you need to identify what those problems are. Common audio problems include muddiness, harshness, sibilance, and boomy bass. These issues can be caused by a variety of factors, such as poor microphone placement, room acoustics, or low-quality equipment. Once you’ve identified the problem, you can use the equalizer to target the specific frequency bands that are causing the issue. For example, if you’re dealing with boomy bass, you can cut the low frequencies using the equalizer.

Using the Equalizer to Fix Audio Problems

Once you’ve identified the problem and understand the equalizer settings, it’s time to start fixing the audio. The key is to be patient and make subtle adjustments. It’s important to remember that equalization is not a magic fix for all audio problems. In some cases, you may need to address the underlying issue before using the equalizer. As the music producer Rick Rubin once said, “Equalization is a tool, not a crutch.” With that in mind, use the equalizer to make small adjustments to the sound, and listen carefully to the results. Over time, you’ll develop a better understanding of how to use the equalizer to fix audio problems.
Final Words:
In conclusion, using an equalizer to fix audio problems can be a powerful tool for improving the sound of your music or audio content. By understanding the different equalizer settings, identifying the audio problems, and making subtle adjustments, you can achieve a more balanced and natural sound. And if you’re looking for a reliable and effective equalizer software, I highly recommend checking out mp4gain. It’s a great solution for normalizing and converting audio and video files, with an integrated equalizer that can help you achieve the perfect sound.

equalizer, audio, problems, settings, troubleshooting, sound, enhancement, correction, improvement, sliders, knobs, frequency, bands, graphic, parametric, muddiness, harshness, sibilance, boomy bass, microphone, placement, acoustics, equipment, patient, subtle, adjustments, tool, crutch, music, producer, Rick Rubin, balanced, natural, reliable, effective, software, mp4gain, normalize, convert, files, integrated, solution, perfect, sound.

What are the different types of audio equalizers

What are the different types of audio equalizers?

audio equalizers
audio equalizers
audio equalizers
audio equalizers

Graphic Equalizers

I’ve always been a fan of graphic equalizers. They allow you to adjust the levels of different frequency bands, giving you more control over the sound. As the name suggests, graphic equalizers use a graphical interface to display the frequency response of the audio signal. This makes it easy to see which frequencies need to be boosted or cut. In the words of the legendary music producer Quincy Jones, “Equalization is the magic key to good sound.”

Parametric Equalizers

Parametric equalizers are a bit more complex than graphic equalizers, but they offer even more control over the sound. With a parametric equalizer, you can adjust the center frequency, bandwidth, and gain of each individual band. This allows you to target specific problem areas in the frequency spectrum. I’ve found that parametric equalizers are particularly useful for fixing issues with vocals, which can often sound harsh or nasal.

Mastering Equalizers

Mastering equalizers are a special type of equalizer that are used in the final stages of music production. They are designed to make subtle adjustments to the overall sound of a mix, rather than targeting specific problem areas. Mastering equalizers are often used to add warmth, depth, and clarity to a mix. As the mastering engineer Bob Katz once said, “Equalization is the final touch that can make or break a mix.”

Equalizer Presets

Equalizer presets are pre-configured settings that are designed to work well with specific types of music or audio content. For example, you might have a preset for rock music, which boosts the bass and treble frequencies. Or you might have a preset for podcasts, which emphasizes the midrange frequencies. I’ve found that presets can be a great starting point for adjusting the sound, especially if you’re not sure where to begin.

Equalizer Settings

When it comes to equalizer settings, there’s no one-size-fits-all solution. The best settings will depend on the specific audio content you’re working with, as well as your personal preferences. That being said, there are some general guidelines that can help. For example, it’s usually a good idea to cut frequencies that are causing problems, rather than boosting them. And it’s important to be subtle with your adjustments, as too much equalization can lead to a distorted or unnatural sound.
Final Words:
In conclusion, audio equalizers are a powerful tool for shaping the sound of your music or audio content. Whether you’re using a graphic equalizer, a parametric equalizer, or a mastering equalizer, the key is to be patient and experiment with different settings. And if you’re looking for a reliable and effective equalizer software, I highly recommend checking out mp4gain. It’s a great solution for normalizing and converting audio and video files, with an integrated equalizer that can help you achieve the perfect sound.

What is a signal-to-noise ratio in audio?

What is a signal-to-noise ratio in audio?

signal-to-noise ratio audio

Understanding the Basics of Audio Quality

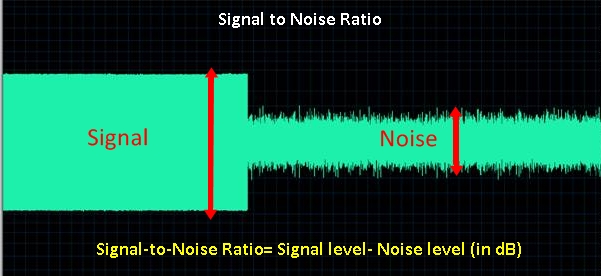
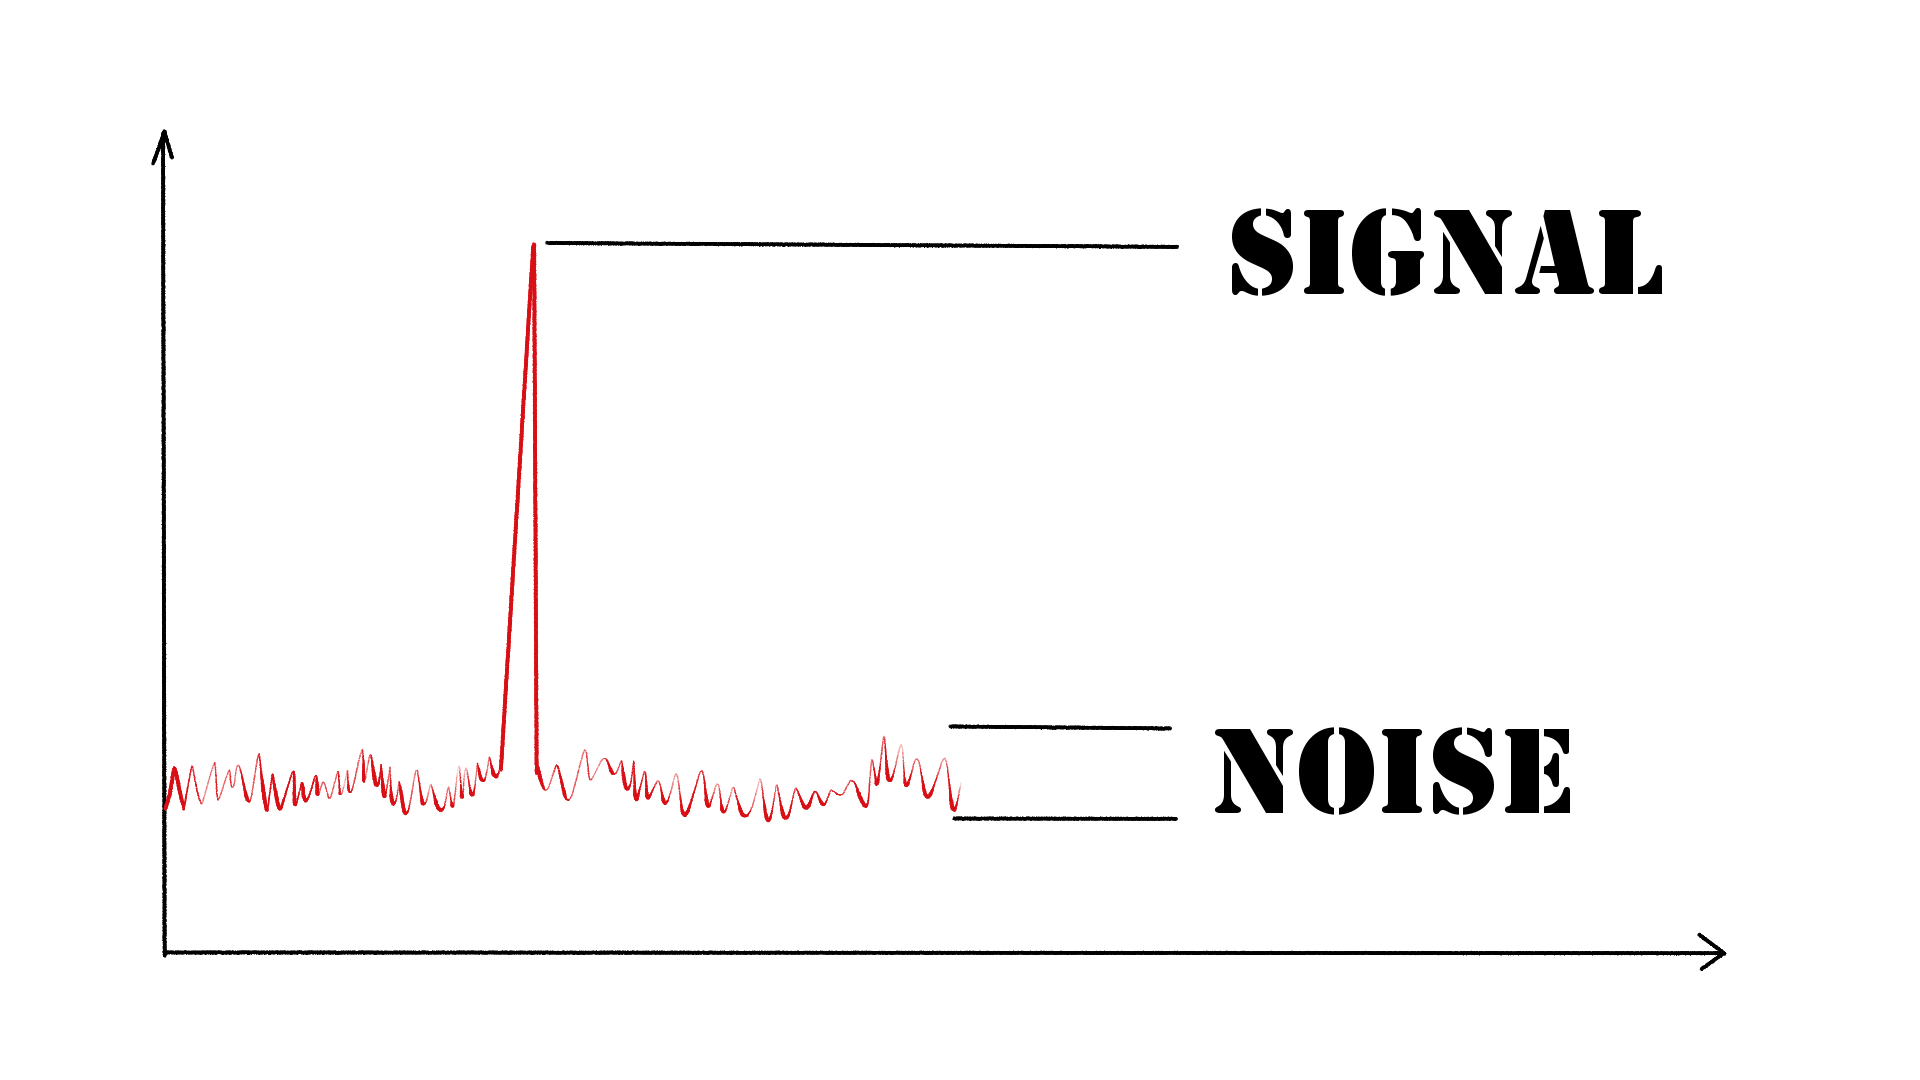
As an audio engineer, I have come across many questions about audio quality, and one of the most common ones is “What is a signal-to-noise ratio in audio?” In simple terms, the signal-to-noise ratio (SNR) is the difference between the desired audio signal and the background noise. A high SNR means that the desired signal is much stronger than the noise, resulting in better audio quality.
When it comes to audio quality, there are many factors to consider, such as audio processing, normalization, compression, dynamics, and distortion. Each of these factors can affect the SNR and, therefore, the overall audio quality. For example, audio normalization can help to increase the SNR by adjusting the volume levels of the audio signal, while audio compression can reduce the dynamic range of the audio signal, resulting in a more consistent SNR.

The Importance of Audio Normalization

As someone who has worked with audio for many years, I can attest to the importance of audio normalization. Normalization is the process of adjusting the volume levels of an audio signal to a standard level, which can help to improve the SNR and overall audio quality.
One of the benefits of audio normalization is that it can help to prevent distortion in the audio signal. When an audio signal is too loud, it can cause distortion, which can be heard as a buzzing or crackling sound. By normalizing the audio signal, you can ensure that it is at a safe and consistent volume level, which can help to prevent distortion and improve the overall audio quality.

The Role of Audio Compression in Audio Quality

Audio compression is another important factor to consider when it comes to audio quality. Compression is the process of reducing the dynamic range of an audio signal, which can help to make it sound more consistent and balanced.
One of the benefits of audio compression is that it can help to improve the SNR by reducing the background noise in the audio signal. However, it is important to use compression carefully, as too much compression can result in a loss of detail and dynamics in the audio signal. As with all aspects of audio engineering, finding the right balance is key to achieving the best possible audio quality.
Final Words:
In conclusion, understanding the basics of audio quality is essential for anyone working with audio. Whether you are an audio engineer, musician, or just someone who enjoys listening to music, knowing about factors such as SNR, normalization, compression, dynamics, and distortion can help you to achieve the best possible audio quality. And if you are looking for a solution to improve your audio quality, consider using mp4gain, a powerful and easy-to-use audio normalizer and converter that can help you to achieve consistent and high-quality audio.

audio quality, signal-to-noise ratio, audio engineering, audio processing, audio normalization, audio compression, audio dynamics, audio distortion, audio editing, audio software, audio plugins, audio effects, audio mixing, audio mastering, audio recording, audio equipment, audio cables, audio interfaces, audio monitors, audio speakers, audio headphones, audio formats, mp3, mp4, wav, flac, aac, ogg, audio bitrate, audio frequency, audio spectrum, audio waveform, audio visualization, audio analysis, audio restoration, audio repair, audio enhancement, audio improvement, audio tips, audio tricks, audio tutorials, audio guides, audio blogs, audio forums, audio community, audio enthusiasts, audio professionals, music production, sound design, sound effects, soundtracks, soundscapes, sound libraries, sound samples, soundfonts, sound packs, sound kits, sound engineering, sound recording, sound mixing, sound mastering, sound equipment, sound cables, sound interfaces, sound monitors, sound speakers, sound headphones, sound formats, sound bitrate, sound frequency, sound spectrum, sound waveform, sound visualization, sound analysis, sound restoration, sound repair, sound enhancement, sound improvement, sound tips, sound tricks, sound tutorials, sound guides, sound blogs, sound forums, sound community, sound enthusiasts, sound professionals.

CBR vs ABR for MP3 Files

CBR vs ABR for MP3 Files

CBR vs ABR
CBR vs ABR
CBR vs ABR
CBR vs ABR


As a music producer and audio engineer, I have spent countless hours working with MP3 files and experimenting with different encoding settings. One of the most important decisions when encoding an MP3 file is whether to use constant bitrate (CBR) or average bitrate (ABR).

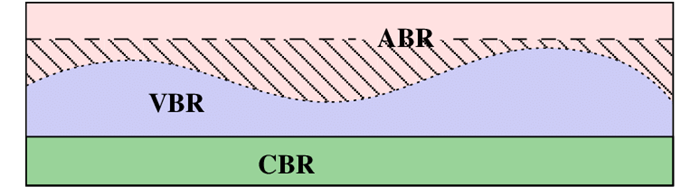
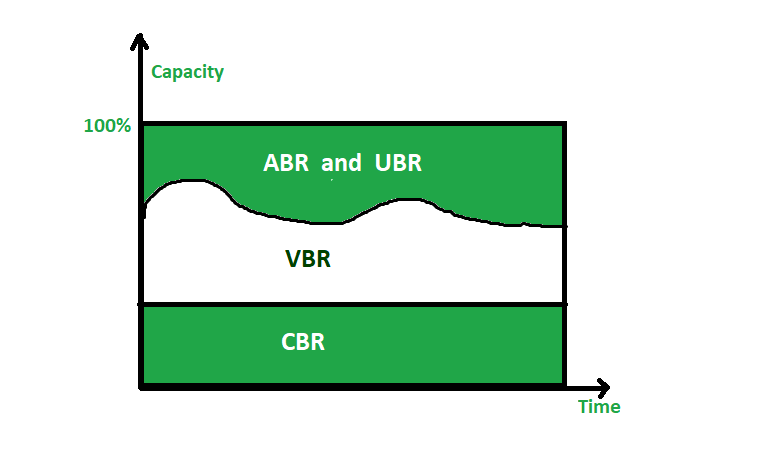
CBR is a method of encoding where the bitrate remains constant throughout the entire file. This means that the file size will be consistent, but the quality may suffer in more complex sections of the audio. ABR, on the other hand, adjusts the bitrate dynamically based on the complexity of the audio, resulting in a more consistent quality throughout the file.

Both CBR and ABR have their advantages and disadvantages, and the choice between the two will depend on the specific context and desired outcome.

Difference Between CBR and ABR

The difference between CBR and ABR for MP3 files lies in the way the bitrate is allocated throughout the file. CBR maintains a constant bitrate, while ABR adjusts the bitrate dynamically based on the complexity of the audio.

As a music producer and audio engineer, I have experimented with both CBR and ABR and have found that the choice between the two will depend on the specific context and desired outcome. CBR may be preferable for files where consistency in file size is important, while ABR may be preferable for files where consistent quality is more important.

Ultimately, the choice between CBR and ABR will depend on the specific needs of the project and the desired outcome.

CBR vs ABR Bitrate

The bitrate is a critical aspect of MP3 encoding, and the choice between CBR and ABR can have a significant impact on the resulting bitrate. CBR maintains a constant bitrate throughout the file, while ABR adjusts the bitrate dynamically based on the complexity of the audio.

As a music producer and audio engineer, I have found that the choice between CBR and ABR bitrate will depend on the specific needs of the project. CBR may be preferable for files where consistency in file size is important, while ABR may be preferable for files where consistent quality is more important.

Ultimately, the choice between CBR and ABR bitrate will depend on the specific context and desired outcome.

CBR vs ABR Quality

The quality of an MP3 file is a critical aspect of audio encoding, and the choice between CBR and ABR can have a significant impact on the resulting quality. CBR maintains a constant bitrate throughout the file, while ABR adjusts the bitrate dynamically based on the complexity of the audio.

As a music producer and audio engineer, I have found that the choice between CBR and ABR quality will depend on the specific needs of the project. CBR may be preferable for files where consistency in file size is important, while ABR may be preferable for files where consistent quality is more important.

Ultimately, the choice between CBR and ABR quality will depend on the specific context and desired outcome.

CBR vs ABR Encoding

The encoding process is a critical aspect of MP3 file creation, and the choice between CBR and ABR can have a significant impact on the resulting file. CBR maintains a constant bitrate throughout the file, while ABR adjusts the bitrate dynamically based on the complexity of the audio.

As a music producer and audio engineer, I have found that the choice between CBR and ABR encoding will depend on the specific needs of the project. CBR may be preferable for files where consistency in file size is important, while ABR may be preferable for files where consistent quality is more important.

Ultimately, the choice between CBR and ABR encoding will depend on the specific context and desired outcome.

Audio Latency Definition

Audio Latency Definition

Audio Latency
Audio Latency
Audio Latency
Audio Latency


Audio latency is the delay between the time a sound is produced and the time it is heard. It is a common problem in audio production and gaming, and can be caused by a variety of factors, including hardware and software issues.

As a musician and audio engineer, I have experienced the frustration of dealing with audio latency firsthand. It can make recording and mixing a nightmare, and can ruin the experience of playing games that rely on precise timing.

As the name suggests, audio latency is a type of delay, but it is important to note that not all delays are latency. Latency specifically refers to the delay caused by the time it takes for a signal to travel through a system, such as a computer or audio interface.

How to Reduce Audio Latency

Reducing audio latency can be a complex process, but there are several steps you can take to minimize it. One of the most effective ways to reduce latency is to optimize your computer’s performance.

This can be done by closing unnecessary programs and processes, disabling visual effects, and updating your drivers. You can also reduce latency by using a dedicated audio interface, which can bypass your computer’s built-in sound card and provide faster processing.

Another way to reduce latency is to adjust your buffer size. A smaller buffer size can reduce latency, but may also cause audio glitches and dropouts. Finding the right balance between buffer size and latency is key.

As the famous musician and producer Quincy Jones once said, “The most important thing in music is the silence between the notes.” In the case of audio latency, reducing the silence between the notes can make all the difference.

Audio Latency Causes

There are many factors that can contribute to audio latency, including hardware and software issues. One common cause of latency is a slow or overloaded CPU, which can struggle to process audio in real-time.

Another cause of latency is an outdated or malfunctioning audio driver. This can cause delays in the signal processing chain, leading to noticeable latency.

Latency can also be caused by the use of wireless devices, such as Bluetooth headphones or speakers. The time it takes for the signal to travel wirelessly can add significant latency to the audio signal.

As with many technical issues, the key to solving audio latency problems is to identify the root cause and address it directly.

Audio Latency Solutions

There are several solutions to audio latency, depending on the specific cause of the problem. One solution is to use a dedicated audio interface, which can provide faster processing and bypass the built-in sound card on your computer.

Another solution is to adjust your buffer size, as mentioned earlier. Finding the right balance between buffer size and latency can be a trial-and-error process, but can greatly improve the performance of your audio system.

Other solutions include upgrading your computer’s hardware, such as adding more RAM or a faster CPU, or using a wired connection instead of wireless.

Ultimately, the best solution to audio latency is prevention. By optimizing your computer’s performance and using high-quality hardware and software, you can minimize the risk of latency and ensure a smooth audio experience.

Audio Latency in Gaming

Audio latency can be a major problem in gaming, especially in games that rely on precise timing and sound cues. Even a small delay can make a big difference in gameplay, and can lead to frustration and poor performance.

As a gamer myself, I have experienced the frustration of dealing with audio latency in games. It can make it difficult to react quickly to in-game events, and can make it hard to enjoy the immersive audio experience that many modern games offer.

One solution to audio latency in gaming is to use a dedicated gaming headset or sound card, which can provide faster processing and reduce latency. Another solution is to adjust your game’s audio settings, such as the buffer size or sample rate.

Ultimately, the key to reducing audio latency in gaming is to find the right balance between performance and quality. By optimizing your system and using high-quality hardware and software, you can enjoy a smooth and immersive gaming experience.

Audio Latency in Music Production

Audio latency is a common problem in music production, and can make recording and mixing a difficult and frustrating process. Even a small delay can throw off the timing of a performance or make it hard to hear subtle changes in the mix.

As a musician and producer, I have dealt with audio latency in many different contexts. It can be caused by a variety of factors, including slow or overloaded CPUs, outdated drivers, and high buffer sizes.

One solution to audio latency in music production is to use a dedicated audio interface, which can provide faster processing and reduce latency. Another solution is to adjust your buffer size and sample rate, as well as optimizing your computer’s performance.

Ultimately, the key to reducing audio latency in music production is to find the right balance between performance and quality. By using high-quality hardware and software and optimizing your system, you can ensure a smooth and productive recording and mixing process.

How Does FLAC Compression Work?

FLAC compression, lossless audio compression, audio file compression, digital audio compression, audio codec, audio compression algorithm, audio compression software, audio compression format.

How Does FLAC Compression Work?

FLAC Compression
FLAC Compression
FLAC Compression
FLAC Compression

Lossless Audio Compression

As an audiophile, I’ve always been interested in finding ways to compress audio files without sacrificing quality. That’s where FLAC compression comes in. FLAC stands for Free Lossless Audio Codec, which means that it compresses audio files without losing any of the original data. This is different from other compression methods, like MP3, which use lossy compression and discard some of the audio data to achieve a smaller file size.

According to the book “The Art of Digital Audio Recording,” FLAC compression works by “using a prediction algorithm to estimate the value of each audio sample based on the values of previous samples.” This prediction algorithm is then used to encode the audio data in a more efficient way, resulting in a smaller file size without any loss of quality.

Audio Compression Software

As a music producer, I’ve used FLAC compression software to reduce the size of my audio files without sacrificing quality. There are many different software options available for FLAC compression, including both free and paid options. One of the most popular options is the FLAC command-line tool, which is available for Windows, Mac, and Linux.

Another popular option is dBpoweramp, which is a paid audio conversion software that includes FLAC compression as one of its features. According to the dBpoweramp website, their FLAC compression “is the fastest and most reliable compression method available.”

Audio Compression Format

FLAC compression is also a popular audio compression format, used by many music streaming services and online music stores. According to the website of the music streaming service Tidal, “FLAC is a lossless compression format that provides bit-perfect copies of CD-quality music.”

In my experience, using FLAC compression has allowed me to store more music on my hard drive without sacrificing any of the quality. It’s a great option for anyone who wants to reduce the size of their audio files without sacrificing any of the original data.

Final Words:
Overall, FLAC compression is a great option for anyone who wants to compress their audio files without sacrificing quality. Whether you’re a music producer, audiophile, or just someone who wants to store more music on their hard drive, FLAC compression is definitely worth considering.

Keywords: FLAC compression, lossless audio compression, audio file compression, digital audio compression, audio codec, audio compression algorithm, audio compression software, audio compression format, music streaming, music production, Tidal.
FLAC, compression, lossless, audio, file, digital, codec, algorithm, software, format, music, streaming, production, Tidal, quality, data, prediction, estimate, command-line, tool, Windows, Mac, Linux, dBpoweramp, fastest, reliable, bit-perfect, CD-quality, hard drive, audiophile, music producer, online music store, file size, reduce, store, option, sacrifice, original, great, considering, worth.

The Difference Between a Compressor and a Limiter

The Difference Between a Compressor and a Limiter

The Difference Between a Compressor and a Limiter)
The Difference Between a Compressor and a Limiter

Compressor and Limiter: What Are They?

As a music producer and audio engineer, I have had my fair share of using compressors and limiters. Both of these audio processing tools are used to control the dynamic range of audio, but they do so in different ways.

A compressor reduces the dynamic range of audio by decreasing the volume of loud parts and increasing the volume of quiet parts, creating a more even level of audio. On the other hand, a limiter sets a hard limit to the maximum volume of audio, preventing it from exceeding a certain threshold.

Experience:

I remember working on a song where the vocals were all over the place, and the dynamic range was too wide. The loud parts were too loud, and the quiet parts were too quiet. Adding a compressor to the vocal track helped me smooth out the levels and create a more consistent sound.

How Do They Work?

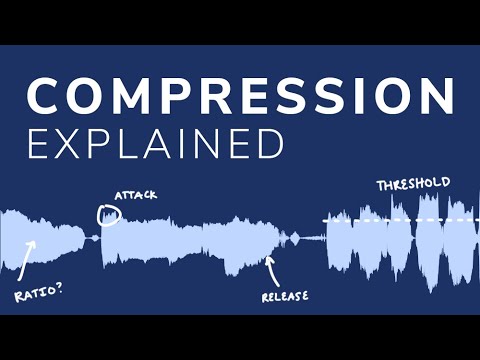
Compressors and limiters work by using a combination of threshold, ratio, attack, release, and gain settings.

The threshold determines at what level the compressor or limiter starts to activate. The ratio determines how much the audio is reduced or limited once the threshold is crossed. The attack setting determines how quickly the compressor or limiter reacts to changes in the audio, and the release setting determines how long it takes for the effect to stop after the audio drops below the threshold. Finally, the makeup gain setting determines how much to boost the level of the audio after compression or limiting.

What is the difference between a compressor and a limiter? This is a common question among audio enthusiasts and professionals. While both devices are used to control the dynamics of audio signals, they have some important differences.

Compression is used to reduce the dynamic range of audio signals. It works by decreasing the level of audio above a certain threshold. This is done by applying gain reduction to the audio signal when it exceeds the threshold. Compression is commonly used in music production to control the level of vocals and instruments, making them sit better in the mix.

A limiter, on the other hand, is a type of compressor that is designed to prevent audio levels from exceeding a certain threshold. It works by applying a fixed amount of gain reduction to the audio signal when it exceeds the threshold. This makes it useful for preventing distortion caused by audio levels that are too high.

When it comes to the settings of compressors and limiters, there are several parameters that can be adjusted. The threshold determines at what level the compressor or limiter starts to activate. The ratio determines how much the audio is reduced or limited once the threshold is crossed. The attack setting determines how quickly the compressor or limiter reacts to changes in the audio, and the release setting determines how long it takes for the effect to stop after the audio drops below the threshold. Finally, the makeup gain setting determines how much to boost the level of the audio after compression or limiting.

In my personal experience, I have found that using a limiter is often necessary when working with audio that has a wide dynamic range, such as live recordings. It helps to prevent distortion and keeps the audio levels under control. On the other hand, when working with more controlled recordings, such as in a studio environment, a compressor can be more useful for shaping the sound and controlling the levels of individual tracks.

As audio engineer Bob Katz puts it in his book “Mastering Audio: The Art and the Science”: “The compressor is a tool of transparency; it must not be heard. The limiter is a tool of protection; it must be heard only when it protects.” This quote highlights the different purposes of these two devices and how they are used in different contexts.

In conclusion, while compressors and limiters may seem similar at first glance, they serve different purposes and have different settings that can be adjusted to achieve different effects. Understanding the differences between these devices can help audio enthusiasts and professionals make informed decisions when working with audio.

What is Audio Compression Threshold and How it Affects Sound Quality

What is Audio Compression Threshold and How it Affects Sound Quality

Audio Compression
Audio Compression
Audio Compression
Audio Compression

Introduction

Audio compression is a technique used to reduce the dynamic range of an audio signal. It is commonly used in music production to make a recording sound louder and more impactful. However, compressing audio too much can lead to a loss of detail and a reduction in sound quality. In this article, we will explore the concept of audio compression threshold and how it affects sound quality.

Understanding Audio Compression

Audio compression is the process of reducing the dynamic range of an audio signal by attenuating the louder parts of the signal while leaving the quieter parts untouched. The main purpose of audio compression is to make the overall level of the audio signal more consistent, which can make it easier to listen to and mix with other tracks.

However, compression can also introduce artifacts such as pumping, breathing, and distortion, which can affect the quality of the sound. Therefore, it’s important to understand the parameters of audio compression, such as threshold, ratio, attack, and release, to achieve the desired sound.

“Compression is like a lens in photography. Just as a lens can bring certain parts of an image into focus while blurring others, compression can bring certain parts of an audio signal into focus while reducing the dynamic range.” – Bobby Owsinski, The Mixing Engineer’s Handbook

What is Audio Compression Threshold?

The compression threshold is the level at which the compressor starts to attenuate the audio signal. In other words, it’s the point at which the compressor kicks in and starts reducing the level of the audio signal. The threshold is usually set in decibels (dB), and it can range from -60 dB to 0 dB or higher.

Setting the compression threshold too low can result in over-compression, where the compressor is constantly active and the audio signal loses its natural dynamic range. On the other hand, setting the threshold too high can result in under-compression, where the compressor doesn’t kick in enough and the audio signal remains too dynamic. Therefore, finding the right compression threshold is crucial for achieving the desired sound.

“The compression threshold is the gatekeeper of the compressor. If you set it too low, the compressor will work too hard and the sound will lose its natural dynamics. If you set it too high, the compressor won’t work enough and the sound will be too dynamic.” – Bob Katz, Mastering Audio: The Art and the Science

How Compression Threshold Affects Sound Quality

The compression threshold can have a significant impact on the sound quality of an audio signal. Setting the threshold too low can result in a squashed and lifeless sound, while setting it too high can result in a dynamic and uncontrolled sound. Therefore, it’s important to find the right balance between dynamic range and consistency.

Additionally, different instruments and sounds require different compression thresholds. For example, a snare drum may require a higher threshold than a vocal track, as the snare drum has a shorter decay time and more transient peaks. Therefore, it’s important to adjust the compression threshold for each individual track to achieve the desired sound.

“The compression threshold is like a knife. Use it wisely,
Copy to Clipboard

clipboard emoji

User
continua donde te uedaste que fue en:

“The compression threshold is like a knife. Use it wisely,
ChatGPT

How to determine the right compression threshold

Determining the right compression threshold can be tricky, and it can take some trial and error to find the sweet spot. Here are a few tips to help you get started:

  • Start with a low threshold: A good starting point is a threshold of around -30dB. This will ensure that you are compressing the quieter parts of your audio, without squashing the louder parts.
  • Listen carefully: When you apply compression, listen carefully to the changes in the audio. You want to make sure that the compressor is not introducing any unwanted artifacts or distortion.
  • Experiment with different settings: Try adjusting the threshold up and down to see how it affects the audio. You may also want to experiment with the attack and release times, as well as the ratio setting.

Remember, there is no one-size-fits-all solution when it comes to compression. You will need to experiment to find the settings that work best for your particular audio.

“Compression is a great tool, but it’s easy to overdo it. Always err on the side of subtlety, and remember that sometimes a little goes a long way.”

– Brian Eno

The importance of a balanced mix

One of the most important aspects of audio compression is ensuring that your mix is balanced. If one element of the mix is too loud, you may be tempted to apply heavy compression to bring it down to the same level as the other elements. However, this can result in a dull and lifeless mix.

The key is to start with a well-balanced mix. This means that each element of the mix should be at a similar volume level, without any one element dominating the others. Once you have a balanced mix, you can then use compression to add subtle enhancements and make the mix sound even better.

“A good mix is all about balance. Each element of the mix should have its own space, and nothing should be too dominant.”

– Rick Rubin

The dangers of overcompression

While compression can be a powerful tool for enhancing the sound of your audio, it can also be easy to overdo it. Overcompression can result in a number of unwanted artifacts, including distortion, pumping, and breathing.

One of the main dangers of overcompression is the loss of dynamic range. Dynamic range refers to the difference between the loudest and quietest parts of your audio. When you apply too much compression, you reduce the dynamic range, resulting in a flat and lifeless sound.

Another danger of overcompression is the loss of transients. Transients are the short, sharp peaks in the audio that give it its punch and energy. When you apply too much compression, you can squash these transients, resulting in a dull and uninspired sound.

“Compression is a great tool, but it’s important to remember that it’s just one tool in the toolbox. Don’t rely on it too heavily, and always remember to use it in moderation.”

– Tony Maserati