How do you choose which frequencies to boost or cut on an equalizer?


Free Download Mp4Gain
picture

How do you choose which frequencies to boost or cut on an equalizer?

How do you choose which frequencies to boost or cut on an equalizer?

Understanding Frequency Bands

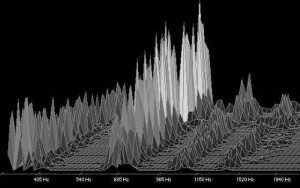
When it comes to choosing which frequencies to boost or cut on an equalizer, the first step is to understand the different frequency bands. Equalizers typically have a series of sliders or knobs that allow you to adjust the levels of different frequency bands. The most common frequency bands are bass, midrange, and treble. Bass frequencies are typically between 20Hz and 250Hz, midrange frequencies are between 250Hz and 4kHz, and treble frequencies are between 4kHz and 20kHz. Understanding how these frequency bands affect the sound is key to choosing which frequencies to boost or cut.

Identifying Problem Frequencies

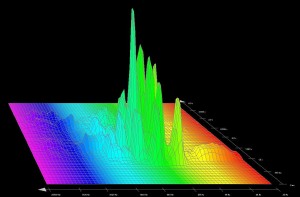
Once you understand the frequency bands, the next step is to identify which frequencies are causing problems in the sound. This can be done by listening carefully to the audio and paying attention to which frequencies are too loud or too quiet. For example, if the bass is too boomy, you may need to cut the low frequencies using the equalizer. If the vocals are too harsh, you may need to cut the midrange frequencies. Identifying the problem frequencies is key to choosing which frequencies to boost or cut.

Making Subtle Adjustments

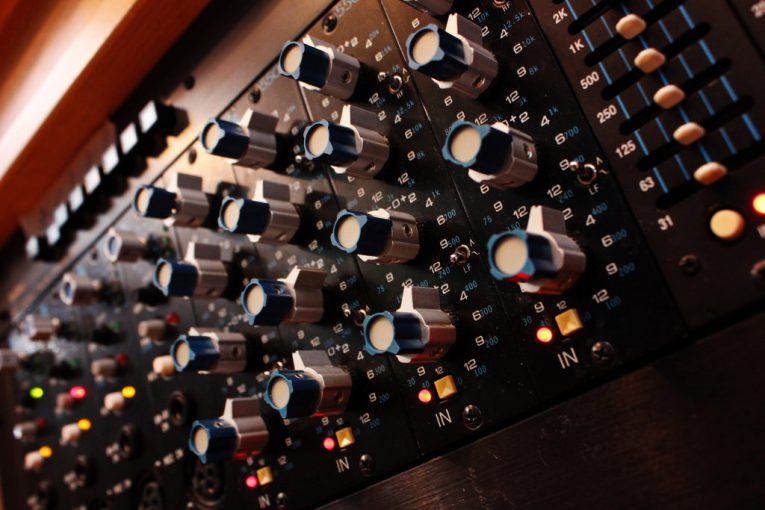
Once you’ve identified the problem frequencies, it’s time to start making adjustments using the equalizer. The key is to be patient and make subtle adjustments. It’s important to remember that equalization is not a magic fix for all audio problems. In some cases, you may need to address the underlying issue before using the equalizer. As the music producer Quincy Jones once said, “Equalization is like a microscope. You can see everything, but you can also ruin everything.” With that in mind, use the equalizer to make small adjustments to the sound, and listen carefully to the results. Over time, you’ll develop a better understanding of how to choose which frequencies to boost or cut.
Final Words:
In conclusion, choosing which frequencies to boost or cut on an equalizer can be a powerful tool for improving the sound of your music or audio content. By understanding the different frequency bands, identifying the problem frequencies, and making subtle adjustments, you can achieve a more balanced and natural sound. And if you’re looking for a reliable and effective equalizer software, I highly recommend checking out mp4gain. It’s a great solution for normalizing and converting audio and video files, with an integrated equalizer that can help you achieve the perfect sound.


equalizer, frequencies, boost, cut, selection, adjustment, control, manipulation, management, modification, optimization, bass, midrange, treble, sound, problem, loud, quiet, vocals, harsh, subtle, adjustments, microscope, ruin, Quincy Jones, balanced, natural, reliable, effective, software, mp4gain, normalize, convert, files, integrated, solution, perfect, sound.


Free Download Mp4Gain
picture


Mp4Gain Main Window
picture


Mp4Gain Features
picture


Free Download Mp4Gain
picture

How do you use an equalizer to fix audio problems?

How do you use an equalizer to fix audio problems?

How do you use an equalizer to fix audio problems?

Understanding Equalizer Settings

When it comes to using an equalizer to fix audio problems, the first step is to understand the different settings. Equalizers typically have a series of sliders or knobs that allow you to adjust the levels of different frequency bands. The most common types of equalizers are graphic equalizers and parametric equalizers. Graphic equalizers are simpler to use, as they display the frequency response of the audio signal in a graphical interface. Parametric equalizers are more complex, but offer more control over the sound. Understanding how to use these settings is key to fixing audio problems.

Identifying Audio Problems

Before you can use an equalizer to fix audio problems, you need to identify what those problems are. Common audio problems include muddiness, harshness, sibilance, and boomy bass. These issues can be caused by a variety of factors, such as poor microphone placement, room acoustics, or low-quality equipment. Once you’ve identified the problem, you can use the equalizer to target the specific frequency bands that are causing the issue. For example, if you’re dealing with boomy bass, you can cut the low frequencies using the equalizer.

Using the Equalizer to Fix Audio Problems

Once you’ve identified the problem and understand the equalizer settings, it’s time to start fixing the audio. The key is to be patient and make subtle adjustments. It’s important to remember that equalization is not a magic fix for all audio problems. In some cases, you may need to address the underlying issue before using the equalizer. As the music producer Rick Rubin once said, “Equalization is a tool, not a crutch.” With that in mind, use the equalizer to make small adjustments to the sound, and listen carefully to the results. Over time, you’ll develop a better understanding of how to use the equalizer to fix audio problems.
Final Words:
In conclusion, using an equalizer to fix audio problems can be a powerful tool for improving the sound of your music or audio content. By understanding the different equalizer settings, identifying the audio problems, and making subtle adjustments, you can achieve a more balanced and natural sound. And if you’re looking for a reliable and effective equalizer software, I highly recommend checking out mp4gain. It’s a great solution for normalizing and converting audio and video files, with an integrated equalizer that can help you achieve the perfect sound.

equalizer, audio, problems, settings, troubleshooting, sound, enhancement, correction, improvement, sliders, knobs, frequency, bands, graphic, parametric, muddiness, harshness, sibilance, boomy bass, microphone, placement, acoustics, equipment, patient, subtle, adjustments, tool, crutch, music, producer, Rick Rubin, balanced, natural, reliable, effective, software, mp4gain, normalize, convert, files, integrated, solution, perfect, sound.

Volume equalizer, mp3 louder.

Volume equalizer, mp3 louder.

Volume equalizer

Anyone who has some mp3 or video files or music files of other formats will soon discover that some have a problem with the volume…they don’t sound at the same volume level as the other files.

Volume equalizer

And this forces him to start looking for a solution.

It is obvious that this solution is Mp4Gain, not only because it has the most modern algorithm to normalize the volume of an mp3, video, etc. But because it can also be a converter, that is, we normalize an mp4 but we want to obtain an mp3, for example.

And it also has certain advanced settings, which should only be used by someone who has very specific knowledge and needs, to get exactly what he is needing. For example, add Replay Gain.

For the rest of the users, Mp4Gain is so simple to use that it is enough to load one or several files (in batch mode) and press the button to normalize, just that and the program does everything without further need to modify or move settings.

Mp4Gain is powerful for those who need it and easy and simple to use for the rest, and offers the best results.

Volume equalizer – mp3 louder

Volume equalizer – mp3 louder

Volume equalizer

Equalize the volume of mp3, mp4 or any other audio or video file, in the main formats.

Volume equalizer

That is something that Mp4Gain offers and that it achieves with the best quality, because it is without a doubt the best audio normalizer in the world.

Anyone who has a fair amount of sound or video files has noticed that there is an unevenness in the volume level. Which is annoying to play them one after the other. Well, the difference between some of them is too noticeable, perhaps it sounds lower in volume or perhaps it sounds very loud.

The reasons why this happens and why we find these differences are many. Perhaps the most obvious is because they have been encoded (converted) by some amateur user, who chose the settings (bit rate, sample rate, etc) without knowing what he was doing… and it also turns out that we have a mixture of different bit rates, for example, in all our mp3.

Mp4Gain can not only standardize the bit rate, for example, but it analyzes the audio frame by frame (more than 40 thousand times per second) and finds the precise levels so that they have the same decibel level, which you can choose or let Mp4Gain does it automatically.

Volume equalizer, how does it work?

Volume equalizer, how does it work?

Volume Equalizer

Many people ask us how an mp3, mp4, etc. They save so much space.

volume equalizer

First of all there is obviously the zip type compression. That is, those algorithms that reduce the space basically seeking to eliminate the redundancy of symbols. That is, if in a row you find: 11111110000000 what you do is put 7-1,7-0 implying that there are 7 times a one and 7 times a zero. You save space by describing what you write when you have repetitive characters.

This is just a very simplified example.

But there is also another compression that is based on knowing how the human ear works. We already know that there are low and high frequencies that the human ear does not perceive, so everything that is outside the hearing range of the human ear can be ruled out.

There is also masking, which implies that if two similar frequencies sound almost simultaneously, one of them at a higher volume, it will mask the second, that is, we will not hear the second, so it can be discarded.

It is obvious that all these processes cause information to be discarded and that can damage the quality, but in general, if it is done correctly, the human ear, even the trained one, cannot perceive the difference.

Thousands of tests have been done making people, including musicians, listen to high bitrate mp3s and listen to a WAV and it has been verified that they cannot tell the difference.

HOW TO CORRECTLY USE AN EQUALIZER

An equalizer, concealer or equalizer in English, is a tool also used for recording, mixing or reinforcing sound, to increase or decrease the volume of certain frequency bands of a sound.

I – HARMONIC ANALYSIS OF SOUND

On the sound page, we have seen that the audible frequency spectrum, that is, the range of frequencies perceived by the human ear, extended from 16 to 20,000 Hz. Each sound has its own frequency spectrum corresponding to the “signature acoustics”. The 3 voiceprint examples below will allow you to practice frequency analysis.

equalizer
Example 1

This harmonic analysis is carried out from a wav file. There are 4 frequency bands (around 330, 660, 990, and 1600 Hz). We note that the 660 Hz band dominates with its strongest energy: it defines the dominant tone. The other bands are secondary tones. Voices are not the only voices featuring spectrums with particular dominant tones; This is also the case for musical instruments. This is what differentiates them from noises that also have secondary tones that overlap without any relationship between them.

Audio Equalizer

Example 2

Recording of a female voice characterized by a low-mid dominant spectrum. Low frequencies at the beginning of the low-mid range and in the bass register.

female_vote_equalizing
Example 3

Recording of a female voice, voiceover on television. The registration is more extensive in the range of low and low mids.

II – RECOGNIZING FREQUENCIES

The equalizer allows you to intervene in the frequency spectrum of a sound by increasing (increasing) or attenuating (cutting) certain bands. In this way, we can eliminate unnecessary or unpleasant frequencies, strengthen a voice, correct the instruments so that they do not overlap too much when playing simultaneously or create a musical style. Such manipulations must be exercised with discernment. Before embarking on frequency corrections, you must learn to recognize the most important frequencies of a sound. This will avoid big mistakes that could kill crucial ranges of the spectrum … A little too low or an exaggeration of the treble and the song will quickly transform into an amalgam of frequencies that will sound more like noise than music! In isolated sounds, identification of different frequency bands is relatively easy. Choose audio files for vocals or instruments instead of composite songs.

III – THE EQUALIZER SETTING

The correct setting of an equalizer is not obvious since there is no miracle recipe. Adjustments are just compromises for a set to keep its balance while making corrections on certain instruments. Musical tastes and sensibilities also influence the stages. Therefore, in this area it is difficult to give absolute rules, but we can reflect on the following points to avoid …

There is no need to cut entire ranges of the spectrum. Pay attention to strong fades in the mid range. You run the risk of getting a confusing set. Preferably make corrections in a very narrow spectrum or specific frequencies.

IV – GAIN ORĀ  LIMITATER?

In a composition, most of the corrections correspond to attenuations that allow giving rise to each instrument. In some cases, a positive gain is applied to increase the presence of a voice or to give air to an ensemble. Corrections are generally between -6 dB and +6 dB, but we can also reserve a space for creativity by deviating from these values.