Enhancing Video Format


Free Download Mp4Gain
picture

Enhancing Video Format

Video Format
Video Format
Video Format
Video Format

Exploring Video Format Enhancement

Video format enhancement is a multifaceted process that involves improving the quality, clarity, and overall visual appeal of video content. This enhancement can significantly impact the viewing experience and is crucial for various applications, from filmmaking to online streaming. In this comprehensive guide, we’ll delve deep into the intricacies of video format enhancement, covering everything from the fundamental principles to advanced techniques.

The Importance of Video Quality

Video quality is a paramount consideration in today’s digital age, where video content is ubiquitous across platforms and industries. Whether you’re a content creator, filmmaker, or business owner, the quality of your videos plays a pivotal role in capturing and retaining your audience’s attention.

Enhancing video formats begins with an understanding of the key factors that influence quality. This includes resolution, bit rate, frame rate, and compression techniques. Each of these elements contributes to the overall clarity and visual appeal of your videos.

Resolution: A Deep Dive

Resolution, often expressed in pixels (e.g., 1080p, 4K), is a critical aspect of video format enhancement. It determines the level of detail and sharpness in your videos. Higher resolutions offer more clarity and are especially beneficial for larger screens and cinematic experiences. However, it’s essential to strike a balance between high resolution and file size, as larger files can lead to longer loading times and may not be suitable for all viewing platforms.

Bit Rate and Compression

Bit rate and compression techniques are closely tied to video quality. Bit rate refers to the amount of data transmitted per unit of time, usually measured in megabits per second (Mbps). Higher bit rates result in less compression and better image quality but can lead to larger file sizes. Compression, on the other hand, reduces file size but may sacrifice some image detail.

Finding the right balance between bit rate and compression is a delicate art in video format enhancement. Advanced video codecs like H.265 offer improved compression efficiency, allowing for high-quality videos with reduced file sizes.

Advanced Techniques in Video Enhancement

While understanding the basics of video quality is crucial, true video format enhancement goes beyond resolution and bit rate adjustments. Advanced techniques involve post-production processes that fine-tune video elements for optimal results.

Color Grading and Correction

Color grading is a sophisticated process that involves adjusting the colors and tones in a video to achieve a specific look or mood. It can make a significant difference in the visual appeal of your content. Correcting color imbalances, enhancing contrast, and applying creative color grading techniques can elevate your videos to a professional level.

High Dynamic Range (HDR)

HDR technology enhances the contrast and brightness of videos, resulting in more vivid and lifelike images. It expands the range between the darkest and brightest parts of a video, capturing a broader spectrum of colors and details. HDR is particularly beneficial for creating stunning visuals in films and high-end productions.

Delivering Enhanced Videos to Your Audience

Enhancing video formats is not just about creating stunning visuals; it’s also about ensuring that your audience can enjoy your content seamlessly. As you optimize your video formats, consider compatibility with various devices and platforms, as well as efficient streaming solutions.

Adaptive Streaming

Adaptive streaming is a technique that adjusts video quality in real-time based on the viewer’s internet connection and device capabilities. This ensures smooth playback and a consistent viewing experience, even under varying network conditions. Implementing adaptive streaming protocols like DASH or HLS can enhance the accessibility of your content.

Choosing the Right Format

Lastly, selecting the appropriate video format for your content is essential. Different formats offer various advantages and disadvantages, so it’s crucial to align your choice with your audience’s preferences and the platforms you’ll be using for distribution.

In conclusion, video format enhancement is a multifaceted journey that encompasses resolution, bit rate, compression, color grading, HDR, and delivery methods. By mastering these elements, you can create visually stunning videos that captivate your audience and deliver an exceptional viewing experience. Whether you’re a filmmaker, content creator, or business owner, the art of enhancing video formats can set you apart in today’s digital landscape.

Future Trends in Video Format Enhancement

As technology continues to evolve, the field of video format enhancement is poised for exciting advancements. Understanding these emerging trends can help you stay ahead in the world of video production and distribution.

8K Ultra High Definition (UHD)

While 4K resolution is becoming the new standard, 8K UHD is emerging as the next frontier in video quality. With four times the pixels of 4K, 8K offers unparalleled clarity and detail. Although it’s currently in its early stages of adoption, we can expect to see more 8K content in the future, especially for high-end cinematic experiences.

Immersive Technologies: VR and AR

Virtual Reality (VR) and Augmented Reality (AR) are transforming how we consume video content. These immersive technologies require specialized formats and techniques to create truly captivating experiences. Video format enhancement in VR and AR involves considerations like spatial audio, 360-degree video, and interactive elements, opening up new creative possibilities.

The Importance of Audio Enhancement

While much attention is given to video quality, audio plays an equally crucial role in the overall viewer experience. Audio enhancement techniques, such as spatial audio, surround sound, and noise reduction, complement video format enhancement efforts. These audio enhancements immerse viewers in a more engaging auditory environment.

Spatial Audio for Immersion

Spatial audio technology simulates the three-dimensional soundscapes, creating a more immersive audio experience. Viewers can perceive sounds coming from specific directions, heightening their sense of presence within the content. Incorporating spatial audio into video format enhancement can make a significant difference, especially in VR and AR applications.

Surround Sound for Cinematic Impact

Surround sound systems are a staple in cinemas and high-end home theaters. They create a multi-dimensional audio experience by placing speakers strategically around the viewer. Enhancing video formats to support surround sound can add a cinematic touch to your content, making it more engaging and impactful.

Conclusion

In the ever-evolving landscape of video production and distribution, video format enhancement remains at the forefront. Understanding the intricacies of resolution, bit rate, compression, color grading, HDR, and audio enhancement techniques is essential for creating captivating videos that leave a lasting impression on your audience.

As technology continues to advance, embracing emerging trends like 8K UHD and immersive technologies such as VR and AR will set you apart in the competitive world of multimedia. Remember that video format enhancement is not just about achieving technical excellence; it’s about creating experiences that resonate with viewers and leave a lasting impact.

In this article, we’ve delved deep into the world of video format enhancement, exploring its core principles, advanced techniques, and future trends. Whether you’re a filmmaker, content creator, or simply someone passionate about the world of multimedia, mastering the art of video format enhancement can elevate your creations to new heights.


Free Download Mp4Gain
picture


Mp4Gain Main Window
picture


Mp4Gain Features
picture


Free Download Mp4Gain
picture

Boost the Volume of Lossy Audio Files

Boost the Volume of Lossy Audio Files

Boost the Volume of Lossy Audio Files

Amplify Sound in Lossy Audio Files

When it comes to enhancing the audio quality of your favorite songs or podcasts, you might find yourself dealing with lossy audio files. These files, while space-efficient, often suffer from reduced sound quality. Fortunately, there are ways to amplify the sound in lossy audio files, giving your listening experience a significant boost.
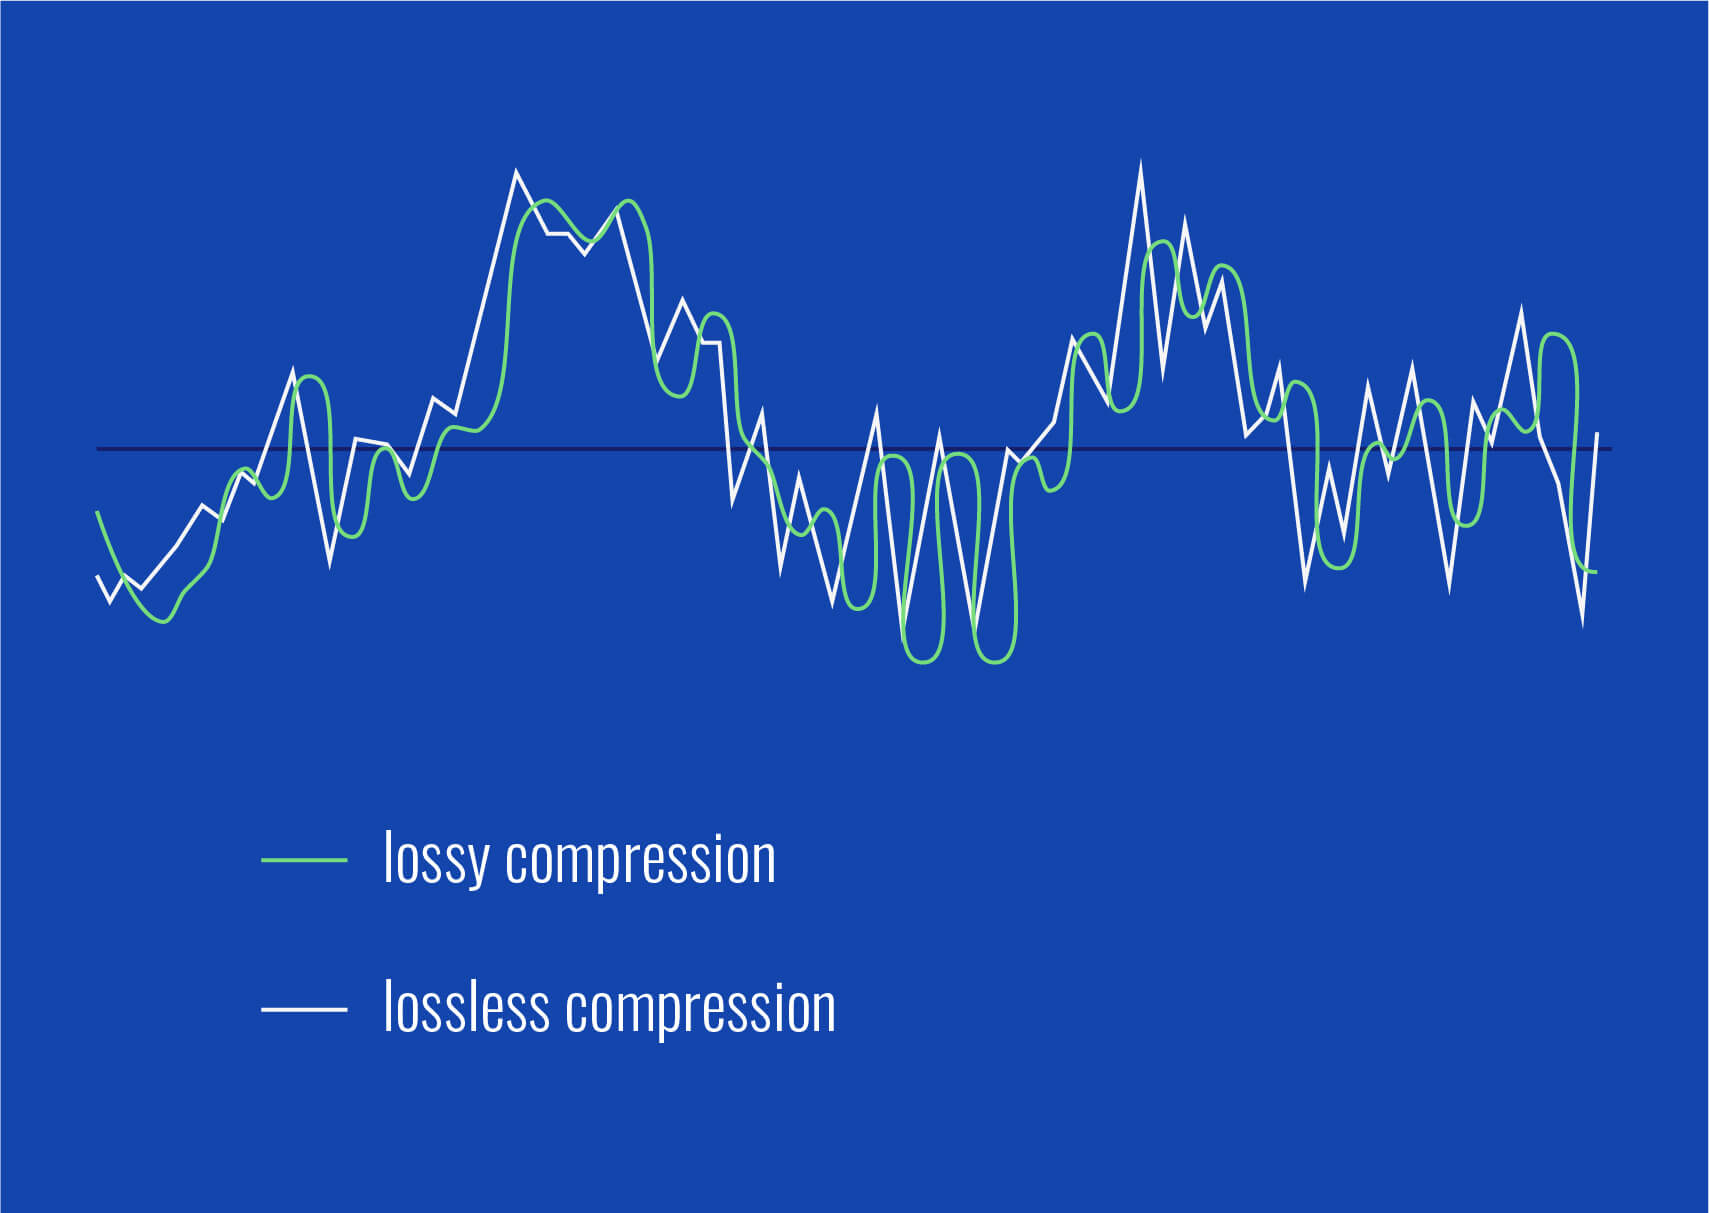
Lossy audio formats, such as MP3, AAC, or OGG, are designed to compress audio data to save storage space. However, this compression can lead to a loss of audio detail and a decrease in overall volume. To address this, you can use audio editing software to amplify the sound. By carefully adjusting the volume levels, you can make the audio more prominent and enjoyable. Just be cautious not to overdo it, as excessive amplification can lead to distortion.

Another effective way to amplify sound in lossy audio files is to use specialized audio processing tools. These tools often come with built-in volume normalization features that can help you increase the loudness while maintaining the audio’s quality. Whether you’re an aspiring musician, a podcast enthusiast, or simply looking to improve your music collection, amplifying sound in lossy audio files can breathe new life into your audio content.

Increase Volume of Compressed Audio

Compressed audio files have become the norm in today’s digital world due to their convenience and storage efficiency. However, one common drawback of these files is that they often lack the volume and punch of their uncompressed counterparts. If you’re wondering how to increase the volume of compressed audio, you’re in the right place.
To boost the volume of compressed audio files, you can start by using audio editing software. Most audio editing programs allow you to adjust the volume levels of individual tracks or sections of a file. Simply open your desired audio file in the software, locate the volume control, and gradually increase it until you achieve the desired loudness. Be cautious not to push the volume too high, as this can result in distortion and a loss of audio quality.

Additionally, consider using dynamic range compression (DRC) techniques. DRC helps balance the loud and quiet parts of an audio file, making it sound more consistent in volume. This technique is particularly useful when dealing with audio files that have uneven loudness levels. With the right adjustments, you can bring out the nuances in your compressed audio while maintaining clarity and preventing clipping.

By employing these techniques, you can effectively increase the volume of your compressed audio files, making them sound more vibrant and engaging.

Audio Volume Enhancement Techniques

Audio volume enhancement techniques are essential tools for anyone looking to improve the sound quality of their audio files, especially those in lossy formats. These techniques involve various methods to make audio files sound louder and more impactful.
One common technique is equalization, which allows you to adjust the balance of frequencies in your audio. By boosting certain frequency ranges, you can make your audio files sound fuller and more vibrant. This is particularly helpful for restoring lost detail in lossy audio files.

Another technique is the use of audio limiters and compressors. These tools help control the dynamic range of your audio, ensuring that loud parts aren’t too overpowering and quiet parts are audible. They can help you achieve a consistent and balanced volume throughout your audio file.

Additionally, you can explore mastering techniques. Mastering involves fine-tuning the overall sound of an audio file, including volume optimization. Professional mastering engineers use specialized software and hardware to enhance the loudness, clarity, and overall quality of audio recordings.

Enhance Audio Loudness in Lossy Formats

Enhancing audio loudness in lossy formats requires a combination of technical expertise and the right tools. Lossy formats like MP3 or AAC often sacrifice audio quality for smaller file sizes, which can result in lower volume levels. Here’s how you can address this issue effectively.
First, consider using audio editing software with volume normalization features. These features analyze the audio file and adjust the volume levels to ensure consistent loudness. This is particularly useful when dealing with a collection of lossy audio files with varying loudness levels.

Furthermore, explore dynamic range compression (DRC) to balance the audio’s dynamics. DRC reduces the difference between the loudest and quietest parts of an audio file, making it sound more uniform in volume. However, be cautious not to apply excessive compression, as it can lead to an unnatural and compressed sound.

Lastly, if you have a specific audio file that needs a volume boost, you can manually adjust the volume using your preferred audio editing software. Keep in mind that raising the volume too much may introduce distortion, so it’s crucial to find the right balance to enhance the loudness while preserving audio quality.

By utilizing these techniques, you can effectively enhance the audio loudness of your lossy format files and enjoy a more immersive listening experience.

Raise the Volume of Low-Quality Audio

Dealing with low-quality audio can be frustrating, especially when the volume is barely audible. Whether it’s an old recording or a poorly encoded audio file, there are ways to raise the volume and salvage the listening experience.
One approach is to use audio restoration software. These tools are designed to improve the quality of audio recordings, including boosting the volume. They often come with noise reduction features, which can help reduce background noise and further enhance the clarity of your audio.

Another option is to employ audio equalization. By adjusting the equalizer settings, you can emphasize the frequencies that are most critical for clarity and volume. Boosting the mid-range frequencies, for example, can make the vocals and instruments more prominent, resulting in a perceptible increase in volume.

If you have access to the original source of the audio, consider re-recording it or obtaining a higher-quality version. This approach eliminates the limitations of the existing low-quality audio file and ensures a better listening experience.

In summary, raising the volume of low-quality audio involves a combination of software tools and, when possible, improving the source material. These steps can help you enjoy clearer and louder audio, even from initially subpar recordings.

Boosting Sound Levels in Lossy Files

Boosting sound levels in lossy audio files is a common requirement for those looking to enhance their audio experience. Lossy formats, while efficient, often compromise on audio quality, resulting in lower volume levels. Here’s how you can effectively increase the sound levels in such files.
One of the simplest methods is to use audio editing software. Most audio editors provide volume adjustment controls that allow you to raise the volume of your lossy audio files. When doing this, be cautious not to push the volume too high, as it can lead to distortion and a loss of audio fidelity.

Additionally, you can explore the use of audio amplification plugins or tools. These specialized software options are designed to boost the loudness of audio files while minimizing the risk of distortion. They often come with presets and fine-tuning options to ensure optimal results.

When boosting sound levels, it’s essential to consider the intended playback environment. Different platforms and devices may have varying volume levels, so aim for a balance that ensures your audio remains clear and enjoyable across different systems.

By following these techniques and experimenting with volume adjustments, you can effectively boost sound levels in your lossy audio files and enjoy an improved listening experience.

Improving Audio Clarity in Compressed Formats

Improving audio clarity in compressed formats, such as MP3 or AAC, is a pursuit for audiophiles and music enthusiasts alike. While these formats offer excellent compression, they can sometimes sacrifice audio quality. Let’s explore how to enhance audio clarity in such files.
One approach is to use high-quality audio conversion tools. These tools can help you convert your compressed audio files into a lossless format, such as FLAC. Once in a lossless format, you can make edits and enhancements without further loss of audio quality. After the improvements, you can convert the file back to a compressed format with improved clarity.

Another technique involves applying equalization to your audio files. By fine-tuning the frequency balance, you can emphasize certain audio elements, such as vocals or instruments, and reduce any muddiness. This can result in clearer and more defined audio, even in compressed formats.

Furthermore, consider using noise reduction software to eliminate background noise and artifacts that may be present in your compressed audio. Reducing these unwanted elements can significantly enhance audio clarity.

Finally, if you have access to the original, uncompressed source of the audio, consider re-encoding it into a higher-quality compressed format. This can provide better clarity while still maintaining a smaller file size compared to lossless formats.

Enhancing audio clarity in compressed formats requires a combination of technical tools and careful adjustments. By experimenting with these techniques, you can achieve remarkable improvements in audio quality.

Loudness Enhancement for Lossy Audio

Loudness enhancement for lossy audio files can make a world of difference in your listening experience. Lossy formats, known for their space-saving benefits, often suffer from lower perceived volume levels. Here’s how you can effectively enhance the loudness of your lossy audio files.
One of the simplest methods is to use an audio player with built-in equalization settings. These settings allow you to boost specific frequency ranges, making the audio sound louder and more impactful. Experiment with different equalizer presets until you find the one that works best for your audio.

Another technique is to employ audio normalization. Many audio editing software tools provide normalization features that adjust the volume of your audio files to a consistent level. This ensures that all tracks play back at a similar loudness, enhancing the overall listening experience.

If you’re looking for a more advanced solution, consider using audio mastering techniques. Mastering involves fine-tuning the audio’s overall quality, including loudness optimization. Professional mastering engineers use specialized equipment and software to achieve the perfect balance of loudness and clarity.

Lastly, be mindful of the playback device you’re using. Some devices have built-in sound enhancements or equalization settings that can further enhance loudness. Experiment with these settings to find the right balance for your preferences.

By implementing these loudness enhancement techniques, you can breathe new life into your lossy audio files and enjoy them at a higher volume without sacrificing quality.

How to Make Quiet Audio Louder

Have you ever encountered audio that’s so quiet you strain to hear it even when you max out your volume controls? Learning how to make quiet audio louder is a valuable skill that can transform your listening experience.
One straightforward method is to use audio editing software. Open the quiet audio file in your chosen software and locate the volume adjustment controls. Gradually increase the volume until it reaches a comfortable level. Keep an eye on the audio waveform to ensure it doesn’t clip, which can result in distortion.

Another technique involves the use of audio normalization. This process analyzes the audio file and adjusts its volume to a consistent level, making quiet parts more audible without causing loud parts to become overly aggressive. Audio normalization is especially useful when you have multiple audio files with varying loudness levels.

Consider employing dynamic range compression (DRC) as well. DRC helps balance the dynamics of your audio, ensuring that the quietest parts are audible without overpowering the louder segments. However, use DRC judiciously to maintain natural audio quality.

Additionally, explore specialized audio enhancement software or plugins designed specifically for increasing the loudness of quiet audio. These tools often offer advanced algorithms to maximize loudness while minimizing distortion.

By mastering these techniques, you can effectively make quiet audio louder, bringing back the enjoyment in your audio content.

Audio Volume Optimization for Lossy Formats

Audio volume optimization for lossy formats is a crucial step to enhance the quality of your compressed audio files. These formats, while convenient, can suffer from reduced loudness. Let’s delve into the strategies for achieving audio volume optimization.
One method is to use audio editing software with volume adjustment capabilities. Open your lossy audio file in the software and increase the volume to your preferred level. Ensure that you maintain a balance between loudness and audio quality to prevent distortion.

Additionally, explore the use of volume normalization tools available in audio editing software. These tools analyze the audio and automatically adjust the volume to a consistent level. This is particularly useful when you have a collection of lossy audio files with varying loudness levels.

Dynamic range compression (DRC) is another technique to consider. DRC helps level out the loud and quiet parts of an audio file, resulting in a more uniform volume. However, exercise caution to avoid over-compression, which can lead to an unnatural sound.

Lastly, when exporting your audio, choose a higher bit rate if possible. This can improve the overall audio quality and contribute to better volume levels in lossy formats.

By applying these strategies for audio volume optimization, you can enjoy your favorite music and podcasts in lossy formats at a higher volume with improved clarity.

Final Words
In conclusion, whether you’re dealing with lossy audio files, compressed formats, or quiet audio, there are various techniques to boost volume and enhance your listening experience. Experiment with different methods, and remember to strike a balance between loudness and audio quality to achieve the best results. By mastering these techniques, you can enjoy your audio content at its fullest potential.

MP4 audio enhancement

MP4 audio enhancement

MP4 audio enhancement

Are you tired of watching MP4 videos with poor audio quality? Well, you’re not alone. Many of us have come across videos that have great visuals but lackluster sound. In this article, we’ll delve into the world of MP4 audio enhancement and explore various methods to improve the sound in your MP4 files.

Audio quality improvement

When it comes to MP4 audio enhancement, the first step is to focus on improving the overall audio quality. This can be achieved by using specialized software that can analyze and enhance the audio in your videos. These tools often come with features like noise reduction, equalization, and audio normalization, all of which can significantly enhance the clarity and richness of the sound.

MP4 audio enhancement software

There are several dedicated MP4 audio enhancement software options available in the market. These programs are designed to cater to both beginners and professionals. They offer a user-friendly interface and a wide range of audio enhancement tools, making it easy to adjust audio levels, remove background noise, and fine-tune the audio to perfection.

Enhance audio in MP4 files

Enhancing audio in MP4 files requires a keen ear and the right tools. You can manually adjust the audio settings, such as volume, equalization, and balance, using video editing software. Additionally, you can use audio enhancement plugins or filters to target specific issues like unwanted background noise or distorted audio.

Audio enhancement tools

There’s a treasure trove of audio enhancement tools available online, both free and paid. These tools often come with pre-configured settings for different types of audio issues, making it easier for users to enhance their MP4 audio without extensive knowledge of audio engineering.

MP4 audio editing

If you’re a perfectionist and want complete control over your MP4 audio, consider diving into audio editing. Software like Adobe Audition or Audacity allows you to get down to the nitty-gritty details of your audio, enabling you to remove imperfections, enhance clarity, and fine-tune every aspect of your sound.

Improve sound in MP4 videos

Enhancing the sound in your MP4 videos not only improves the viewing experience but also adds a professional touch to your content. With the right techniques and tools at your disposal, you can make your videos stand out with exceptional audio quality.

Audio enhancement techniques

Audio enhancement isn’t just about turning up the volume; it’s about using various techniques to polish and refine the audio. Techniques like equalization, compression, and reverb can be employed strategically to make your audio shine.

MP4 audio cleanup

Sometimes, MP4 files come with unwanted noise or artifacts that can be distracting. Audio cleanup tools can help you identify and remove these issues, leaving you with clean and crisp sound that complements your video perfectly.

Audio enhancement plugins

Plugins are like magic wands for audio enhancement. They can be integrated into your video editing software to provide specialized audio processing capabilities. Whether you need to reduce background noise or add special effects, there’s likely a plugin that can do the job.

Enhance audio clarity in MP4

Clarity is key when it comes to audio enhancement. Enhancing the clarity of your MP4 audio ensures that every word is heard crystal clear, making your videos more engaging and professional.

Final Words

In a world where multimedia content is king, MP4 audio enhancement is a valuable skill to have. With the right tools and techniques, you can elevate your videos to a whole new level of audio quality, captivating your audience and leaving a lasting impression.

Audio Noise Reduction

Audio Noise Reduction

Audio Noise Reduction


Audio Noise Reduction

Noise reduction – Introduction

Audio noise is the unwanted sound that gets recorded or produced along with the desired sound. It can be caused by various factors, such as electrical interference, background noise, microphone hiss, or low-quality equipment. Audio noise can be a significant distraction and can ruin the listening experience for the listener.

Types of Audio Noise

1. Electrical Interference

Electrical interference is caused by electrical devices or wiring that can generate electromagnetic fields. These fields can interfere with the audio signal, causing a buzzing or humming sound. Examples of electrical interference include power cables, fluorescent lights, and electronic devices such as smartphones or computers.

2. Background Noise

Background noise is any noise that is present in the recording environment. It can be caused by environmental factors such as wind, rain, traffic, or people talking. Background noise can be challenging to remove without affecting the desired audio signal.

3. Microphone Hiss

Microphone hiss is caused by the internal noise of the microphone itself. This noise is more apparent in lower-quality microphones and can be reduced by using high-quality microphones or by using a noise reduction filter.

Methods for Audio Noise Reduction

1. Audio Editing Software

Audio editing software, such as Adobe Audition or Audacity, has built-in noise reduction tools that can remove unwanted noise from audio recordings. These tools work by analyzing the audio signal and removing any frequencies that match the noise profile. The effectiveness of the tool depends on the complexity and type of noise present in the recording.

2. Noise Reduction Filters

Noise reduction filters are hardware devices that can be used to remove unwanted noise from audio recordings. These filters work by analyzing the audio signal and removing any frequencies that match the noise profile. They are particularly useful for removing electrical interference and microphone hiss.

3. Dynamic Noise Reduction

Dynamic noise reduction is a technique that can be used to reduce unwanted noise from audio recordings in real-time. This technique works by analyzing the audio signal and dynamically adjusting the noise reduction filter to remove any unwanted noise. This method is particularly useful for removing background noise during live performances or recording sessions.

Tips for Effective Audio Noise Reduction

  • Record in a quiet environment
  • Use high-quality equipment
  • Use a noise reduction filter or software
  • Use dynamic noise reduction if recording in a live environment
  • Avoid over-processing the audio signal

Conclusion

Audio noise can be a significant distraction and can ruin the listening experience for the listener. Fortunately, there are several methods available for removing unwanted noise from audio recordings. By following the tips mentioned above and using appropriate noise reduction methods, you can produce high-quality audio recordings with minimal noise.

FAQs

What is the best software for audio noise reduction?

There are several audio editing software available that have built-in noise reduction tools, such as Adobe Audition and Audacity. However, the effectiveness of the tool depends on the complexity and type of noise present in the recording.

What is the difference between noise reduction and noise suppression?

Noise reduction and noise suppression are both techniques used to remove unwanted
Copy to Clipboard

clipboard emoji

[email protected]
continua dpnde te quedaste que fue en:

Noise reduction and noise suppression are both techniques used to remove unwanted
background noise from audio recordings, but they work differently.

Noise Reduction

Noise reduction is a technique that involves reducing the noise level in an audio recording without affecting the quality of the audio. The goal is to minimize the unwanted noise and leave the audio intact. This technique is often used in post-production and editing of audio recordings.

There are different ways to perform noise reduction, including:

  • Equalization: This technique involves adjusting the frequency response of the audio recording to remove unwanted frequencies that cause noise.
  • Filtering: This technique involves using a high-pass filter to remove low-frequency noise and a low-pass filter to remove high-frequency noise.
  • Noise gates: This technique involves setting a threshold level below which the audio is muted, effectively removing any noise below that level.
  • Spectral editing: This technique involves analyzing the spectral content of the audio and selectively removing unwanted noise.

Noise Suppression

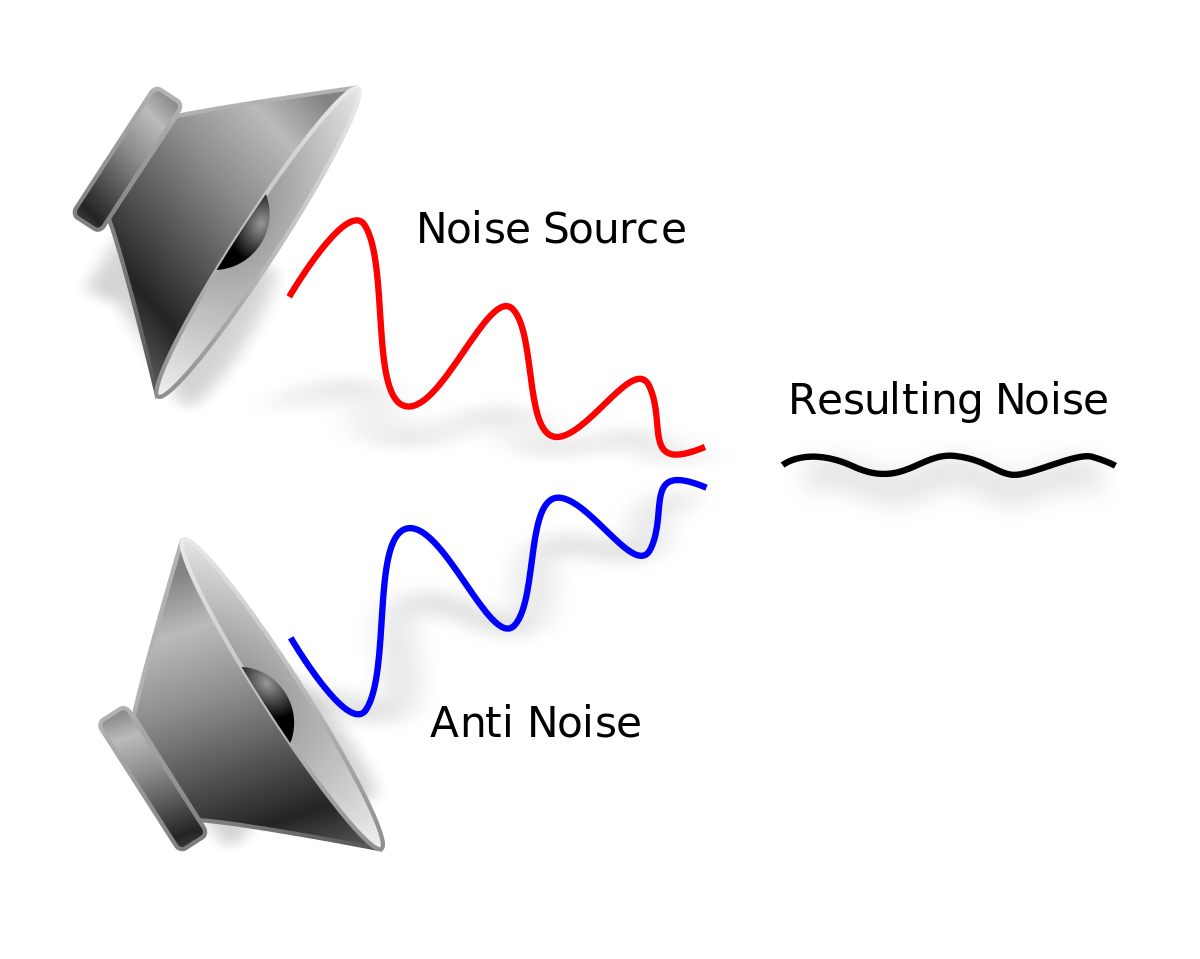
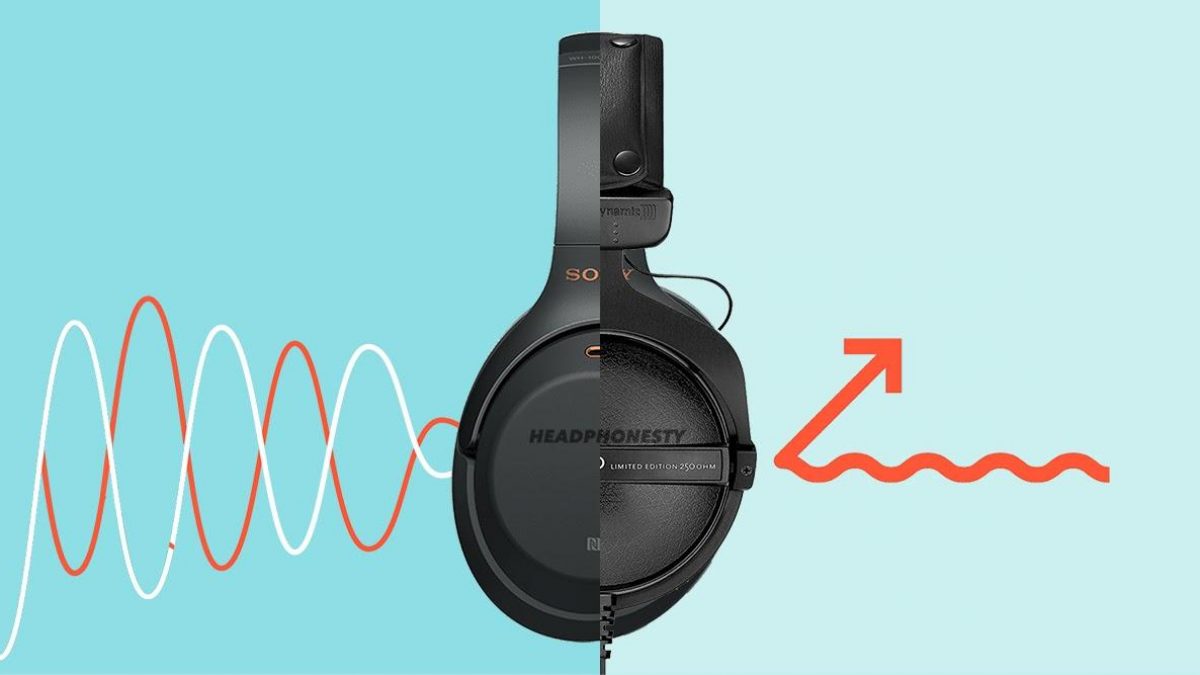
Noise suppression is a technique that involves removing unwanted noise by actively suppressing it. This technique is often used in real-time audio processing and is commonly used in applications such as noise-cancelling headphones and conference call software.

There are different ways to perform noise suppression, including:

  • Adaptive filtering: This technique involves analyzing the noise signal and creating an adaptive filter that actively removes the noise in real-time.
  • Subtraction: This technique involves recording a sample of the noise and then subtracting it from the audio signal to remove the noise.
  • Active noise cancellation: This technique involves using an anti-noise signal that cancels out the unwanted noise.

Best Practices for Audio Noise Reduction

When performing audio noise reduction, it is important to follow some best practices to achieve the best results:

  • Record in a quiet environment: The best way to reduce noise is to avoid recording it in the first place. Record in a quiet environment, away from sources of noise.
  • Use a good microphone: A good microphone will capture the audio with high quality and reduce the noise level.
  • Use a pop filter: A pop filter is a device that reduces the popping sound when speaking into a microphone, which can help reduce unwanted noise.
  • Record at the correct level: Recording at the correct level ensures that the signal is strong enough to minimize the noise level.
  • Perform noise reduction as the last step: Perform noise reduction as the last step in the audio editing process to avoid degrading the quality of the audio.

FAQ

What is audio noise?

Audio noise is any unwanted sound that is captured during audio recording. It can be caused by a variety of sources, including electronic interference, background noise, and environmental factors.

What is the difference between noise reduction and noise suppression?

Noise reduction involves reducing the noise level in an audio recording without affecting the quality of the audio, while noise suppression involves actively suppressing unwanted noise in real-time.

What are the best practices for audio noise reduction?

The best practices for audio noise reduction include recording in a quiet environment, using a good microphone, using a pop filter, recording at the correct level, and performing noise reduction as the last step in the audio editing process.

What are some common techniques used for audio noise reduction?

Common techniques used for audio noise reduction include equalization involves adjusting the levels of different frequency components in the audio signal to reduce the effect of noise. The process involves boosting or reducing certain frequencies using an equalizer. For example, if noise is concentrated at a particular frequency range, an equalizer can be used to attenuate that range.

Filtering is a technique that involves removing unwanted frequencies from an audio signal. High-pass filters, low-pass filters, and band-pass filters are commonly used for this purpose. High-pass filters remove frequencies below a certain threshold, while low-pass filters remove frequencies above a certain threshold. Band-pass filters allow frequencies within a certain range to pass while attenuating frequencies outside that range.

Spectral subtraction is a more sophisticated technique that involves estimating the spectral content of the noise and subtracting it from the original signal. The process involves first analyzing the spectral content of the noise and then creating a noise profile. The noise profile is then subtracted from the original signal to reduce the noise.

Other techniques used for audio noise reduction include adaptive filtering, which involves dynamically adjusting a filter to remove noise, and wavelet analysis, which involves decomposing the signal into different frequency bands and selectively removing noise from each band.

Challenges of Audio Noise Reduction

While there are several techniques for audio noise reduction, the process is not always straightforward. In some cases, removing noise can result in a loss of signal quality, leading to artifacts such as distortion, clipping, and phasing. Additionally, different types of noise require different techniques for effective reduction.

Moreover, it can be challenging to distinguish between noise and signal components in some cases, making it difficult to remove noise without affecting the signal. For example, in the case of speech signals, noise can be difficult to distinguish from the natural variation in the speaker’s voice.

Conclusion

Audio noise reduction is a crucial technique for improving the quality of audio recordings. There are several techniques available for reducing noise, including equalization, filtering, and spectral subtraction. However, the process can be challenging, and it is essential to understand the different types of noise and the appropriate techniques for reducing them.

In conclusion, noise reduction is an essential process that can help improve the quality of audio recordings. By understanding the different techniques available for reducing noise and the challenges associated with the process, it is possible to achieve effective noise reduction without compromising signal quality.

What is digital audio and video?

What is digital audio and video?

Digital Audio and Video

Digital audio and video are types of data that we can store on a computer or other electronic device. They are made up of a series of numbers that represent the sound or image we want to save. This means that instead of using physical materials like film or tape to record sound or video, we can use a computer to store and manipulate digital versions of that data.

Digital Audio and Video

How is sound digitized?

Sound is a type of wave that travels through the air. When we want to digitize sound, we need to find a way to measure that wave and turn it into a series of numbers. We do this by using a device called a microphone, which converts sound waves into electrical signals that can be processed by a computer.

Here’s an example: imagine you’re at a concert and you want to record a song using your phone. You turn on the voice memo app and hold your phone up to the speakers. The microphone in your phone converts the sound waves from the speakers into electrical signals that are then turned into a digital audio file that you can listen to later.

How are multiple sounds combined into a single file?

When we record sound using a microphone, we’re not just capturing one sound at a time. We’re also picking up any other sounds that might be happening in the background, like people talking or the sound of a car driving by. So how do we store all of these different sounds in a single file?

The answer is that each sound is given its own “channel” in the digital audio file. Imagine that you have a stereo system with two speakers – one on the left and one on the right. When you record a song using your phone, the sound that’s coming out of the left speaker is saved in one channel of the audio file, while the sound that’s coming out of the right speaker is saved in another channel.

How are different instruments and voices saved in a single channel?

So now we know how to store multiple sounds in a digital audio file using different channels. But what if we want to save a song that has lots of different instruments and voices playing at the same time? How can we separate out all of those different sounds and make sure they’re saved correctly in the file?

The answer is that each sound is given its own “frequency” in the digital audio file. Think of it like a rainbow: just like how a rainbow has lots of different colors, sound has lots of different frequencies. When we record a song, we’re capturing all of those different frequencies at the same time.

So let’s say we’re recording a song that has a guitar, a bass, a drum set, and a singer. Each of those instruments and the singer’s voice has a different set of frequencies that make up its sound. The guitar might have a lot of high frequencies, while the bass might have a lot of low frequencies. When we record the song, we capture all of those frequencies at the same time and save them in the digital audio file.

How are timbres saved in a digital audio file?

The “timbre” of a sound refers to its unique quality or tone. For example, if you hear a trumpet and a violin playing the same note, you can still tell the difference between the two because they have different timbres. So how do we save the timbre of each instrument or voice in a digital audio file?

To save the timbre of each sound, we use a process called “sampling”. Sampling involves taking tiny snapshots of the sound wave at regular intervals and saving those snapshots as numbers in the digital audio file. The more snapshots we take, the more accurately we can capture the unique timbre of each sound.

Here’s an example: let’s say we’re recording a piano playing a single note. We take 44,100 snapshots of the sound wave per second and save each snapshot as a number in the digital audio file. When we play back the file, the computer reads those numbers and uses them to recreate the sound of the piano note. Because we took so many snapshots per second, we’re able to capture all of the nuances of the piano’s timbre and make it sound like a real piano.

How are noises and other sounds saved in a digital audio file?

When we record sound using a microphone, we’re not just capturing the sounds we want to hear – we’re also capturing any background noise that might be happening. This can include things like people talking, cars driving by, or birds chirping. So how do we deal with all of that extra noise when we save the sound as a digital file?

One way to deal with background noise is to use a process called “noise reduction”. This involves analyzing the digital audio file and looking for parts of the sound that are consistent over time – like the sound of a fan running or the hum of a fluorescent light. The computer can then remove those consistent sounds from the file, leaving behind just the sounds we want to hear.

Another way to deal with background noise is to use a process called “EQ” (short for “equalization”). EQ allows us to boost or cut certain frequencies in the sound to make it sound better. For example, if there’s a lot of low-frequency rumble in a recording, we can use EQ to cut out some of those frequencies and make the sound clearer.

What is digital video?

Digital video is similar to digital audio, but instead of capturing sound waves, we’re capturing images. When we record a video, we’re capturing a series of still images (or frames) at regular intervals and saving them as a digital file.

How are videos saved in digital format?

To save a video in digital format, we need to capture a series of still images (or frames) and save them as a digital file. We do this using a device called a camera, which captures light from the scene we’re filming and turns it into an electrical signal that can be processed by a computer.

Here’s an example: imagine you’re filming a video of your dog playing in the park. You hold up your phone and hit the record button. The camera in your phone captures a series of still images (or frames) of your dog playing and saves them as a digital video file that you can watch later.

How are multiple images combined into a single video file?

When we capture a video, we’re capturing a series of still images (or frames) at regular intervals. To create a smooth video, we need to combine all of those frames into a single file. This is done using a process called “video compression”.

Video compression works by looking for parts of the image that are similar from frame to frame and only saving the parts that are different. For example, if you’re filming a video of a person sitting in a chair, the background behind them might not change much from frame to frame, so the computer can save that part of the image just once and only save the parts that are changing (like the person’s movements).

By only saving the parts of the image that are changing, we’re able to save space and create smaller video files that are easier to store and share. However, too much compression can make the video look blurry or pixelated. So, it’s important to find a balance between file size and video quality when compressing videos.

How do we add sound to a digital video file?

To add sound to a digital video file, we use a process called “audio syncing”. Audio syncing involves combining the digital audio file (which we learned about earlier) with the digital video file so that the sound matches up with the images.

Here’s an example: let’s say you’re filming a concert and you want to create a video of one of the songs. You record the video using your camera and the audio using a separate recording device. When you go to edit the video, you import both the digital audio file and the digital video file into your editing software. Then, you use audio syncing to line up the audio with the video so that the sound matches up with the images.

Conclusion

In conclusion, digital audio and video are complex subjects, but they can be explained in a way that a 6-year-old can understand. Digital audio involves converting sound waves into numbers that can be saved in a digital file. We use sampling to capture the unique timbre of each sound, and we use noise reduction and EQ to deal with background noise. Digital video involves capturing a series of still images (or frames) and saving them as a digital file. We use video compression to combine those frames into a single file and audio syncing to add sound to the video. By understanding these concepts, we can appreciate the technology behind the digital media that we enjoy every day.