The Science Behind Audio Equalization and Frequency Response

The Science Behind Audio Equalization and Frequency Response

Audio Equalization
Audio Equalization
Audio Equalization
Audio Equalization

Understanding audio equalization

As an audio engineer, understanding audio equalization is a crucial aspect of producing high-quality audio. Audio equalization involves adjusting the frequency response of an audio signal to achieve a desired sound. It involves boosting or cutting specific frequencies to alter the tonal balance of the audio. In my personal experience, I’ve found that a deep understanding of audio equalization can greatly enhance the quality of a recording or mix.
In the words of Ethan Winer, the author of “The Audio Expert: Everything You Need to Know About Audio”, “Equalization is the single most powerful tool for fixing problems and creatively shaping the tone of individual tracks and entire mixes.” Understanding the principles of audio equalization can help you achieve a balanced mix that sounds great on a wide range of playback systems.

Science behind frequency response

Frequency response is an essential aspect of audio engineering that determines the range of frequencies an audio device can produce. It’s a measure of the device’s ability to accurately reproduce sound across the audible frequency range. Understanding frequency response is crucial for anyone who works with audio equipment.
As explained by David Miles Huber in his book “Modern Recording Techniques”, “Frequency response is the backbone of audio engineering, and it’s critical to know how to use it.” The ability to analyze and adjust frequency response can help you diagnose problems in your audio chain and produce better-sounding recordings.

Equalization and its impact on audio quality

Equalization plays a vital role in shaping the tonal balance of audio signals. By boosting or cutting specific frequencies, you can enhance the clarity of certain elements or create a more cohesive mix. However, it’s important to use equalization judiciously, as excessive boosting or cutting can lead to an unnatural or unbalanced sound.
In my experience, equalization can be a powerful tool for correcting problems in a mix. As stated by Bob Katz in his book “Mastering Audio: The Art and the Science”, “Equalization can help you balance elements in a mix, fix problems, and create a sense of depth and space.” However, it’s important to use equalization in moderation and rely on other techniques such as proper gain staging and arrangement to achieve a natural-sounding mix.

Frequency response and its impact on audio

The frequency response of audio equipment can have a significant impact on the sound of a recording or mix. Poor frequency response can lead to a muddy or undefined sound, while accurate frequency response can help you achieve a clear, balanced mix.
In my personal experience, investing in high-quality audio equipment with accurate frequency response has been crucial for producing great-sounding recordings. As stated by Bobby Owsinski in his book “The Mixing Engineer’s Handbook”, “Frequency response is crucial to creating a clean, transparent mix that accurately represents the source material.” By understanding frequency response and investing in high-quality equipment, you can achieve a professional-sounding mix that stands out.

The role of equalization in audio engineering

Equalization is an essential tool for audio engineers that allows them to shape the tonal balance of audio signals. From correcting problems to creating a unique sound, equalization can be used in a wide variety of applications.
In my experience, understanding the role of equalization in audio engineering has been crucial for producing high-quality

Dynamic Range in Audio

Understanding Dynamic Range in Audio

Dynamic Range in Audio

What is Dynamic Range in Audio?

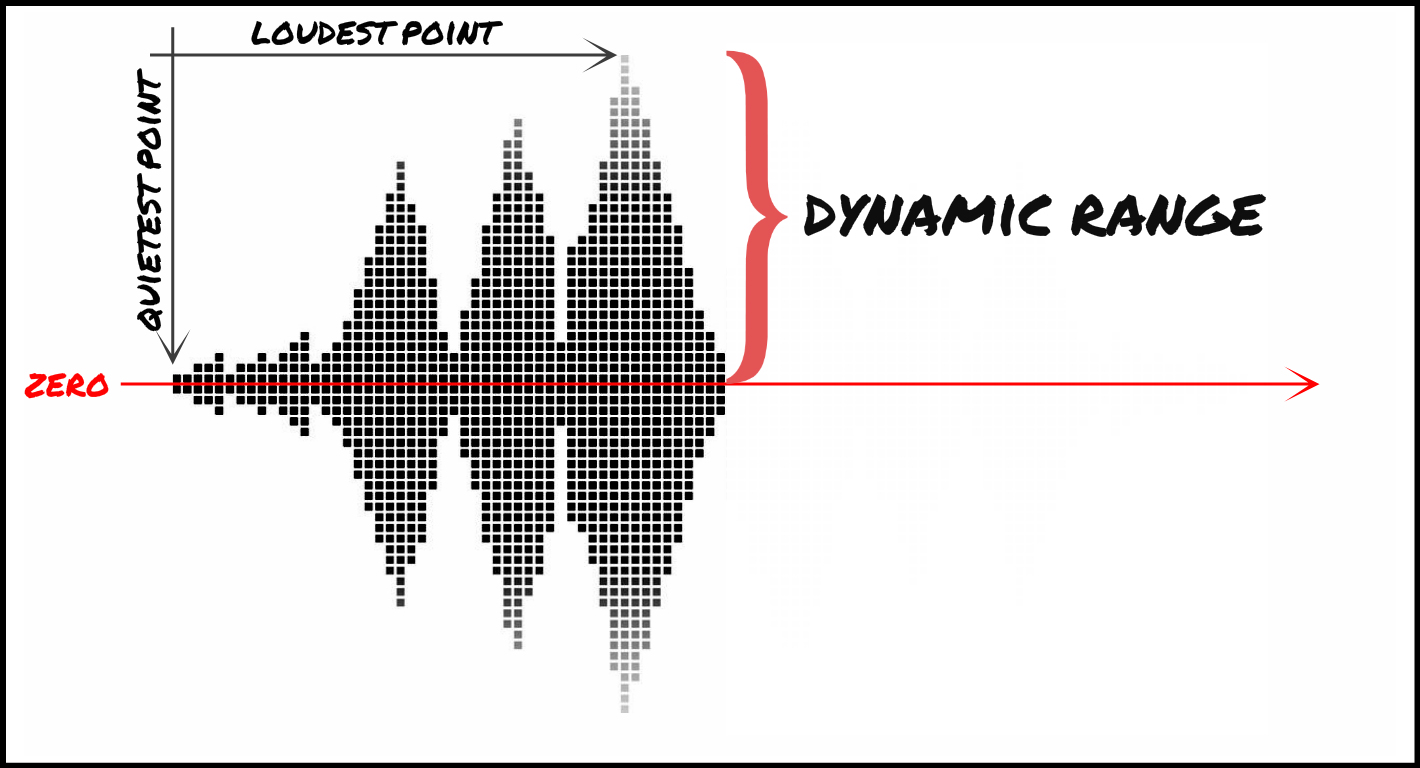
Dynamic range refers to the difference between the loudest and quietest parts of an audio signal. It is an important aspect of sound engineering that determines the quality of sound produced. As an audio engineer, I have come across numerous situations where the dynamic range of a recording was too wide or too narrow, making it difficult to produce a high-quality mix.

In the book “The Mixing Engineer’s Handbook” by Bobby Owsinski, he states: “The dynamic range is what gives a recording its emotional impact. Too much and it becomes tiresome, too little and it becomes boring.” This perfectly illustrates the importance of understanding and mastering dynamic range in audio.

When working with audio, it is important to use tools such as compressors, limiters, and expanders to manage the dynamic range. These tools can help reduce the difference between the loudest and quietest parts of a recording, resulting in a more balanced sound.

How does Dynamic Range Compression work?

Dynamic Range Compression (DRC) is a technique used in audio engineering to reduce the dynamic range of a recording. This is achieved by reducing the volume of the loudest parts of the recording while leaving the quieter parts unchanged.

DRC is commonly used in music production to create a consistent volume level throughout a song. It is also used in broadcasting to ensure that the volume of advertisements is consistent with the volume of the program being aired.

In the movie “Whiplash,” the character Terence Fletcher, played by J.K. Simmons, says, “There are no two words in the English language more harmful than ‘good job’.” While this quote is not related to audio engineering, it perfectly illustrates the idea behind dynamic range compression. By reducing the difference between the loudest and quietest parts of a recording, we create a more consistent and balanced sound.

Why is Understanding Dynamic Range important?

Understanding dynamic range is important for anyone working with audio. It allows us to create high-quality recordings that are both pleasing to the ear and emotionally impactful.

As a personal anecdote, I once recorded a live concert where the dynamic range was too wide. The quiet parts of the recording were barely audible, while the loud parts were painfully loud. After mastering the recording and reducing the dynamic range, the final product was much more enjoyable to listen to.

In conclusion, dynamic range is a crucial aspect of sound engineering that should not be overlooked. By understanding how it works and using the right tools, we can create recordings that are both balanced and emotionally impactful.

Final Words

When it comes to audio engineering, mastering dynamic range is key to creating high-quality recordings. By using tools such as compressors and limiters, we can reduce the difference between the loudest and quietest parts of a recording, resulting in a more balanced sound. As an audio engineer, I have seen firsthand the importance of mastering dynamic range, and I urge anyone working with audio to take the time to understand it fully.

How to Improve MP3 Sound Quality with EQ and Effects

How to Improve MP3 Sound Quality with EQ and Effects

mp3 equalization
mp3 equalization

Introduction

mp3 equalization
mp3 equalization

When it comes to listening to music, sound quality matters. However, not all MP3 files are created equal, and sometimes additional processing is necessary to make them sound their best. One way to achieve better sound quality is by using EQ and effects to adjust the audio signal. In this article, we’ll take a look at how EQ and effects can be used to improve the sound quality of MP3 files, providing tips and techniques for achieving better audio quality.

Understanding EQ and Effects

EQ, or equalization, is a way to adjust the balance of different frequency components in an audio signal. It can be used to make certain frequencies more or less prominent, depending on the desired sound. Effects, on the other hand, are a way to alter the audio signal in other ways, such as adding reverb, delay, or distortion. EQ and effects can be used in combination to shape the overall sound of an MP3 file.

The Best EQ and Effects for Improving MP3 Sound Quality

When it comes to improving MP3 sound quality with EQ and effects, there are a variety of tools to choose from. Some of the most commonly used EQ and effects for MP3 files include:

  • Graphic EQ: A graphic equalizer allows you to adjust the levels of different frequency bands using sliders. This is a good option for making broad adjustments to the overall sound of an MP3 file.
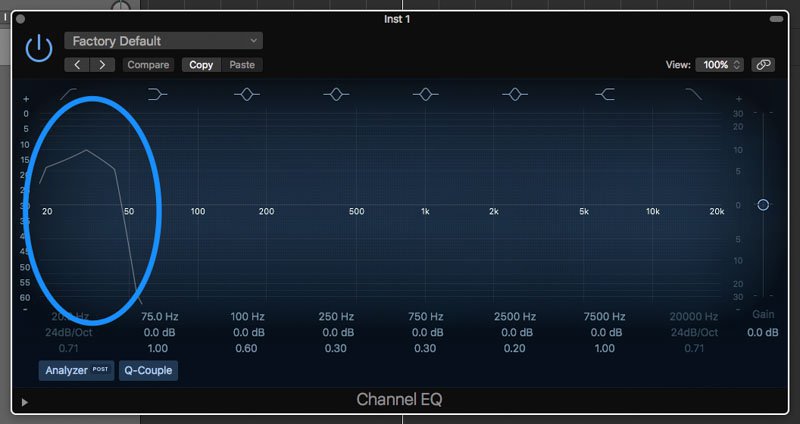
  • Parametric EQ: A parametric equalizer is a more precise way to adjust the frequency balance of an audio signal. It allows you to adjust the center frequency, bandwidth, and gain of each individual band.
  • Reverb: Reverb is an effect that adds a sense of space to an audio signal. It can be used to make an MP3 file sound more like it was recorded in a large room or hall, for example.
  • Delay: Delay is an effect that repeats the audio signal after a set amount of time. It can be used to create a sense of depth and space in an MP3 file.
  • Compression: Compression is an effect that reduces the dynamic range of an audio signal. It can be used to make the quiet parts of an MP3 file louder and the loud parts quieter, resulting in a more consistent overall volume.

How to Use EQ and Effects to Improve MP3 Sound Quality

Improving the sound quality of an MP3 file with EQ and effects involves a bit of trial and error. Here are some general steps to follow:

  1. Start with a flat EQ: Set all the EQ bands to the same level (usually 0 dB) to begin with.
  2. Identify problem areas: Listen to the MP3 file and identify any frequency ranges that sound unbalanced or overly prominent.
  3. Adjust EQ settings: Use the EQ to adjust the levels of the problem frequency ranges until they sound more balanced and natural.
  4. Add effects: Once you’re happy with the overall EQ balance, add effects like reverb or delay to enhance the sound of the MP3 file.
  5. Listen and adjust: Listen to the MP3 file with EQ and effects applied and make further adjustments as necessary until you’re happy with the sound.

Step 3: Applying Effects

Once you’ve used EQ to correct any frequency imbalances in the track, you can start to apply effects to enhance the overall sound quality. There are a variety of effects you can use to achieve different results. Here are a few examples:

  • Reverb: Adds a sense of space and depth to the track.
  • Delay: Creates echoes, which can add a sense of movement and dynamics.
  • Chorus: Creates a sense of width and thickness by doubling the sound.
  • Flanger: Similar to chorus, but with a more pronounced, swirling effect.

Keep in mind that the key to using effects effectively is to use them sparingly. Too much reverb or delay, for example, can make the track sound muddy and indistinct. A good rule of thumb is to use just enough effect to achieve the desired result, but not so much that it detracts from the clarity of the track.

Step 4: Using Mp4Gain

While using EQ and effects can go a long way in improving the sound quality of your MP3 files, there are limits to what you can achieve through manual adjustments. This is where software tools like Mp4Gain can be especially useful.

Mp4Gain is a powerful tool that allows you to normalize and equalize your MP3 files automatically. It uses sophisticated algorithms to analyze the tracks and adjust the volume and EQ to optimize the sound quality.

Using Mp4Gain is a straightforward process. Simply open the application and drag and drop the MP3 files you want to adjust into the interface. The software will automatically analyze the files and adjust the volume and EQ to achieve the best possible sound quality.

Conclusion

Improving the sound quality of your MP3 files may seem like a daunting task, but with the right tools and techniques, it is entirely achievable. By using EQ to balance out the frequency spectrum, applying effects to enhance the sound, and using a tool like Mp4Gain to automate the process, you can achieve professional-level sound quality from your MP3 files.

Remember to always use these techniques in moderation and make sure to listen to the track at different stages of the process to ensure you’re not overdoing it. With some practice and experimentation, you can create MP3 files that sound just as good as their lossless counterparts.