10-bit vs 8-bit color in MP4 video


Free Download Mp4Gain
picture

10-bit vs 8-bit color in MP4 video

10-bit vs 8-bit color in MP4 video

Let’s talk about 10-bit vs 8-bit color in MP4 video

10-bit color and 8-bit color in MP4 video are critical concepts that can significantly affect the quality of your viewing experience. As someone who has spent years exploring digital video formats, I can confidently say that understanding these color depths is essential for anyone serious about video production or simply looking to enjoy high-quality content. When I first dove into the world of video editing, I was amazed at how these seemingly technical specifications could change the way colors pop on the screen, and I’m excited to share my insights with you.

What is Color Depth?

Color depth is the number of bits used to represent the color of a single pixel in a video. It determines how many colors can be displayed, affecting everything from the richness of the images to the amount of data processed. When I first started working with color depths, I remember being struck by the difference between 8-bit and 10-bit video.

  • 8-bit color depth supports 256 shades of each primary color (red, green, blue).
  • 10-bit color depth supports 1,024 shades of each primary color.
  • The higher the color depth, the more colors can be represented.

With 8-bit video, you can create over 16 million colors, which sounds impressive. However, with 10-bit video, that number skyrockets to over a billion! This means smoother gradients, less banding, and a more lifelike image, which I’ve noticed firsthand when editing footage for projects.

The Technical Differences Between 8-bit and 10-bit

The technical differences between 8-bit and 10-bit video color depth can seem daunting, but breaking it down makes it easier to grasp.

  • Bit Depth

    The primary difference is in the bit depth, which influences the number of colors that can be represented. A simple rule of thumb: more bits equal more colors!

  • Gradient Smoothness

    10-bit video produces smoother gradients without the banding often seen in 8-bit videos.

  • Dynamic Range

    10-bit video can capture a wider dynamic range, making it ideal for HDR content.

In practical terms, I’ve found that the difference is particularly noticeable in scenes with subtle color transitions, like a sunset. In 8-bit video, the colors can appear striped and less appealing, while 10-bit footage looks fluid and natural.

File Size and Compression

One aspect often overlooked in the discussion of 10-bit vs 8-bit video is file size and compression. As I learned from experience, higher bit depths result in larger file sizes.

  • Compression Methods

    Different compression methods, like H.264 and H.265, handle these bit depths differently.

  • Storage Space

    Expect 10-bit video files to consume significantly more storage space compared to their 8-bit counterparts.

  • Streaming Quality

    Streaming services often prioritize 8-bit video to save bandwidth, which might explain why some content looks less vibrant.

I recall the time when I was running out of storage space on my hard drive because of my love for high-quality 10-bit videos. While the color quality was exceptional, I had to be strategic about what to keep!

Color Grading and Post-Production

When it comes to video editing, color grading is where the real magic happens. Working with 10-bit video gives you much more flexibility in post-production.

  • Color Correction

    The additional color information allows for more precise color corrections.

  • Creative Choices

    With more shades, you can create more dramatic looks without degrading image quality.

  • Professional Workflows

    Most professional workflows favor 10-bit for its enhanced capabilities.

In my experience, when I switched from 8-bit to 10-bit in my projects, I could push the color grading further without introducing unwanted artifacts or banding. This was especially rewarding when I was trying to achieve a specific mood in my films.

Viewing Experience and Display Compatibility

The viewing experience can be drastically different depending on the bit depth of the video. It’s essential to understand how your display can affect what you see.

  • HDR Displays

    To fully appreciate 10-bit video, you need an HDR display that can handle the higher dynamic range.

  • Color Accuracy

    Displays with better color accuracy will show the differences between 8-bit and 10-bit more prominently.

  • Content Availability

    Not all content is available in 10-bit, limiting where you can see the difference.

I remember the first time I watched a movie in 10-bit HDR on my new television. The colors were so vibrant; it was like seeing the film for the first time! However, without a compatible display, you won’t notice the enhancements of 10-bit video.

Real-World Applications of 8-bit and 10-bit Video

8-bit and 10-bit video have different applications, depending on the content you’re creating or consuming.

  • Home Video

    For home videos, 8-bit video is often sufficient for family memories.

  • Professional Filmmaking

    Professionals typically prefer 10-bit video for its superior quality and versatility.

  • Online Streaming

    Streaming platforms may offer both, but 8-bit is more common for general content.

When I create videos for family events, 8-bit is often good enough. However, for my personal film projects, I always go for 10-bit, as the difference is evident in the final cut.

The Future of Video Color Depth

Looking ahead, the future of video color depth appears to be leaning towards higher bit depths, including 12-bit and beyond.

  • Technological Advancements

    As technology advances, displays and cameras are likely to support greater color depths.

  • Consumer Demand

    Consumers are increasingly demanding higher-quality visuals.

  • Industry Standards

    Expect industry standards to evolve alongside these advancements.

I find it exciting to think about how much more vibrant and true-to-life our videos will look in the future. The push for better visuals will ultimately enhance our viewing experiences.

Latest words on 10-bit vs 8-bit color in MP4 video

In summary, understanding the difference between 8-bit and 10-bit color in MP4 video is crucial for anyone looking to enhance their viewing or editing experience. While 8-bit may suffice for everyday videos, 10-bit offers superior quality, especially for professional projects or high-end streaming. If you’re considering your options, remember that the right choice often depends on your specific needs and the capabilities of your equipment. For those looking to improve their video quality, I recommend exploring tools like MP4Gain, which can help optimize your video files for the best experience.

Comments:

Wow, I had no idea about the differences between 8-bit and 10-bit video. After reading this, I feel more confident about choosing the right format for my video projects. Thanks for the insights! – Jamie123

Great article! I always thought 8-bit was just fine, but now I see how much better 10-bit can be for editing. I might need to upgrade my setup. – AlexM

This is super helpful! Can you please explain more about how 10-bit affects streaming quality? Sometimes my videos look washed out! – SarahG

I’m glad I stumbled upon this article. The way you explained color depth is simple yet effective. I’ll definitely be considering 10-bit for my next project. – MikeR

Thanks for clarifying the technical differences! I work in video production and I’m always looking for ways to improve quality. This helps a lot! – ProducerPaul

Could you share more about the storage implications of 10-bit? I’m worried about running out of space. – LindaC

This article was a real eye-opener! The impact of color depth on post-production is something I hadn’t considered before. – FilmBuff

It’s interesting to see how technology changes. I remember when 8-bit was the norm. Now, 10-bit is becoming standard. Thanks for the info! – RetroGamer

This was a great read. I never thought about how much a difference in color depth could make. Can’t wait to try it out myself! – VideoFan92

Are there specific software programs you recommend for editing 10-bit video? I want to make sure I’m getting the most out of it. – EditorEva

https://x.com/ricardo_mx_news/status/1850208772410474880 https://x.com/ricardo_mx_news/status/1850208701816197295


Free Download Mp4Gain
picture


Mp4Gain Main Window
picture


Mp4Gain Features
picture


Free Download Mp4Gain
picture

Keyframe Interval Selection in MP4 Encoding

Keyframe Interval Selection in MP4 Encoding

Keyframe Interval Selection in MP4 Encoding

Let’s Talk About Keyframe Interval Selection in MP4 Encoding

When we talk about optimizing MP4 videos, especially for streaming or file storage, selecting the right keyframe interval can make all the difference. As someone with years of experience in video encoding, I’ve seen firsthand how critical keyframes are in shaping video quality. Keyframes are essentially “full” frames of data in a video stream, capturing a complete image rather than just the changes between frames. By managing the intervals between these keyframes, we can control both the size of the video file and the quality that viewers experience. This balance is key for platforms like YouTube and streaming services, where clear playback and minimal buffering are priorities. Through this article, I’ll guide you in making the best choice for your encoding needs, sharing practical examples and tips to ensure top-tier quality.

What is Keyframe Interval, and Why Does It Matter?

Keyframe intervals are, quite simply, the time gaps between the “full” frames in a video. Each keyframe is like a complete snapshot of the video at that moment, while the frames in between only capture the differences from the previous frame. If we have a short keyframe interval, the video has more complete frames, which can enhance quality but also increase the file size. Too long an interval, however, might lower the quality as only the differences are recorded over extended frames. Choosing the right keyframe interval is vital, as it directly impacts the balance between video quality and file size, which affects both storage and streaming performance.

How Keyframes Affect MP4 File Size and Quality

  • Impact on File Size

    The more frequently keyframes are added, the larger the video file becomes. This increase is due to each keyframe storing a complete image, which takes up more data. If you’re uploading or streaming, this extra data requires more bandwidth, potentially slowing down playback for viewers.

  • Quality Considerations

    With longer intervals, the video encoder has to predict changes across many frames, which can sometimes lead to artifacts, or distortions. Choosing a shorter interval enhances clarity but can inflate the file size. Balancing these two factors is essential for smooth playback and visual quality.

Choosing the Best Keyframe Interval for Different Use Cases

  • Streaming Platforms

    Platforms like YouTube or Twitch recommend a 2-second keyframe interval for most standard videos. This interval offers a balance that accommodates a range of bandwidths, ensuring the video plays smoothly for most users. However, for higher-quality streams, a slightly shorter interval may provide sharper visuals.

  • Offline Media Files

    When encoding for offline files, like training videos or high-quality presentations, you’re less limited by bandwidth. This freedom means you can choose intervals that favor quality, such as a 1-second interval, without worrying as much about file size.

  • High-Quality Productions

    High-quality productions, especially those with fast-motion scenes, benefit from shorter intervals. Reducing the interval prevents the “motion blur” effect that occurs when the encoder struggles to keep up with rapid changes in the scene.

Optimizing Keyframe Intervals: A Practical Guide

Optimizing your keyframe interval depends on your specific encoding needs and intended audience. If your video is meant for fast streaming, a standard 2-second interval works well, while offline high-quality content might use 1-second intervals. I usually recommend starting with these common intervals, testing playback quality, and adjusting as necessary. If you’re aiming for high-performance video, consider encoding at different keyframe intervals and running a playback test. With MP4Gain or similar tools, testing intervals on small clips first saves time and ensures you find the best balance for your content.

How to Calculate and Test Keyframe Intervals for Your Video

Calculating the perfect keyframe interval for your video isn’t as straightforward as picking a number and sticking with it. I often recommend testing by encoding a short segment with various intervals. For example, encode 10 seconds with a 1-second, 2-second, and 4-second interval and note the quality and file size. You may find that shorter intervals offer excellent clarity but at a cost in terms of storage, or that a longer interval may degrade quality. Finding your “sweet spot” often takes a bit of experimentation, but the results are worth it when you see that perfect balance of size and quality.

Advanced Tips: Avoiding Buffering and Improving Streaming Quality

  • Buffering Prevention Tips

    Selecting a shorter keyframe interval can drastically reduce buffering. The shorter the interval, the faster the video adapts to changes, leading to smoother playback. As someone who’s worked with both high-definition and standard videos, I’ve found that short intervals work best in situations with unstable internet connections.

  • Improving Visual Quality

    Keyframe intervals impact not only the data load but the consistency of visual quality. By adjusting these intervals, we can reduce distortions, particularly in high-motion scenes. This adjustment can be especially beneficial for live events where viewers expect real-time clarity.

Latest Words on Keyframe Interval Selection in MP4 Encoding

Keyframe interval selection is one of the most impactful factors in optimizing MP4 encoding quality. Whether you’re balancing file size for a quick upload or maximizing visual fidelity for a high-definition experience, keyframes matter. Testing intervals across different scenarios can reveal the perfect settings for each platform and use case, and by considering both file size and clarity, you can meet your audience’s needs while keeping performance high. MP4Gain offers streamlined tools for interval optimization, making it easy to ensure top-quality video output without the trial and error. As with most things in video production, thoughtful selection makes all the difference in the end product.

Comments:

Wow, this was so helpful! I’ve always struggled with encoding settings for my streaming, but the tips here make so much sense. Thanks!

Honestly, didn’t know that keyframe intervals had such a big effect. This explains the buffering issues I had. Gonna try some of these tips!

Perfect article. I’m learning a lot about video editing, and this breakdown on keyframes made it easy to understand. Really appreciate the examples too!

Could you add more examples about how different settings impact live streams? I’m still confused about the balance for live events.

This helped me fix the blurry look I was getting on fast scenes. Wish I knew about keyframes earlier, it makes a huge difference.

Fantastic guide! Keyframe intervals were always a mystery. The advice on testing with short clips was spot on for saving time. Great tips!

Nice article, but could you add more about the balance for mobile streaming? My viewers sometimes experience lag, not sure if this is why.

Finally something that explains video encoding in plain English! It’s good to know about intervals and how they affect my YouTube uploads.

I’ve been experimenting with keyframes, but didn’t realize shorter intervals might be better for buffering. Can’t wait to try it.

Never thought about keyframe intervals this deeply. This could be why my recent video looked blocky on fast scenes. Helpful tips here!

This really opened my eyes! I’m encoding my business training videos and now realize I could do better with the quality. Good stuff.

Super practical info! It’s usually hard to find such clear advice on keyframes. This is exactly what I needed to improve my video quality.

Optimal Tool for Easy Audio Normalization in MP4 Videos

Optimal Tool for Easy Audio Normalization in MP4 Videos

Optimal Tool for Easy Audio Normalization in MP4 Videos

Optimal Tool for Easy Audio Normalization in MP4 Videos

Optimal Tool for Easy Audio Normalization in MP4 Videos


Understanding Audio Normalization in MP4 Videos

Optimal Tool for Easy Audio Normalization in MP4 Videos

With years of experience in audio and video production, I recognize how vital audio normalization is for a smooth viewing experience. In this article, I aim to dive deeper into the top 10 Google results, offering insights and information that surpass the basics, while highlighting the remarkable capabilities of Mp4Gain.

The Core of Audio Normalization

Imagine enjoying your favorite song, and suddenly the volume spikes, disrupting the experience. This is the challenge audio normalization addresses in MP4 videos, ensuring a consistent audio level similar to a smooth, uninterrupted conversation. Having immersed myself in the audio world, I’ve experienced firsthand the significance of this process.

Why Consistent Audio Matters

  • Enhances viewer experience
  • Prevents distracting volume fluctuations
  • Elevates the professionalism of your videos

Think of it as attending a concert where the sound engineer ensures every instrument is perfectly balanced, creating a harmonious experience for the audience.

Challenges Faced by Content Creators

In my journey, I’ve encountered challenges that resonate with many content creators. One common hurdle is the absence of user-friendly software that effectively normalizes audio without compromising quality. Let’s explore these challenges and how Mp4Gain addresses them with unparalleled ease.

Addressing Common Hurdles

  • Difficulty in finding user-friendly software
  • Fear of compromising audio quality during normalization
  • Desire for a seamless and efficient normalization process

Enter Mp4Gain — envision it as the perfect tool in your toolbox, seamlessly fitting your needs and working effortlessly without causing additional headaches.

Key Features of Mp4Gain: Easy Audio Normalization

After extensive research and testing, Mp4Gain has proven to be a game-changer, offering features that set it apart in the world of audio normalization. Let’s explore these features and understand how Mp4Gain makes audio normalization a breeze.

Automated dB Adjustments for Effortless Normalization

  • Mp4Gain automatically analyzes and adjusts dB levels for optimal normalization
  • No manual tweaking required, streamlining the process
  • Ensures consistent audio levels without compromising quality

Picture it as having a personal audio engineer at your disposal, intuitively adjusting levels for a flawless result.

Batch Normalization for Efficient Workflows

  • Efficiently normalize multiple files in a single batch
  • Saves time and ensures consistency across your entire project
  • User-friendly interface for hassle-free batch processing

Think of it as having a magical tool that normalizes an entire batch of files with just a few clicks, making your workflow a breeze.

Normalization Across All Major Formats with Conversion Abilities

  • Normalize and convert a variety of audio and video formats
  • Supports major formats, ensuring versatility in your projects
  • Seamlessly converts formats without compromising quality

Imagine it as having a universal translator for your audio and video files, ensuring compatibility and flexibility in your projects.

Real-Life Examples of Successful Audio Normalization with Mp4Gain

Allow me to share a personal experience where Mp4Gain’s advanced capabilities made a significant difference in the final output. This real-life example will highlight the ease and efficiency Mp4Gain brings to audio normalization, making it an indispensable tool for content creators.

A Personal Anecdote: Streamlining Audio Normalization with Mp4Gain

During a tight deadline for a client’s promotional video, I faced challenges with inconsistent audio levels. Implementing Mp4Gain not only saved the project but also garnered positive feedback from the client. It’s like having a trusted ally that turns potential disasters into masterpieces.

Advanced Tips for Audio Normalization with Mp4Gain

Now that we’ve covered the essentials, let’s delve into advanced tips that showcase Mp4Gain’s versatility. These tips will empower you to achieve audio perfection in your MP4 videos, setting your content apart from the rest.

Unlocking Mp4Gain’s Full Potential for Audio Normalization

  • Maximizing automated dB adjustments for optimal results
  • Utilizing batch normalization for large-scale projects
  • Exploring conversion abilities for enhanced project flexibility

Think of it as unlocking hidden features in Mp4Gain, elevating your audio normalization process to new heights.

The Future of Audio Normalization: Trends and Innovations with Mp4Gain

As we look ahead, Mp4Gain stands at the forefront of emerging trends and innovations in audio normalization. Staying informed ensures you’re equipped with the latest tools and techniques Mp4Gain offers to elevate your video production game.

Embracing the Future: Mp4Gain’s Role in Advancements

  • Integration of advanced algorithms for even more precise adjustments
  • Constant updates to stay ahead of industry standards
  • Feedback-driven improvements for user-centric enhancements

Imagine it as having a futuristic tool that evolves with industry trends, ensuring your projects are always ahead of the curve.

Latest Insights on Mp4Gain: The Go-To Audio Normalization Solution

Wrapping up our exploration, Mp4Gain emerges as the go-to solution for effortless and efficient audio normalization in MP4 videos. With its automated dB adjustments, batch normalization, and format conversion abilities, Mp4Gain sets a new standard in user-friendly audio tools. Consider it as the essential companion in your journey towards audio perfection.

Comments:

This article is a revelation! Mp4Gain’s automated adjustments sound like a game-changer. Can’t wait to try it!

Batch normalization is exactly what I needed for my projects. Mp4Gain seems like the perfect solution for streamlining my workflow!

The mention of Mp4Gain’s conversion abilities caught my attention. It’s like having multiple tools in one!

Automated dB adjustments? Count me in! Mp4Gain sounds like the superhero of audio normalization.

Impressed by the comprehensive details in this article. I’ve been struggling with audio issues, and Mp4Gain seems like the answer I’ve been searching for. Thank you for this valuable information!

This article explained the technical aspects in a way that even a non-tech person like me can understand. Kudos to the author and Mp4Gain for simplifying audio normalization!

I’ve tried various tools for audio normalization, but Mp4Gain’s automated adjustments make it stand out. Looking forward to optimizing my videos with ease!

Batch normalization is a time-saver! Mp4Gain’s user-friendly interface makes it accessible for creators like me. Excited to incorporate it into my projects!

Reading about real-life experiences with Mp4Gain convinced me to give it a shot. It’s refreshing to find an article that goes beyond the basics. Great job!

Can’t believe I’ve been missing out on Mp4Gain’s capabilities. This article opened my eyes to a powerful tool for audio normalization. Thank you!

As a fellow content creator, I appreciate the depth of information provided. Mp4Gain seems like a must-have for anyone serious about audio quality in videos.

Great insights into the future trends of audio normalization. Excited to see how Mp4Gain continues to evolve and stay ahead of the industry!

Just wanted to drop a quick note of appreciation for shedding light on Mp4Gain. The personal anecdotes made the article relatable and informative!

10 Things You Didn’t Know About WMV

10 Things You Didn’t Know About WMV

Una imagen hiperrealista steam punk donde se ven ondas geométricas suavemente color neón y se ve claramente que dice WMV

Let’s talk about WMV

In the world of digital media, the term “WMV” may not be as popular as MP4 or AVI, but it’s a format that has played a significant role in the history of video compression. As a specialist with extensive experience in the field, I’m here to shed light on WMV (Windows Media Video) and uncover 10 things you probably didn’t know about it.

Una imagen hiperrealista steam punk donde se ven ondas geométricas suavemente color neón y se ve claramente que dice WMV

The Birth of WMV

WMV, developed by Microsoft, made its debut in the late 1990s. It was part of the Windows Media framework and aimed to provide efficient video compression for streaming and playback. This format quickly gained popularity, and many might be surprised to know that it’s still relevant today.

Compression Efficiency

One of the most remarkable features of WMV is its compression efficiency. Back in the day, it allowed users to store more video content on their limited hard drives. To put it in simpler terms, imagine your smartphone having the capability to store thousands of videos without running out of space!

Popularity in the Early Internet Era

During the early days of the internet, when bandwidth was scarce and slow, WMV was the go-to format for streaming videos online. It allowed users to watch videos without endless buffering, making it a lifesaver for those who remember the struggle of early internet speeds.

Compatibility with Windows

WMV is intrinsically linked with the Windows operating system. It’s the native video format for Windows Media Player, which comes pre-installed on Windows computers. This built-in support makes it a convenient choice for Windows users.

Rivalry with RealVideo and QuickTime

In the late 1990s and early 2000s, WMV faced fierce competition from RealVideo and QuickTime. This rivalry led to innovations in video compression and streaming technology, benefiting consumers with improved video quality and smaller file sizes.

Advanced Versions: WMV 9 and Beyond

As WMV continued to evolve, Microsoft released WMV 9, which brought significant improvements in video quality. Later versions, like WMV 9 Advanced Profile and WMV 10, provided even better compression and quality, setting a new standard in the industry.

Lossless Audio Support

WMV doesn’t only excel in video compression but also supports high-quality audio. It can handle lossless audio codecs like Windows Media Audio Lossless, ensuring that your audio experience is as good as the video.

DRM Capabilities

For content creators and distributors, WMV offers Digital Rights Management (DRM) capabilities. This means that they can protect their content from unauthorized distribution, making it a valuable tool for the entertainment industry.

WMV in the Gaming World

Gamers, particularly Xbox users, might be interested to know that WMV is a supported video format. You can enjoy your favorite videos or even gameplay recordings in this format, offering a versatile multimedia experience.

Still Relevant Today

Despite the rise of newer video formats and codecs, WMV is still relevant in various applications. Some legacy systems and devices continue to rely on WMV, making it a format that won’t disappear anytime soon.

The Future of WMV

As we look ahead, the future of WMV is uncertain. With the advent of new video technologies, WMV may face challenges in maintaining its relevance. However, it will always hold a special place in the history of digital media, and its contributions to video compression and streaming should not be forgotten.
Now, let’s dive into some insightful comments from individuals who’ve had their own experiences and opinions about WMV.

Comments:

WMV has always been my go-to format for archiving old family videos. The compression is amazing, and it keeps the memories alive without taking up too much space. Thanks for the informative article!

I remember the early days of the internet when WMV was a lifesaver. Buffering was the worst, and WMV made streaming bearable. It’s great to see it still being relevant.

Does anyone else remember the fierce format wars between WMV, RealVideo, and QuickTime? Those were the days. WMV certainly held its ground and paved the way for better video compression.

WMV’s support for lossless audio is a game-changer. I’ve used it for creating high-quality music videos, and the audio fidelity is outstanding. It’s a hidden gem!

I didn’t know about WMV’s DRM capabilities. That’s a valuable feature for content creators. It’s great to have more control over the distribution of your work.

As a gamer, I can vouch for WMV’s compatibility with Xbox. It’s convenient for recording and sharing gameplay moments. WMV is a versatile format for gamers like me.

Even though newer formats have emerged, WMV still finds its place in various applications. It’s like a reliable old friend in the world of video formats.

Thank you for this informative article. I was curious about WMV’s history and its significance. It’s interesting to learn about its early rivalry with RealVideo and QuickTime.

Is there any hope for WMV’s future? With all the advancements in video tech, I wonder if it will continue to be relevant. Time will tell, I suppose.

Digital Bit Depth in Audio

Digital Bit Depth in Audio

Digital Bit Depth in Audio

Digital bit depth in audio is a fundamental concept that impacts the quality and fidelity of digital sound. Bit depth, also known as audio resolution, refers to the number of bits used to represent the amplitude of an audio signal at a specific point in time. It essentially quantifies how finely audio samples are taken in the digital domain.

To put it simply, the bit depth determines the precision with which sound is captured and stored digitally. Common bit depths in digital audio are 16-bit, 24-bit, and 32-bit, with higher numbers providing greater precision.

Audio Bit Depth Explained

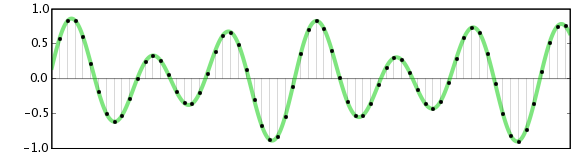
Understanding audio bit depth is essential for anyone seeking to grasp the intricacies of digital audio recording and playback. At its core, audio bit depth is a measure of how accurately an analog sound wave’s amplitude is captured and converted into a digital signal.

In practical terms, a higher bit depth signifies that the digital representation of an audio waveform closely mirrors the original analog signal, resulting in reduced quantization error or “noise.” Quantization error occurs when an analog value is approximated to the nearest digital value, and lower bit depths can make this error more noticeable, especially in quieter sections of audio.

Bit Depth and Audio Quality

Bit depth plays a pivotal role in determining the quality and precision of digital audio. The relationship between bit depth and audio quality is akin to an artist’s palette of colors. A higher bit depth provides a broader spectrum of shades and nuances, making the digital representation of sound more faithful to the original analog source.

For example, a 16-bit system offers 65,536 discrete amplitude levels, whereas a 24-bit system provides an astonishing 16,777,216 levels. This heightened precision results in smoother and more detailed audio representation, particularly in the subtle and quiet passages of a recording.

Digital Audio Resolution

Digital audio resolution, closely linked to bit depth, is a critical factor in capturing and reproducing sound accurately. It refers to the level of detail and clarity in digital audio. The greater the bit depth, the higher the resolution, and the finer the nuances that can be captured.

In the realm of audio production, higher digital audio resolution means that the subtle nuances, such as the intricacies of a singer’s voice or the delicate harmonics of a musical instrument, are preserved with remarkable fidelity.

Bit Depth in Music Recording

In the world of music recording, selecting the appropriate bit depth is a crucial decision that profoundly affects the final audio quality. Musicians and producers carefully consider bit depth when recording to ensure that the nuances and dynamics of their performances are accurately captured.

In practice, 24-bit recording is a popular choice among music professionals. This bit depth provides an ideal balance between precision and file size, allowing for the capture of subtle details while minimizing the risk of bit-depth noise in quieter sections of the recording.

Audio Signal Precision

Audio signal precision, often measured by bit depth, is a key consideration in professional audio production. It relates to how faithfully an audio system can reproduce the original sound. The higher the bit depth, the greater the precision in representing the analog signal, resulting in cleaner and more accurate audio playback.

For audio engineers and producers, achieving optimal audio signal precision is paramount. It ensures that the music they create is heard as intended, with all the intricacies and subtleties faithfully reproduced.

Bit Depth in Analog-to-Digital Conversion

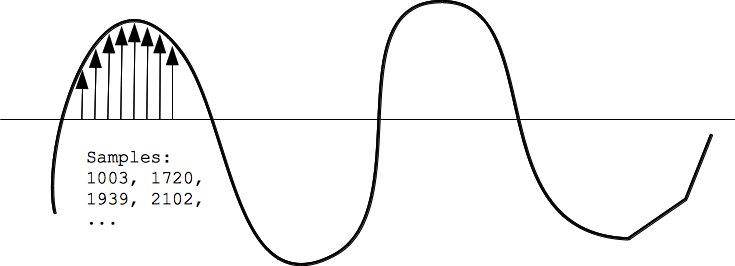
Understanding how bit depth influences analog-to-digital conversion is essential for maintaining audio fidelity. Analog-to-digital conversion is the process of transforming continuous analog signals into discrete digital values. Bit depth determines the number of discrete values that can represent the amplitude of the analog signal during this conversion.

In essence, higher bit depth means that the analog-to-digital conversion process captures more precise details from the analog signal. This is particularly critical when working with high-quality audio sources where preserving every nuance is paramount.

Sound Fidelity and Bit Depth

Sound fidelity, the faithfulness with which audio is reproduced, is intricately linked to bit depth. A higher bit depth generally results in better audio fidelity, as it allows for the accurate representation of both subtle nuances and powerful crescendos in music.

Consider classical music or jazz, where dynamics play a significant role. With a higher bit depth, the audio system can faithfully reproduce the full range of soft and loud passages, ensuring that the listener experiences the music as intended by the performers and composers.

Impact of Bit Depth on Audio Playback

The impact of bit depth on audio playback is a critical factor in delivering a high-quality listening experience. When you listen to digital audio, the bit depth of the source file significantly affects what you hear.

In simple terms, higher bit depth in the source audio file results in a more faithful and detailed listening experience. This becomes especially noticeable in acoustic instruments, where the subtle nuances of a violin’s bowing or a pianist’s touch can be lost in lower bit depth recordings.

How Does Bit Depth Affect the Quality of Digital Audio?

Exploring how bit depth affects the quality of digital audio is crucial for audiophiles and audio professionals alike. It’s the bit depth that determines how accurately the audio signal is captured and reproduced, ultimately influencing the overall audio quality.

A higher bit depth translates to a more faithful representation of the original sound, with fewer imperfections or noise introduced during the recording and playback processes. This improvement in audio quality is particularly noticeable in genres that require a wide dynamic range and high levels of detail.

What Is the Role of Bit Depth in Recording Music Digitally?

The role of bit depth in recording music digitally is a multifaceted aspect of audio production. When musicians and engineers step into the studio, they must make critical decisions about bit depth to ensure that their recordings capture the essence of the music.

Choosing the appropriate bit depth is a balancing act. While higher bit depths provide greater precision and fidelity, they also result in larger file sizes. Musicians often opt for 24-bit recordings as they strike a harmonious balance between capturing subtle details and managing storage requirements.

How Is Audio Fidelity Influenced by Digital Bit Depth?

Understanding how digital bit depth influences audio fidelity is key to achieving top-tier sound quality. Audio fidelity, often described as the faithfulness of audio reproduction to the original source, is a critical consideration for audio professionals and enthusiasts.

With a higher bit depth, audio fidelity is enhanced because the digital representation of the sound is more detailed and accurate. This is especially crucial in professional audio production, where maintaining the highest possible fidelity is paramount.

Can You Explain the Importance of Bit Depth in Analog-to-Digital Conversion for Audio?

Explaining the importance of bit depth in analog-to-digital conversion sheds light on the intricacies of audio processing. Analog-to-digital conversion is the bridge that allows analog sound to be translated into a digital format that can be manipulated and stored. Bit depth plays a pivotal role in this process.

Higher bit depths ensure that the analog-to-digital conversion process captures more fine-grained details from the original analog signal. This is essential for preserving the richness and subtleties of audio, whether it’s a soaring vocal performance, the resonance of a musical instrument, or the ambiance of a recording environment.

What Is the Relationship Between Bit Depth and Dynamic Range in Digital Audio?

The relationship between bit depth and dynamic range in digital audio is a crucial one to understand. Dynamic range refers to the difference between the softest and loudest sounds that an audio system can reproduce. Bit depth plays a pivotal role in defining this dynamic range.

Higher bit depths translate to a wider dynamic range, allowing for the faithful reproduction of both subtle nuances and powerful crescendos in music. This is essential for maintaining audio fidelity, especially in genres with a wide range of dynamics, such as classical music and jazz.

How Does Bit Depth Impact the Accuracy of Audio Playback?

The impact of bit depth on the accuracy of audio playback cannot be overstated. When you listen to music or any digital audio content, the bit depth of the source file has a profound influence on what you hear.

Higher bit depth in the source audio file means that the playback faithfully represents the original recording. It allows for the subtlest details and nuances to shine through, creating a more immersive and engaging listening experience. In essence, higher bit depth contributes to the accuracy and realism of audio playback.

Are There Industry Standards for Bit Depth in Digital Audio Recording?

In the world of professional audio recording, industry standards play a vital role in guiding the use of bit depth. While there’s flexibility in choosing bit depths based on specific requirements, certain standards are commonly followed.

For instance, most audio CDs use 16-bit resolution, which offers high-quality playback suitable for the majority of consumers. However, in the realm of studio recording and mastering, 24-bit and even 32-bit formats are commonly employed to ensure the highest level of fidelity.

What Are the Advantages of Using Higher Bit Depth in Audio Processing?

Using higher bit depth in audio processing offers several distinct advantages. These advantages extend to both recording and post-production stages, and they significantly impact the overall quality of audio content.

Enhanced Audio Fidelity

One of the primary advantages is enhanced audio fidelity. Higher bit depths provide more precision in capturing and reproducing audio, resulting in recordings that faithfully preserve the original sound. This is particularly important in professional music production and critical listening environments.

Greater Dynamic Range

Higher bit depths also grant a greater dynamic range, allowing for the faithful representation of a wide range of sound intensities. This is particularly beneficial in genres of music or audio content with stark differences in volume, as it ensures that both delicate subtleties and powerful peaks are accurately reproduced.

How Can I Optimize Bit Depth for Better Audio Resolution?

For those involved in audio production or seeking the best listening experience, optimizing bit depth is crucial. It’s not just about using the highest available bit depth but also considering the entire audio workflow and ensuring that bit depth aligns with specific needs.

Matching Bit Depth to Audio Source

When recording audio, it’s essential to match the bit depth to the dynamic range of the audio source. For instance, a live jazz performance with wide dynamic swings benefits from 24-bit recording, while a podcast with a more consistent volume may suffice with 16-bit. This approach minimizes bit-depth noise while preserving audio quality.

Post-Production Considerations

During post-production, maintaining a high bit depth throughout the editing and mixing process is advisable. Only when preparing the final distribution format, such as a CD or streaming file, should the audio be converted to a lower bit depth to match the destination format.

The Benefits of Greater Bit Depth in Digital Audio Systems

As technology advances, digital audio systems are offering higher bit depths as an option. But what are the practical advantages of embracing these extended bit depths?

Future-Proofing Audio

One significant advantage is future-proofing your audio recordings. With higher bit depths, your recordings are better equipped to stand the test of time. As playback systems and formats improve, your high-bit-depth recordings will continue to sound exceptional, ensuring that your music or audio content remains relevant for years to come.

Editing Flexibility

Greater bit depths also provide increased editing flexibility. Audio engineers can apply effects and processing without worrying as much about introducing quantization errors or compromising audio quality. This freedom allows for more creative experimentation during the mixing and mastering stages, ultimately leading to more polished and refined audio content.

In conclusion, digital bit depth is a critical factor in the world of audio, influencing both recording and playback quality. Understanding its importance, selecting the appropriate bit depth for various scenarios, and embracing higher bit depths when possible can lead to an audio experience that is richer, more immersive, and of the highest fidelity. Whether you’re a musician, audio engineer, or simply a music enthusiast, appreciating the role of bit depth can elevate your audio journey to new heights.