mp3 audio normalizer


Free Download Mp4Gain
picture

mp3 audio normalizer


An mp3 audio normalizer is a tool to avoid differences in volume level in 2 or more audio files.
audio volume normalizer

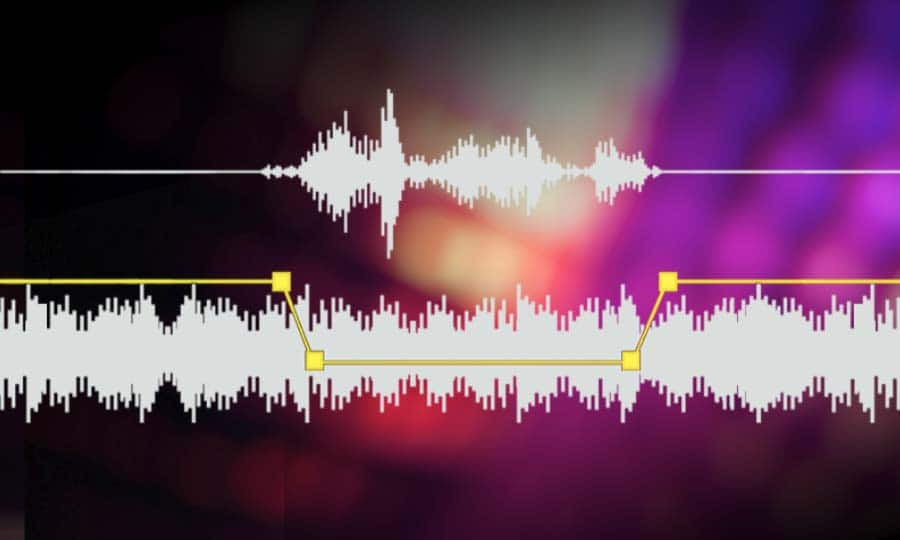
There are various ways to do this, but the most common is to use software that can normalize the levels of the files automatically. This can be done with an audio editor, or with a dedicated mp3 normalizer program.
audio volume normalizer

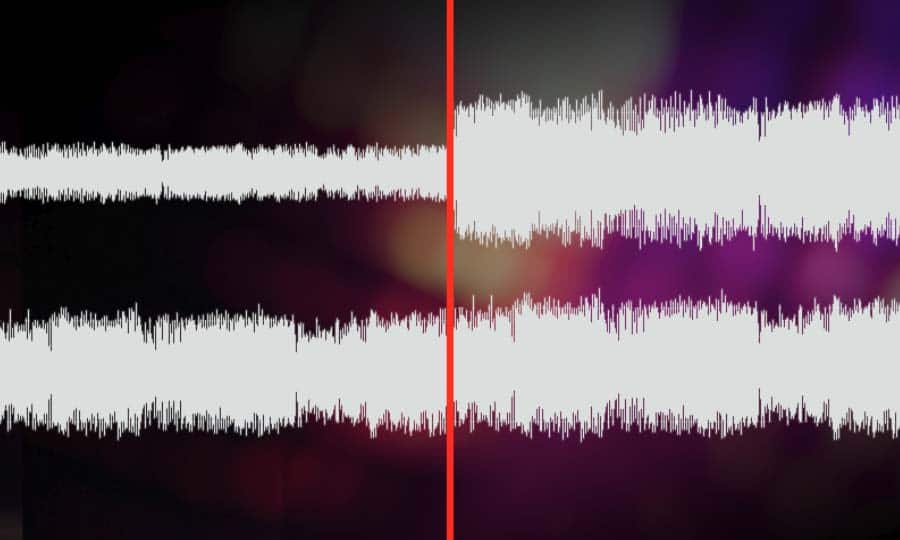
Normalizing an audio file is checking each frame and adjusting it to be sure that each one is optimized to get the best possible volume without distortion.

An audio file can be normalized in two ways:

1. Peak Normalization:

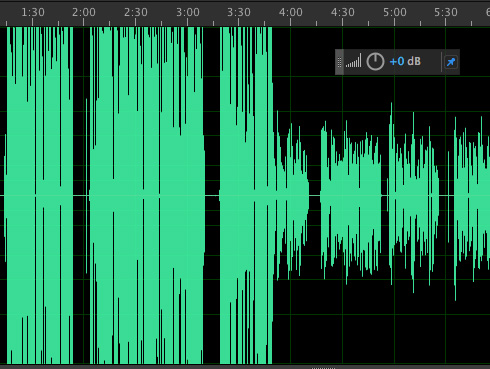
This is where the audio file is analyzed and the highest peak is identified. The volume of the entire file is then increased or decreased so that this peak is at the maximum possible level without distortion.

2. RMS Normalization:

This is where the audio file is analyzed and the average volume level is identified. The volume of the entire file is then increased or decreased so that this average level is at the maximum possible level without distortion.

This behavior is similar to the compressor that keep the volume range of noisy and lower passages of the audio to keep both in a range that can sound fine.

The main difference is that the goal of an audio normalizer is not to change the sound of the audio, but to make sure that the volume levels of all the files are the same.

The most common format that is normalized is MP3, but other formats such as WAV can also be normalized.

In this times even video files can be normalized too.,

There are many reasons why you might want to normalize your audio files.

For example, if you have a number of files that were recorded at different levels, you may want to normalize them so that they all have the same volume level.

This can be useful if you want to create a playlist of files that are all the same volume, or if you want to make sure that all the files in a particular folder have the same volume level.

Another reason to normalize your audio files is if you want to make sure that they sound their best when played back on different devices.

For example, if you have an MP3 file that sounds great on your computer, but sounds terrible on your phone, you may want to normalize it so that it sounds its best on both devices.

Normalizing your audio files can also be useful if you want to make sure that they are suitable for use in different situations.

For example, if you have an MP3 file that you want to use as background music for a video, you may want to normalize it so that it is not too loud or too quiet.

Normalizing your audio files can also be useful if you want to make sure that they sound their best when played back at different speeds.

For example, if you have an MP3 file that sounds great when played back at normal speed, but sounds terrible when played back at double speed, you may want to normalize it so that it sounds its best at both speeds.

Normalizing your audio files can also be useful if you want to make sure that they sound their best when played back at different volumes.

For example, if you have an MP3 file that sounds great when played back at a low volume, but sounds terrible when played back at a high volume, you may want to normalize it so that it sounds its best at both volumes.

Normalizing your audio files can also be useful if you want to make sure that they are suitable for use in different environments.

For example, if you have an MP3 file that you want to use as background music for a party, you may want to normalize it so that it is not too loud or too quiet.

Normalizing your audio files can also be useful if you want to make sure that they are suitable for use in different places.

For example, if you have an MP3 file that you want to use as background music for a restaurant, you may want to normalize it so that it is not too loud or too quiet.

Normalizing your audio files can also be useful if you want to make sure that they are suitable for use at different times of the day.

For example, if you have an MP3 file that you want to use as background music for a morning show, you may want to normalize it so that it is.



Free Download Mp4Gain
picture


Mp4Gain Main Window
picture


Mp4Gain Features
picture


Free Download Mp4Gain
picture

What is a loudness normalizer or an audio volume normalizer?

What is a loudness normalizer or an audio volume normalizer?

audio volume normalizer

A volume normalizer is used to make sure that audio files play at the best possible volume without clipping and also that all audio files play at a similar volume.

audio volume normalizer

A volume normalizer analyzes an audio file and then adjusts it to sound at a specific volume level. This is often done with audio files that are uploaded to file sharing sites, so that all users can listen to the audio at a similar volume.

It is quite common to find volume differences in the files that are downloaded from the internet, since these have been created from a wav but different sampling and bit frequencies have been used to create them.

A volume normalizer can analyze an audio file and then apply gain or attenuation to adjust the volume of the file to a specified level. This is useful if you want to ensure that all audio files played on your website or in your application sound at a similar volume.

Because it’s frustrating to have a collection of audio or even video files and find that when you play them they play at different volumes.

For this reason, it is necessary to use a volume normalizer, with which you can make sure that all audio and video files are heard at a similar volume.

It is important to ask yourself if the bit rate is important for the quality of an audio or video file, the same for the sample rate.

The answer is no, not always.

Bit rate and sample rate refer to the amount of information that can be stored in an audio or video file.


The higher the bit rate, the higher the quality of the audio or video file.


However, sometimes a low-quality video or audio file can sound better than a high-quality file.


This is because the bit rate and sample rate are not always indicative of the quality of the audio or video file.


There are many factors that can affect the quality of an audio or video file, such as the encoder used to encode the file, the quality of the microphone used to record the file, the quality of the equipment used to play the file, etc.


In summary, the bit rate and the sample rate are not always indicative of the quality of the audio or video file.

Youtube normalize audio Mp4Gain

Youtube normalize audio Mp4Gain

Youtube normalize audio

We all dream of downloading songs or videos from youtube… but something we will need is the possibility of youtube normalize audio.

Youtube normalize audio

Each video has been uploaded by a different person, who edited it in a different editing program, who used it in his own way, who took the background (for example: a song) from a different place… and this causes the Different YouTube videos have different volumes and it is necessary to normalize them in order to obtain that all our files have a similar loudness.

Mp4Gain is the ideal program, I would say the only one, that can carry out all these functions efficiently and with results that are typical of a television or radio station. In fact, many television or radio stations F.M. They use Mp4Gain.

Even universities, with very specific needs, such as comparing the sound of birds or a medical ultrasound, have turned to Mp4Gain to optimize their audio before conducting their research.

From the Vatican they have bought our software possibly to record and debug and improve sermons that someone records there.

Anyway, the number of important clients include a former president of the United States, a musician from a London group famous for decades… many famous, knowledgeable and important people.

And it is for a reason that they resort to Mp4Gain, because they have tried it and have perceived the audio quality of Mp4Gain.

YOUTUBE SOUND QUALITY AND PICTURE QUALITY (AS OF JUNE 2021) Part 2

YOUTUBE SOUND QUALITY AND PICTURE QUALITY (AS OF JUNE 2021) Part 2

YouTube Audio

Video format: VP9
DASH value Video size Video bitrate Comments
278 144p (256 × 144) 100K-300 Kbps Validated in Firefox
330 144p (256 × 144) (Only HDR compatible terminals can be selected) Validated with Google Pixel 4
242 240p (426 × 240) 100K-500 Kbps Validated in Firefox
331 240p (426 × 240) (Only HDR-compatible terminals can be selected) Validated with Google Pixel 4
243 360p (640 × 360) 200K-950 Kbps Validated in Firefox
332 360p (640 × 360) (Only HDR-compatible terminals can be selected) Validated with Google Pixel 4
244 480p (854 x 480) 300K-2 Mbps Validated in Firefox
333 480p (854 x 480) (Only HDR-compatible terminals can be selected) Validated with Google Pixel 4
247 720p (1280 x 720) 30 fps 600K-4.3 Mbps Validated in Firefox
302 720p (1280 x 720) 60 fps 600K-4.3 Mbps Validated in Firefox
334 720p (1280 x 720) (Only HDR compatible terminals can be selected) Validated with Google Pixel 4
248 1080p (1920 × 1080) 30 fps 700K-7 Mbps Validated in Firefox
303 1080p (1920 × 1080) 60 fps 700K-7 Mbps Validated in Firefox
335 1080p (1920 x 1080) (Only HDR compatible terminals can be selected) Validated with Google Pixel 4
271 1440p (2560 × 1440) 30 fps 3.5 M-13 Mbps Validated in Firefox
308 1440p (2560 × 1440) 60 fps 3.5 M-13 Mbps Validated in Firefox
336 1440p (2560 x 1440) (Only HDR compatible terminals can be selected) Validated with Google Pixel 4
313 2160p (3840 × 2160) 30 fps 5.7 M-37 Mbps Validated in Firefox
315 2160p (3840 × 2160) 60 fps 5.7 M-37 Mbps Validated in Firefox
337 2160p (3840 x 2160) (Only HDR compatible terminals can be selected) Validated with Google Pixel 4
272 4320p (7680 × 4320) 10 M-50 Mbps Validated in Firefox
Video format: AV1
AV1 is an open source video compression format called AOMedia Video 1. Since it is a codec in development as a successor standard to VP9, ​​it seems that VP9 videos will eventually be replaced by AV1, but it will take time to replace them because the only supported browsers currently are Chrome and Firefox. .

Postscript 2020/4/23: Confirmed to apply to some videos.
When applied, the DASH value will be as follows
av01.0.05M.08 (398) / opus (251)

DASH value Video size Video bitrate Comments
394 144p (256 × 144) is not clear Validated in Firefox
395 240p (426 × 240) is not clear Validated in Firefox
396 360p (640 × 360) is not clear Validated in Firefox
397 480p (854 x 480) is not clear Validated in Firefox
398 720p (1280 x 720) is not clear Validated in Firefox
399 1080p (1920 x 1080) is not clear Validated in Firefox
571 4320p (7680 × 4320) is not clear Validated in Firefox
Audio
Audio format: AAC-LC
DASH value Audio bit rate Cutoff frequency Comments
36 not clear not clear Can’t verify because iPhone 7 has no headphone output
18 96 Kbps 15 kHz Validated with Internet Explorer 11 on Windows 10
Twenty-two 128 Kbps 15.8 kHz Validated with Internet Explorer 11 on Windows 10
139 96 Kbps 15 kHz Validated with Internet Explorer 11 on Windows 10
140 128 Kbps 15.8 kHz Validated with Internet Explorer 11 on Windows 10
Same for AAC = 139 (96 Kbps) 18

Same for AAC = 140 (128 Kbps) 22

Audio format: Opus
Since the Opus audio bit rate is a variable bit rate (VBR), the average value is displayed. It will increase up to about 2 times.

DASH value Audio bit rate Cutoff frequency Comments
249 48 Kbps (VBR) 20 kHz Validated in Firefox
250 64 Kbps (VBR) 20 kHz Validated in Firefox
251 128 Kbps (VBR) 20 kHz Validated in Firefox
Opus = 249 (48 Kbps)

Opus = 250 (64 Kbps)

Opus = 251 (128 Kbps)

Postscript 2020/2/11: It looks like Opus audio was finally created for all users’ videos.

Please refer to the article linked above for how to upload in high quality.

To check after upload, right click on the video about a day after upload, click “Detailed Statistics” and check the value of “Codecs”.
At this time, be sure to use a browser other than “Safari”. Safari is not compatible with Opus.

Success story: Codecs vp09.00.51.08.01.01.01.01 (243) / opus (251)
Failure example: Codecs avc1.4d401e (134) /mp4a.40.2 (140)
The video / audio codecs are listed in order. (In this case, the video is vp9 (243), so it is 360p in WebM format, and the audio is Opus (251), so it is 128Kbps video in Opus format.)

Depending on the video, more than 30 videos can be generated in one video.

● YouTube app
Click here to download the app
ANDROID IOS

Version “15.20.33” or later updated on May 14,
2020 (strictly speaking, it will apply approximately from May 23, 2020)

Now it is compatible with Opus audio. (Android compatible devices only)

YOUTUBE SOUND QUALITY AND PICTURE QUALITY (AS OF JUNE 2021)

YOUTUBE SOUND QUALITY AND PICTURE QUALITY (AS OF JUNE 2021)

YouTube Audio

This time, I investigated the sound quality and image quality of “YouTube”.

youtube audio

HOW TO UPLOAD TO YOUTUBE WITH HIGH QUALITY SOUND

Basically YouTube uses “H.264 AAC-LC” or “Opus” as the audio codec.
The video codec used is “H.264” (MP4) or “VP9” (WebM). “AV1” is also used in some videos.

Verification method
(Video) Download the official video of “3D Youtube Downloader”, upload the video to “VLC Media Player” and refer to Media Information → Input Bit Rate in Statistics.
(Audio) Check the audio of the video downloaded by the above method using “foobar2000” for the bit rate. The cutoff frequency is converted to .wav format by “XMedia Recode”, and the file is imported into “WaveSpectra” and verified.

● PC
The PC version of YouTube ranges from 144p (320 x 180) to 4K (3860 x 2160), but there are differences in the image quality that can be selected and the audio that can be played depending on the browser.
You can check if your browser supports it on the next page.
YOUTUBE SUPPORT BROWSER

The following is the support status for each browser (browsers that support both VP9 and MP4 have the highest picture and sound quality).

Browser name PIN
Internet Explorer (Windows7) Not supported (not visible)
Incompatible iOS Safari
Internet Explorer (Windows 8.1 / 10) Only compatible with MP4 (not viewable)
Safari on Macintosh Only compatible with MP4
Microsoft Edge (EdgeHTML) Correspondence (depending on model)
Microsoft Edge (Chrome) Correspondence
Firefox Correspondence
Google Chrome (recommended browser) Correspondence
Correspondence table by DASH browser
* We are looking for information. Provide information in the comment section.

Recommended browser
YouTube Help from
> YouTube video is available to view in a variety of formats and resolutions. However, some browsers do not support the new video format. Depending on your browser, you may only have one or two video formats to choose from. We recommend that you update your browser or operating system to enjoy watching the video comfortably.

The following is an example of a browser and operating system combination that supports the video format for high-quality YouTube videos.

Google Chrome (all operating systems)
MS Edge
Safari (Mac OS X 10.10 or later)
Firefox (Windows 7 or later and Mac OS X 10.10 or later)
* Internet Explorer is no longer supported.

Video and Audio DASH Correspondence Table
[Caution] In the following table, only those whose use is currently confirmed are listed. Therefore, not all configurations are listed.

Photography
Since the video bit rate is a variable bit rate (VBR), the upper and lower limits are listed. The mean value is somewhere in the middle.

Image format: MP4
DASH value Video size Video bitrate Comments
36 240p (426 × 240) is not clear Validated with Safari on iOS14 (mp4v.20.3, mp4a.40.2)
18 360p (640 × 360) 500K-1 Mbps Validated with Safari on iOS14 (avc1.42001E, mp4a.40.2)
22 720p (1280 × 720) 1-3 Mbps Validated with Safari on iOS14 (avc1.64001F, mp4a.40.2)
160 144p (256 × 144) 50K-90 Kbps Validated with Internet Explorer 11 on Windows 10
133 240p (426 × 240) 150K-580 Kbps Validated with Internet Explorer 11 on Windows 10
134 360p (640 × 360) 200K-1 Mbps Validated with Internet Explorer 11 on Windows 10
135 480p (854 × 480) 250K-2.3 Mbps Validated with Internet Explorer 11 on Windows 10
136 720p (1280 × 720) 30 fps 300K-4.4 Mbps Validated with Internet Explorer 11 on Windows 10
298 720p (1280 × 720) 60 fps 300K-4.4 Mbps Validated with Internet Explorer 11 on Windows 10
137 1080p (1920 × 1080) 30 fps 500K-6.2Mbps Validated with Internet Explorer 11 on Windows 10
299 1080p (1920 × 1080) 60 fps 500K-6.2Mbps Validated with Internet Explorer 11 on Windows 10
Image form: VP9
DASH value Video size Video bitrate Comments
278 144p (256 × 144) 100K-300 Kbps Validated in Firefox
330 144p (256 × 144) (Only HDR compatible terminals can be selected) Validated with Google Pixel 4
242 240p (426 × 240) 100K-500 Kbps Validated in Firefox
331 240p (426 × 240) (Only HDR-compatible terminals can be selected) Validated with Google Pixel 4
243 360p (640 × 360) 200K-950 Kbps Validated in Firefox
332 360p (640 × 360) (Only HDR-compatible terminals can be selected) Validated with Google Pixel 4
244 480p (854 × 480) 300K-2 Mbps Validated in Firefox
333 480p (854 × 480) (Only HDR-compatible terminals can be selected) Validated with Google Pixel 4
247 720p (1280 × 720) 30 fps 600K-4.3

What is volume? Part 4

What is volume? Part 4

audio volume

If we multiply the signal by too large a number, an overflow may occur.

AUDIO VOLUME

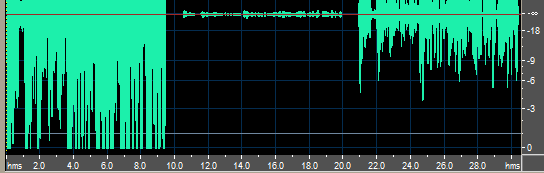
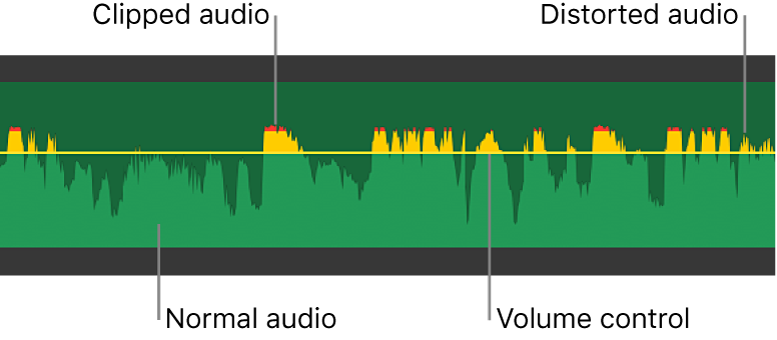
If the overflow is not monitored, then the amplitude value takes on almost random values ​​(see figure) and this leads to very noticeable frequent clicks. The simplest way to solve this defect is to cut the signal (clipping), that is, where the amplitude of the signal exceeds the limits, we ‘cut’ it (see figure). With a slight overflow, the clipping is almost invisible to the ear, however as the level increases it appears as ‘sand’ in the sound.

A more complicated way, but also more effective, is the limitation of the signal. Its essence is to automatically reduce the signal level so that there is simply no overflow. This requires an Automatic Gain Control (AGC) system that corrects the current signal level. So, as long as there is no overflow, AGC does not change the signal, and as soon as the signal exceeds the maximum level, a correction is made, which changes the signal so that its level does not exceed the maximum. As you can see in the figure, the sign completely retains its shape. However, the volume is kept at maximum:

It is necessary to pay attention to the fact that the above figure shows the amplitude, and this one shows the loudness (determined by a large group of amplitudes). Therefore, even though the loudness graph is “cut off”, the shape of the signal itself is distorted to a minimum. This method is not without its drawbacks, either. Initially, the sound had a different volume, but after limiting all the sounds outside the limits they have the same volume and the sound can become “flat” and expressionless. Let’s look at the histograms (Fight Club):

Here is an example of failed amplification. With a gain of + 10dB, distortions are still barely noticeable (there are still relatively few places in the film where spillover occurs), however, as the gain increases, the level capping appears more and more often, already a + 30dB level, the voice starts to be limited, which is extremely noticeable. The downsides of limiting are especially noticeable with significant changes in volume in a short time: subjectively, the volume begins to jump up and down. If, in the context of a conversation (which with an amplification of + 30 dB is already reproduced at maximum volume), a loud sound is produced (which is louder than the original voice, for example, a phone call), then the The amplification level is lowered so that loud sound is not distorted, but the volume of the conversation also drops sharply.

So the relative volume of the different sounds played at the same time is preserved, however the gain level is constantly changing, which is clearly perceptible and very unpleasant. Therefore, at high gain levels (20-30dB and more), limiting also gives a bad result.

At low gain levels, signal clipping defects are almost invisible, while signal clipping is almost always audible. Those. All other things being equal, the restriction gives a better quality result. The filter always produces clipping or clipping, so it is recommended to always keep the clipping option enabled.

5. Standardization

Let’s set ourselves the goal of turning up the volume without losing any quality. It’s possible? Yes, if there is a “top margin” of dynamic range. Let’s look at the histograms with movies again, Film Cube (yellow graph). The histogram shows that the volume does not rise above -15dB (there may be one or two of those moments for the entire movie, however for the purposes of this consideration we will assume there is no loud sound). And since there are no loud sounds, you can increase the volume by 15 dB without losing quality!

Other than increasing the volume, there is no change in the signal. In this case, the histogram will move close to the right edge without changing its shape:

So it turns out that the sound is now present at maximum volume in the movie. But if we increase the volume more, it will produce distortions (described above). This waveform, where there is a sound of maximum intensity without distortions being introduced at the same time, is called normalized and the process is called normalization. Normalization is usually carried out at the stage of preparing music recordings and the sound reaches us already normalized (for example, AudioCD). However, there is no standardization for movies. Why?

Think of histograms of music and chaos with volume. For music, it is important to play at maximum volume, as it is designed for the maximum target audience: CD players, street noise, subway, cheap headphones.

What is volume? Part 3

What is volume? Part 3

Audio volume

A completely different volume distribution immediately catches your eye.

audio volume

All sounds are heavily shifted to the ‘loud’ part of the dynamic range. The difference in the average volume of movies and music reaches 40 dB. In addition, movies are characterized by a smooth drop in the histogram in the noisy area. For music, the maximum of the histogram is usually at the maximum level (0 dB). There are few such charts, but this situation is very common.

The concept of dialogue level is often inapplicable to music, so it is very difficult to separate high and low sounds. Therefore, it is also difficult to determine the subjective volume of the composition. Therefore, a subjectively noisy composition can be objectively quieter than a subjectively noisy one. Here positive or negative drops in volume, which are not visible in these histograms, are of great importance.

The lack of a single reference point leads to chaos – the sound from different sources has different loudness – the difference in the maximums of the composition histograms reaches 20 dB. And, in general, the concept of ‘volume of a composition’ is very difficult to formalize in any way. Many people are likely familiar with the situation when there is a lot of different music from different sources and when they play it back-to-back (for example, if you record an audio CD), the volume constantly changes when you switch from song to song, which is unpleasant (and the aforementioned effect of a discrepancy between actual and subjective volume can be an even more confusing perception). The graphs given illustrate this situation very well.

The dynamic range of musical compositions (the difference between the loudest and quietest sound) is 20 to 40 dB, which is significantly less than the dynamic range of movies (70 dB).

3. DVD volume problem

On average, the volume level of music recordings (as well as Windows system sounds) is significantly louder than that of DVD movies. Therefore, with the same system volume settings, the absolute volume of the movies will be much lower and in the presence of external noise it may be insufficient, it will be difficult to hear (sic!) And it will seem that the sound is of poor quality . Increasing the gain in the system settings and in the amplifier even to the maximum may not solve the problem: the difference in the average volume reaches 40 dB, which is a lot. However, even if the power of the amplifier turns out to be sufficient and the DVD is played with enough absolute volume, it is not always convenient, since the sounds of the operating system

This problem is typical mainly of computer playback, since in hardware players, the gain level is controlled by the decoder itself. Some software DVD players can control the volume of the system, but this is also not always convenient, as the volume of all system sounds changes (you can accidentally stun the neighbors) and the program still cannot control the volume in a external amplifier. So this is only a partial solution to the problem.

The trade-off is to process the sound just before playing it. Such processing can greatly improve the playback quality of a specific recording and under specific conditions. Many may argue that this is a loss of ‘quality’, however, as already mentioned, there is no absolute quality, we did not set ourselves the goal of editing the sound, our goal is to achieve listening in our conditions, yours was pleasant . If the speaker system does not have enough power, or if we have nervous neighbors, watching a movie at a reduced volume, when half the words cannot be distinguished and half the silent sounds cannot be heard, it will be just unpleasant. Even self-hypnosis about the maximum “quality” achieved will not be able to soften this impression. I’ll repeat the main idea one more time: quality is what we hear. Sound goes through many stages of processing before reaching the listener, and the variety of acoustics and their properties is so great that the last stage of processing just before playback is practically a necessity.

4. Level change. Overflow, circumcision and limitation.

A level change is simply a multiplication of the amplitude of a signal by a certain value, as a result of which the volume of the entire signal changes (increases or decreases).

What is volume? Part 2

What is volume? Part 2

audio volume

Therefore, a sound with the same absolute volume can be perceived as high or low depending on the surrounding conditions.

Audio Volume

Let’s say we adjust the gain level so that the volume of the dialogue in the movie roughly corresponds to reality. So if the movie has the sound of a clock ticking silently, then when we watch a movie in the noise of the city, we will not hear the clock at all, as the sound of the clock is much lower than the surrounding noise, and hearing is adapted to filter out ambient noise. In good listening conditions, when there is no ambient noise, the same watch will be clearly audible.

In many cases, it is convenient to measure the recording volume relative to some reference level. For example, if the recording volume is -20dB, is it high or low? And if we know that the volume of the dialogs in the same recording is -30dB, then we can immediately say that it is loud enough, and if the volume of the dialogs is -10dB, then we can say that it is quite quiet. Dialogue level (average conversation volume) is a very convenient reference level, relative to which you can easily navigate. If the sound volume is 10 dB louder than the dialogue level, then it is loud, and if it is 10 dB lower, then it is quiet. At the same time, the level of the dialogue itself can be arbitrary and depend on the recording: in one recording, the level of the dialogue can be -10dB and in another it can be -30dB. In any case, sounds with a volume below the dialogue level will be perceived as quiet and above the dialogue level as loud, even if the speaker system is incorrectly calibrated and the dialogue will sound at an absolute volume of 40 dB. or 60 dB. Thanks to the adaptive property, the hearing adapts to the current average loudness and makes an appropriate ‘correction’.

Therefore, one more loudness scale can be entered (in addition to the digital signal loudness scale and the absolute loudness scale): the loudness relative to the dialogue level. By comparing different volume levels, we get:

absolute volume of real sounds volume relative to dialogue level recording volume-1 recording volume-2 absolute volume during playback records 1 absolute volume during playback records 2
Silent sounds
low whisper 10dB -40dB -70dB -50dB 10dB 10dB
noise standard in residential premises 20..30dB -20 ..- 30dB -50 ..- 60dB -30 ..- 40dB 20..30dB 20..30dB
quiet conversation 40dB -10dB -40dB -20dB 40dB 40dB
Dialogue level
middle volume talk 50dB 0dB -30dB -10dB 50dB 50dB
Loud sounds
typewriter noise 70dB + 20dB -10dB 0dB (maximum) 70dB 60dB
truck motor 80dB + 30dB 0dB (maximum) 0dB 80dB 60dB
strong signal from the car at a distance of 5-7m 100dB + 50dB 0dB 0dB 80dB 60dB
the noise of a tractor running at a distance of 1 m 120dB + 70dB 0dB 0dB 80dB 60dB
pain threshold 130dB + 80dB 0dB 0dB 80dB 60dB

The table also shows two hypothetical recordings recorded under different conditions: the dialogue level in recording-1 is -30dB, and in recording-2 -10dB. You can see that when played back on a calibrated system, the first recording reproduces loud sounds much better; Sounds can be played with a volume of up to 80 dB, while the second recording plays sounds with a volume of only up to 80 dB. 60 dB.

Also note that the two recordings shown require different speaker calibration. So for acoustics capable of creating 100 dB pressure, the required gain level for the first recording is -20 dB and for the second, 40 dB. So the first recording requires significantly higher gain, and when both recordings are played at the same gain setting, the first recording will sound much quieter. Therefore, the second input is convenient for uncalibrated systems, as it allows large deviations in the gain level.

Therefore, record-1 transmits loud sounds well, but requires a higher level of amplification; with insufficient gain and the presence of external noise, it will be perceived as excessively quiet. Recording-2 does not require much amplification, it is well audible even at low amplification levels and in the presence of noise, but it cannot reproduce loud sounds well.

Now let’s remember that the sound signal is variable:

What to bring to calculate loudness? Obviously, a pressure change over a period of a sound wave does not make sense to change the volume of a sound, since we do not hear individual vibrations. Therefore, loudness is not determined by a point, but by a certain period of time.

What is volume?

What is volume?

Volume - audio

This seemingly obvious question is quite difficult to formalize, as completely different things are understood in different cases.

AUDIO VOLUME

The meaning of loudness is more obvious when we talk about sound pressure, since it is something that is perceived directly by the ear.

Sound pressure: the pressure that additionally arises during the passage of a sound wave in a liquid and a gaseous medium. By propagating in the medium, the sound wave forms thickening and rarefaction, which create additional pressure changes relative to the mean pressure value in the medium. Therefore, the sound pressure is the variable part of the pressure, that is, pressure fluctuations with respect to the mean value, whose frequency corresponds to the frequency of the sound wave. (Great Soviet encyclopedia)

Therefore, we can evaluate any sound: loud sounds create a lot of pressure, quiet sounds little. Pressure is measured in pascals, but in acoustics, sound pressure is usually measured in decibels (dB) relative to the threshold of hearing. By definition, the threshold value is taken equal to pt = 0.00002Pa = 20μPa. The threshold of audibility is taken as 0dB and the volume calculated as l = 20 * log (p / pt), where l [dB] – volume (in the sense of sound pressure), p [Pa] – sound pressure, pt [Pa ] – hearing threshold. In this case: all audible sounds have a positive volume value; inaudible (below loudness threshold) – negative; a 6 dB volume change corresponds to twice the pressure change; 20 dB change – pressure change 10 times. Loudness in the sound pressure sense will be referred to below as absolute loudness.

Some typical loudness values:

Sound Volume Pressure
Hearing threshold 0dB 20 μPa
Whisper of foliage and wind
soft The ticking of a wristwatch
Breath 10-20 dB 60-200 μPa
Silent whisper The
wall clock ticking 20-30dB 200 – 600 μPa
Interior noise 30-40dB 0.6 – 2 MPa
Quiet conversation 40-50dB 2-6 MPa
Moderate talk 50-60dB 6 – 20 MPa
Loud talk 60-70dB 20 – 60 MPa
Noisy street 70-80dB 60-200 mPa
Truck motor ~ 80dB 200 mPa
Noise in the subway while driving
Jackhammer ~ 90dB 600 mPa
Noisy disco 100-120dB 2 – 20 Pa
Airplane taking off 120dB 20 Pa
Pain threshold 130dB 60 Pa

Pay attention to the range of perceived pressures: the pressure at the hearing threshold and that created by the aircraft differ by a factor of a million! Therefore, the logarithmic scale is much more consistent with the physiology of hearing: a linear change in sound pressure does not correspond to the sensation of a linear change in volume. For example, a change in sound pressure of 50 MPa during a conversation will be very noticeable, but completely imperceptible when the plane takes off. A change in sound pressure by 6 dB (twice) will be perceived as an approximately equal change in volume in both cases, although in the first case it will correspond to a change in pressure by 25 MPa and in the second – 10 Pa.

Another volume is the volume of the recording (the volume of the signal). This loudness is not sound pressure (it can be voltage, magnetization, etc.), however, the sound pressure is generated according to the loudness of the recording signal by the playback system. Each specific signal volume corresponds to a specific sound pressure. The volume of the signal can also be measured in decibels. However, if sound pressure is generally measured relative to the hearing threshold (minimum audible sound pressure), then the volume of a digital signal is generally measured relative to the maximum digital level taken as 0dB. Thus, the loudness of a digital signal is expressed in negative values ​​(-3dB, -20dB) since the loudness of the recording must always be less than the maximum. The lower the volume value, the lower the signal (-20dB is lower than -3dB). If the volume of a digital signal is positive, it means overflow and, as a result, the appearance of digital distortion. (The essence of these distortions will be discussed later).

The volume controls on the amplifier, in the system settings, on the player do not create sound pressure at all. In the absence of a signal, even with the maximum volume setting, we will not hear anything (as long as the playback system itself does not create noise). Therefore, they affect loudness only indirectly and make sense to amplify the signal. (gain may mean attenuation of the signal). In the following, the term loudness will not be used to denote gain levels, with the exception of system loudness, as it is an established term. The system volume will mean both the gain level set in the operating system settings and the player, amplifier / receiver, etc.