Increase Video Sound Quality: Tips and Techniques

Video content has become an integral part of our lives. From entertainment to education, videos are an essential medium for communication. However, poor sound quality can ruin the viewing experience and distract the audience from the video’s message. Therefore, it is crucial to ensure the video’s sound quality is clear, crisp, and loud enough. In this article, we will discuss some tips and techniques to increase the video sound quality and enhance the viewing experience.

Understanding Video Sound Quality
Before we delve into tips and techniques to improve video sound quality, let’s first understand the basics of video sound quality. Video sound quality is determined by several factors, including sample rate, bit depth, and compression. The sample rate refers to the number of audio samples captured per second, while bit depth refers to the number of bits used to represent each audio sample. Compression, on the other hand, refers to the reduction in audio data size to minimize the file size.
Another critical factor that affects video sound quality is the audio codec used to compress the audio data. Different audio codecs have varying levels of compression and affect the audio quality differently. Therefore, it is essential to choose the appropriate audio codec for your video.
Optimizing the Audio Recording
The first step to improve video sound quality is to optimize the audio recording. A high-quality audio recording is critical to ensuring that the audio quality remains intact throughout the video production process. Here are some tips for optimizing the audio recording:
- Use a High-Quality Microphone: A high-quality microphone can significantly improve the audio recording quality. Therefore, invest in a good quality microphone that suits your recording needs.
- Eliminate Background Noise: Background noise can significantly affect the audio recording quality. Therefore, record the audio in a quiet environment and use a noise-canceling microphone or software to eliminate background noise.
- Set the Recording Levels: Setting the recording levels correctly can prevent clipping and ensure that the audio remains clear and crisp throughout the recording.
Editing the Audio
After recording the audio, it’s time to edit it to further enhance the sound quality. Audio editing involves removing unwanted noise, adjusting the volume, and applying various effects to the audio. Here are some tips for editing the audio:
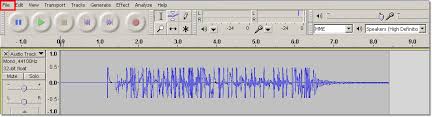
- Remove Unwanted Noise: Use noise reduction software to remove unwanted noise from the audio. Audacity is a free, open-source software that can be used for this purpose.
- Adjust the Volume: Adjusting the volume levels is crucial to ensure that the audio is loud enough and balanced. Use a compressor to even out the volume levels and a limiter to prevent clipping.
- Apply Audio Effects: Applying audio effects can significantly enhance the audio quality. For example, use equalization to adjust the frequency levels or add reverb to create a more natural-sounding audio.
Choosing the Right Audio Codec
Choosing the right audio codec is critical to ensure that the video’s sound quality is not compromised during compression. Different audio codecs have varying levels of compression and affect the audio quality differently. Therefore, it is essential to choose the appropriate audio codec for your video. Here are some popular audio codecs used for video production:
- PCM: PCM is a lossless audio codec that provides the highest audio quality but results in large file sizes.
- MP3: MP3 is a popular audio codec that provides good quality audio while keeping file sizes relatively small. However, when it comes to video sound quality, MP3 is not the best choice. This is because MP3 was designed for compressing audio only, and when it is used to compress video audio, the quality of the audio is reduced significantly. Therefore, it is best to avoid using MP3 for video sound.
- AAC: AAC (Advanced Audio Coding) is another popular audio codec that is widely used for compressing audio files. It is known for providing good audio quality while keeping file sizes relatively small. AAC is also commonly used for compressing audio in video files. However, it is important to note that not all AAC codecs are created equal, and some codecs may provide better audio quality than others. Therefore, it is important to choose the right AAC codec when compressing video audio.
- FLAC: FLAC (Free Lossless Audio Codec) is an audio codec that provides high-quality audio compression without any loss in audio quality. It is a popular choice among audiophiles who value audio quality above all else. However, because FLAC is a lossless audio codec, it is not suitable for compressing video audio, as the resulting file sizes would be too large. Therefore, it is best to use FLAC only for audio files and not for video sound.
- AC3: AC3 (Audio Codec 3) is a popular audio codec that is commonly used for compressing audio in video files. It is known for providing good audio quality while keeping file sizes relatively small. AC3 is also capable of encoding multi-channel audio, making it a good choice for surround sound audio. However, because AC3 is a proprietary codec, it may not be supported by all devices and software. Therefore, it is important to check whether the target device or software supports AC3 before using it to compress video audio.
2. Use a High-Quality Microphone
One of the most important factors that affect video sound quality is the microphone used to record audio. A low-quality microphone can result in poor audio quality, even if the audio codec used to compress the audio is of high quality. Therefore, it is important to use a high-quality microphone when recording audio for video.
There are many different types of microphones available, each with its own strengths and weaknesses. Some of the most common types of microphones used for recording audio for video include:
- Shotgun Microphones: Shotgun microphones are directional microphones that are designed to capture audio from a specific direction. They are commonly used for recording audio in outdoor environments or in noisy environments where background noise can be a problem. Shotgun microphones are also commonly used for recording dialogue in movies and TV shows.
- Lavalier Microphones: Lavalier microphones are small microphones that are worn on the body, typically on the lapel or collar. They are commonly used for recording audio in interviews or in situations where the microphone needs to be hidden from view. Lavalier microphones are also commonly used in TV and film production.
- Condenser Microphones: Condenser microphones are high-quality microphones that are commonly used for recording audio in studios. They are known for their sensitivity and accuracy and are capable of capturing a wide range of frequencies. Condenser microphones require a power source, either from a battery or from an external power supply.
- Dynamic Microphones: Dynamic microphones are durable and rugged microphones that are commonly used for recording audio in live performances and on stage. They are less sensitive than condenser microphones but can handle high sound pressure levels without distortion.
- Microphone placement: Proper microphone placement is crucial for capturing high-quality audio. The distance and angle of the microphone from the sound source can significantly affect the sound quality. Microphones should be positioned close to the sound source for a clear and detailed sound, but not so close that they pick up unwanted sounds or distortions. For example, when recording vocals, the microphone should be placed around six inches away from the singer’s mouth and slightly off-axis to minimize popping sounds.
Improving Video Sound Quality in Post-Production
After recording the audio, the next step is to enhance the audio quality in post-production. Here are some ways to improve video sound quality in post-production:
- Noise reduction: Background noise such as hum, hiss, and air conditioning noise can be reduced or eliminated using noise reduction software. Many video editing software tools have built-in noise reduction plugins that can help to reduce unwanted noise.
- Equalization: Equalization or EQ is the process of adjusting the frequency balance of audio to improve its quality. With EQ, you can boost or reduce specific frequencies to improve the overall sound quality. For example, boosting the bass frequencies can add warmth and depth to the audio, while reducing the high frequencies can eliminate harsh sounds.
- Compression: Compression is the process of reducing the dynamic range of audio by lowering the volume of loud sounds and increasing the volume of soft sounds. This can help to even out the audio levels and make the sound more consistent. However, over-compression can result in a flat and lifeless sound, so it’s important to use compression carefully.
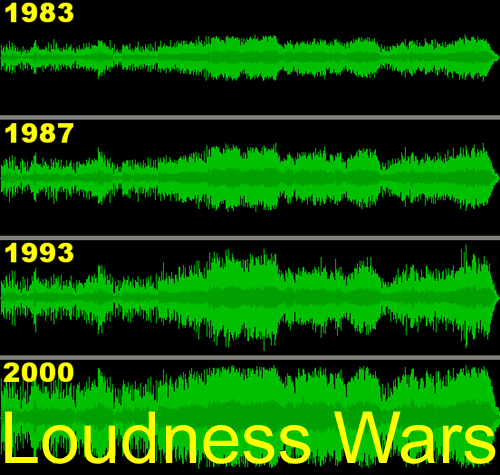
- Loudness normalization: Loudness normalization is the process of adjusting the audio levels to ensure that they are consistent and compliant with industry standards. This helps to avoid sudden changes in volume between different videos or audio tracks. Many video editing software tools have built-in loudness normalization features that can help to achieve consistent audio levels.
Conclusion
Improving video sound quality is essential to creating a high-quality video. By using the right equipment, recording techniques, and post-production tools, you can significantly improve the audio quality of your videos. Remember to consider factors such as microphone type, placement, and environment when recording audio, and use post-production techniques such as noise reduction, EQ, compression, and loudness normalization to further enhance the audio quality. Finally, while there are many software tools available to help improve audio quality, be sure to use them judiciously and focus on getting the best possible audio quality during recording to avoid having to rely too much on post-production editing. One tool that you might find helpful for improving audio quality is MP4Gain, which can help to normalize audio levels and improve the overall sound quality.